March 16, 2017
Woodland Whimsy Baby Samplers
The Woodland Whimsy Baby Boy and Baby Girl Collections just might be my favorite product line yet! Both collections are full of versatile prints and incredibly cute embellishments and stickers. However, these collections are not just for baby photos. The woodland theme is also perfect for any type of outdoor photos. In fact, I think that the collections are neutral enough to be used for almost any type of photos.
As always, Creative Memories is right on trend with these collections. The woodland theme is currently a popular motif for baby nurseries, and both of my samplers would make a cute decor item. They could be used with an easel on a dresser or framed for the wall. The samplers would also make a great introduction page to a baby scrapbook album.
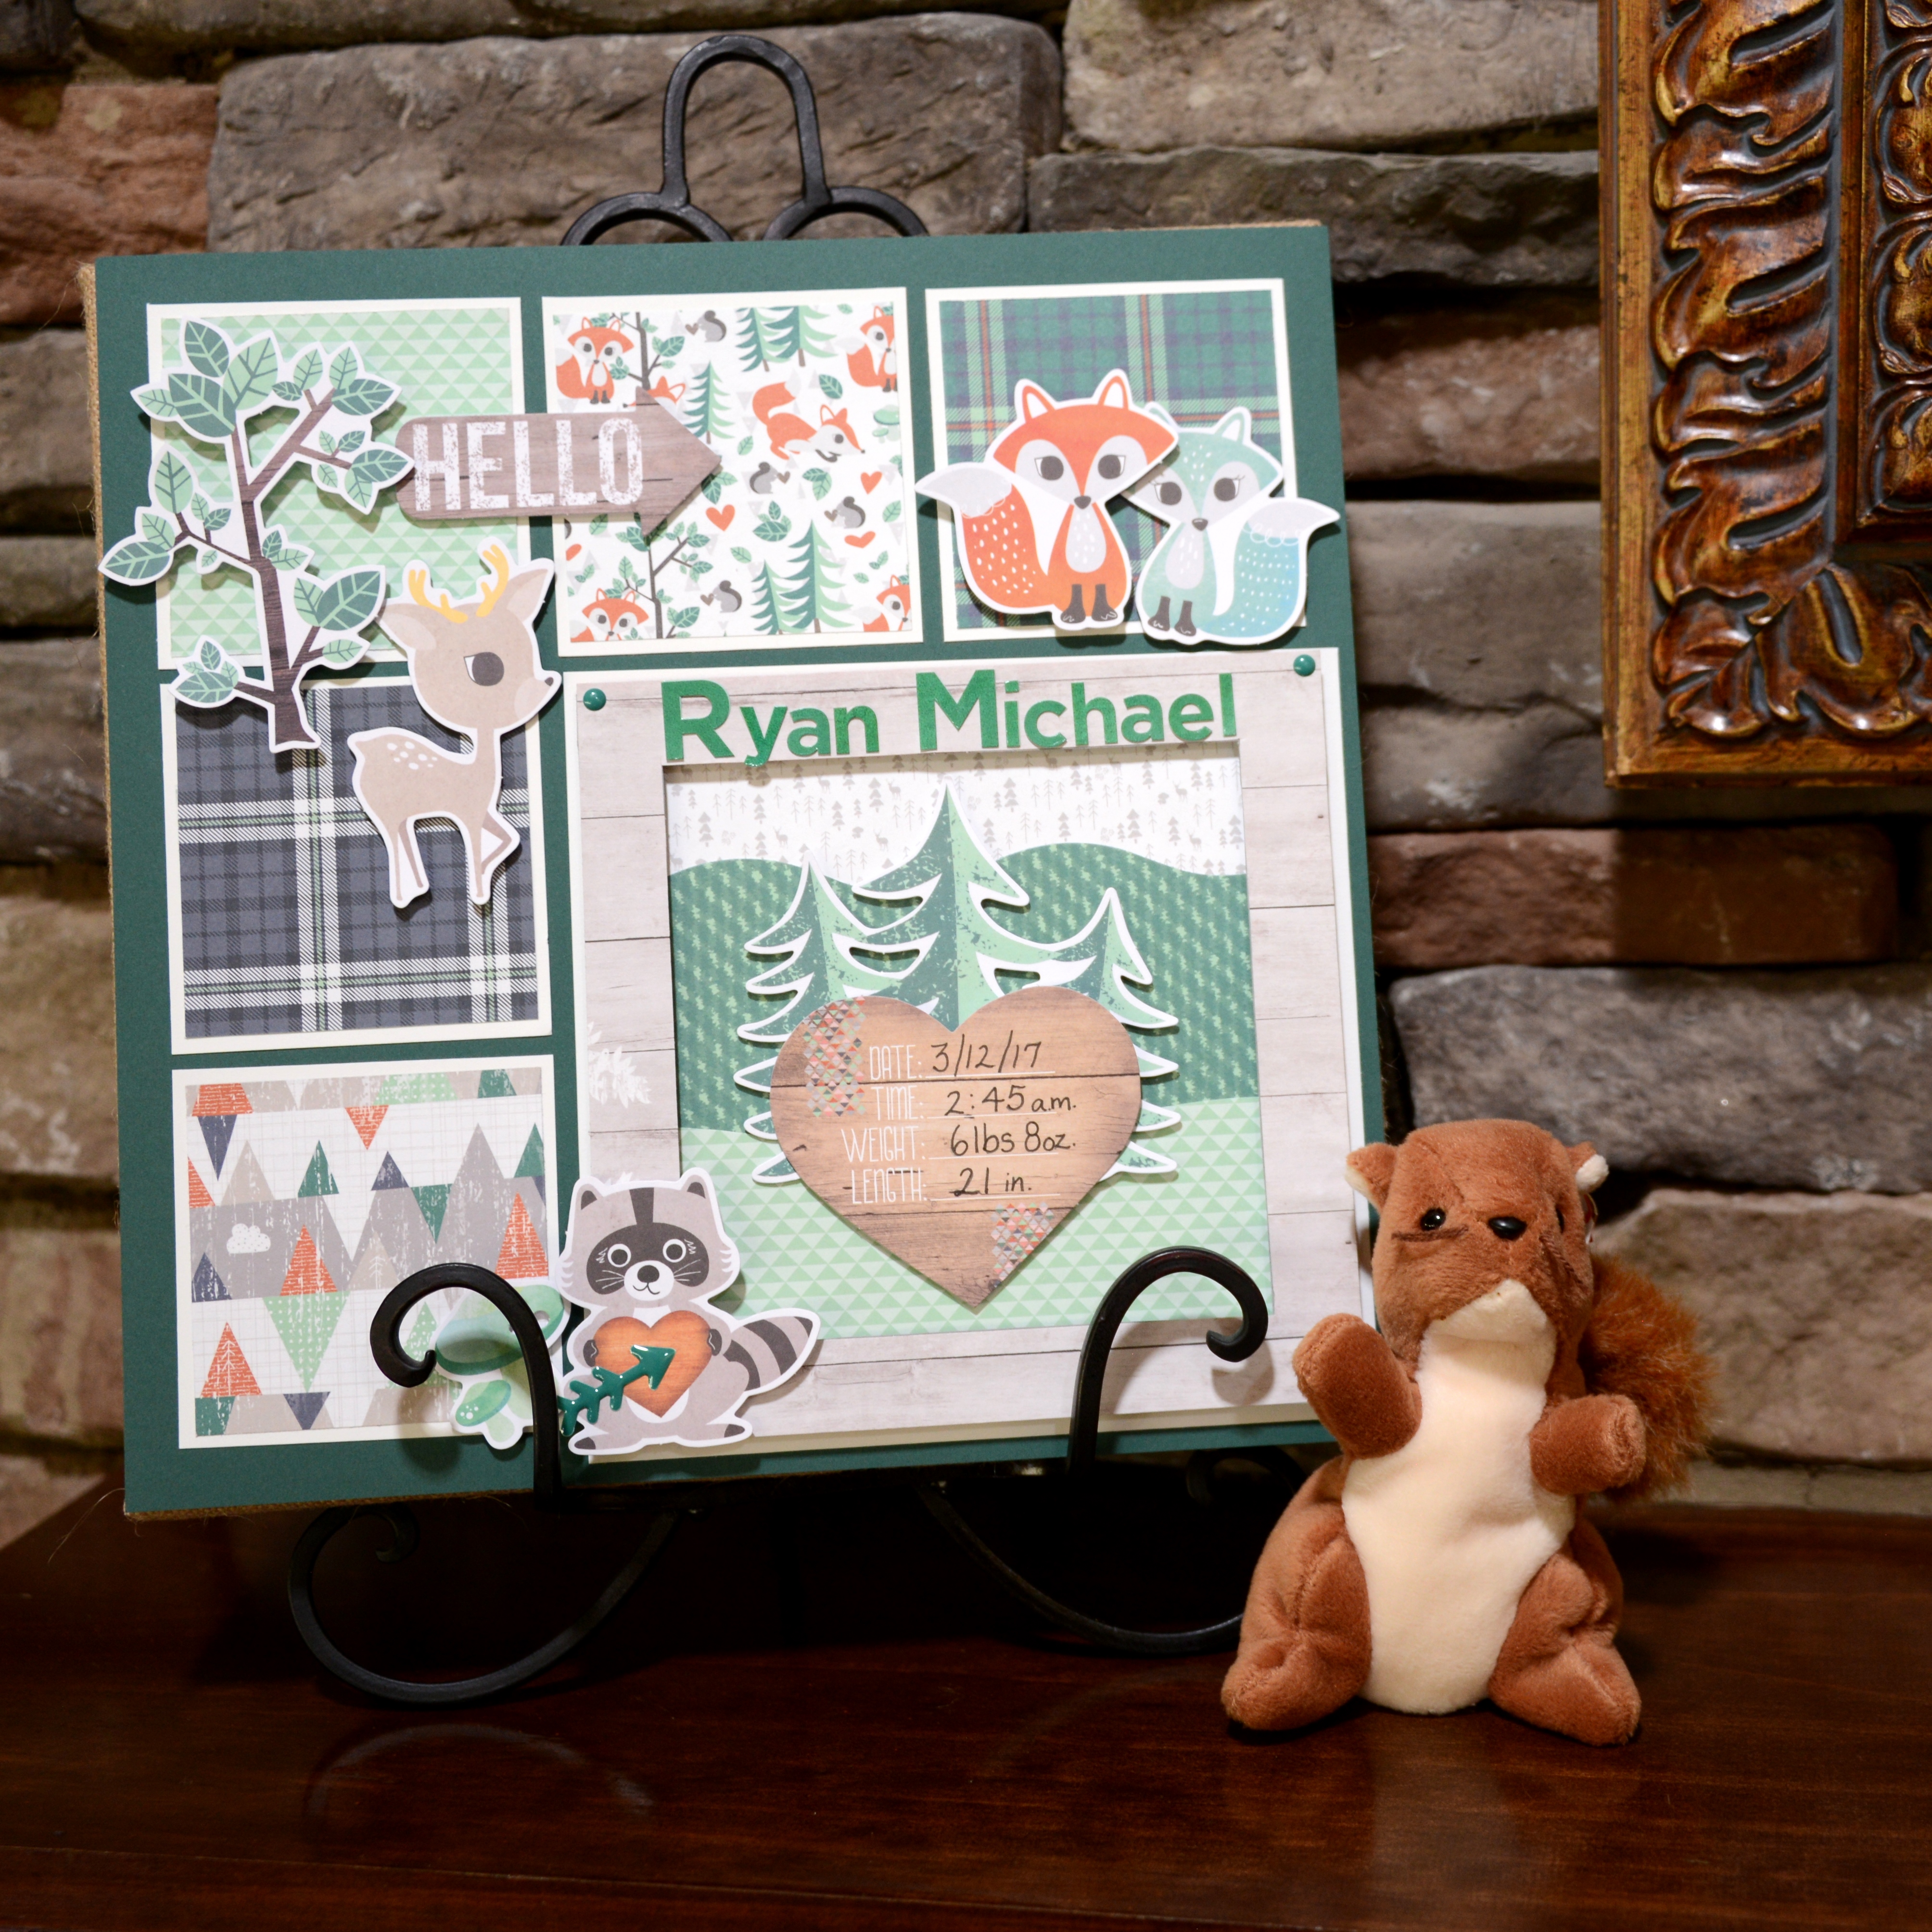
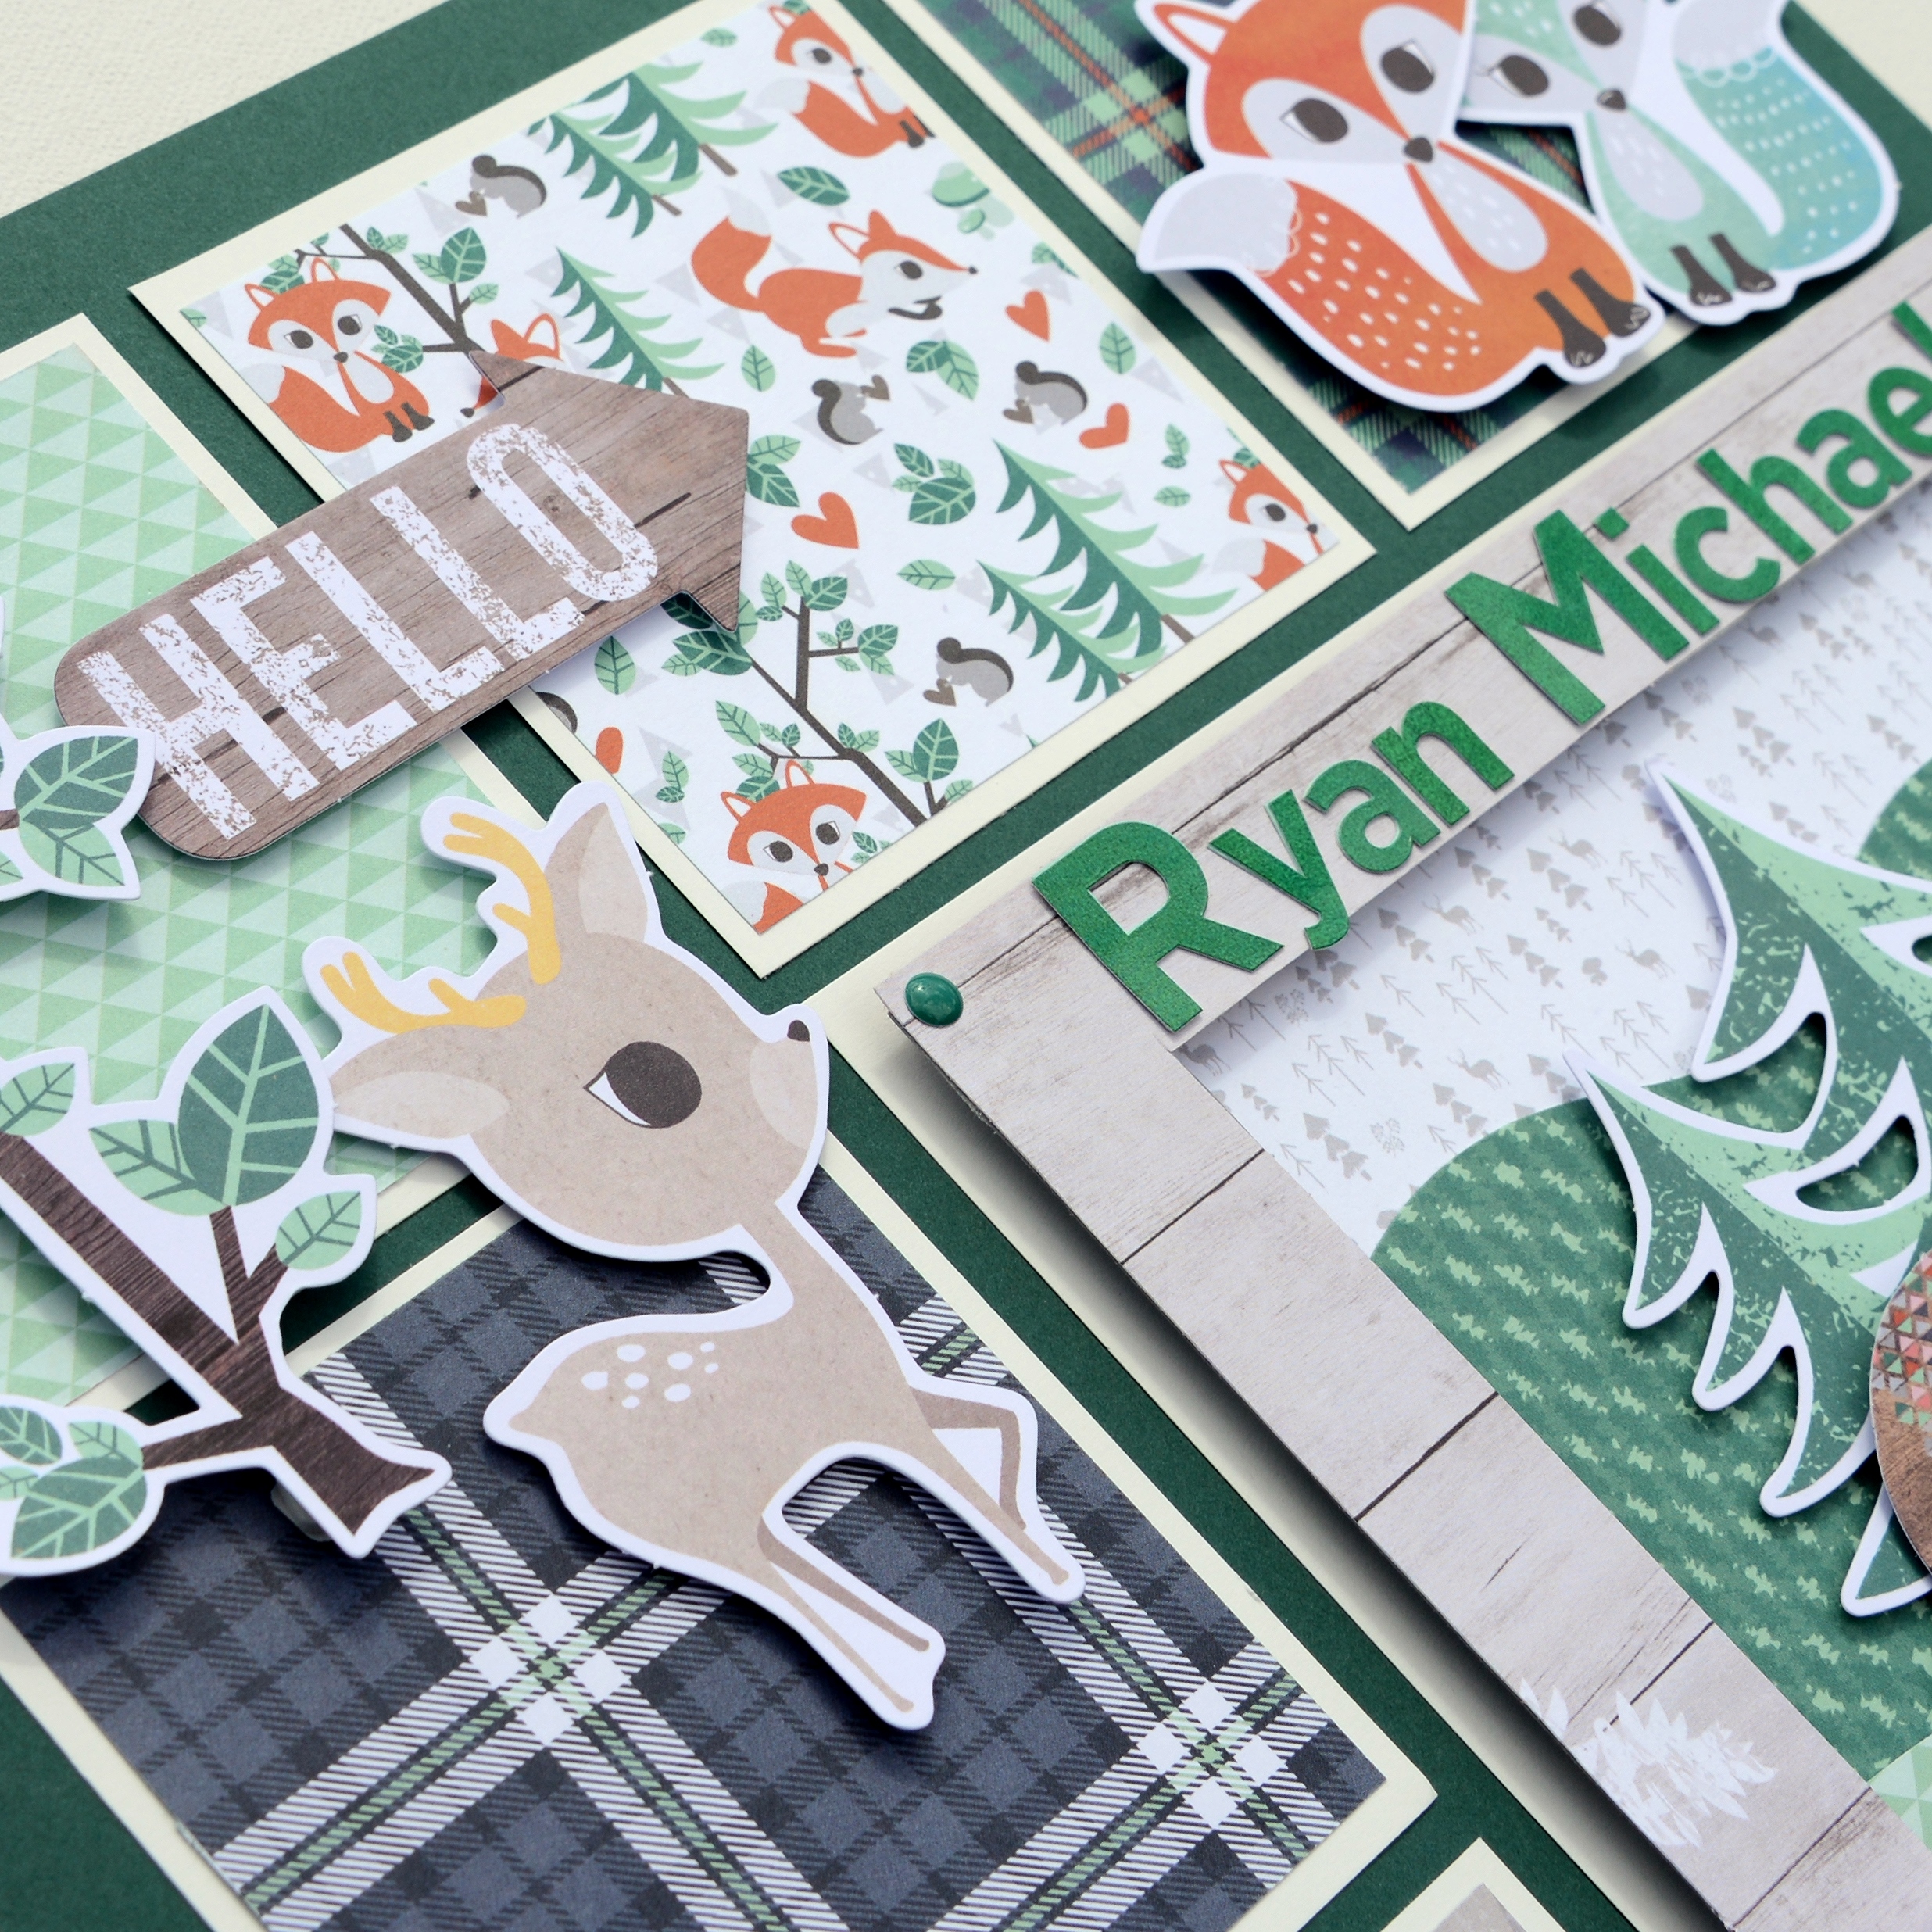
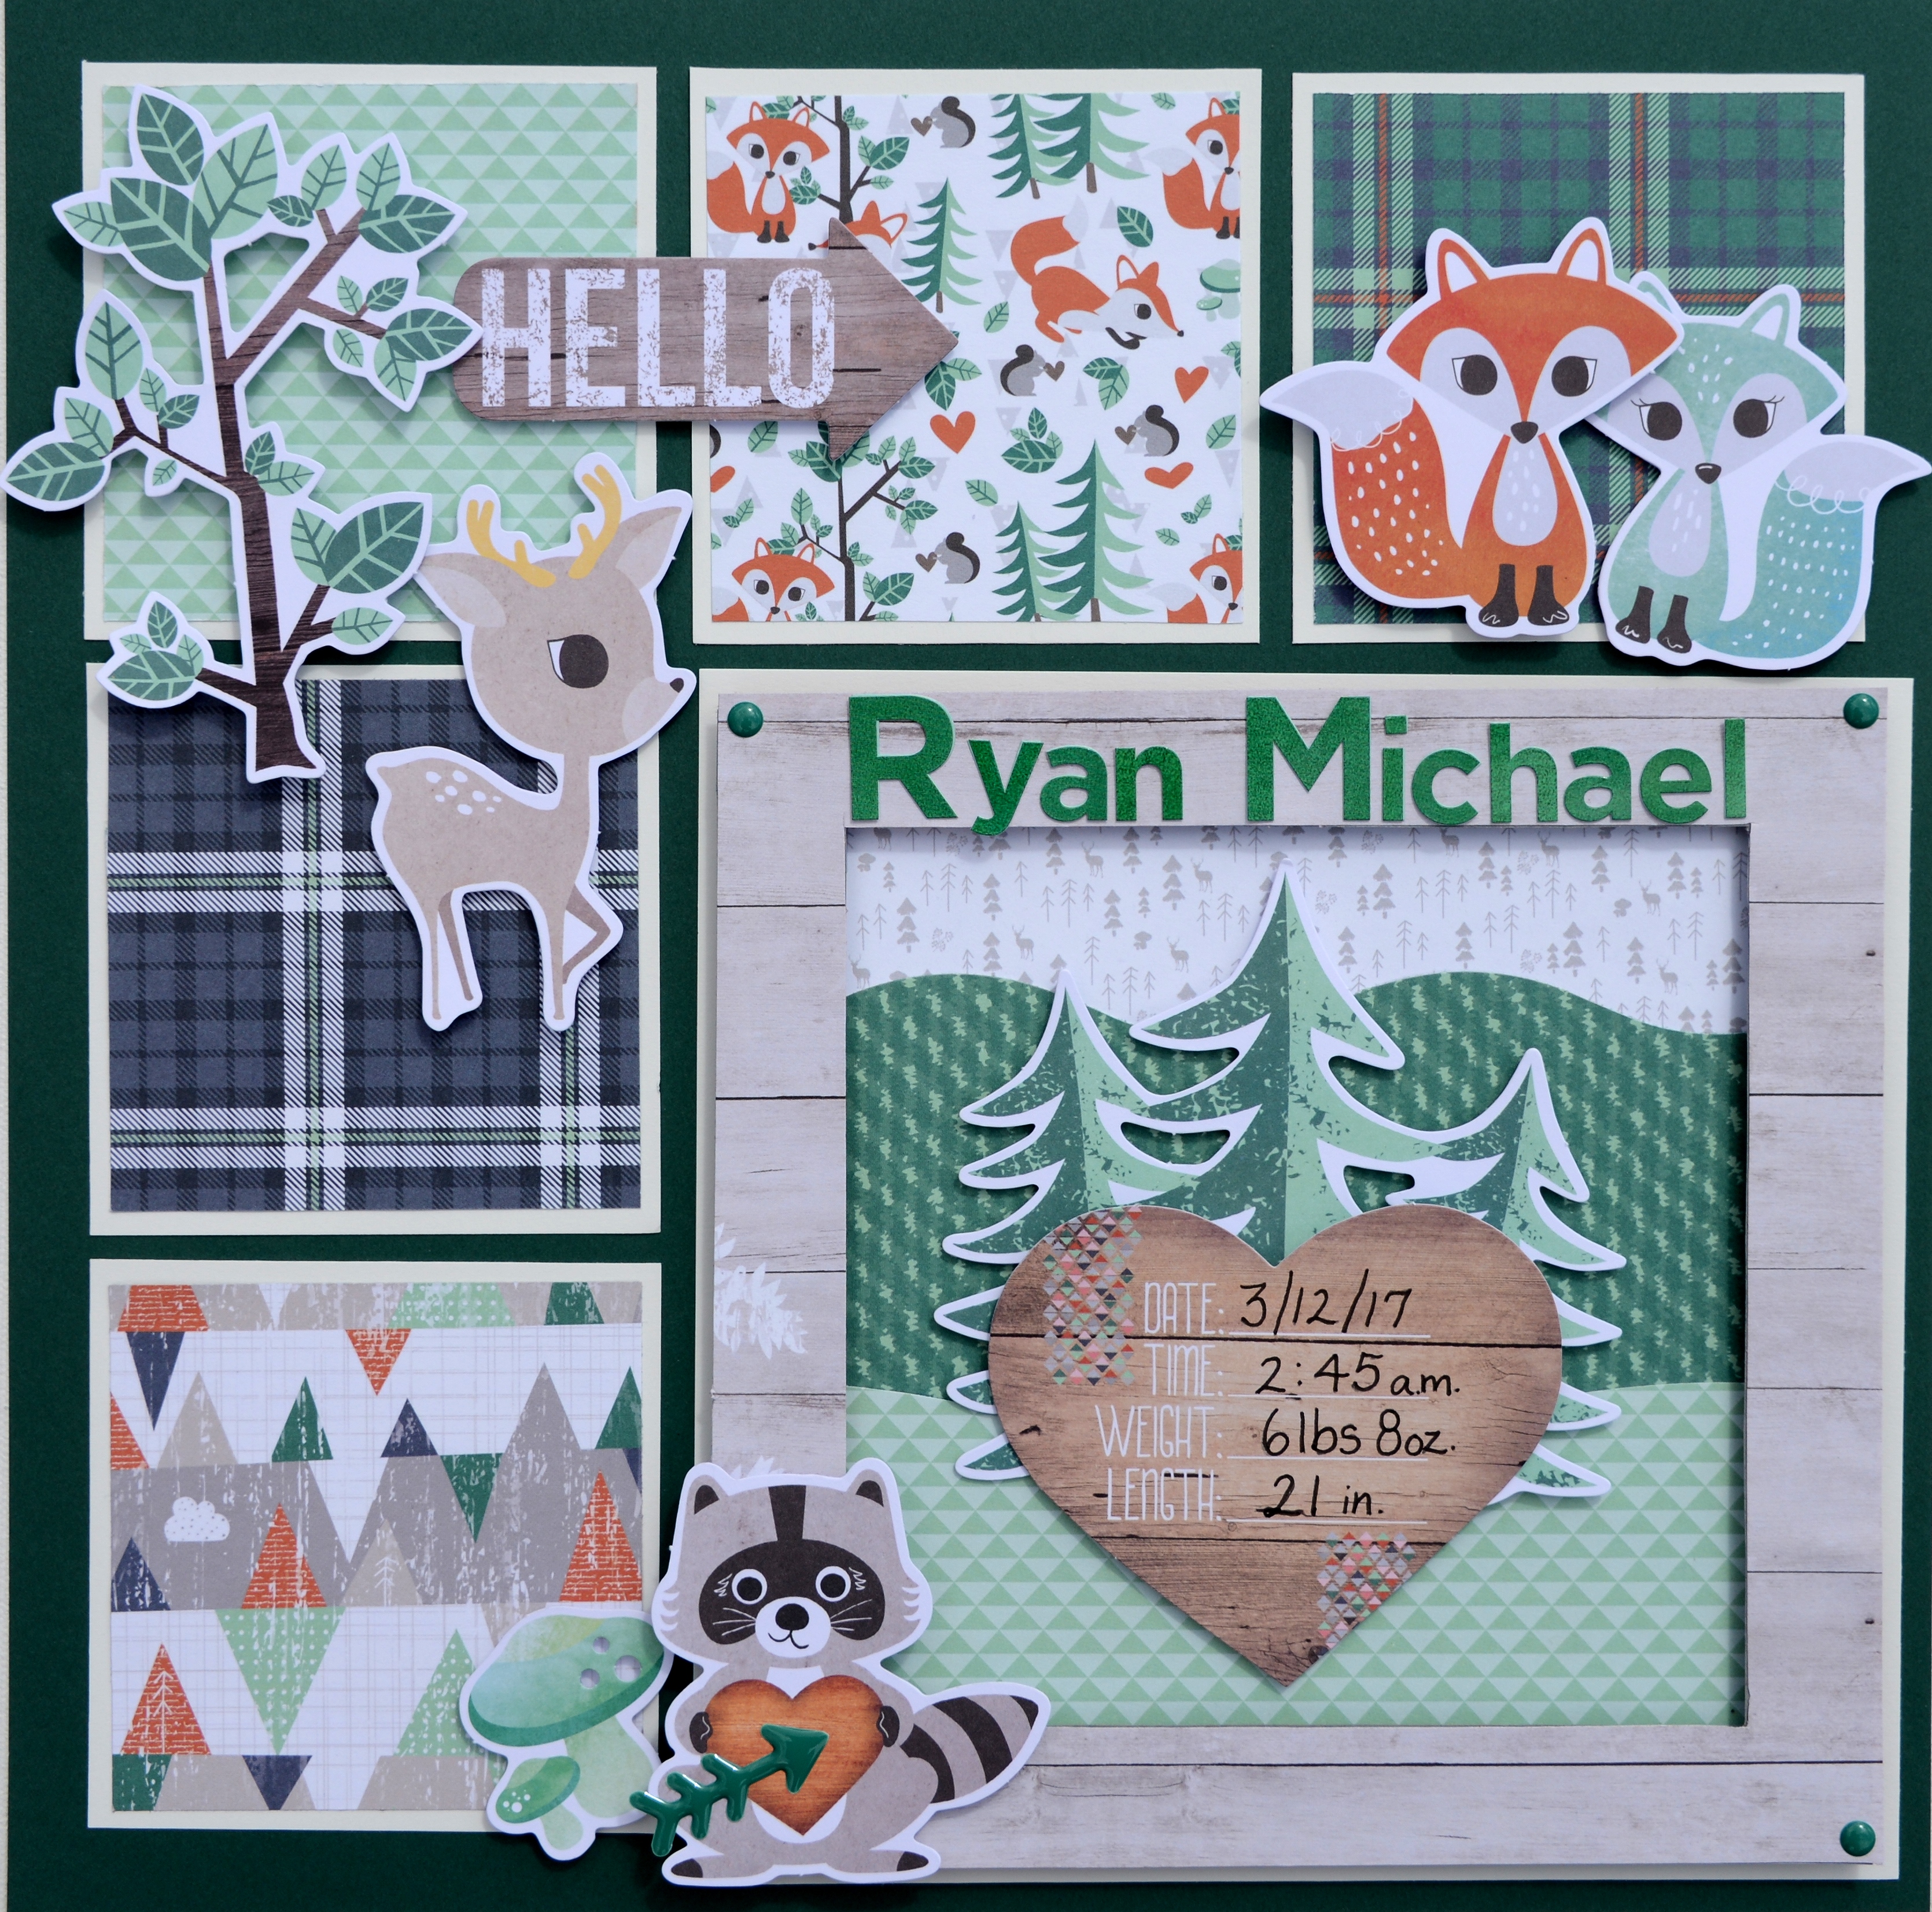
This baby boy sampler has a tailored, classic look with the addition of a “shadowbox square”.
To make the baby boy sampler, you’ll need:
Woodland Whimsy Baby Boy Paper Pack
Woodland Whimsy Baby Embellishments
Evergreen Solid 12 x 12 Cardstock Paper
White Solid 12 x 12 Cardstock Paper
Watercolor Green ABC/123 Stickers
Foam Squares
12-Inch Straight Trimmer
12-Inch Decorative Trimmer
Tape Runner
Black Dual-Tip Pen
- From white cardstock, cut five squares to 3-1/2″ x 3-1/2″. From designer paper, cut five squares to 3-1/4″ x 3-1/4″, and adhere them to the white squares.
- From white cardstock, cut a 7-1/2″ x 7-1/2″ square. From white-patterned designer paper, cut a 7-1/4″ x 2-1/2″ piece. From dark green-patterned designer paper, cut a 7-1/4″ x 3″ piece and trim one long edge with the wave side of the decorative trimmer. From light green-patterned designer paper, cut a 7-1/4″ x 2-1/2″ piece and trim one long edge with the swell side of the decorative trimmer. Arrange and adhere these pieces onto the white cardstock piece leaving a quarter inch edge on the white cardstock.
- Adhere all square pieces to a sheet of evergreen cardstock.
- From wood-patterned designer paper, cut a 7-1/4″ x 7-1/4″ square. From white cardstock, cut a 7-1/4″ x 7-1/4″ square. Adhere wood piece to the white piece. Use straight trimmer to cut a hollow frame from both pieces. Push hard to cut through both pieces and leave a 1″ edge for your frame. (The white cardstock behind the wood paper, gives the piece more stability. If needed, re-tape the pieces together after cutting the frame.) Add your baby name or title now. Adhere the wood frame to the large square using foam squares stacked two high to give extra height. You should have a quarter-inch edge of the white cardstock showing.
- Add baby info to the heart embellishment, and add all embellishments to the page using foam squares as shown. For extra height, I used stacked embellishments for the tree in the upper left corner and the brown fox.
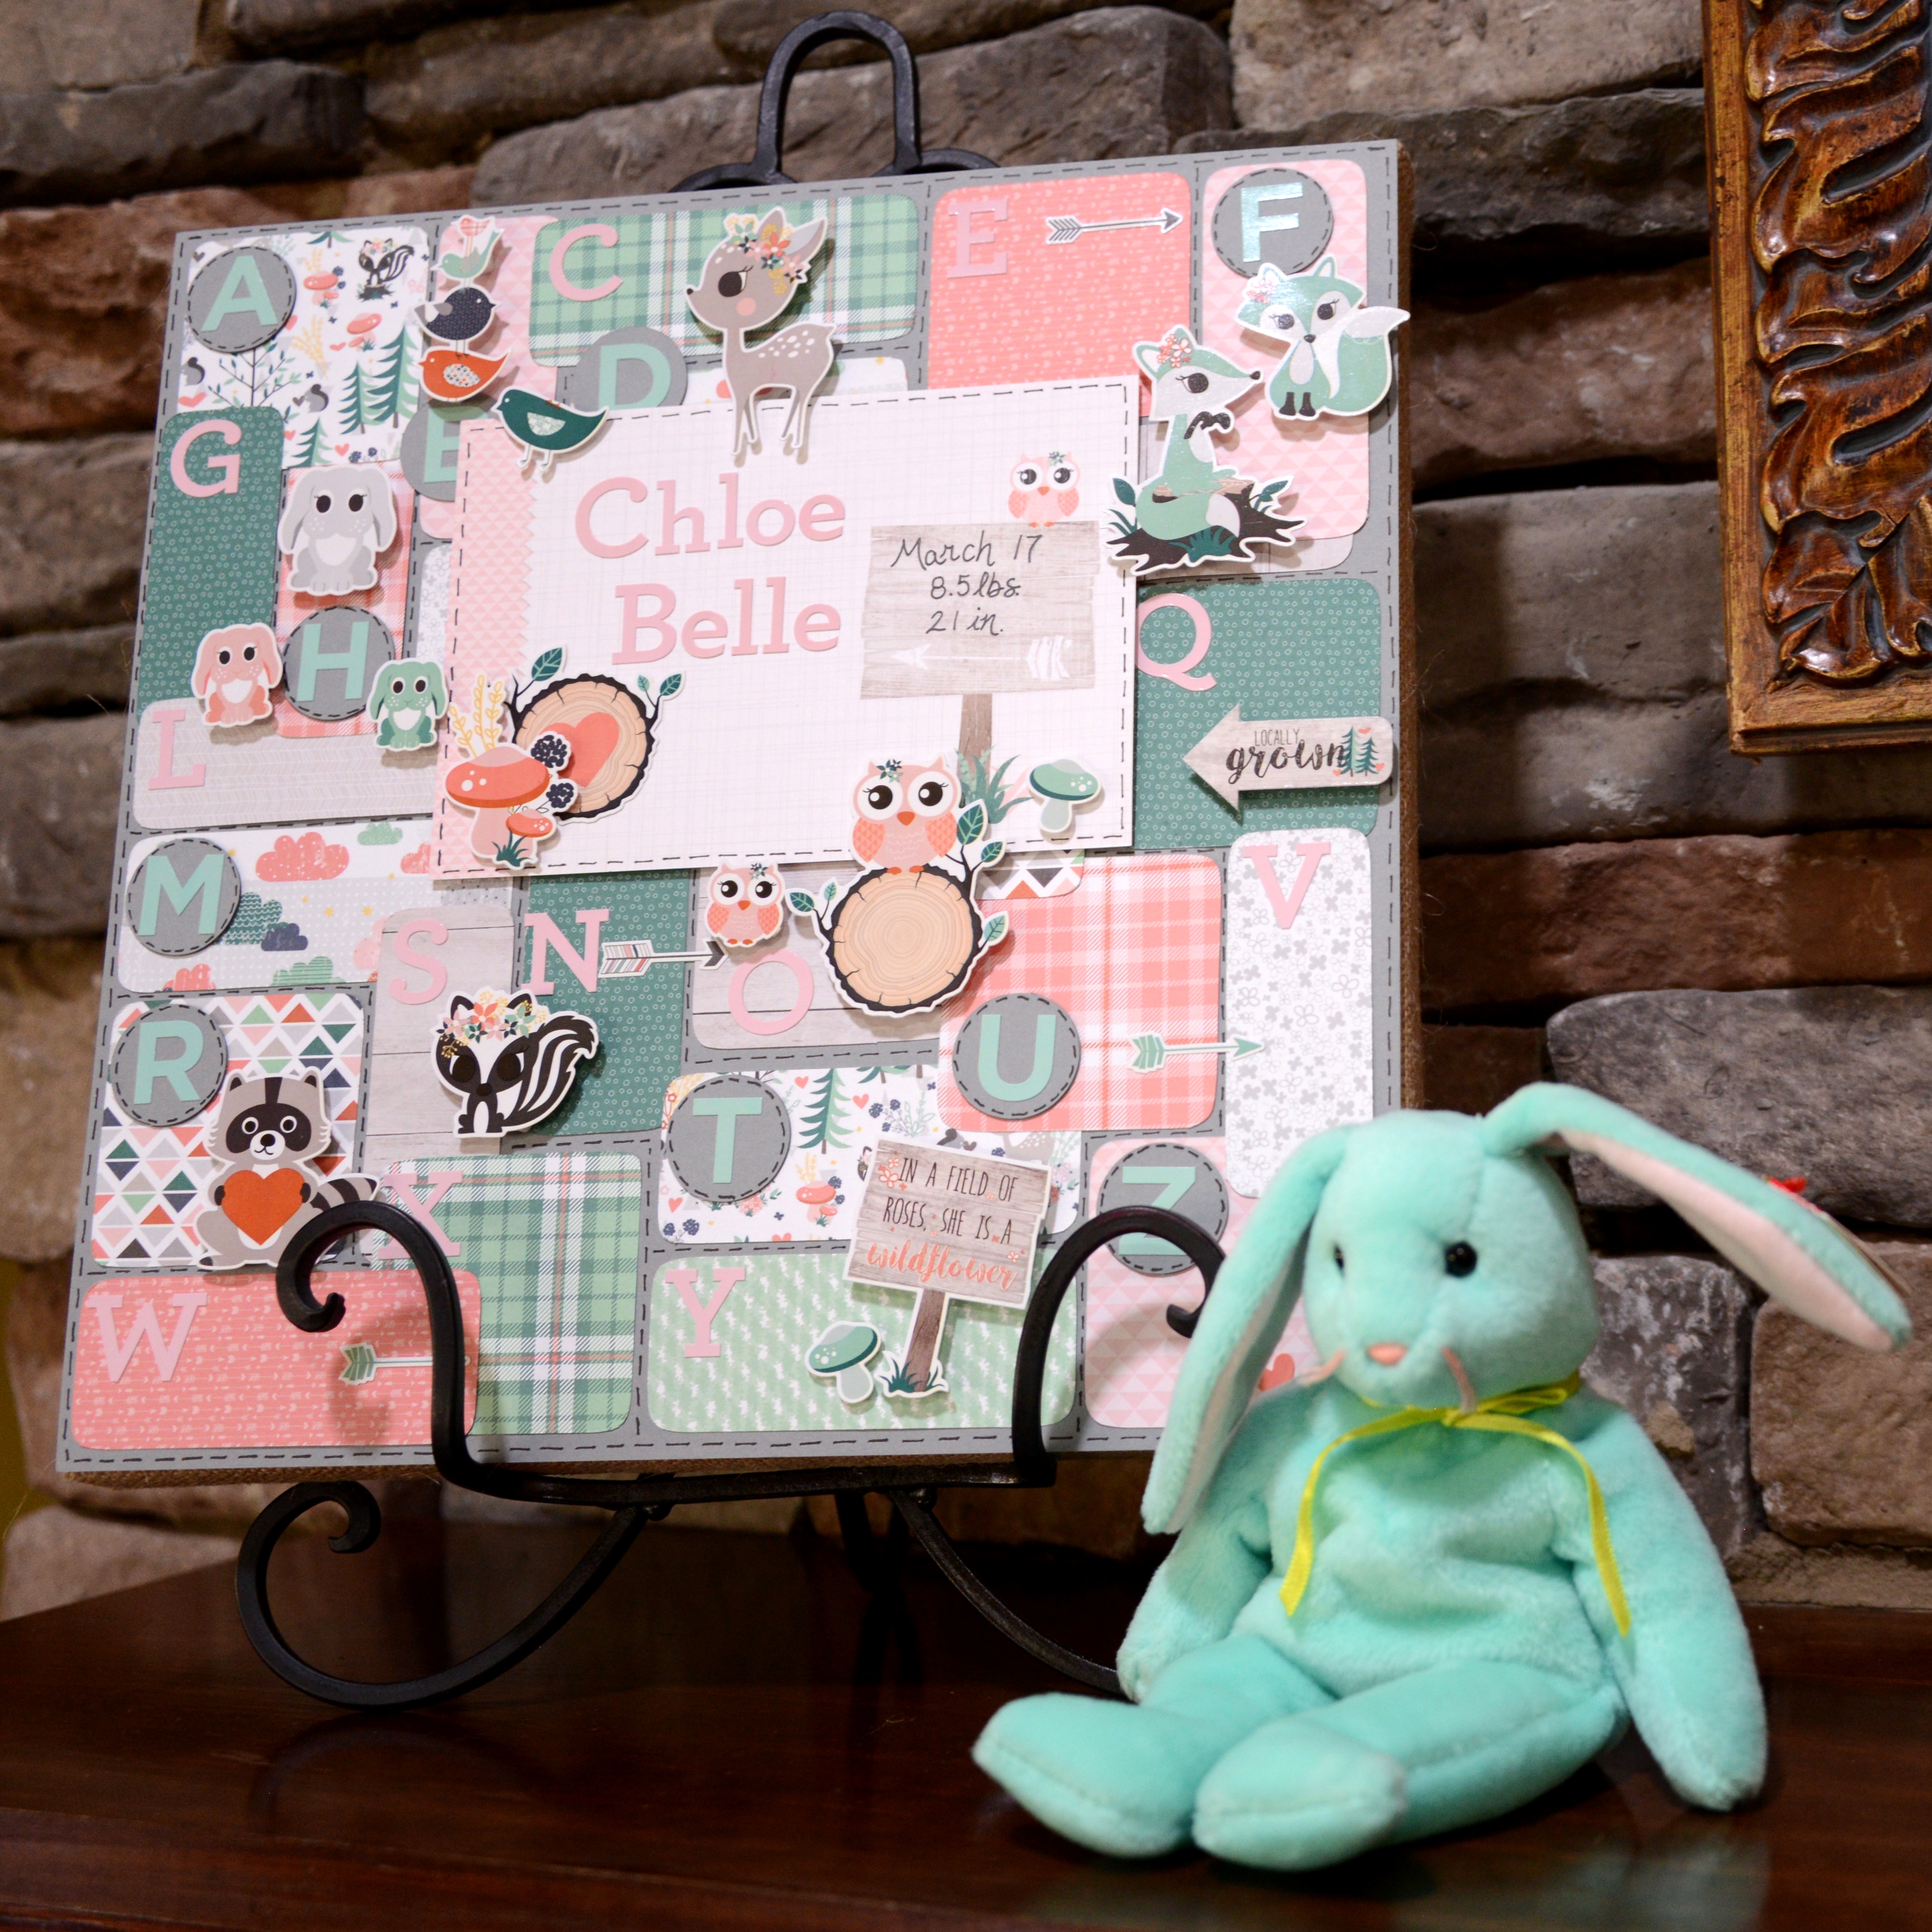
This baby girl sampler is reminiscent of an old-fashioned crazy quilt. If the baby girl sampler is too busy for you, try it without the alphabet letters or use black cardstock for the background to give it more pop and definition.
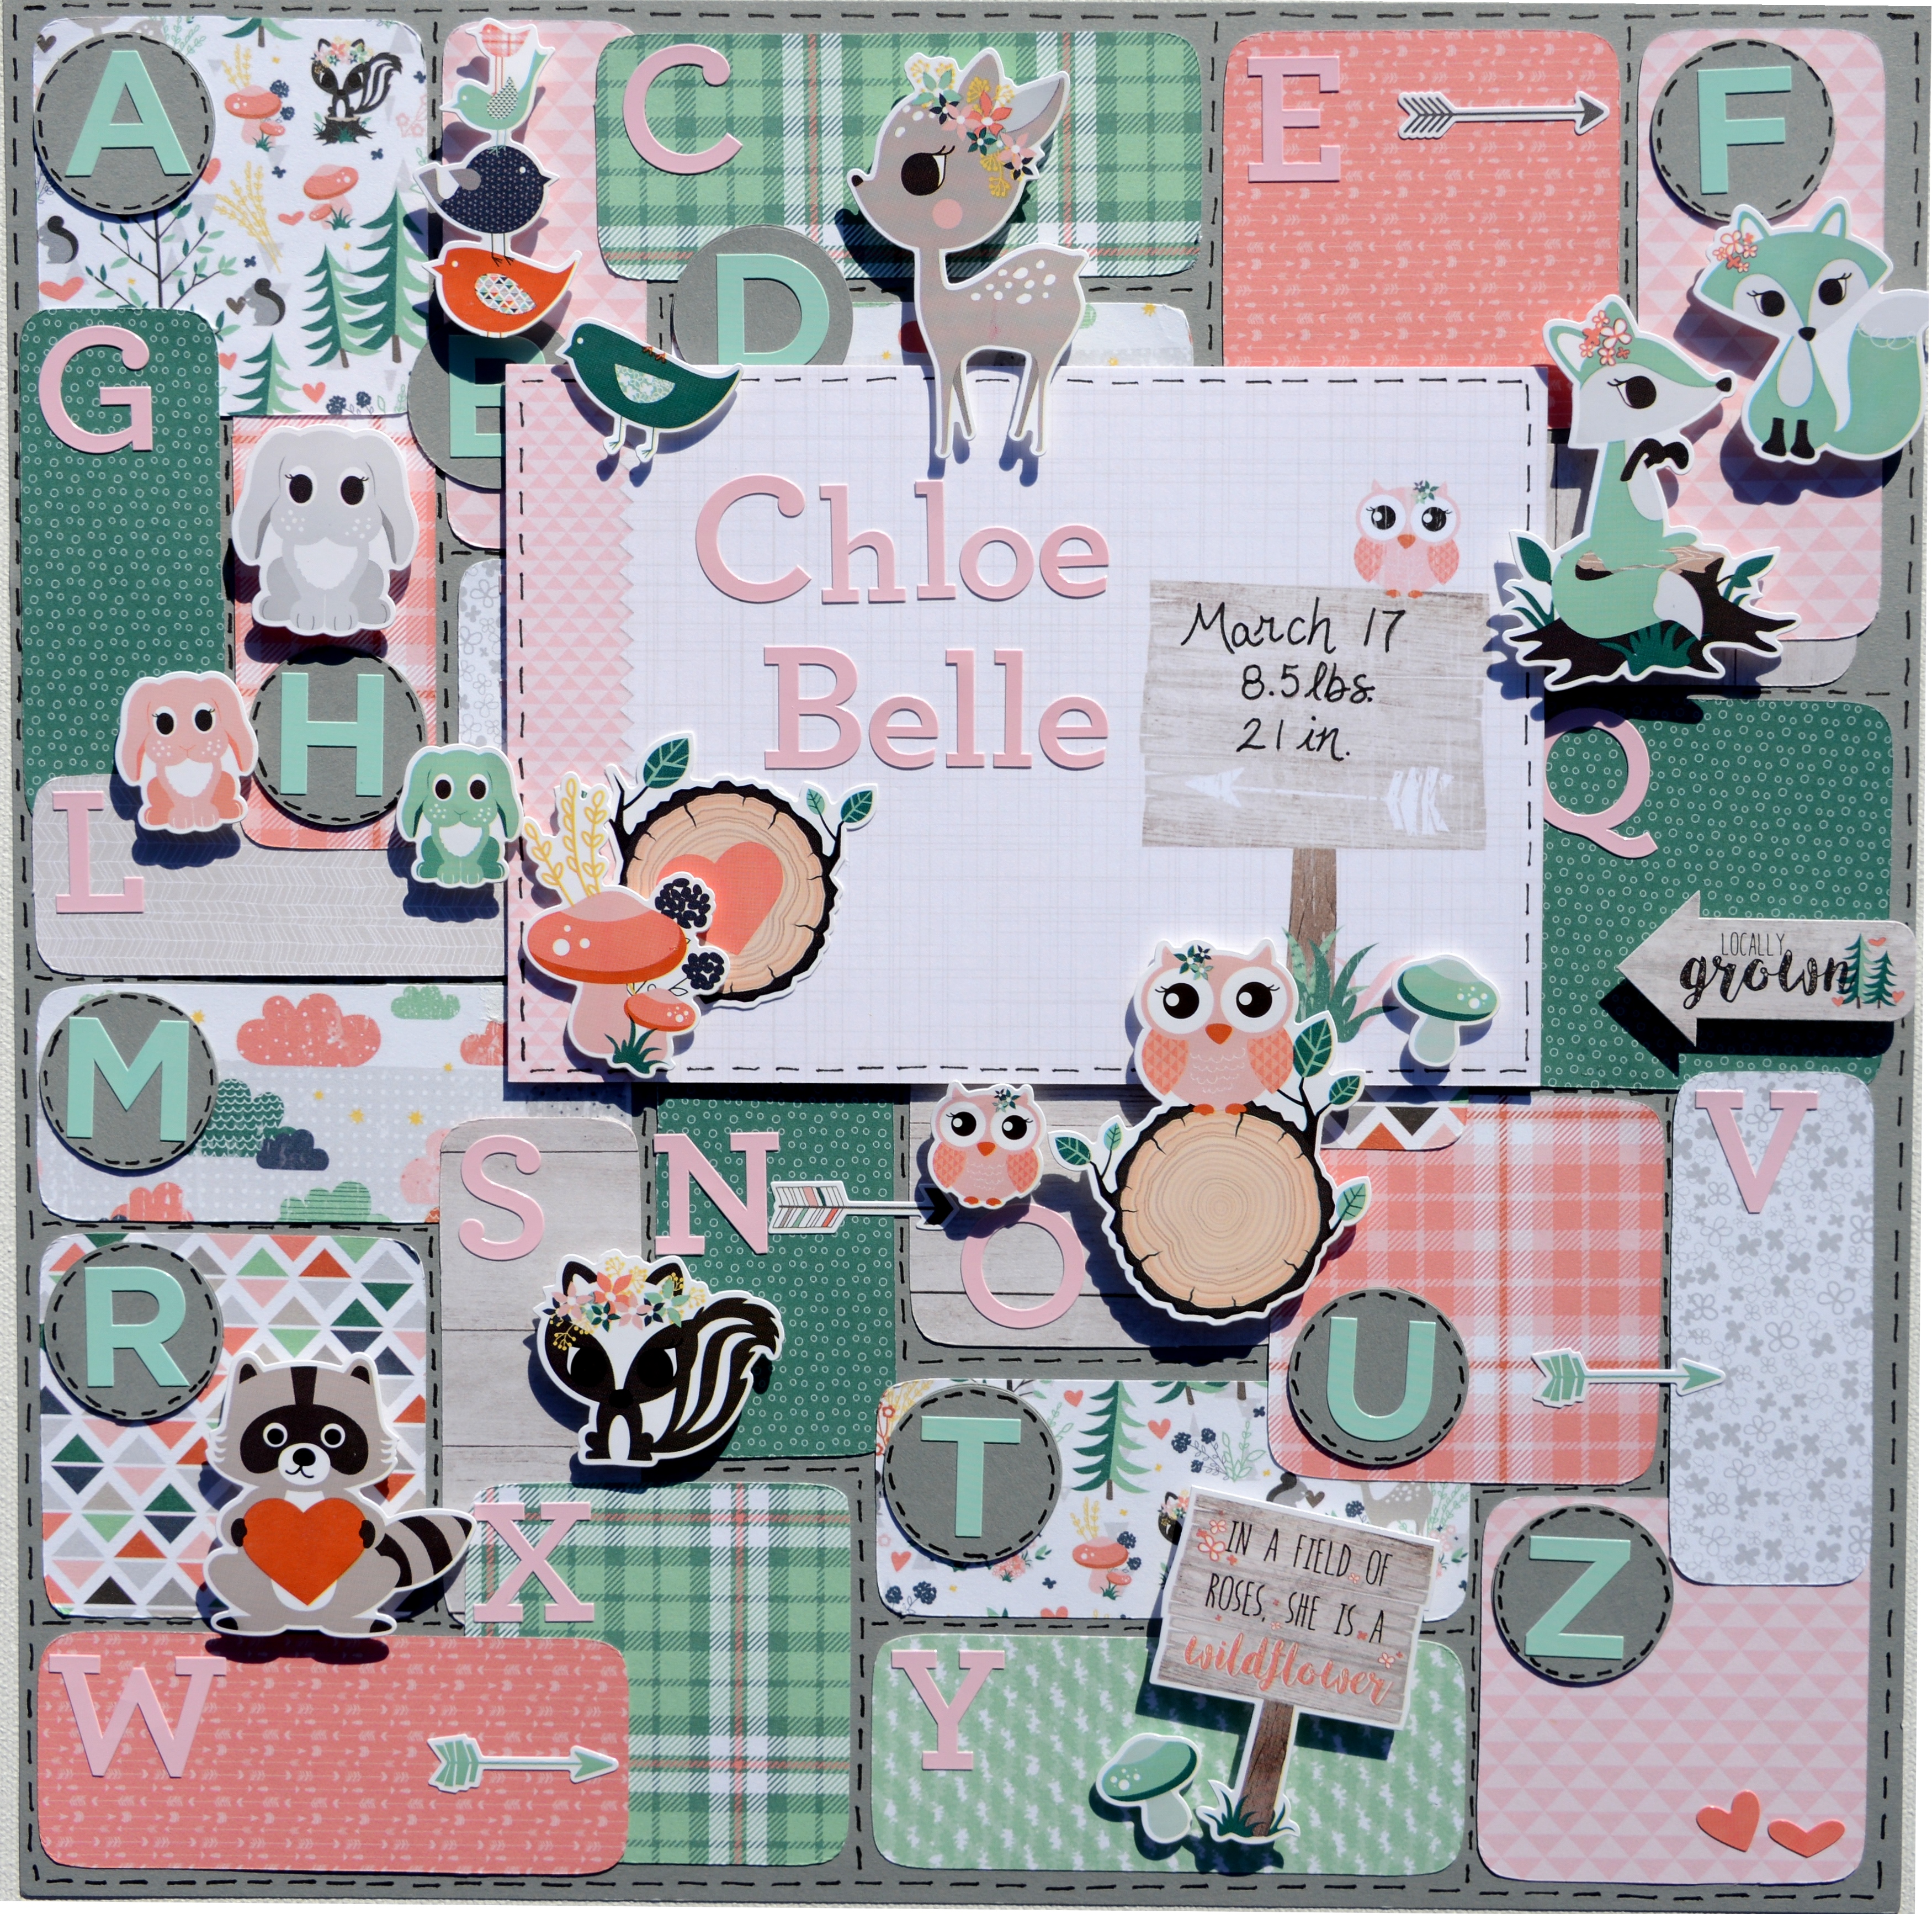
To make the baby girl sampler, you’ll need:
Woodland Whimsy Baby Girl Paper Pack
Woodland Whimsy Baby Girl Stickers
Woodland Whimsy Baby Girl Variety Mat Pack
Gray Solid 12 x 12 Cardstock Paper
Pastel Pink ABC/123 Stickers
Mint ABC/123 Stickers
Foam Squares
Custom Cutting System with Rectangle and Circle Cutting Patterns
Tape Runner
Repositionable Tape Refill
Black Dual-Tip Pen
- Use the custom cutting system with rectangle cutting patterns and the blue blade on the inside edge to cut squares and rectangles. Adhere the pieces to the gray cardstock and overlap as needed. I found it helpful to lay it all out before adhering the pieces. Our repositionable tape runner refill was very handy for this.
- With black pen add faux stitching around the pieces.
- Add ABC/123 Stickers in the order of the alphabet as shown. I adhered some letters to small circles that I cut from gray cardstock using the custom cutting system with the 1-1/2″ circle pattern and green blade on the inside edge.
- Add baby name and info to a variety mat and edge with faux pen stitching. Add the mat to the page using foam squares.
- Add animal stickers to the page using foam squares stacked two high for extra dimension. I put my animal stickers next to their letter in the alphabet.
- Add extra stickers such as arrows, mushrooms, hearts and signs if desired.
I can’t wait to make more pages using the Woodland Whimsy Collections!
What photos do you plan to scrapbook with the Woodland Whimsy Collection?
Happy Scrapping!


What cute displayes! Great gift items too! Super job Karyn!!
Thanks, Sue! Great idea about using them as a baby gift!
How totally sweet!
Thanks, Pam! Glad that you like them! The embellishments and stickers are absolutely adorable!
I love it!!!!
Thanks for your comment, Michele! I hope that you give the Woodland Whimsy Collections a try. They really are versatile – and super cute!
Very sweet layouts, you are inspiring!
Thanks, Barb! The Woodland Whimsy Collections are very inspiring – I have several more ideas that I’m anxious to try. I can’t wait to see what everyone else creates.