March 20, 2017
5 Sorbet Card Ideas & Tips

What to do on a sunny Saturday morning in the spring? Why, grab a cup of coffee, turn on some inspiring music and pull out your card making supplies!
This past week, I experimented with the Sorbet collection. It features a vibrant set of colors and patterns, and the bold papers make it easy to create one-of-a-kind cards that are bursting with fun!
Bundled together below are a few card making tips, as well as 5 card making ideas for you to try using Sorbet. By just adding a few of the Sorbet Embellishments as complementary accents to the beautiful papers, you can easily have a card done in minutes!
Supplies needed to make these cards:
Sorbet Paper Pack
Sorbet Embellishments
Sorbet Stickers
White Solid 12×12 Cardstock
Royal Blue Solid 12×12 Cardstock
Raspberry Solid 12×12 Cardstock Paper Pack
12-Inch Straight Trimmer
Scallop Dot Border Maker Cartridge
Daisy Punch
Embossed Trio Button Punch
Tape Runner
Foam Squares
Gold ABC/123 Stickers (3/pk)
12-Inch Decorative Trimmer
Tip 1: Add a Decorative Bottom Edge
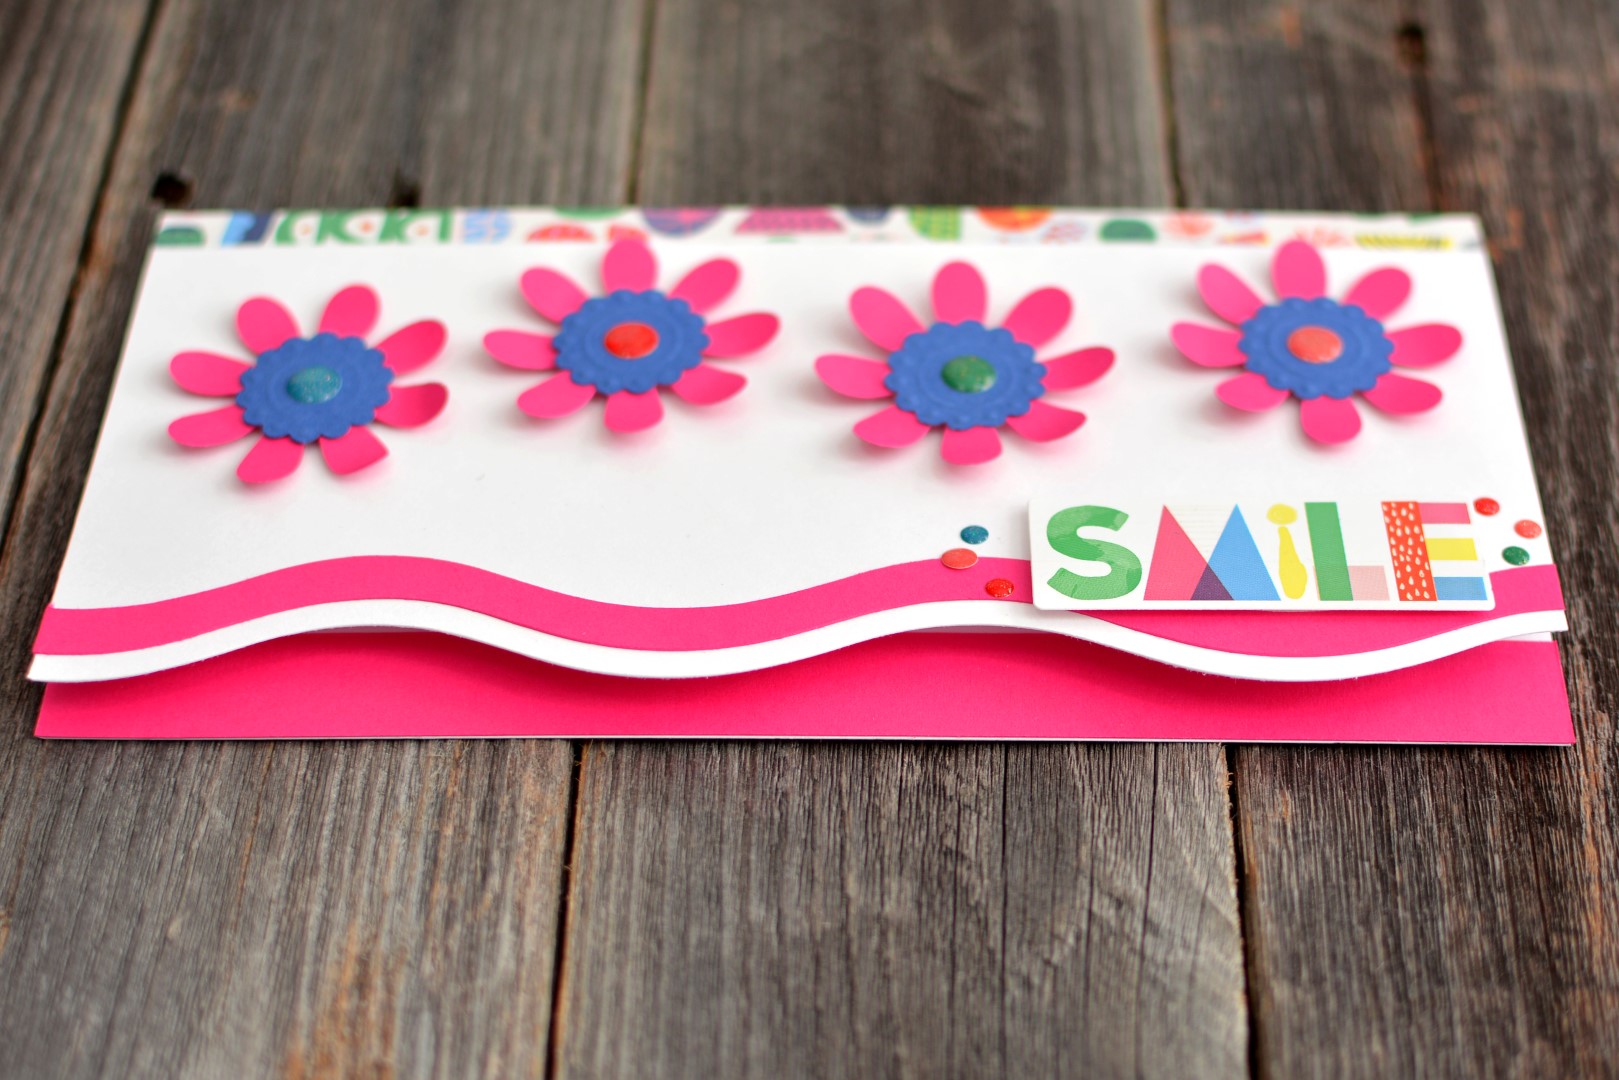
Adding a decorative edge along the bottom of a card’s front panel is an easy, yet eye-catching way to add interest! Additionally, you can add a splash of color or patterned paper to the inside of the card and let that paper “peek” out from behind your decorative edge like on this cute Smile Card.

Smile Card:
1) Cut a piece of White Cardstock to be 8″ x 8″ and fold in half.
2) Cut approximately 1/4″ off the bottom of the front of the card with the 12-inch Decorative Trimmer.
3) Cut a 1/4″ strip of Raspberry Cardstock with the 12-inch Decorative Trimmer and adhere that near the bottom edge of the card.
4) Cut a 1/2″ piece of Raspberry Cardstock and adhere it to the bottom inside of the card.
5) Punch four flowers from Raspberry Cardstock with the Daisy Punch and add to the front of the card with Foam Squares.
6) Use the Embossed Trio Button Punch to punch four buttons from Royal Blue Cardstock and add to the center of each flower.
7) Add a Glitter Gem to the center of each button.
8) Cut a 1/4″ piece of patterned paper from the Sorbet collection and adhere along the top of the card front.
9) Add the “Smile” sticker from the Sorbet collection to the card front with Foam Squares and add additional Glitter Gems around the sticker.
Tip 2: Try a Looser Wave
I took a similar approach and cut the edge of this card with the 12-inch Decorative Trimmer, this time with the looser wave. I also cut a thin strip of Royal Blue Cardstock and adhered it behind the cover with the wavy edge slightly exposed to make the wavy edge stand out more. Again, there is a piece of paper adhered to the inside of the card in a way that it is still visible with the card closed.
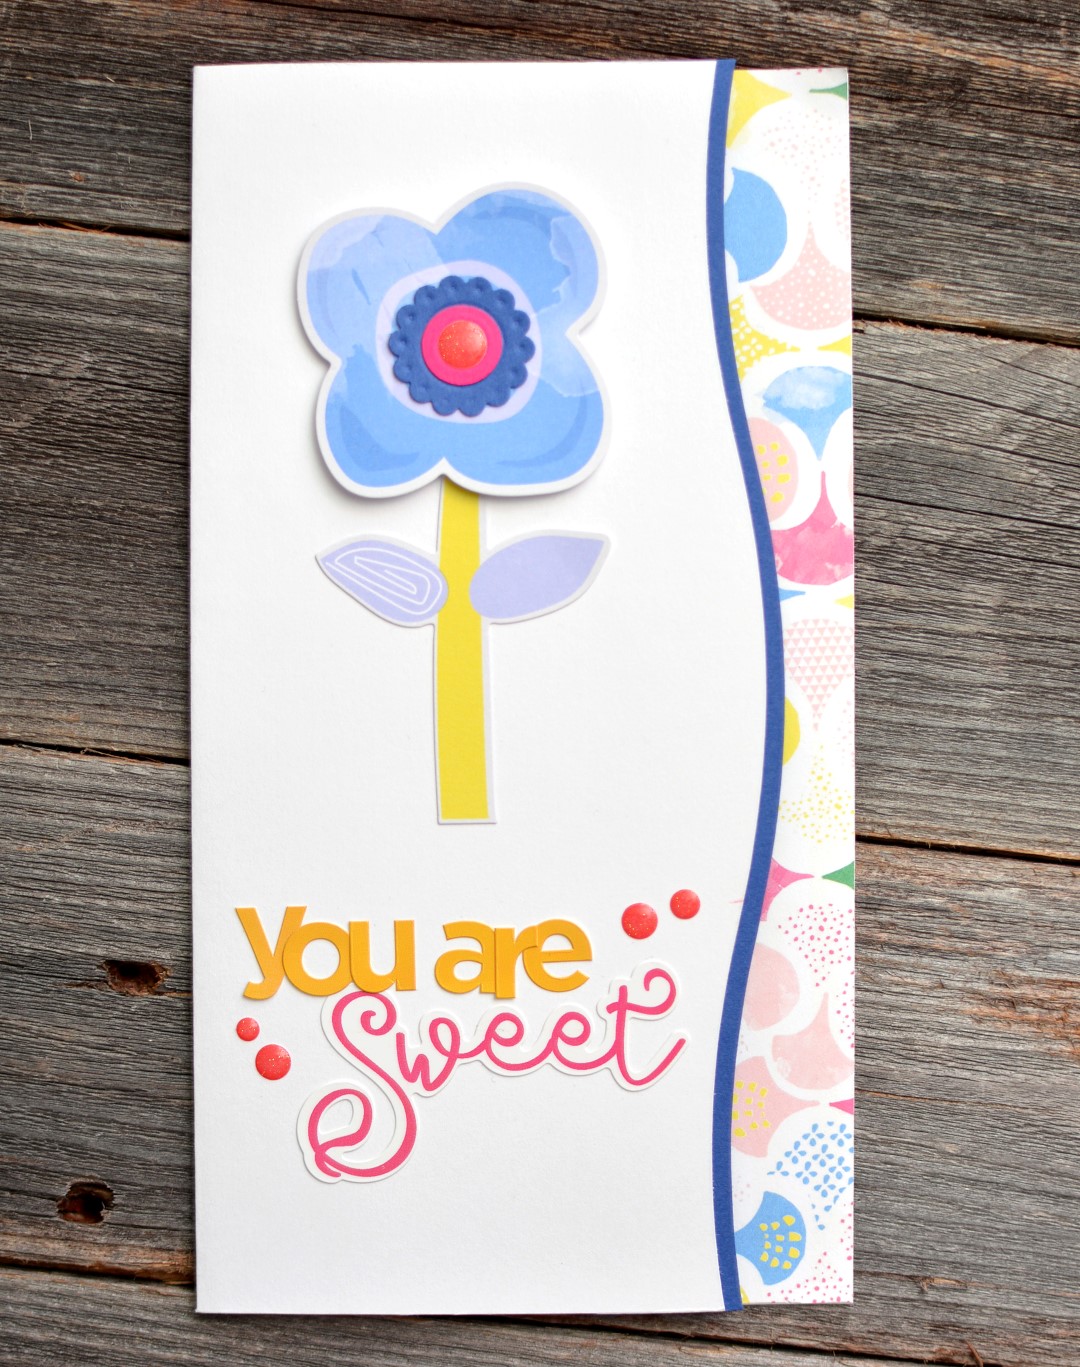
You Are Sweet Card:
1) Cut a piece of White Cardstock to be 8″ x 8″ and fold in half.
2) Cut approximately 3/4″ off the right side of the front of the card with the 12-inch Decorative Trimmer.
3) Cut a 1″ strip of Royal Blue Cardstock with the 12-inch Decorative Trimmer and adhere that under the White Cardstock decorative edge so that about 1/8″ of Royal Blue Cardstock shows along the right edge.
4) Cut a 1 1/2″ piece of patterned paper from the Sorbet collection and adhere it to the right inside edge of the card.
5) Add a flower from the Sorbet collection to the card front. Pop up the flower with a Foam Square. Add the sentiment with Gold ABC/123 Stickers and a Sorbet Sticker.
6) Add Glitter Gems around the sentiment and to the center of the flower.
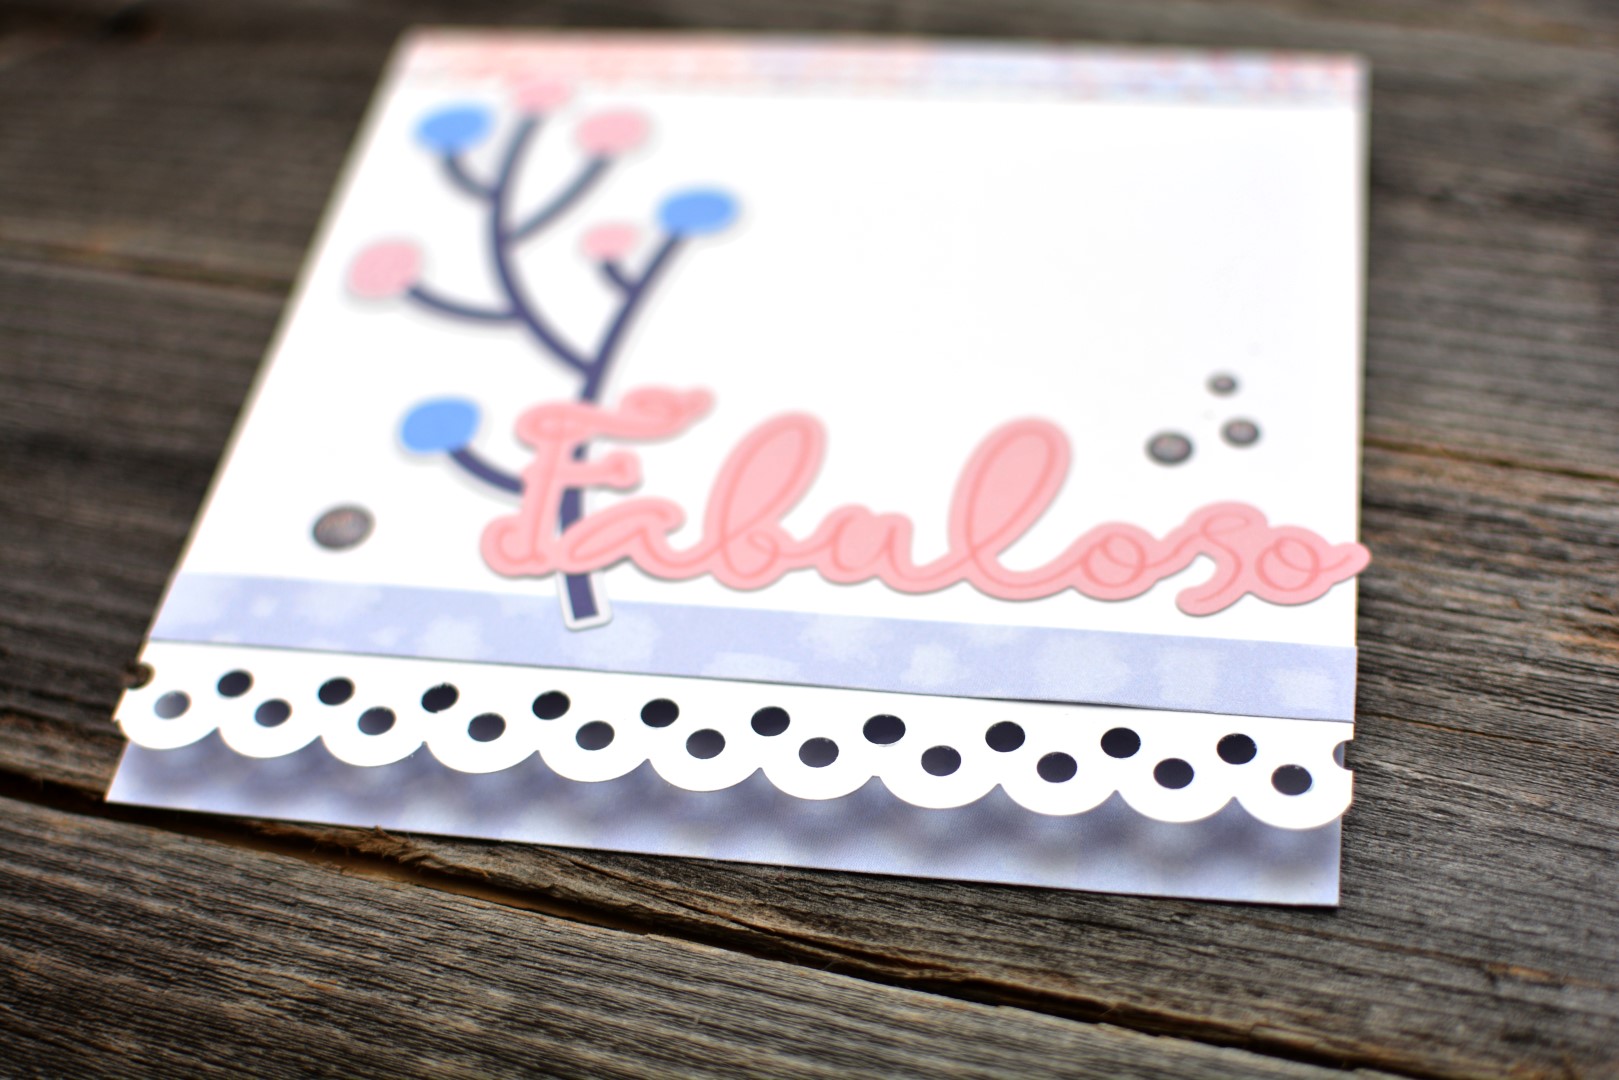
Tip 3: Give It a Feminine Touch with the Scallop Dot Border Maker
This same approach is used here on this pink and blue card, but this time using the Scallop Dot Border Maker to create a soft and feminine edge along the bottom of the card. A light blue piece of patterned paper from the Sorbet collection peeks out from the inside of the card.
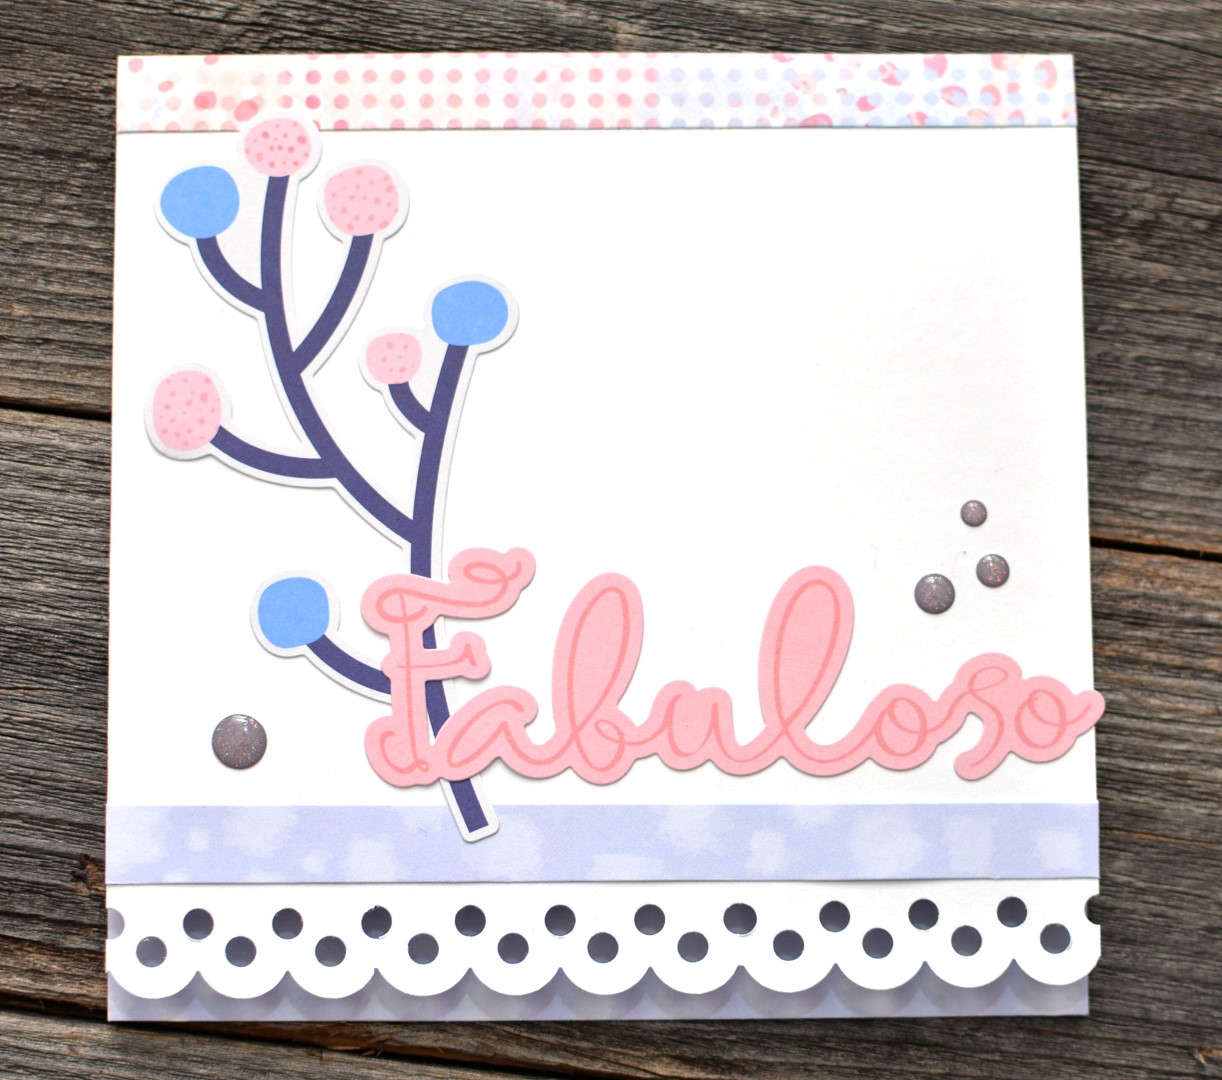
Fabuloso Card:
1) Cut a piece of White Cardstock to be 5 1/2″ x 11″ and fold in half.
2) Cut approximately 1/8″ off the bottom of the front of the card with the Scallop Dot Border Maker.
3) Cut a 1″ piece of patterned paper from the Sorbet collection and adhere it to the bottom inside edge of the card so it can be seen through the scalloped edge.
4) Cut a piece of blue patterned paper from the Sorbet collection to be 1/2″ x 5 1/2″ and add it above the punched border.
5) Cut another piece of blue/pink patterned paper from the Sorbet collection to be 1/2″ x 5 1/2″ and add along the top edge of the card front.
6) Add Sorbet flower and sentiment Embellishments, as well as Sorbet Glitter Gem Embellishments to the card front as shown.
Tip 4: Use Foam Squares to Make Embellishments Pop
On this card, I added my Embellishments with Foam Squares to give them height and stand out from the bright background.
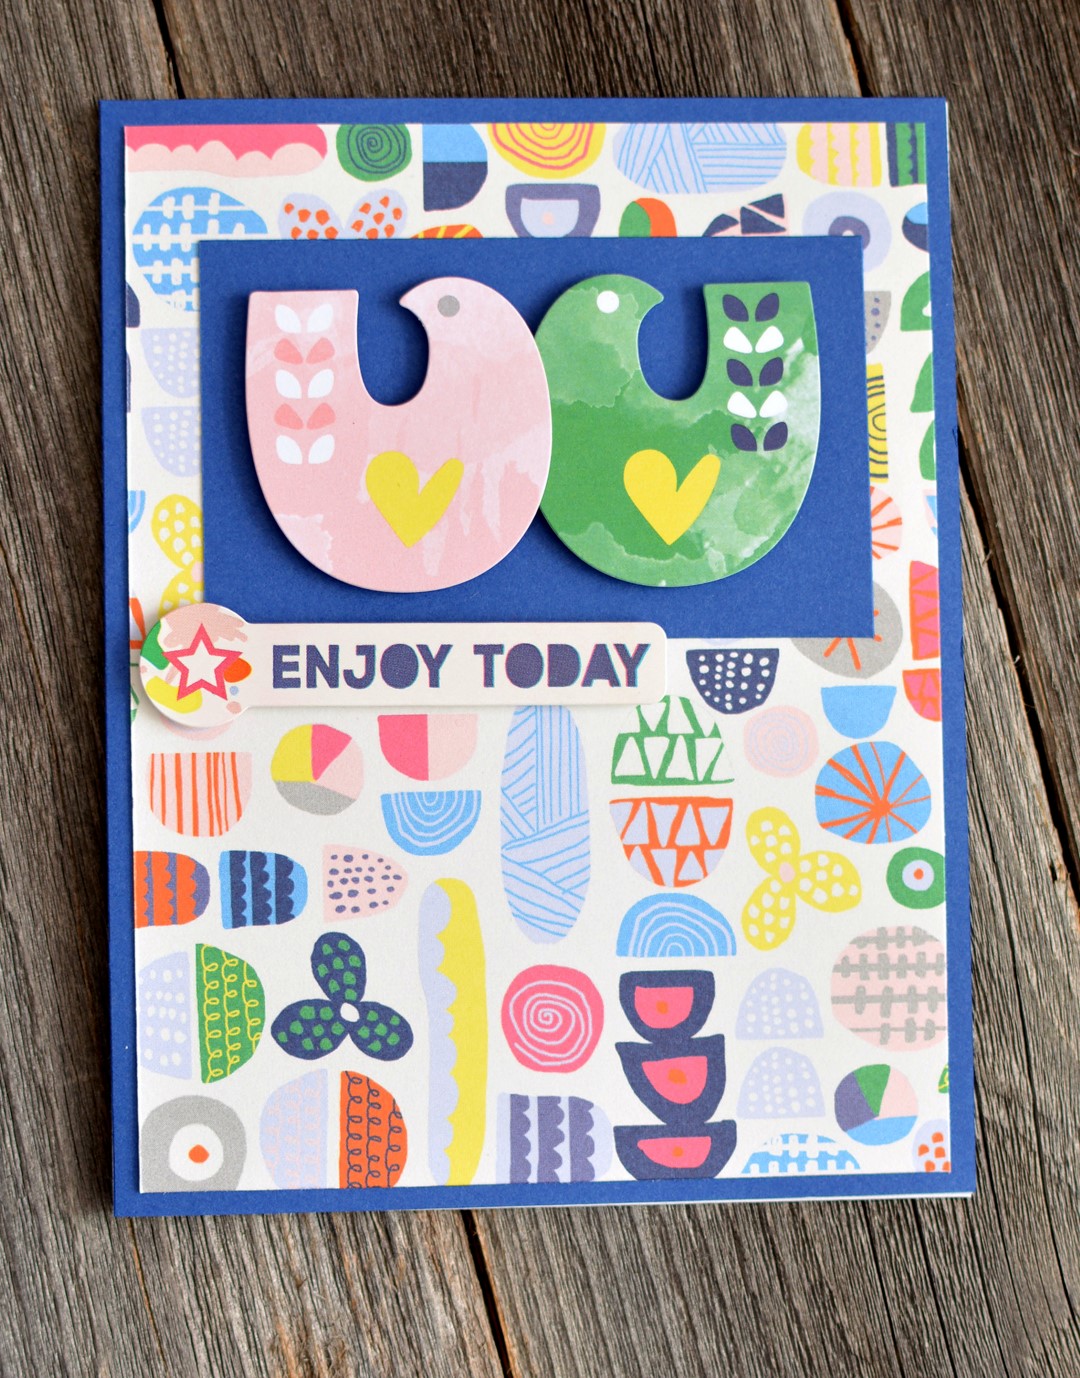
Enjoy Today Card:
1) Cut a piece of Royal Blue Cardstock to be 8 1/2″ x 5 1/2″ and fold in half to make card base.
2) Cut a piece of Sorbet patterned paper to be 4″ x 5 1/4″ and add to the front of the card.
3) Cut a piece of Royal Blue Cardstock to be 3 1/4″ x 2″ and add it to the top center of the card.
4) Add two Sorbet Embellishments to the Royal Blue Cardstock using Foam Squares.
5) Add a Sorbet Sticker under the Embellishments using Foam squares.

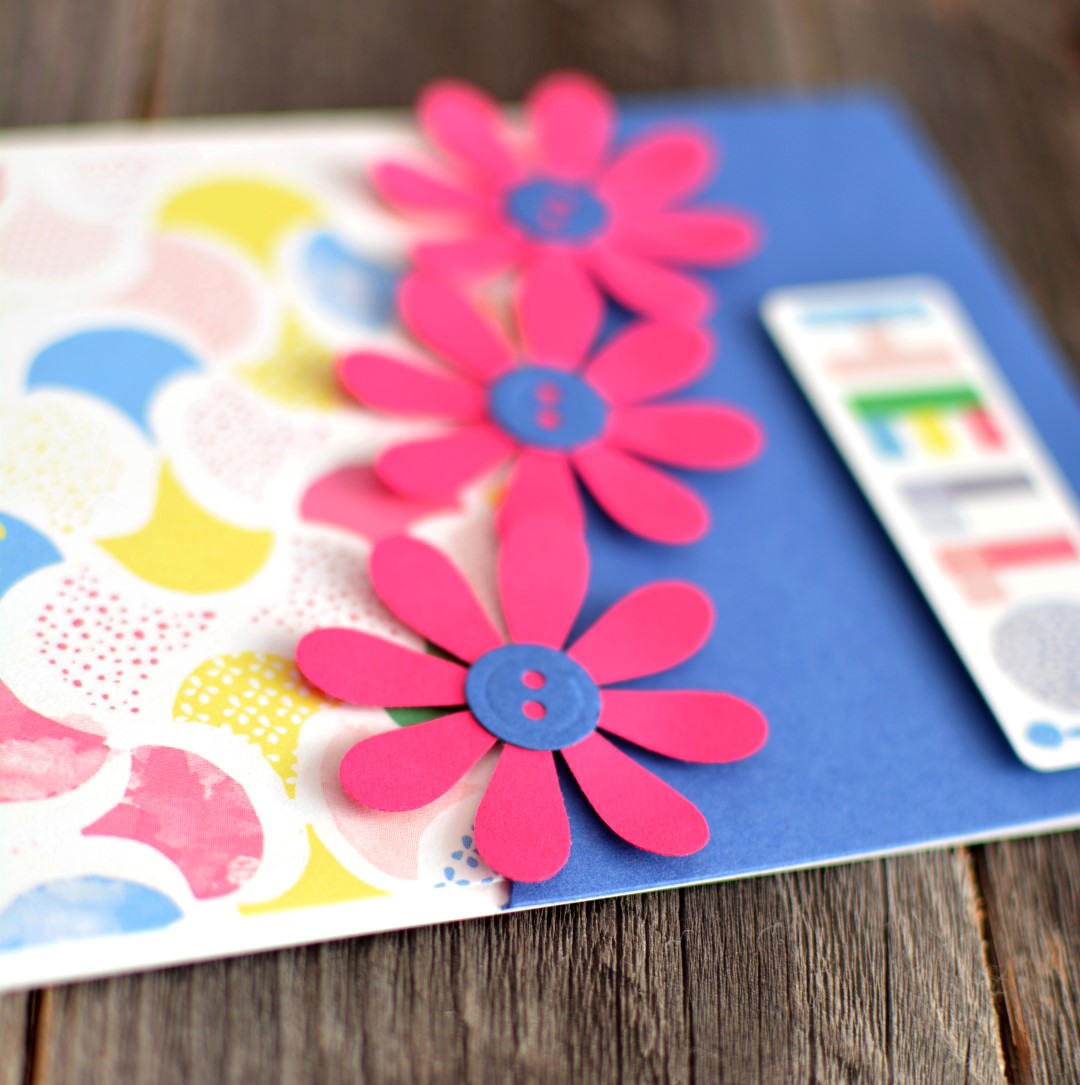
Tip 5: Try a Diagonal Cut
This card uses a diagonal cut to bring interest and to create a place for the three Daisy flowers to fit across the card. Punched button centers form a contrasting color finish off each flower.
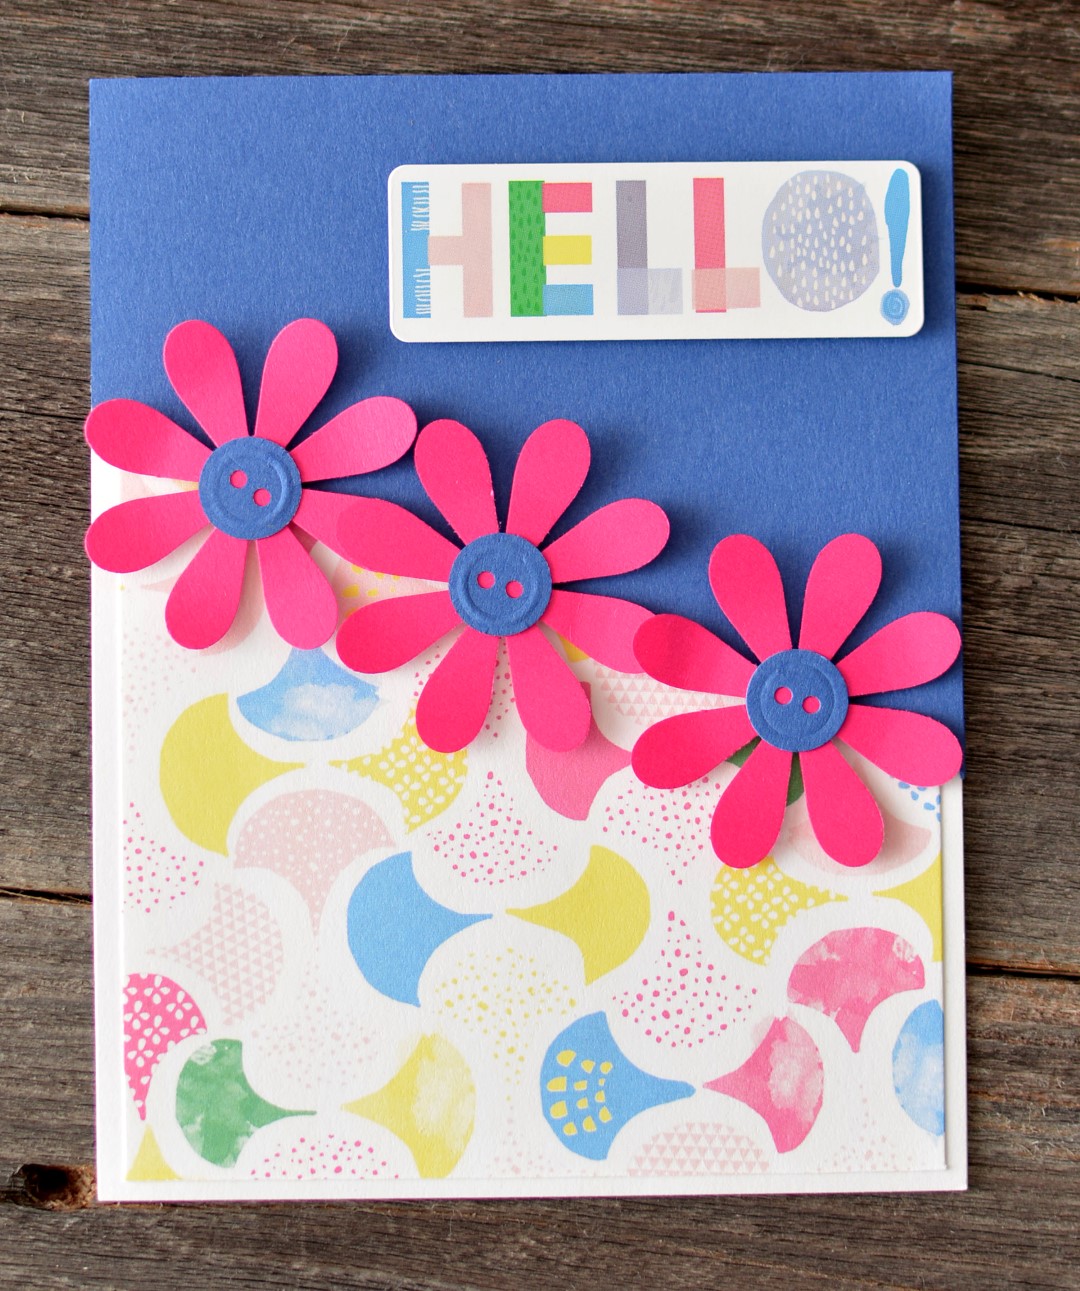
Hello Card:
1) Cut a piece of White Cardstock to be 11″ x 4 1/4″ and fold in half to create the card base.
2) Cut a piece of Sorbet patterned paper to be 4″ x 5 1/4″ and add to the front of the card.
3) Cut a piece of Royal Blue Cardstock to be 4 1/4″ x 3 1/2″ and then cut a deep angle across the cardstock. Add to the top of the card.
4) Punch three flowers with the Daisy Punch from Raspberry Cardstock and add to the card front with Foam Squares.
5) Punch three buttons from Royal Blue Cardstock with the Embossed Trio Button Punch and add to the flower centers.
6) Add a Sorbet Sticker to the top right of the card front with Foam Squares.
Again, the Sorbet Embellishment and the flowers are added to the card with Foam Squares to help them stand out and not feel too flat.
So, this concludes my Saturday card making inspirations… what are yours?

These are adorable!
I love #4- going to make it into a birthday card for my honey!! Thank you!
So springy and perky! Thanks for the examples. Great inspiration. <3
These cards are so cute!!!