April 17, 2017
Fur Buddies Scrapbooking Borders

Furry friends are the best, aren’t they? Many of us love our pets so much we take oodles of pictures of them and dedicate entire albums to capturing the special bonds we share with them. The Fur Buddies Paper and Stickers are PURR-fectly wonderful for those fun and lovable pages, and I couldn’t wait to get my PAWS on the new Paw Prints Border maker Cartridge to make some borders. Hope you DIG ’em!
To make these borders you’ll need:
- Fur Buddies Paper Pack and Stickers
- White Cardstock
- Gold ABC/123 Stickers
- Original Border Maker System with Paw Prints, Scallop Dot, Picket Fence and Heart Chain Cartridges
- 12-inch Straight Trimmer
- 12-inch Decorative Trimmer
- Custom Cutting System with Circle and Rectangle Patterns
- Tape Runner with Repositionable Tape Runner Adhesive
- Foam Squares
- Hole punch
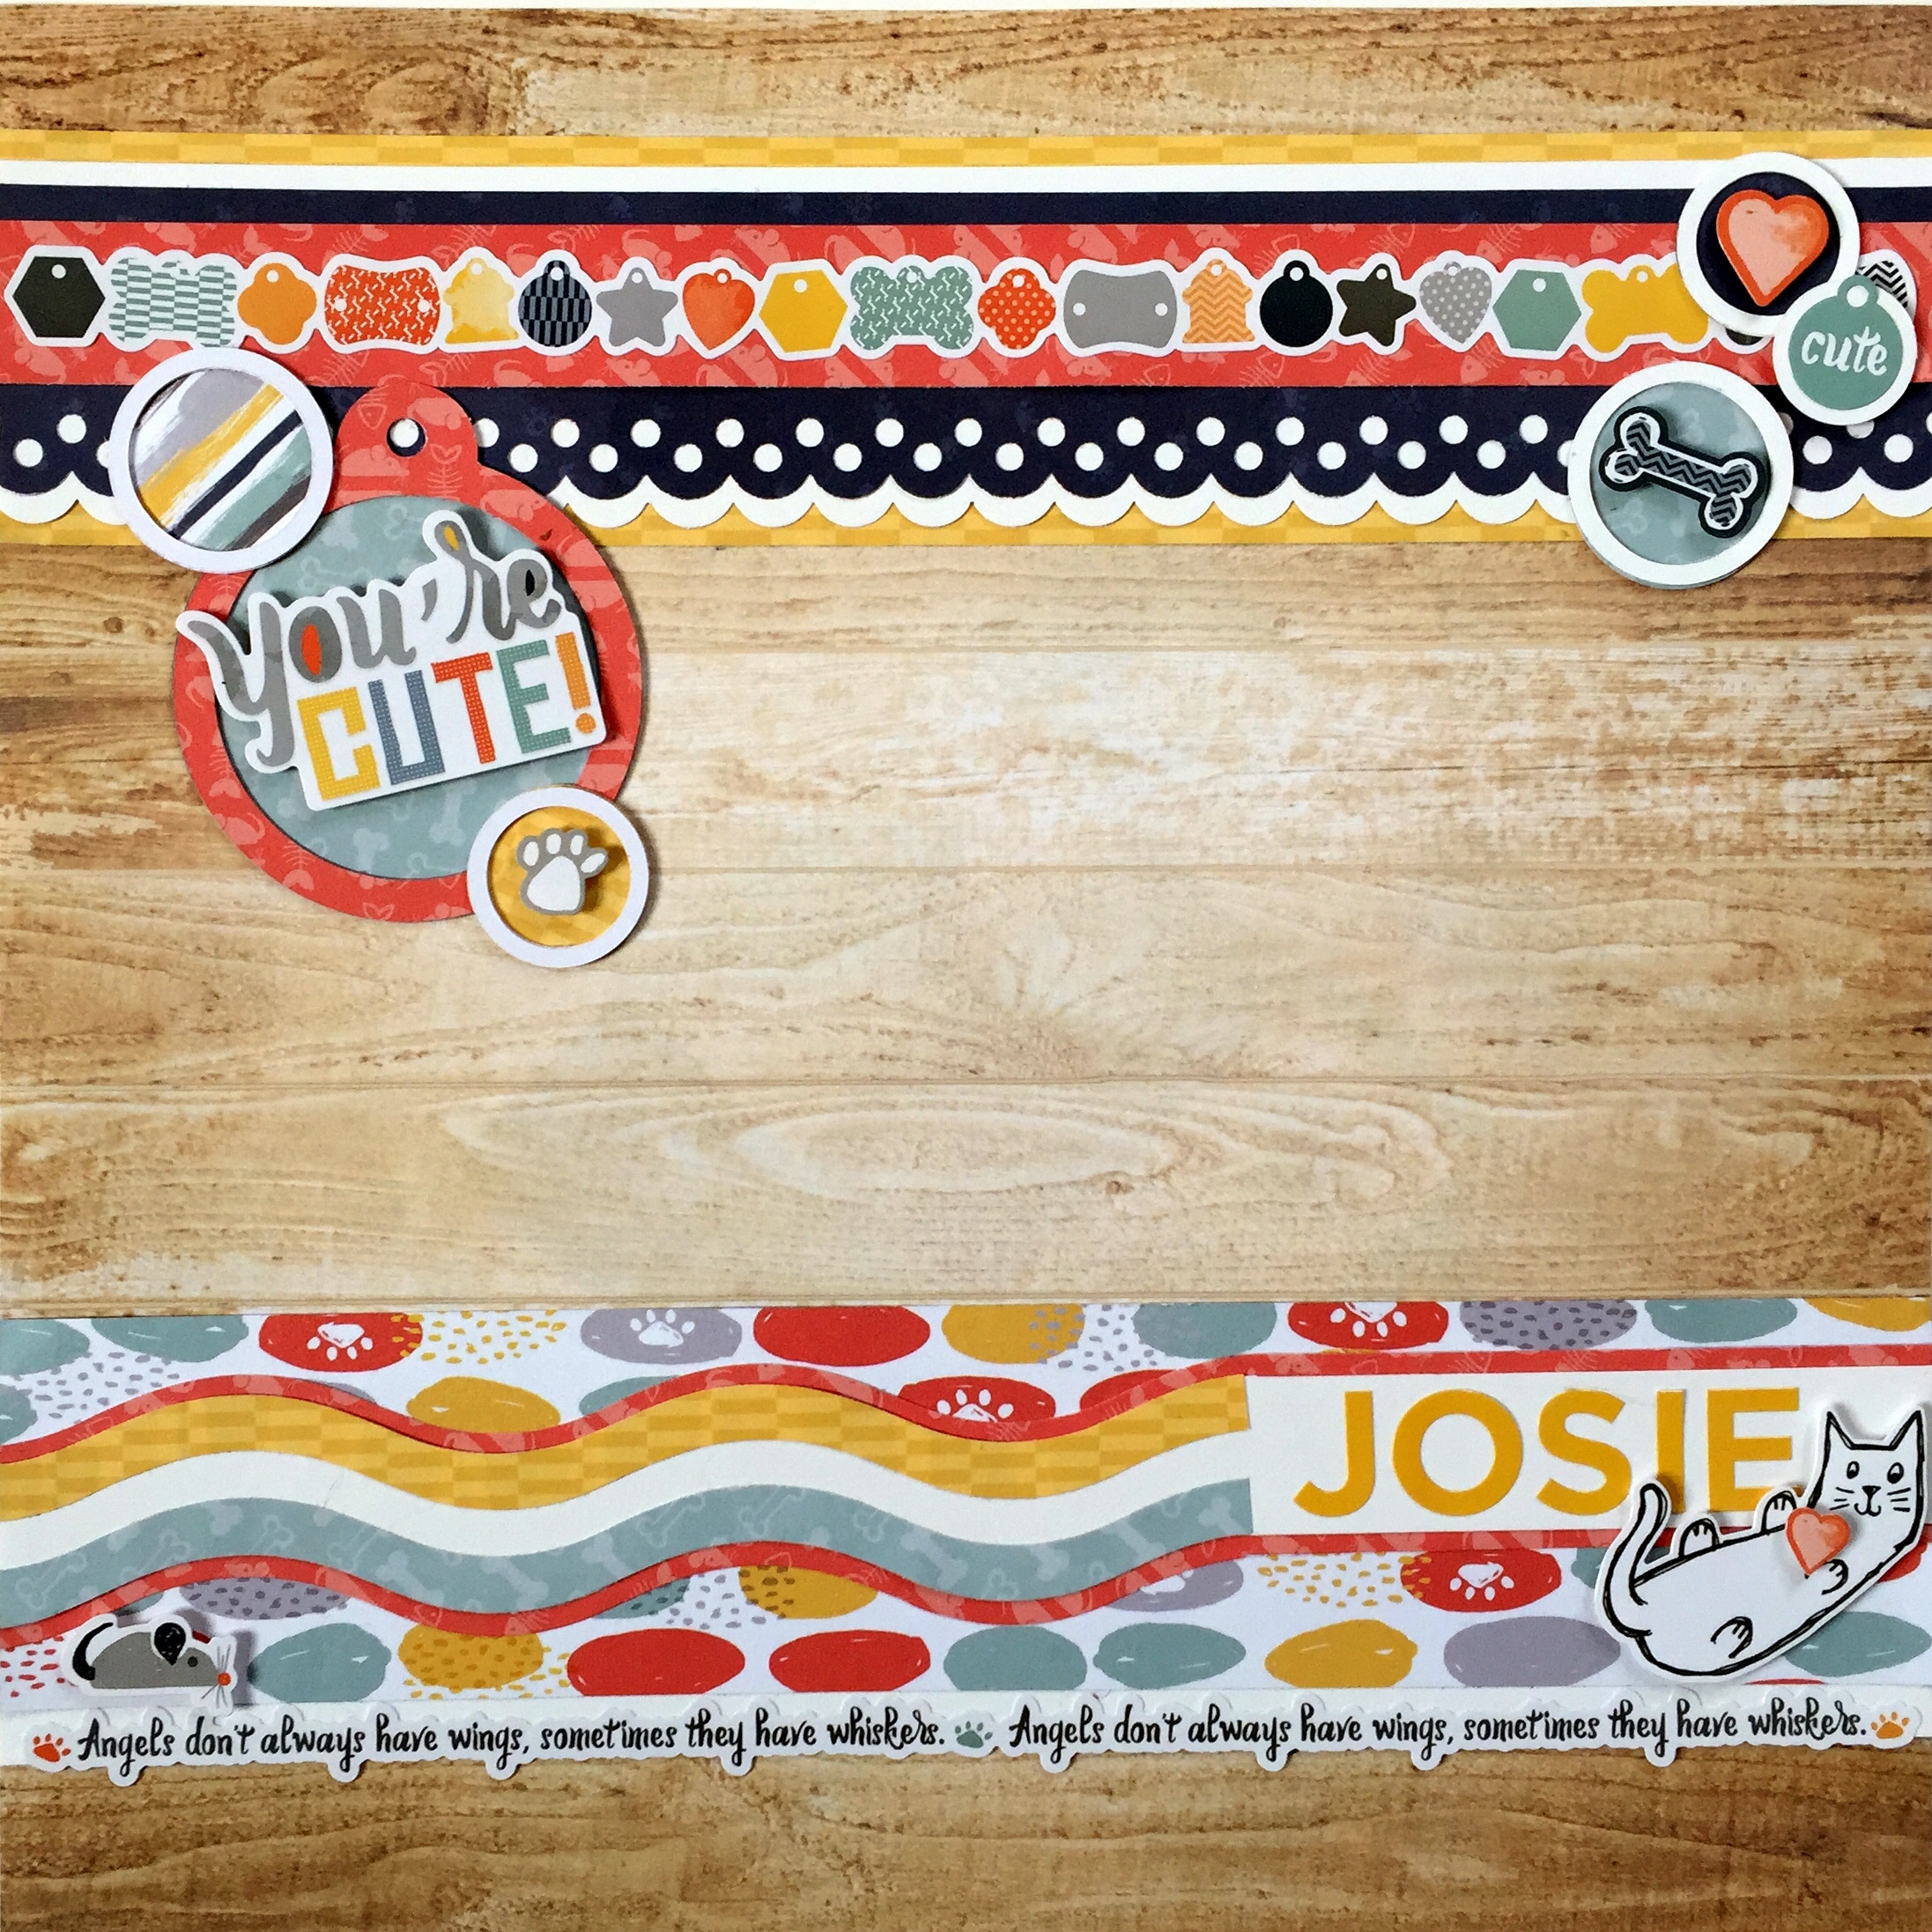
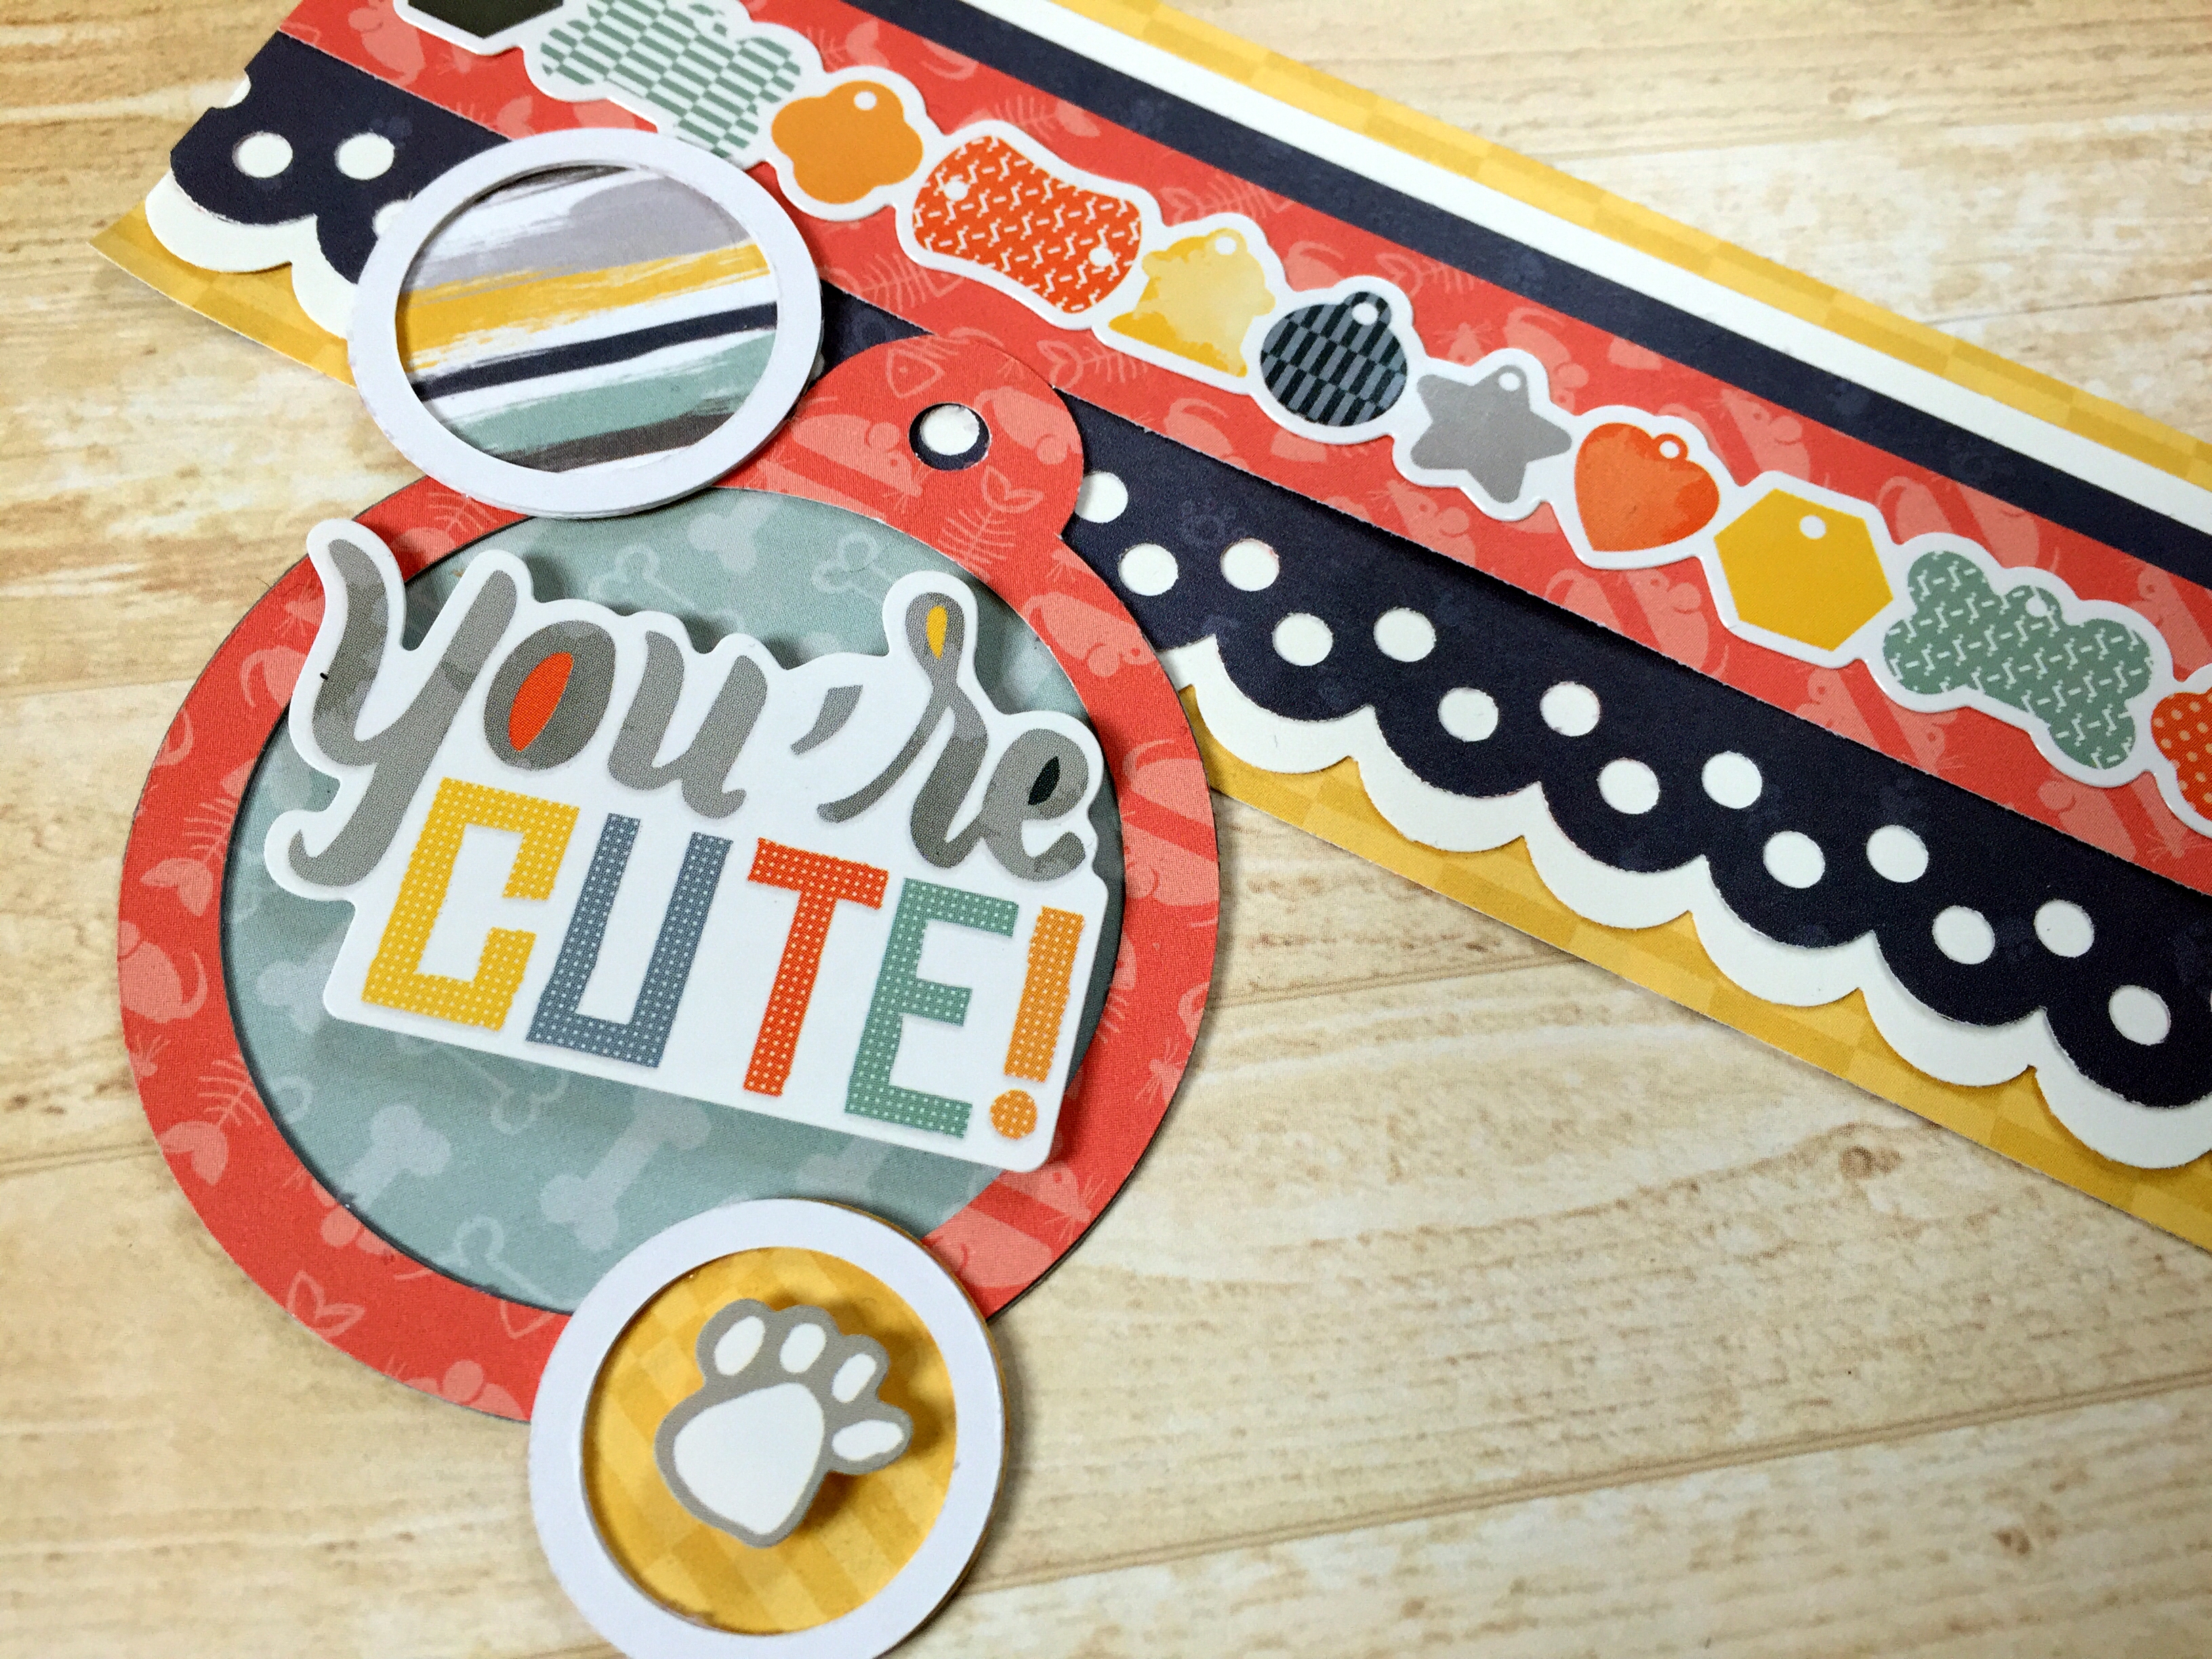
You’re Cute! Border”
- Cut a 2-1/2″ x 12″ strip of yellow paper.
- Using the scallop dot cartridge, punch a border with white cardstock. Trim to 2-1/4″ x 12. Adhere to border. Punch another border with navy paper. Trim to 1-7/8″ x 12″. Align “dots” and adhere to white piece.
- Cut a 1″ x 12″ strip of red paper. Adhere to navy piece and add pet tags sticker as shown.
- Using the inside of the large circle pattern and the blue blade, cut a circle with light blue paper, stopping the cut with about 1″ remaining. Position the inside of the small circle pattern about 1″ above the uncut circle edge and trim a half circle out with the blue blade, creating a pet tag shape. Repeat with red paper. Trim out the inside of the red circle using the medium pattern and the red blade. Adhere red circle to blue circle and punch a hole in the tag with a hole punch. Add “You’re Cute!” sticker with foam squares and apply to border as shown.
- Using the small circle pattern and white cardstock, cut first with the blue blade, then green and then red, being careful not to move the pattern between cuts. You will then have 2 different sized “rings”. Repeat 3 more times. Cut circles with scrap paper with the green and red blades. Stack 2 same-size rings together and mount on colored circles. Add to border and embellish with stickers as desired.
Pet Name Border
- Cut a 2-1/2″ x 12″ strip of paw print patterned paper (and say that 3 times fast…dare ya).
- Using the wavy edge of the decorative trimmer, cut a strip of red paper about 7-3/4″ down the length of the 12″ sheet and stop. Move paper over to the 1-1/4″ mark and cut the same distance. Remove paper and finish the cuts with the straight trimmer. Repeat with white cardstock, making the strip 1″ wide instead of 1-1/4″. Adhere white strip to red.
- Cut two 3/8″ x 7-3/4″ wavy strips of light blue and yellow paper and adhere to white edges as shown. Add your pet’s name in gold ABC/123 stickers along the straight edge of border. Adhere to border.
- Add cat or dog sticker, etc. with foam squares. When adding border to page, place long “Angels…” sticker directly underneath.
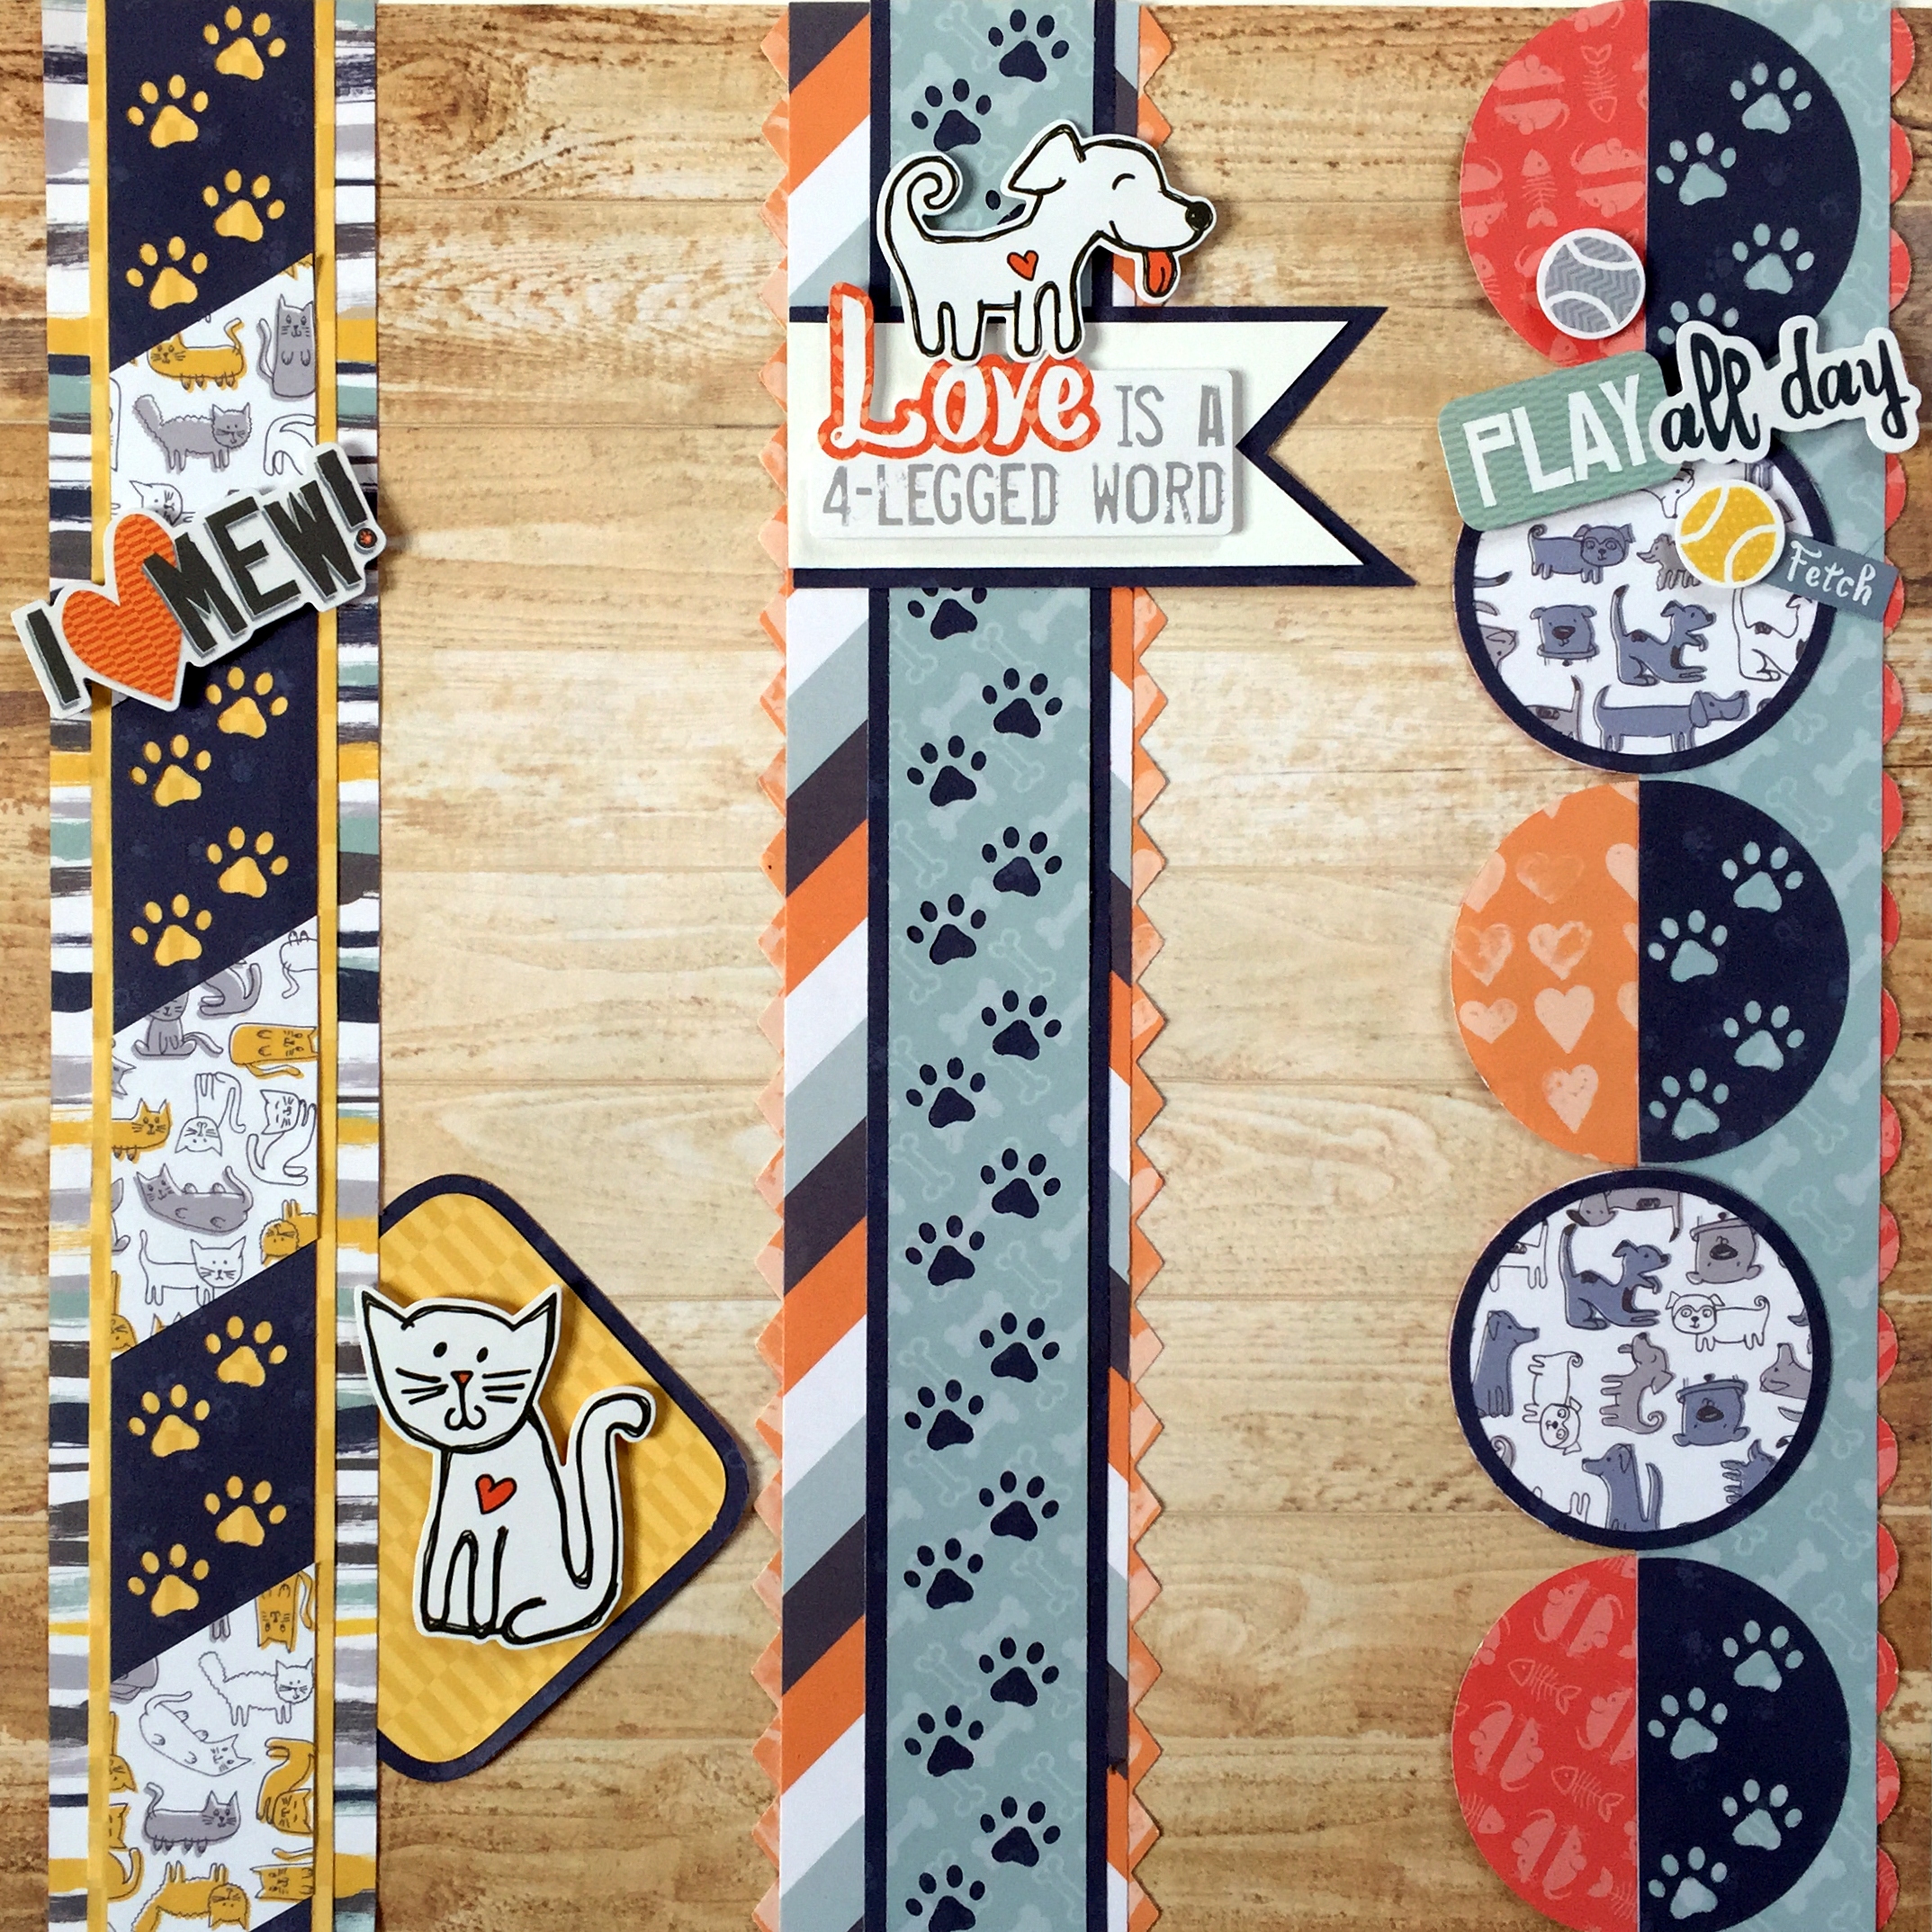
I Love Mew! Border
- Cut a 2″ x 12″ strip of striped paper. Cut a 1-1/2″ x 12″ strip of yellow paper and adhere to border.
- Using paw prints cartridge, punch a border with navy paper. Trim to 1-1/4″ x 12″. Cut a 1–1/4″ x 12″ strip of cats paper. Turn the strip over and align the long edge in the straight trimmer at the 30-degree line and cut. Move the strip down 2″ and cut again. Repeat 2 more times, creating three angled pieces. Adhere them over the paw prints border as shown. Adhere on top of yellow border and add I Love Mew! sticker with foam squares.
- Using the inside of the square pattern and the red blade, cut a square with navy paper. Cut another using the green blade and red paper. Top navy with yellow, adhere to underside of border as shown and add cat sticker with foam squares.
Love is a 4-Legged Word Border
- Using the picket fence cartridge and orange hearts paper, punch a border. Trim to 2-3/4″ x 12″. Punch the other side.
- Cut a 2-1/8″ x 12″ strip of geometric paper and add to border so just the tips of the pickets stick out on both sides. Cut a 1-1/2″ x 12″ strip of navy paper and add to border, just off-center.
- Using the paw prints cartridge, punch a border with light blue paper. Trim to 1-1/4″ x 12″. Apply on top of navy strip.
- Cut a 1-3/4″ x 4″ strip of navy paper. Cut a 1-1/2″ x 3-1/2″ strip of white cardstock. Notch one side of each, creating a flag. Apply white to navy and add “Love is a 4-Legged Word” and dog/cat sticker with foam squares.
Play All Day Border
- Cut a 1-1/2″ x 12″ strip of light blue paper. Using heart chain cartridge, punch a border with red paper. Apply behind blue border so just “scallops” peak out from right side.
- Using the inside of the medium circle pattern and the red blade, cut 4 circles of red/dogs paper. Cut 1 circle of orange paper. Apply 3 circles (2 red and the orange) to top, middle and bottom of border so that half of each circle shows from behind the left side. Apply 2 dogs circles on top of border between the others as shown.
- Cut 2 circles with navy paper, cutting first with the green blade and then the red, being careful not to move the pattern between cuts. Apply these 2 “rings” to tops of dogs circles.
- Using the paw prints cartridge, make one punch on navy paper. Cut a half circle around the prints using the inside of the medium circle pattern and the red blade. Repeat twice. Trim half-circles a bit if needed and add to border, completing the “other half” of the red and orange circles.
- Add “Play all day”, “Fetch” and baseball stickers with foam squares.

 DSC_0006
 IMG_3706
 IMG_3705
 IMG_3704
 IMG_3703

These are so cute! I wish I had a pet to scrap ?
Just so cute! I have a separate book just for my dog. These papers and the paw punch are perfect for her photos! ??