May 18, 2017
Titles & Tags Using Rectangle Patterns
The Custom Cutting System has long been a beloved staple for adding some circle and oval shapes to our pages. Now we can expand our shape-ortoire to rectangles! There are endless ways to use the new Rectangle Patterns on all kinds of pages and album styles. Here are just a few ideas to get you started.


IMG_3370

IMG_3372

IMG_3371
To make these projects you’ll need:
- Painted Harvest Fast2Fab Pages, Paper Pack, Mat Pack and Embellishments
- 11×14 Multi-Pocket Pages
- Cake My Day Paper Pack and Stickers
- Black, Raspberry, Peacock Blue & White Cardstock
- ABC Stickers in Black, Ruby & Gold
- Custom Cutting System with Rectangle Patterns
- 12-inch Straight Trimmer
- All-Purpose Scissors
- 2-Way Corner Rounder
- Original Border Maker System with Stars Cartridge
- Button Trio Punch-Retired
- Garden Vine Punch-Retired
- Tape Runner with Repositionable Refill
- Foam Squares
- Hole punch
- Black Dual-tip Pen
Painted Harvest Fast2Fab Layout
- This simple Fast2Fab layout features a title box, tag and matted photos using the rectangle patterns.
- For the title box, use the inside of the larger rectangle. Cut a piece for the title with the blue blade and a piece to mat it with the red blade. Adhere to each other just off-center, add title with ABC stickers and embellish with garden vines.
- For the tag, use the inside of the square. Cut a piece of paper with the red blade. Journal as desired, add adhesive and tuck one side underneath a photo. Embellish with garden vines.
- Trim a couple of photos using the blue blade inside the square pattern. Cut mats for the photos using the red blade. Align just off-center and adhere to page. Add garden vines.


Painted Harvest Pocket Page Title Box
- Select a 6-1/2″ x 4-1/2″ mat from the Painted Harvest mat pack. (This size fits perfectly in the largest middle opening of the multi-pocket page. The smaller 6″ x 4″ mats fit in the other openings.)
- Cut a piece of paper using the smaller rectangle pattern with the red blade on the outside track. Cut a smaller piece of lighter colored paper with the red blade on the inside track. Mount as shown.
- Add ABC stickers, embellishments and journaling.
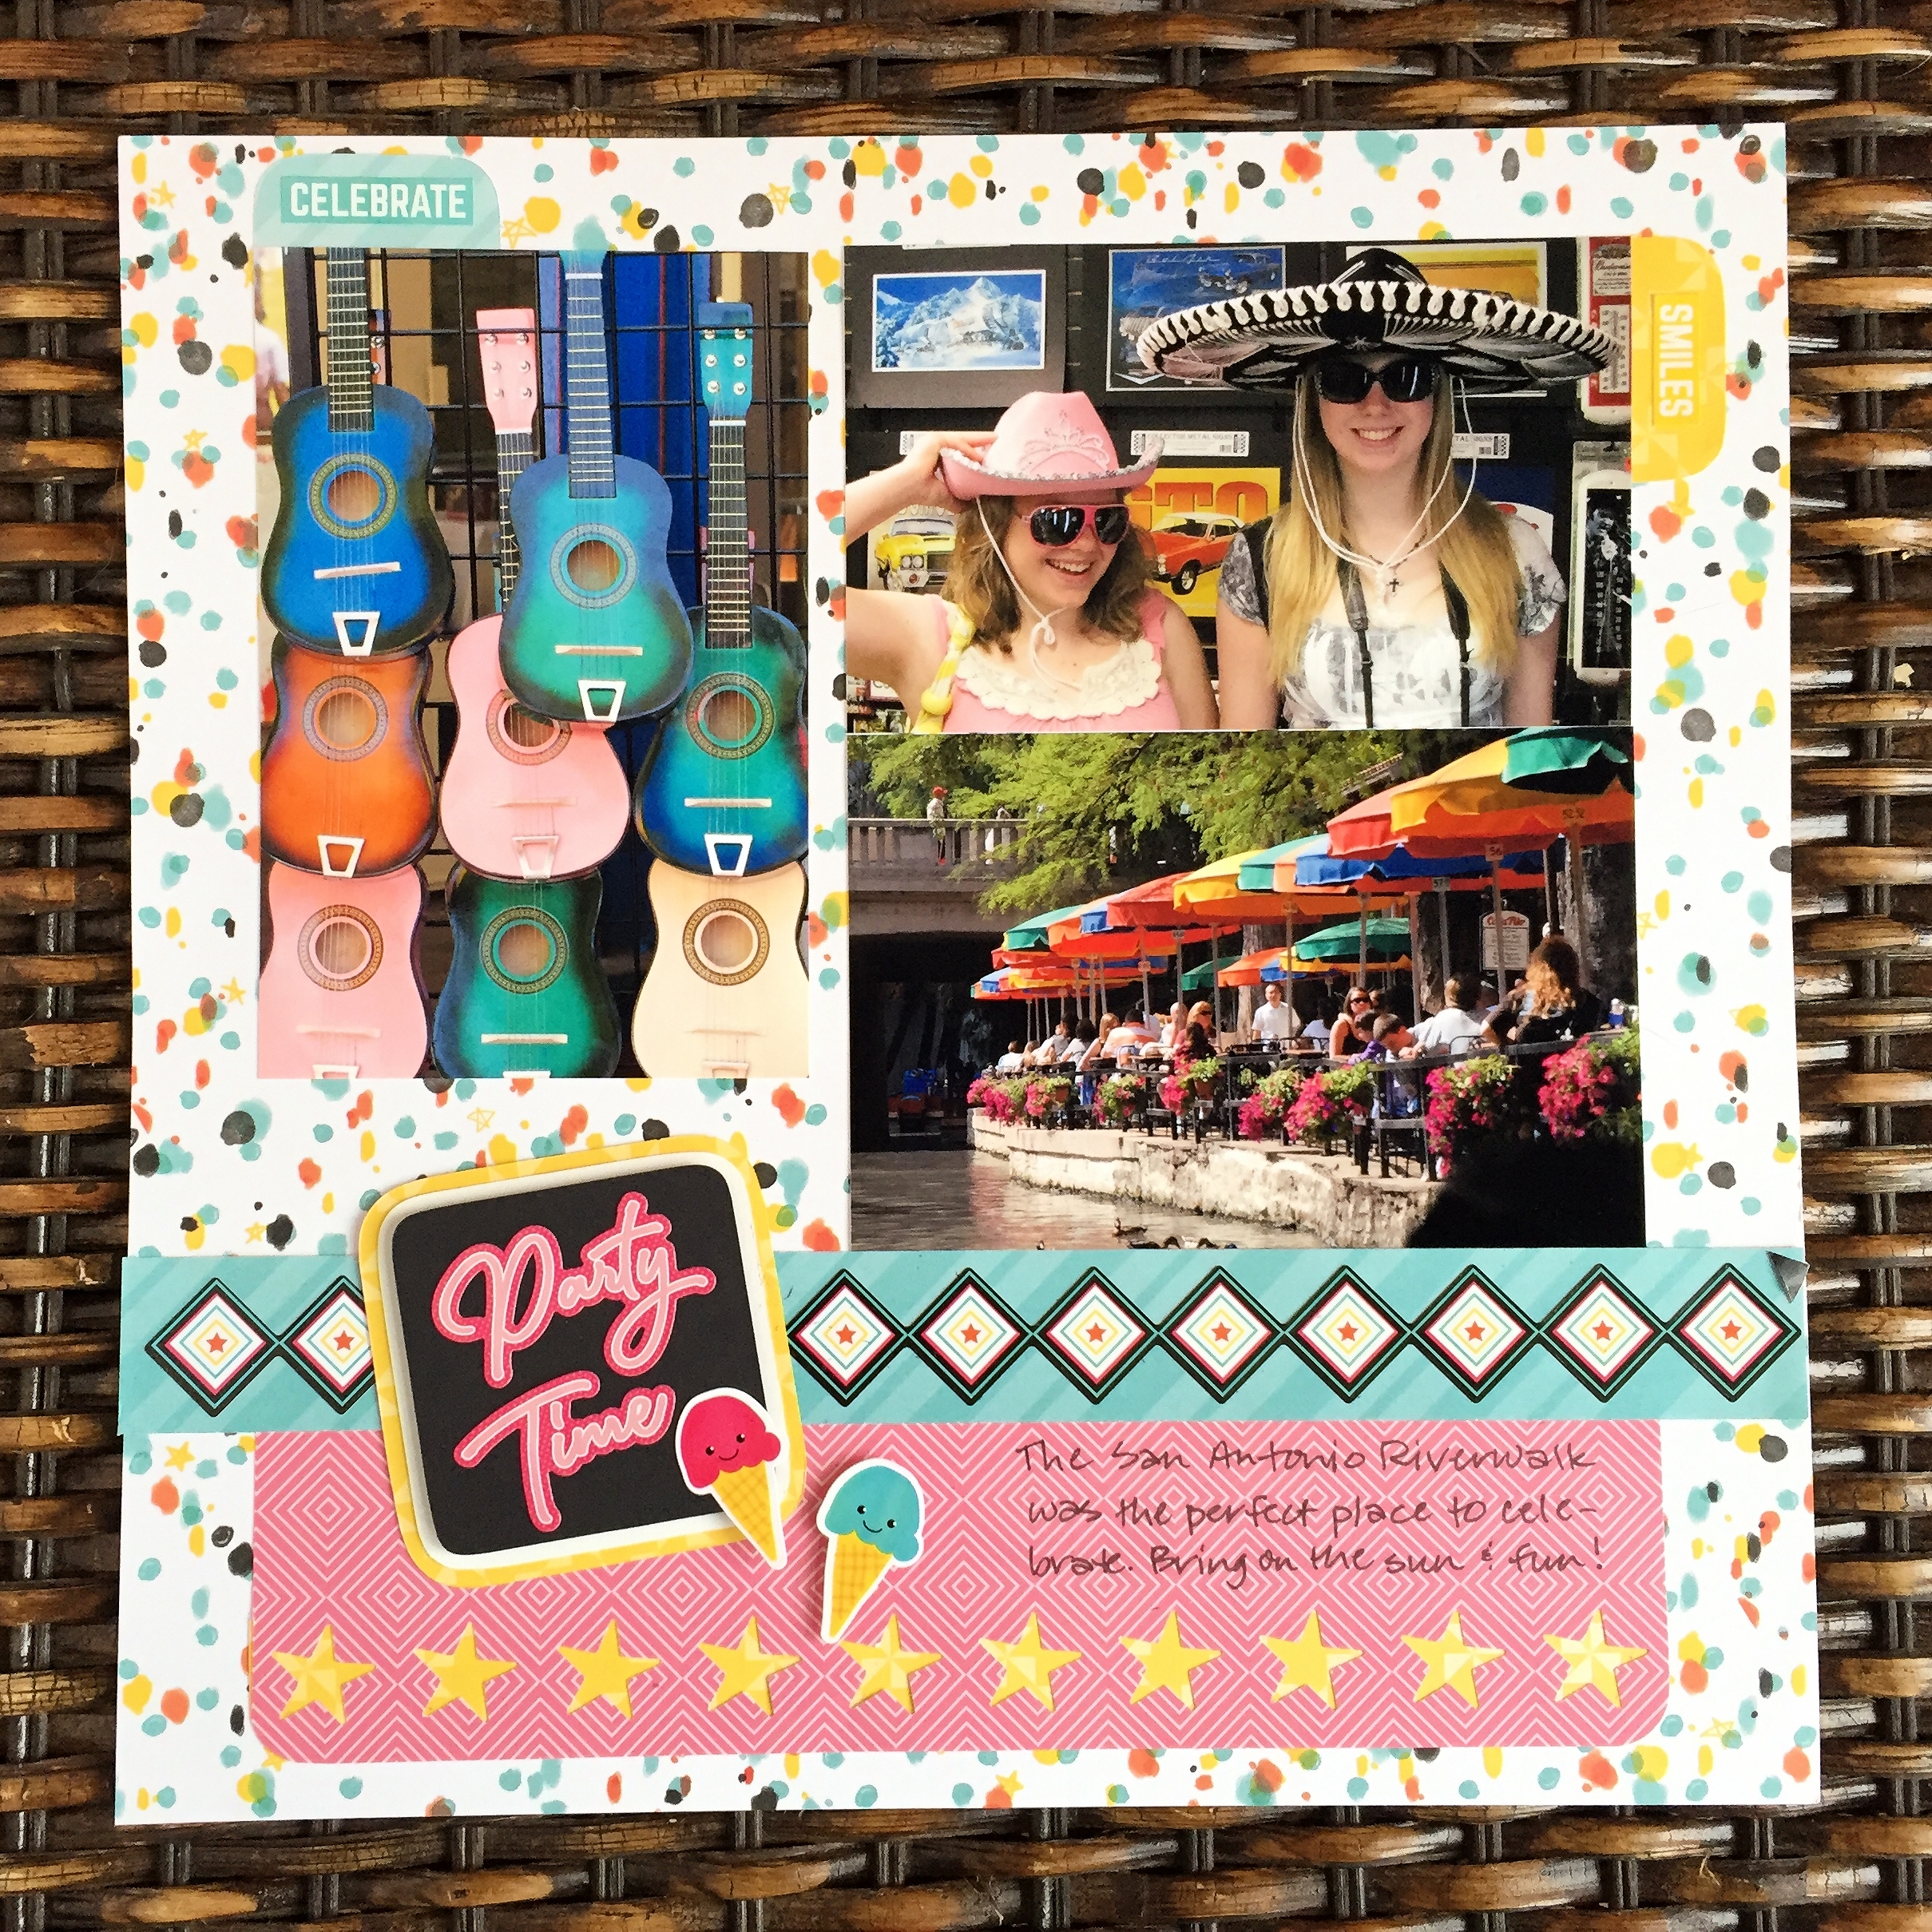
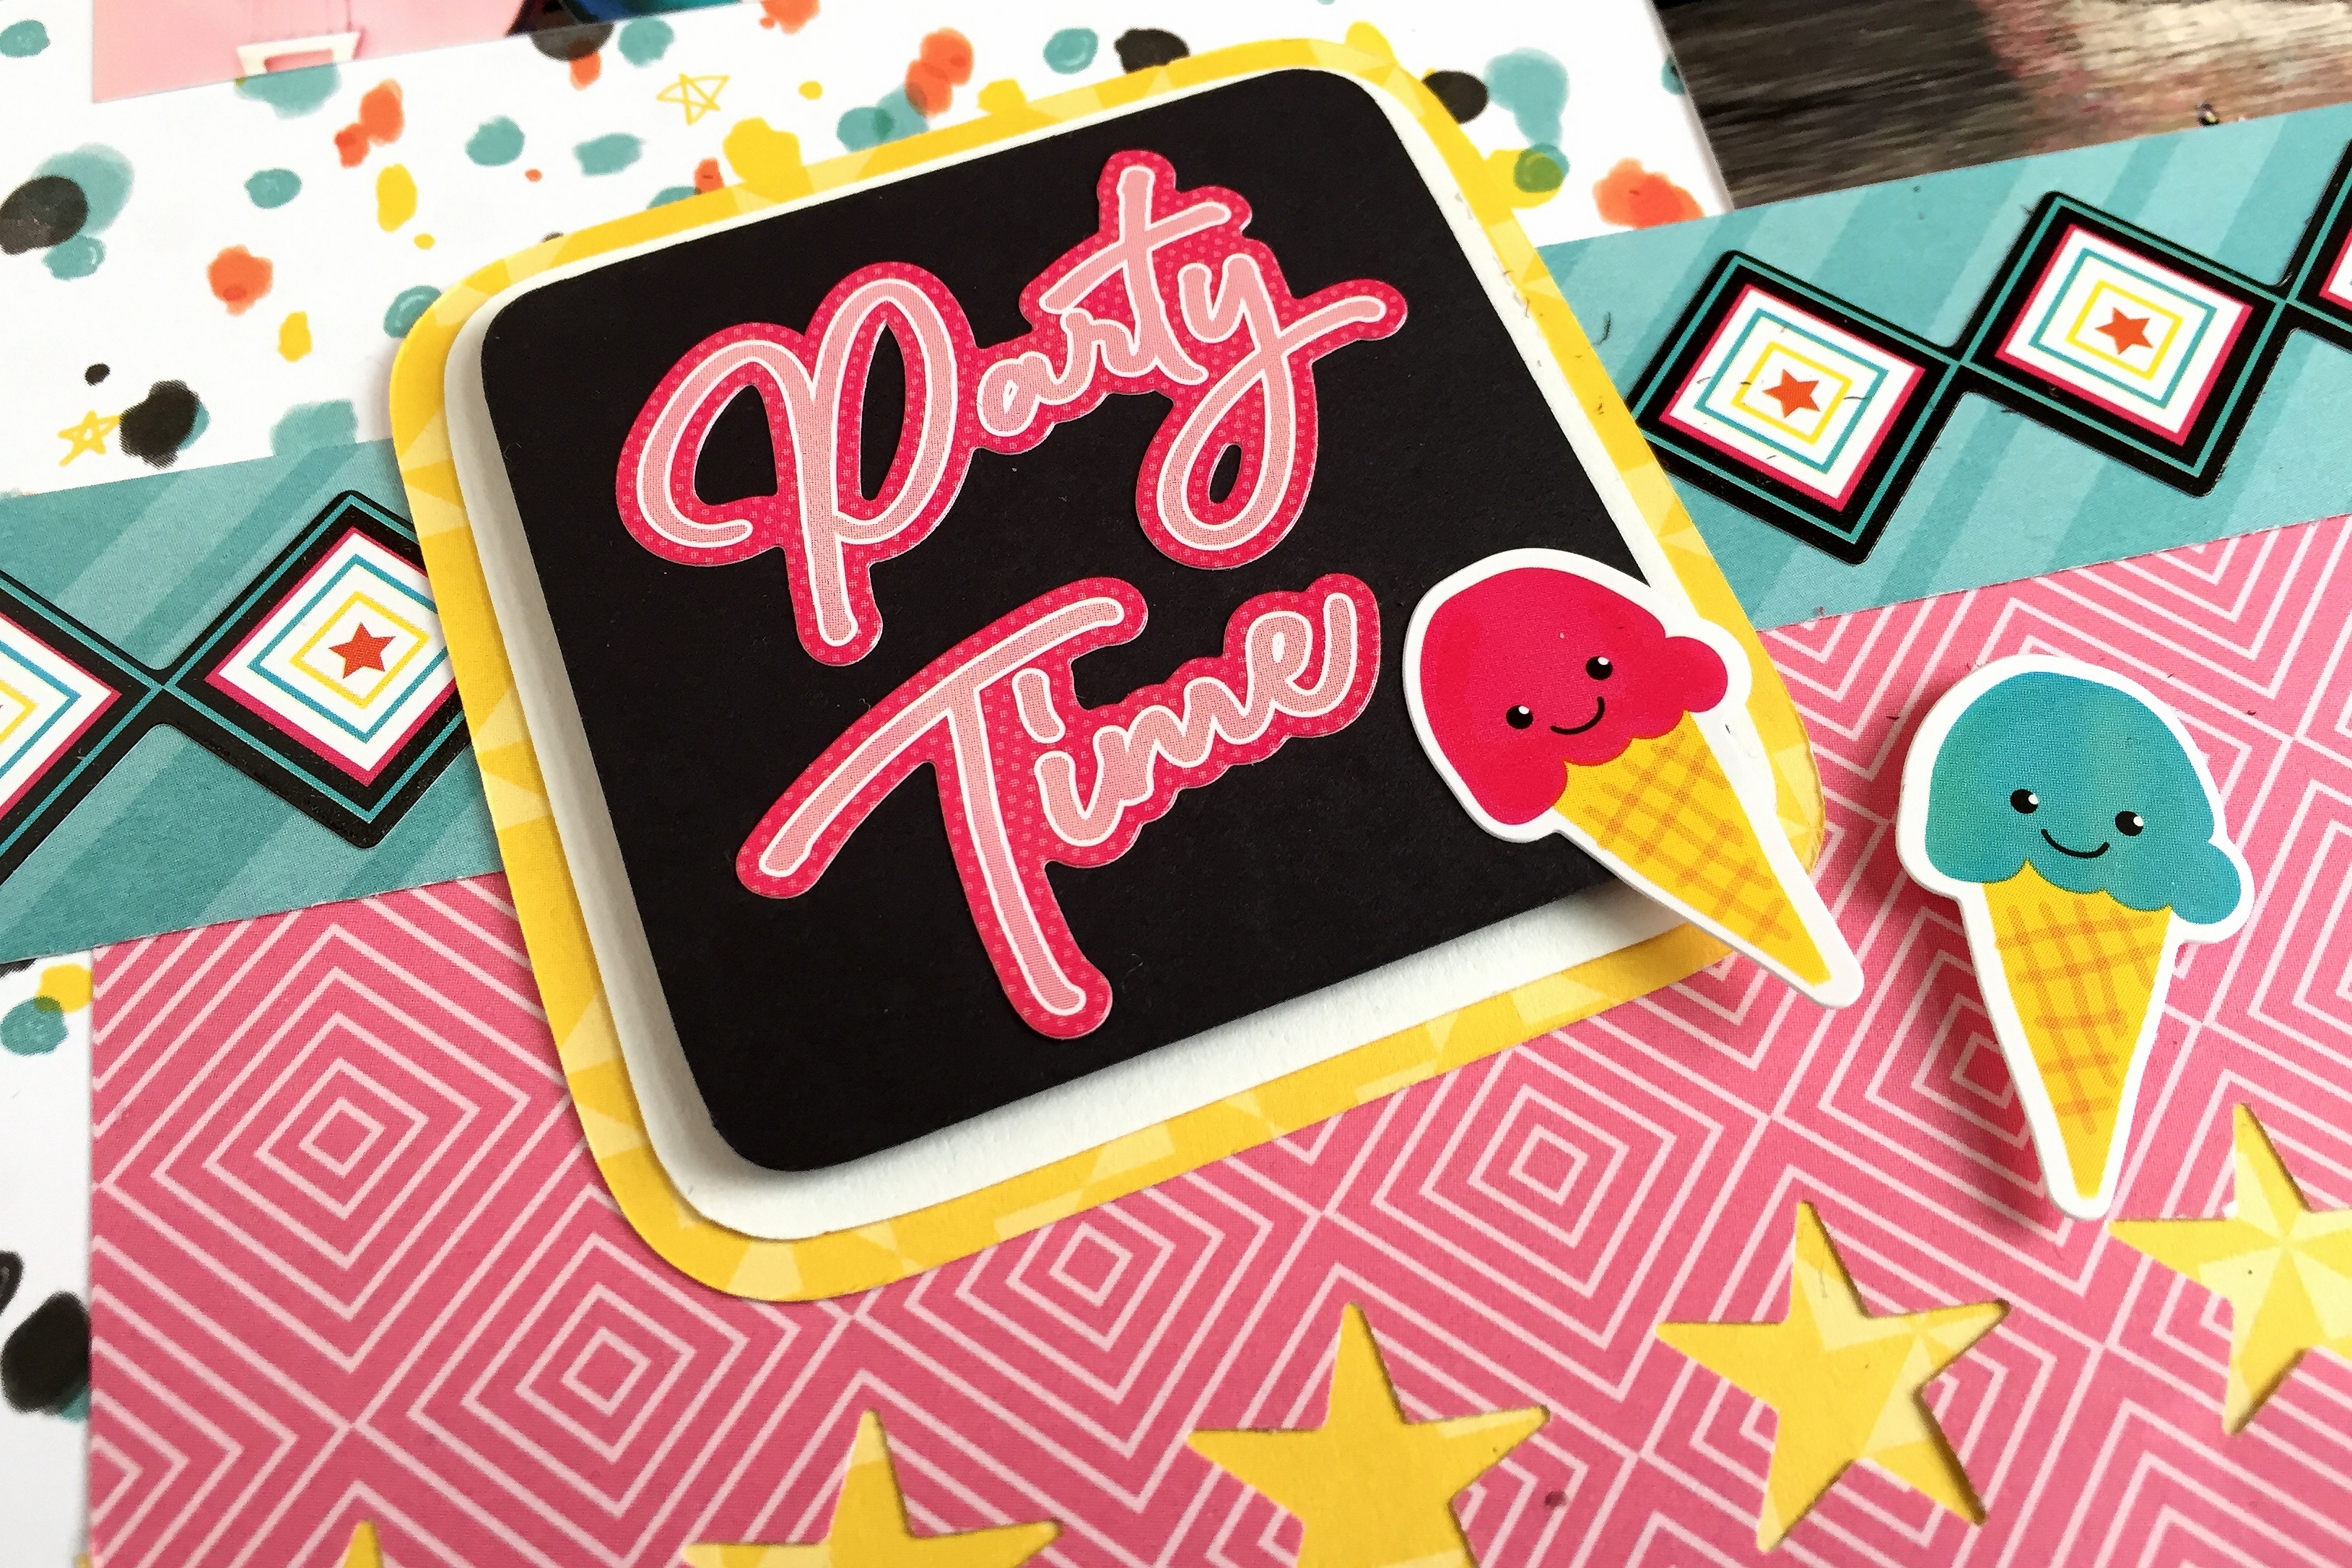
Party Time Title & Tags Layout
- Select a paper for the background.
- Using the border maker with the stars cartridge, punch a border with pink paper. Trim to 2-1/2″ x 10″. Cut a 1″ x 10″ strip of yellow paper and mount behind stars openings. Round bottom corners. Mount to bottom of background paper.
- Cut a 1-1/4″ x 12″ strip of aqua paper. Add boxed star sticker and adhere on top of pink stars border. Mount as shown to page. Add photos and journaling.
- To make title box, use the inside of the square pattern. Cut a black square with the blue blade, a white square with the green blade and a yellow square with the red blade. Mount to each other using foam squares for top black layer. Add Party Time and ice cream cone stickers and mount to page.
- For tags, use the inside of the larger rectangle and green blade. Cut a yellow and an aqua rectangle. Add stickers and tuck behind photos as desired.

Cake My Day Potpourri of Titles & Tags
- Hooray: Cut a variety of tags using the inside of the smaller rectangle and both red and blue blades. Punch holes in the tops and add ties with thin scraps of raspberry cardstock. Add Hooray and balloon stickers with foam squares.
- It’s Your Day: Using the inside of the smaller rectangle pattern, cut a piece of raspberry cardstock first with the blue blade. DO NOT move the pattern. Cut around again with the green blade and then the red blade. Cut a piece of striped paper using the red blade. Arrange elements as shown. Add It’s Your Day stickers, using foam squares for “Your”.
- Love U: Using the inside of the smaller rectangle pattern and the red blade, cut a piece of thin-striped paper. Cut a same-sized piece of black cardstock, but don’t cut all the way around. Instead, leave a 1/4″ area uncut. Then using scissors, trim it out as shown, creating a conversation box. Mount and add ABC title, and a punched raspberry heart button for the O.
- Eat Cake: Using the inside of the square pattern, cut a piece of peacock blue cardstock with the red blade. Cut a piece of pinwheel paper with the green blade, and cut a piece of both pink and striped papers with the blue blade. Arrange as shown. Add Eat Cake and cake stickers with foam squares.


Love all these ideas, Krislyn. What a wonderful kick-start! I need to get back to my scrapping table!
Thanks, Barb! Glad you’re ready to get back at it!
I like the rectangles. I haven’t seen them for the cutting system before now.