November 16, 2017
Let It Snow Glacier Layout
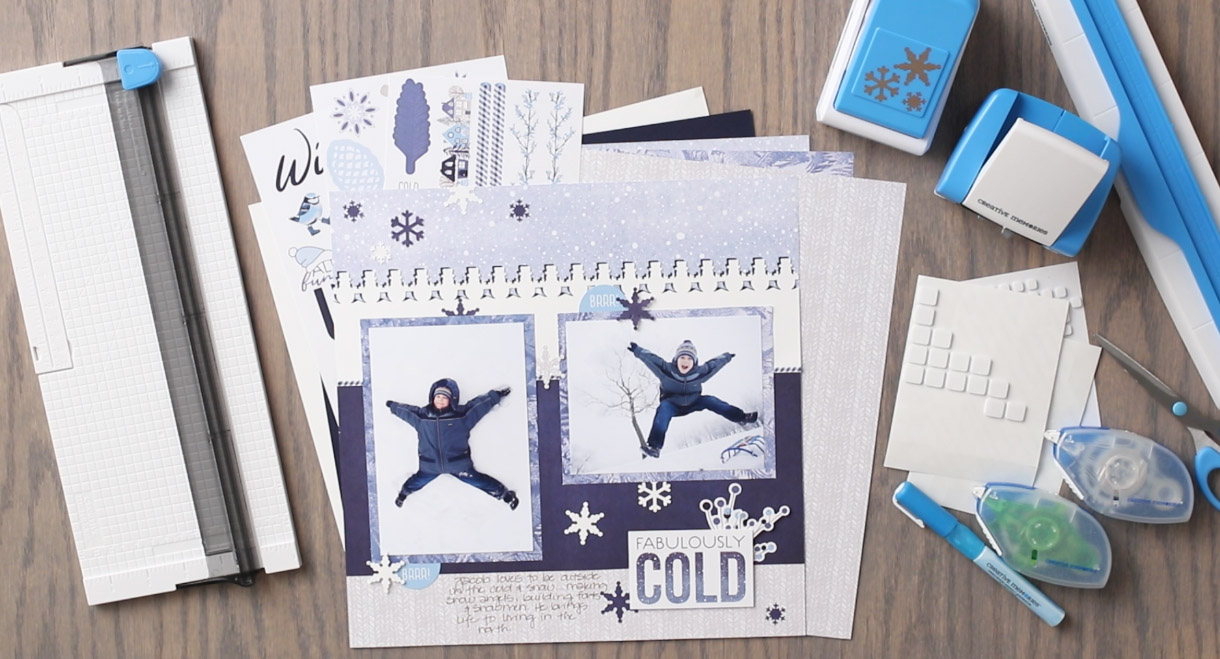
Winter is coming our way and there is no doubt it will be fabulously COLD. There is good news though, you’ll have SNOW much fun scrapbooking this winter with the Snowman Border Maker Cartridge and Snowflake Trio Punch! I loved using these tools together, along with the Glacier Collection to create this winter scrapbook layout.
We want to see your fun, festive winter scrapbook layouts and projects you are making with the Glacier Collection and these scrapbooking tools!
To create this layout, you will need:
- Glacier Paper Pack & Glacier Stickers
- Snowflake Trio Punch
- Border Maker System with Snowman Border Maker Cartridge
- White & Navy Cardstock
- Tape Runner, Repositionable Adhesive, Foam Squares, and Precision Point Adhesive
- 12-Inch Straight Trimmer & Scissors
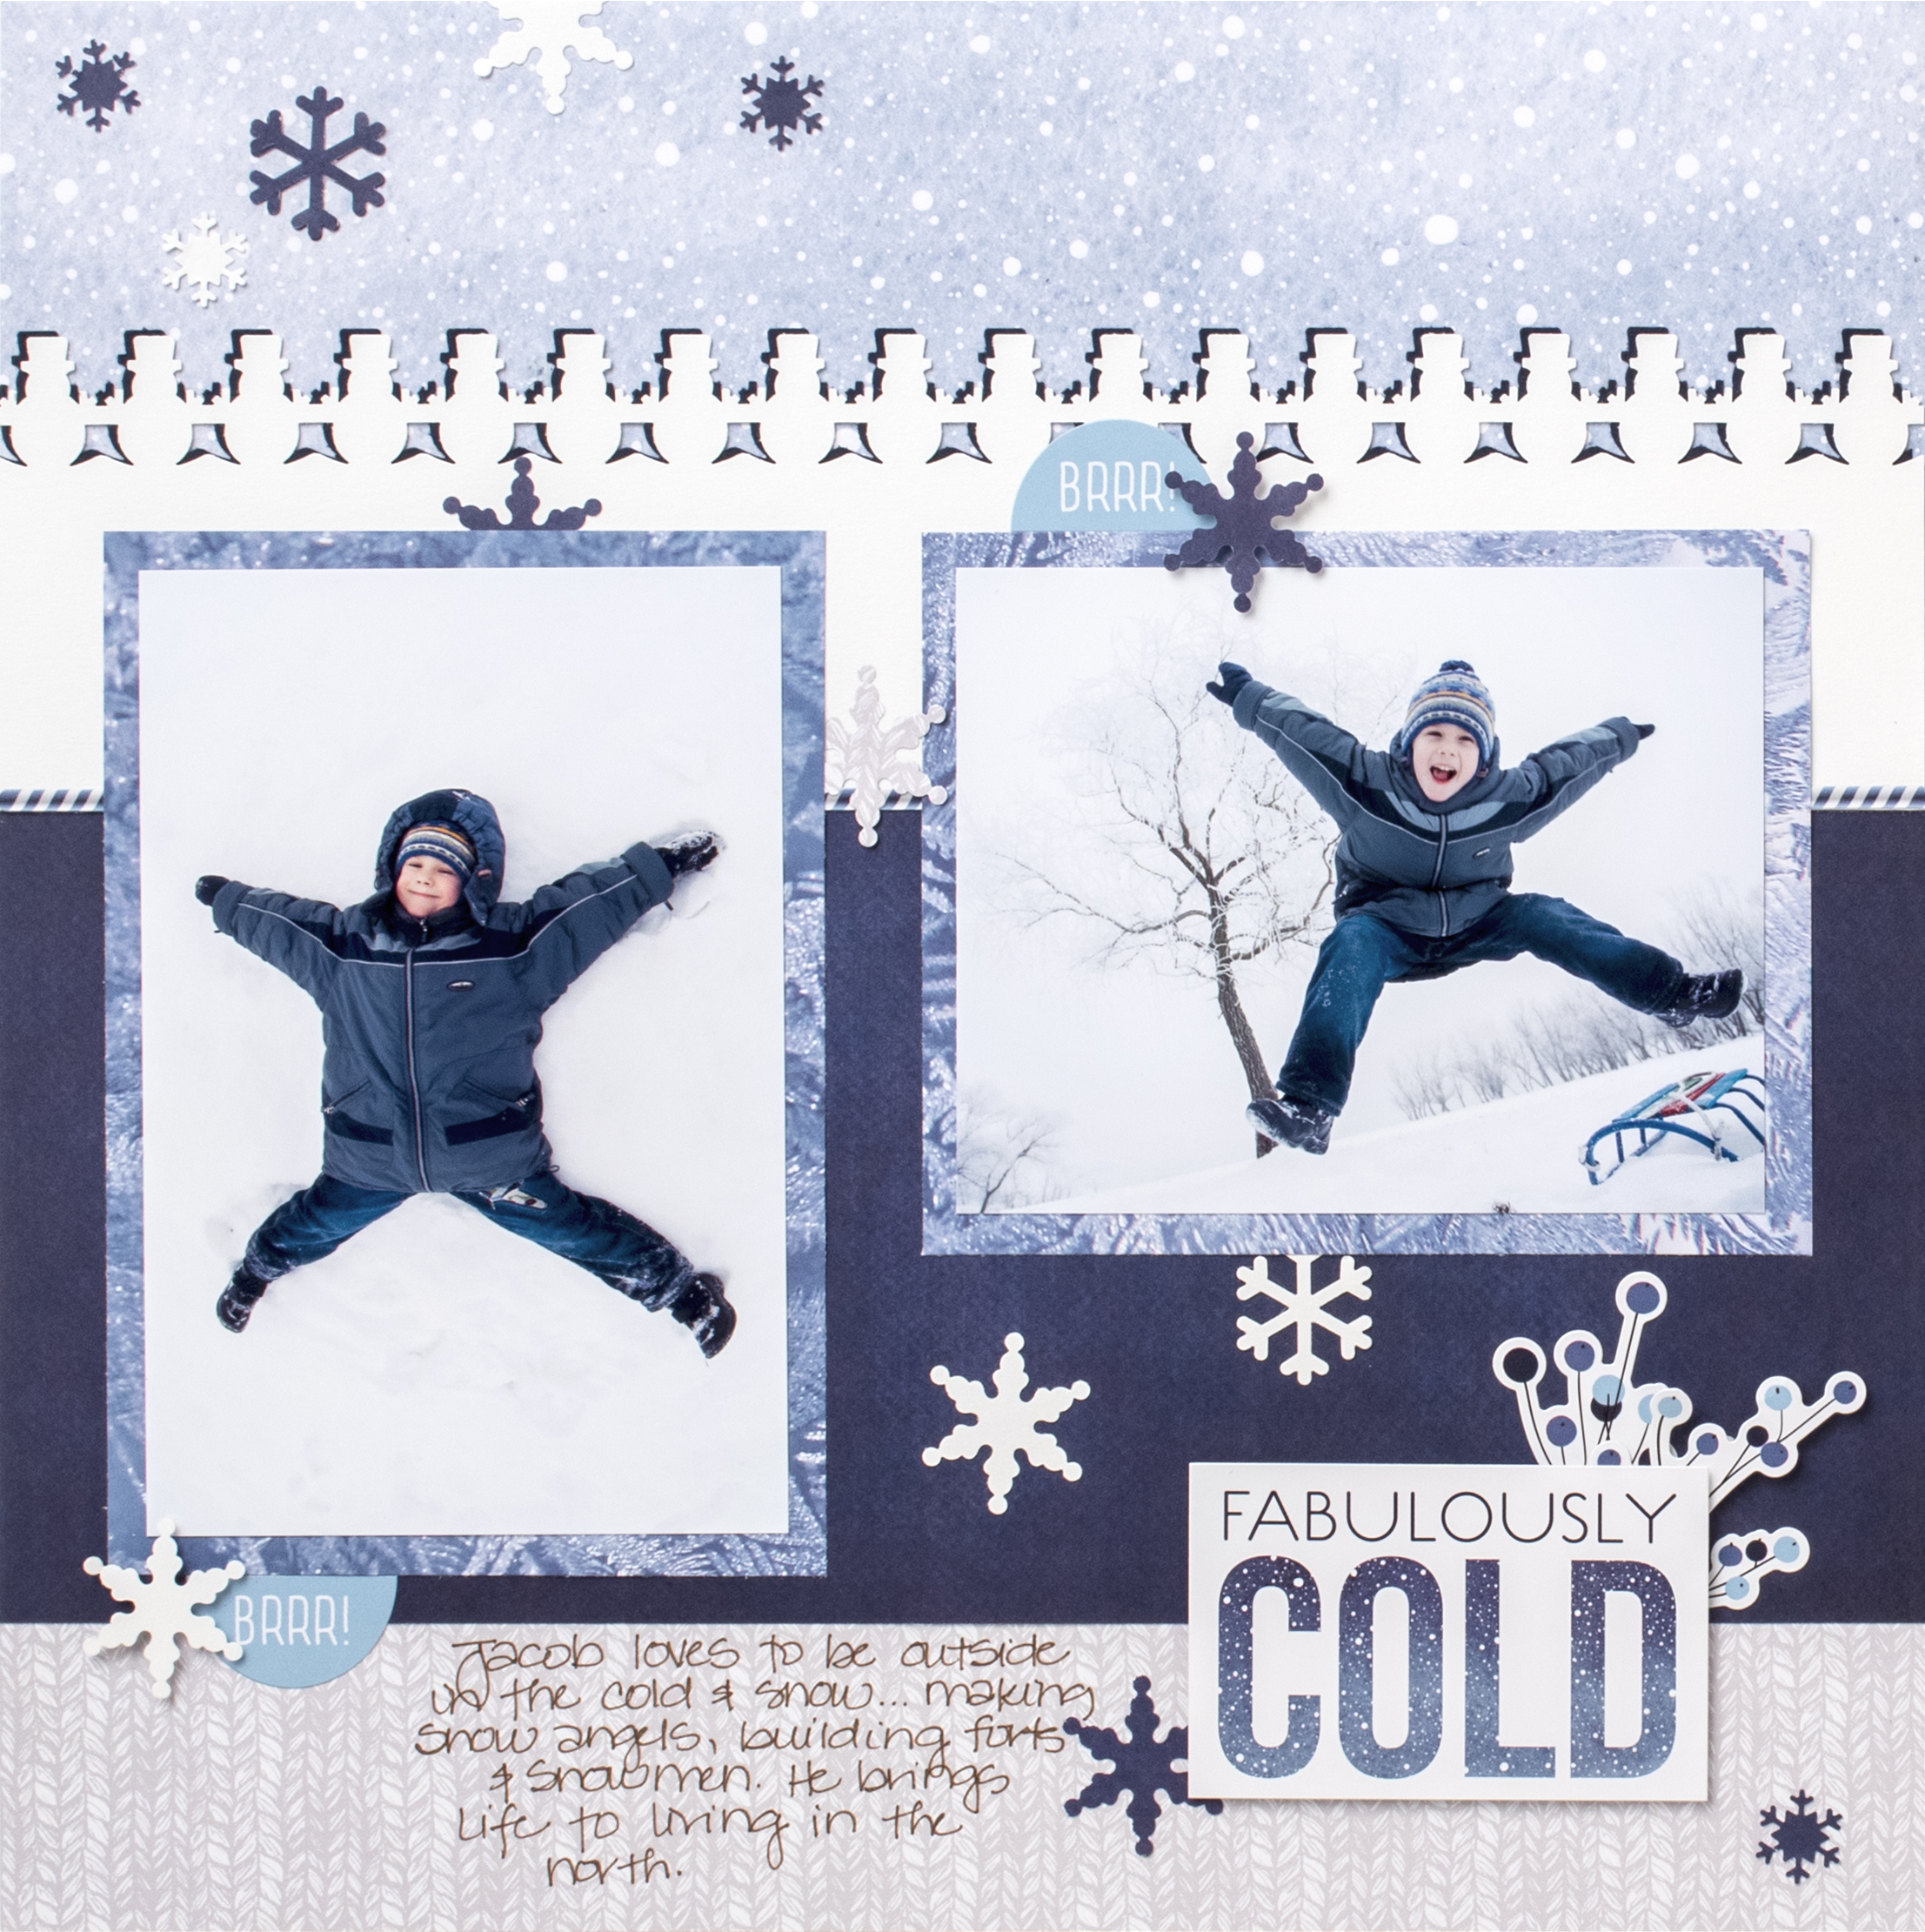
Use the snow patterned paper as the base for this layout.
Cut a piece from the sweater patterned paper to measure 12″ x 2″. Adhere along the bottom edge of the layout.
Cut a piece from the dark blue patterned paper to measure 12″ x 5″. Adhere just above the previous sweater patterned piece.
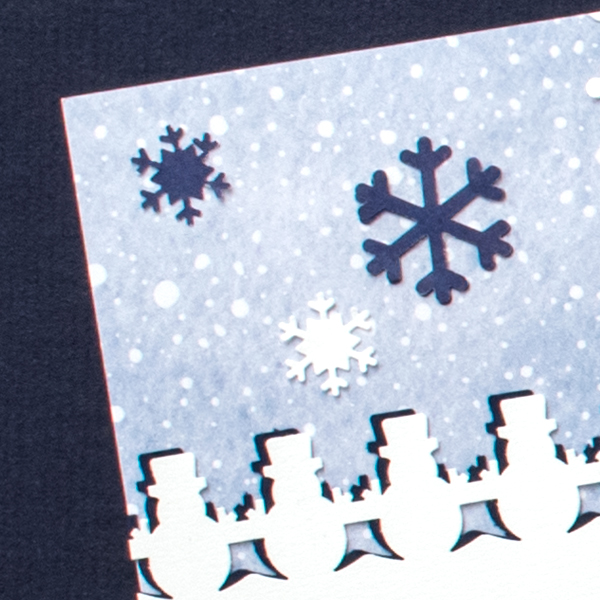
Using the Snowman Border Maker Cartridge in the Border Maker System, punch two 12? borders. One from the White Cardstock and one from the Navy Cardstock. Adhere the white border on top of the navy border slightly offset so it looks like a shadow.
Cut the border piece to measure 12″ x 3″. Adhere to the layout above the dark blue patterned paper. Use a scissors to trim away any excess navy cardstock.
Cut 2 pieces from the frost patterned paper to measure 4-1/2? x 6-1/2? and the other to measure 4-1/2? x 5-1/2?.
Add the border sticker along the seam of the White Cardstock and the blue patterned paper. Adhere the 2 photos mats to the layout.
Adhere the stickers to the layout, using Foam Squares on some for dimension.
Using the Snowflake Trio Punch, punch several snowflakes from the White and Navy Cardstock. Adhere to the layout using the glue pen.
Add photos and journal as desired.
Happy Creating!


Your paper choices capture the cold, crisp temperature in the photos. Just perfect!
I love the way you rolled the repositionable tape – so easy for everyone to see how it works!
Oh, I really like how you used that snowman punch! Great layout.