December 11, 2017
On the 11th Day of Cropping…

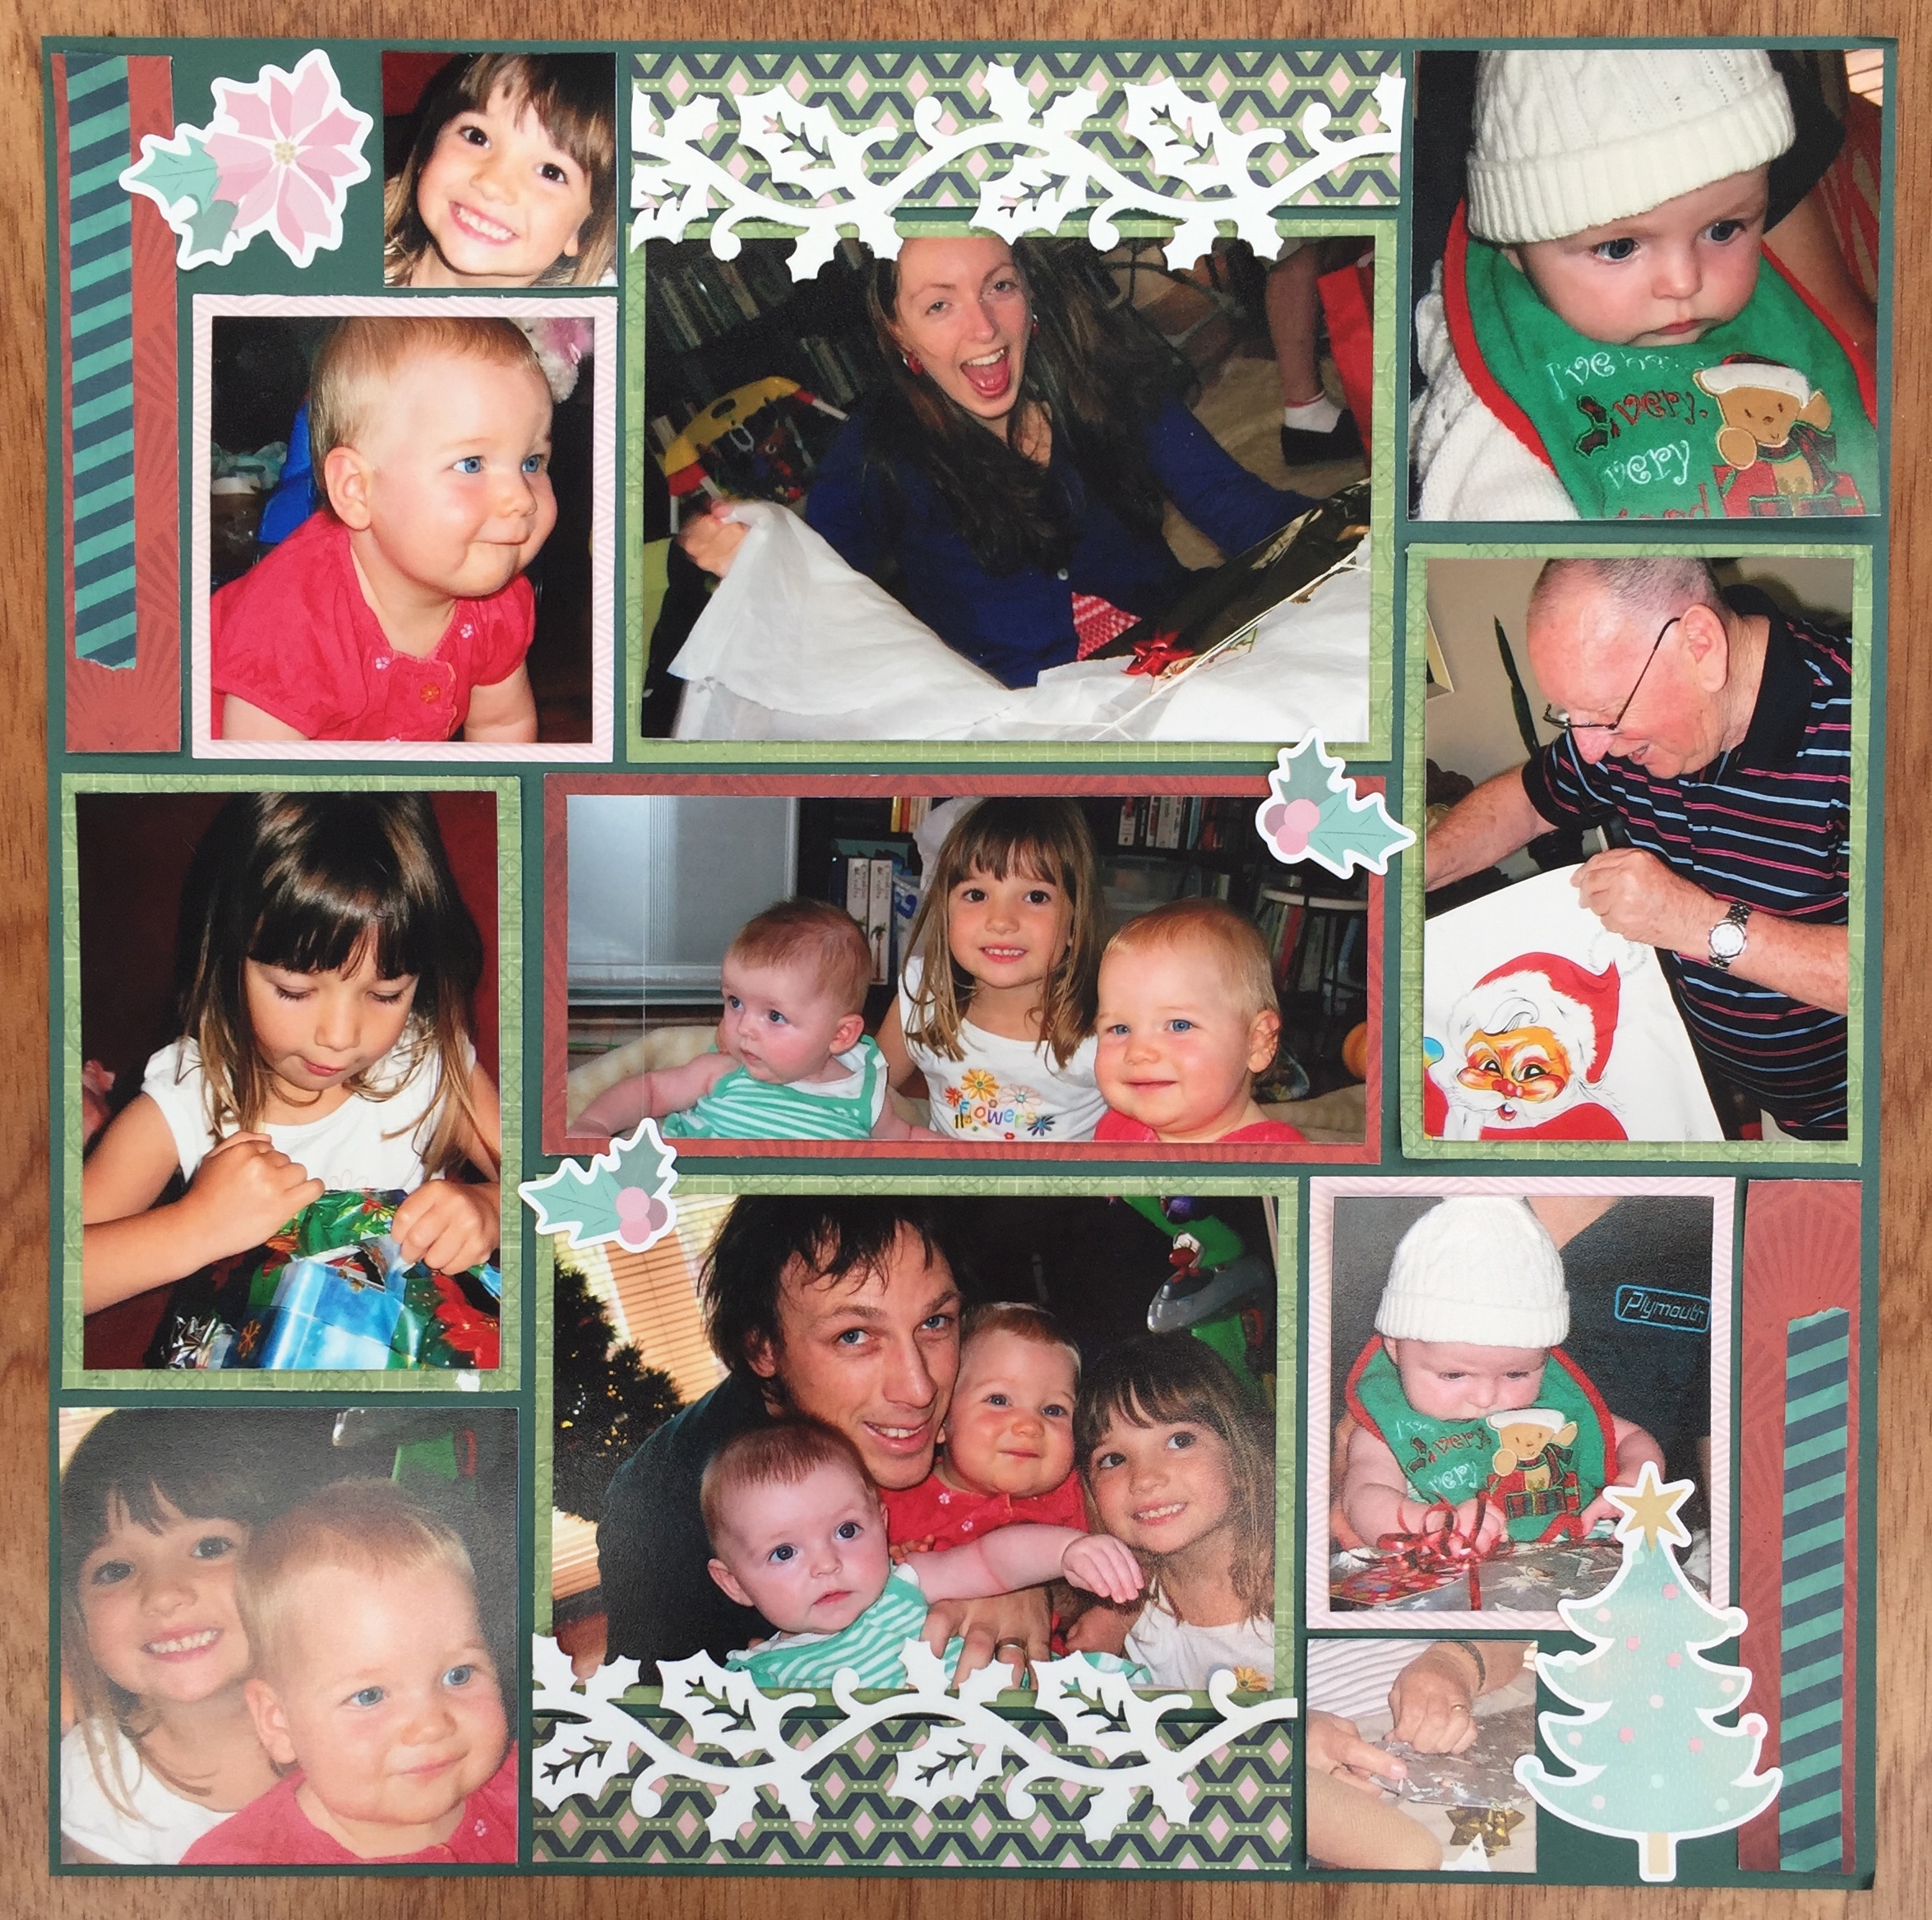
On the 11th Day of Cropping, Creative Memories gave to me an idea with 11 photographs…
- White and Evergreen Cardstock
- Gallivant Paper Pack
- Sugarplum Embellishments
- Toil & Trouble Washi Tape (while supplies last)
- Holly Border Punch
- 12-inch Straight Trimmer
- All-Purpose Scissors
- Tape Runner with Repositionable Tape Runner Refill
Start with a sheet of Evergreen Cardstock as the base of the layout. Be sure to have a small border of the Evergreen Cardstock visible around all photos/mats as you adhere to the layout throughout the following instructions.
Cut two 3″ x 3″ photos and adhere to the bottom left and top right corner of the layout.
Cut two mats from a green sheet of Gallivant paper at 3″ x 4″ and crop two photos at 2-3/4″ x 3-3/4″. Adhere the photos to the mats and adhere these to the left and right sides of the layout.
Cut two 3/4″ x 4-1/2″ strips of red Gallivant paper and adhere to the top left and bottom right corners of the layout. Add strips of the green stripe Toil & Trouble Washi Tape on top.
Cut two mats from the pink/white patterned sheet of Gallivant paper at 2-3/4″ x 3″ and use as mats for two photos cropped at 2-1/2″ x 2-3/4″. Crop another 2 photos at 1-1/2″ x 1-1/2″ Adhere these 4 photos to the top left and bottom right area of the layout. Place a sticker in the spaces between the small square photos and the red paper strips.
Trim two 5″ x 1″ strips of the green/blue pattern sheet of Gallivant paper, adhere to the top and bottom of the layout.
Cut two mats from the green sheet of Gallivant paper at 5″ x 3-1/2″ and use as mats for two photos cropped at 4-3/4″ x 3-1/4″. Adhere one above and one below the green/blue paper strips on the layout.
Crop one photo to 5-1/4″ x 2-1/4″. Mat on a 5-1/2″ x 2-1/2″ piece of red Gallivant paper and then adhere to the center of the layout.
Punch a Holly Border from White Cardstock and using scissors trim two 5″ lengths. Adhere using Repositionable Tape Runner, overlapping the blue/green paper strips and photos at the top and bottom of the layout.
Add a few more Sugarplum Stickers to the layout to finish.


TIP: When cropping photos to suit this layout, think about how to use some photos to show details or focus in on one person in the photo. Examples include; cropping a photo down to see only their hands opening a gift, crop out additional people in a photo to focus on just one person per photo.

Share your projects with us on social media using #CM12DaysofCropping.
Happy Creating!

It looks like matting the individual photos is the secret to making these multi photo layouts to look great. Thanks again for some great ideas.
Great job! Thanks for sharing.
I like the way you worked carefully to get the majority of your subjects to look to the inside of the layout. I hope that statement made sense to you? Perhaps you have been designing layouts long enough to just automatically use that technique. I sometimes observe newbie scrappers allowing their subjects in the photos to look every which way in their layouts. It leaves the viewer with an “uncomfortable feeling, not knowing which way to focus on the layout.
I am really going to miss this blog post when the Twelve Days are completed. I have found all the layouts to be very creative and helpful. Perhaps you can start a blog post “class” quite soon about techniques for better layout designs, such as: the triangle visual effect, anchoring photos, facing towards the inside of a layout and how to accomplish that with a two-page spread as well, etc.
Thanks for all the efforts of the design team to make us better scrappers and to meet our variety of styles. Happy Holidays to all of you!
I’ve never noticed the direction someone in a photo is looking or where I place it based on where they are looking. Almost makes you feel like you have to be a professional but a good tip.
I LOVE IT!!!
?ncredible! This blokg looks exactly like my oldd one!
It’s on a completely ?ifferent subject b?t it has
pretty much the same page layo?t and design. Outstanding choice of colors! http://Www.0755Yly.com/comment/html/?197315.html