December 28, 2017
Easy Steps to Design an Album

With New Year’s around the corner, it is time to start thinking out of the box! With traditional scrapbooking there is lots of creativity and fun! What if we simplified things to get an extra album or two created in 2018?
I love the Fast2Fab™ albums for just that reason. For that vacation or gift album that would be impossible to do along with my chronological albums so, I turn to the Fast2Fab™ albums!
Now, there is a huge selection of Fast2Fab™ albums but what if there is new product launched without a Fast2Fab™ album, panic, tears, what to do? I’ll tell you, you can easily create an album along the same simple style with the new product and to complete an album quickly.
I did this first with the Glacier products and designed an album in 38 minutes and 39 seconds – yes I was timed! And now I would like to share how to do this with the new Imagine paper!
You will need:
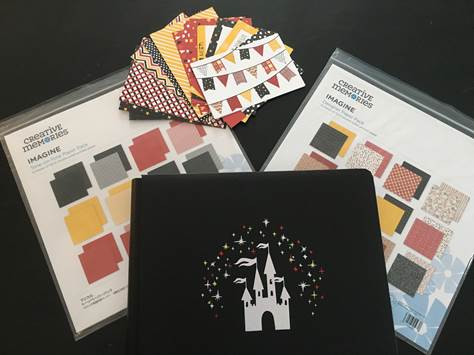
- Album Cover
- 12 x 12 Refill Pages
- 12 x12 Imagine Designer Paper Pack
- 12 x 12 Imagine Tone-on-Tone Paper Pack
- Imagine Variety Mat Pack
- Imagine Stickers
- Imagine Laser Cut Embellishments
- 12-Inch Trimmer
- Tape Runner
- Jagged Tearing Tool (Optional)
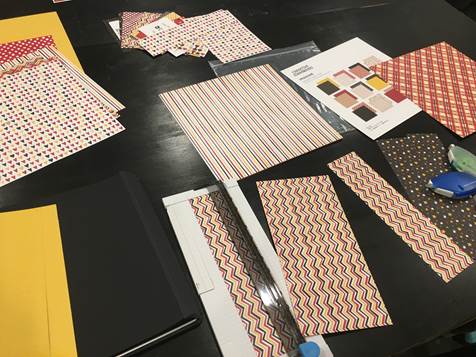
Step 1: Cutting
Evenly divide the designer paper and tone-on-tone paper into 2 piles. Pile 1 – Cut papers in half to measure 6″ x 12″ using the 12-Inch Trimmer or the Jagged Tearing Tool. Pile 2 – Cut the papers into strips that measure 3″ x 12″.


Step 2: Create – It’s just that simple!
Rotate between using the 6″ and 3″ strips. Put strips on the sides or the top/bottom of a page.


Add the Imagine mats to the pages.

Step 3 – Finish
Adhere photos, Stickers and Laser Cut Embellishments.
Note: You will have enough to fill to 2 sets of refill pages – so 64 pages! Cut more 6″ x 12″ strips of paper if needed.
Happy Creating!
Sandra

This is a great way to get an album done fast while maintaining that all-important tactile experience. Thanks! I have one question: The ingredients call for both designer and tone-on-tone papers, but the instructions only mention the designer papers. How are the tone-on-tone papers used?
Looks like the tone on tone paper is the background paper.
Hi Kathy. Thank you – We have updated! Using both the tone-on-tone and designer paper pack will allow you to fill 2 sets of refill pages. Happy scrapping!
Thank you!
You are right, Kathy, this is a great way to finish an album quickly!! I see that in Step 1 above it instructs one to cut both the designer paper and the tone-on-tone paper. Happy Scrapping!!
My goal for 2018 is to complete my 2007, 2008, & 2017 family albums. I really need a method like this to help me accomplish it. Thanks for the brilliant inspiration!
Looks like this would be a great workshop to host! Love it! Thanks!!!