May 20, 2026
Why Home Office’s Annalisa Loves Foiled Papers — Plus a Vivid Melodies 2 Layout
There is nothing quite like opening a fresh pack of paper and seeing those stunning, metallic details catch the light. Foiled papers have a way of making a layout feel instantly special, and we are always looking for new ways to highlight them on our pages. Today, we wanted to pull back the curtain and show you how our team is loving these shimmering sheets—especially how beautifully they pair with Vivid Melodies 2 to create the perfect layout!
Watch: Annalisa, from home office, walks through the Molten Lava Foiled Paper Packs.
Annalisa’s Inspiration: The Perfect Accent
For Creative Content Manager, Annalisa, these shimmering sheets are a total favorite, and she loves using them to create a perfect, intentional pop on her pages. One of her go-to techniques is using the foiled papers to mat her photos. It sounds like such a simple step, but that subtle touch of added dimension effortlessly pulls your eyes right to the focal point of the page! She is already eyeing the Purple Ice Foiled Paper Pack for her daughter’s album, since she is a purple girl through and through.
While keeping things elegant with photo mats is a classic approach, don’t fear to pull even more foil into your layouts! Look below to see how to use these papers to build a striking geometric frame for your layout, perfectly highlighting your shining moments.
To create this layout, you will need:
- Cornflower Blue Molten Lava Paper Pack
- Cornflower Blue Vivid Melodies 2 Designer Paper Pack
- Cornflower Blue Vivid Melodies 2 Embellishments
- Cornflower Blue Vivid Melodies 2 Stickers
- Bright White Solid Cardstock
- Baby Blue Solid Cardstock
- 12-inch Trimmer
- Photo Trimmer
- Repositionable Tape Runner
- Foam Squares
Supply Tip: While this geometric formula works beautifully with any foiled paper and Vivid Melodies 2 combo, if you want to recreate this exact cornflower monochromatic look, you can get the exclusive Cornflower Molten Lava Pack as a free bonus with the Let It Shine One-Click Bundle (which includes all 3 new shades and 4 returning favorites while supplies last!).
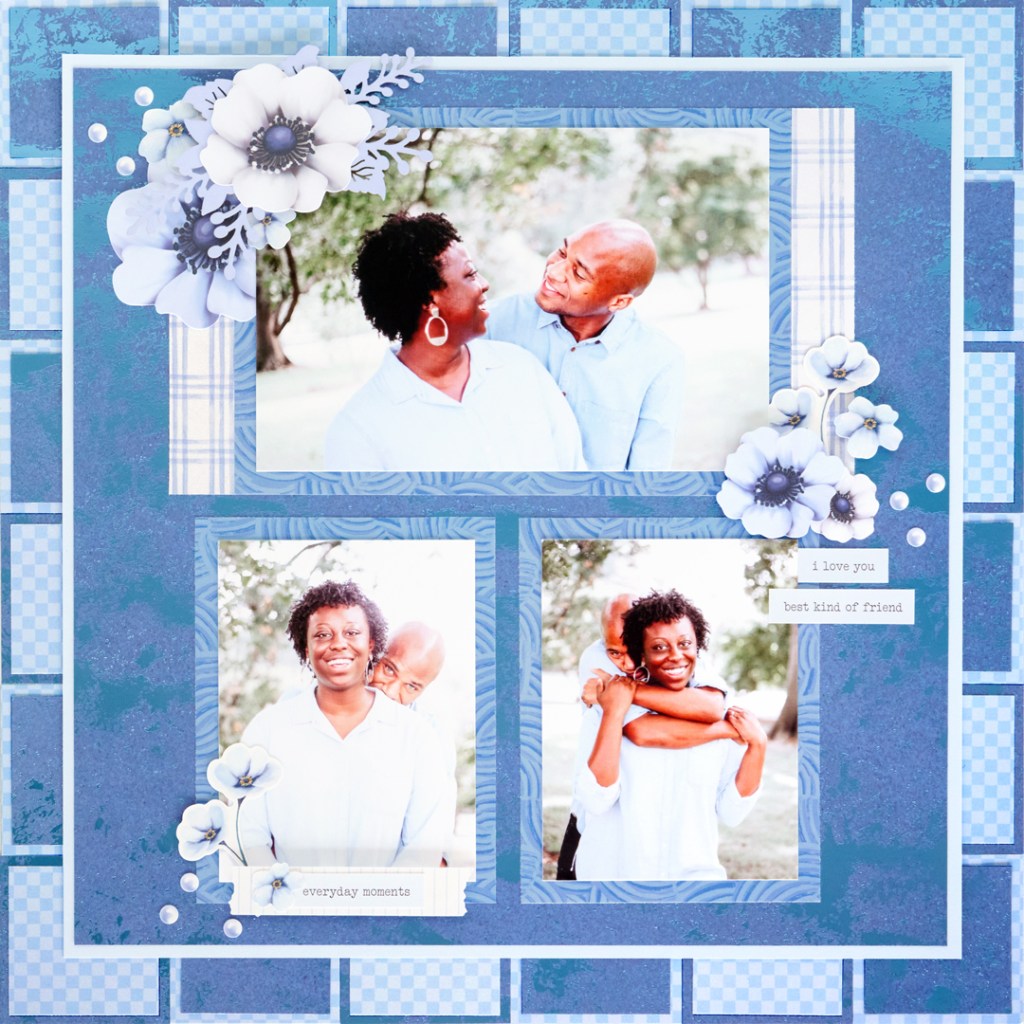

Step 1: Use a sheet of Bright White Cardstock as the base for this layout.
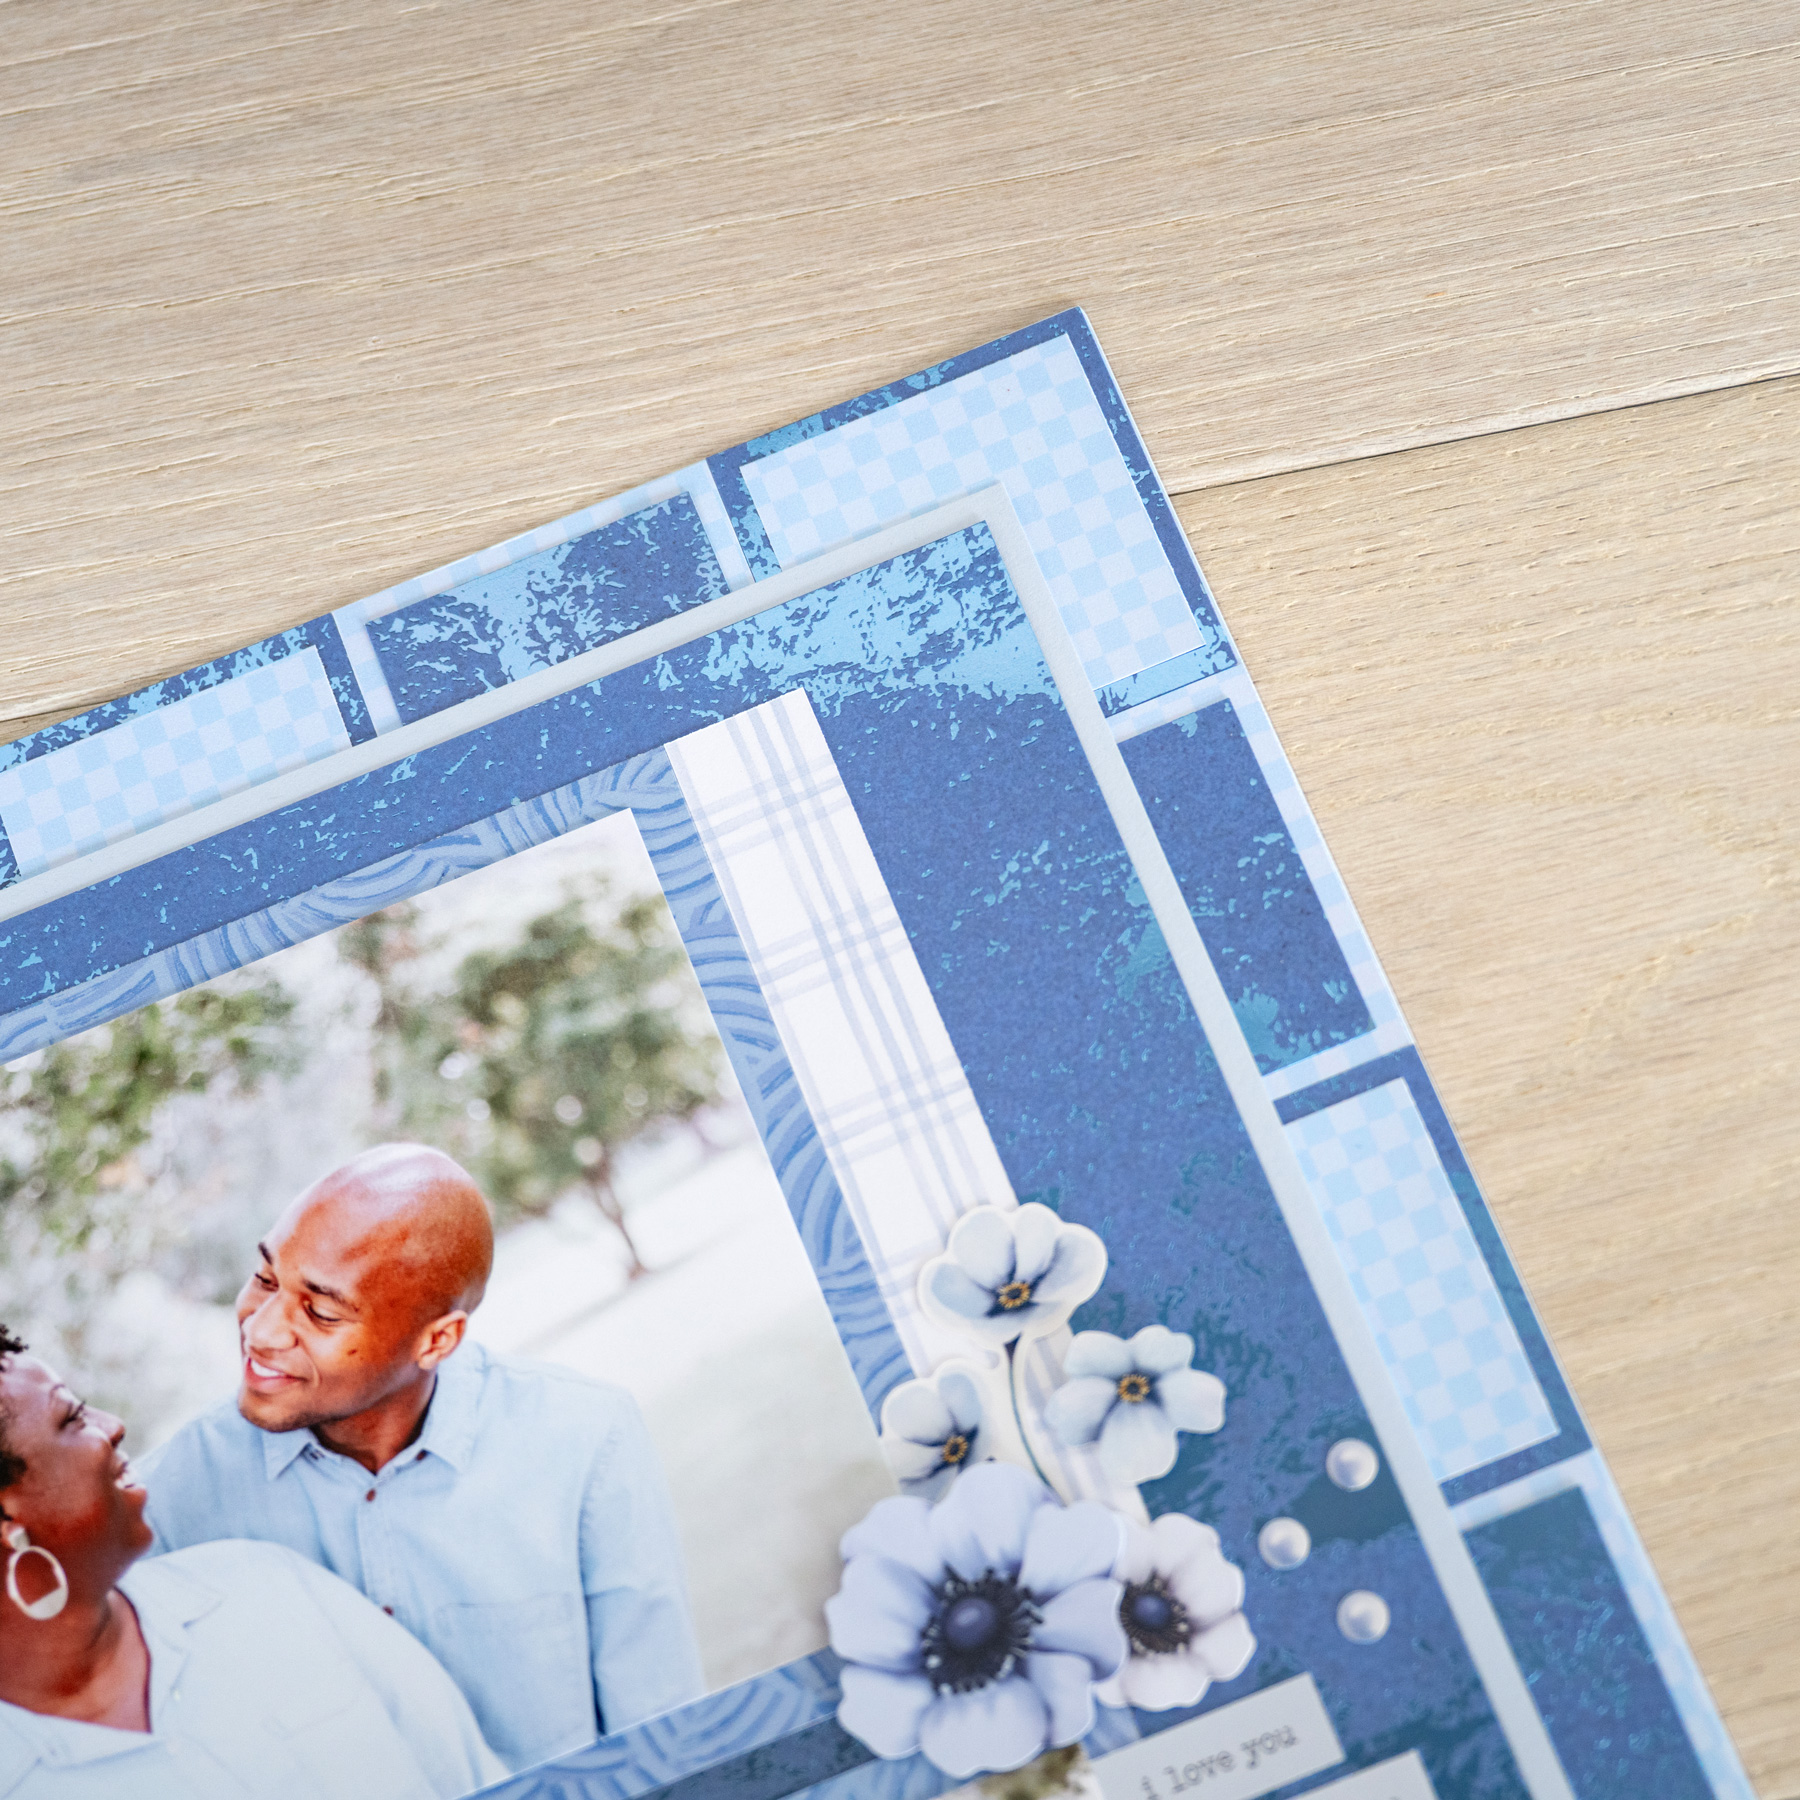
Step 2: Cut ten 2″ x 2″ squares from both the Cornflower Molten Lava paper and the cornflower blue checked designer paper. Adhere these squares along the edge of the layout, alternating patterns as you go.
Step 3: Cut ten 1-3/4″ x 1-3/4″ squares from both the Cornflower Molten Lava and cornflower blue checked papers. Adhere these smaller squares centered on top of the previously placed squares, rotating to the opposite pattern for contrast.
Step 4: Cut a piece of Baby Blue Cardstock to measure 10-1/2″ x 10-1/2″ and adhere it to the center of the layout. Cut a piece of Cornflower Molten Lava paper to measure 10-1/4″ x 10-1/4″ and mount it on top of the cardstock.
Step 5: From the Cornflower Blue Vivid Melodies Paper Pack, cut three photo mats to measure (1) 6-1/2″ x 4-1/2” and (2) 3-1/2″ x 4-1/2″. Adhere the mats to the layout.
Step 6: Cut two 3/4″ x 4-1/2″ strips from the light blue designer paper and adhere one strip on each side of the larger 6-1/2″ x 4-1/2″ photo mat.
Step 7: Adhere stickers and embellishments to the layout, using Foam Squares on some for added dimension.
Step 8: Journal as desired.
Now that you have seen how Annalisa styles these shimmering pieces and how seamlessly they come together with Vivid Melodies 2, it’s your turn to create!
Let’s play a quick game of “This or That” in the comments: Are you a “Shimmer in Doses” crafter who loves using foil as an elegant photo mat like Annalisa, or are you a “More is More” crafter who is ready to dive right into this bold geometric border? Leave a comment below and tell us which team you’re on!
P.S. Are YOU a member of the Virtual Crop Group? It’s your go-to place for MONTHLY Virtual Crops, MONTHLY Completed Album Challenges, QUARTERLY Secret Box Openings with project tutorials and so much more! We hope you’ll join our community of more than 52,000 fellow memory-keeping enthusiasts — you’ll feel right at home!


What a beautiful layout! but shouldn’t it be Twenty 2″ squares and Twenty 1-3/4″ squares (not ten of each)?
Yes, exactly! It’s 10 of each design, which will end up giving you those 40 squares to play with for the layout. Happy crafting!
Thanks so much for clarifying! I read the instructions wrong😉