May 23, 2019
Own the Outdoors with this Spirited Canada Scrapbook Layout

The Great Escape collection was inspired by two things: The great outdoors and the Great White North, aka Canada. The designs drew upon classic Canadian posters, iconography and vast landscapes from the mountains to the ocean, making it perfect for a variety of projects. Whether you want to create an outdoor scrapbook layout or commemorate time spent in the land of all things maple, Great Escape has everything you need! This Canada scrapbook layout shows just how fun the outdoors can be!
")
")
To create this layout, you will need:
- Great Escape Paper Pack and Laser Cut Border Embellishments or (Shop Canada | Shop Australia)
- Beige, Crimson and Evergreen Cardstock or (Shop Canada | Shop Australia)
- Banner Flag Punch or (Shop Canada | Shop Australia)
- 12-inch Trimmer or (Shop Canada | Shop Australia)
- 2-Way Corner Rounder (Shop Canada | Shop Australia)
- Tape Runner or (Shop Canada | Shop Australia)
- Repositionable Tape Runner Refill or (Shop Canada | Shop Australia)
- Black Dual-Tip Pen or (Shop Canada | Shop Australia)

Step 1: Use the navy dot patterned paper as the base for this layout.
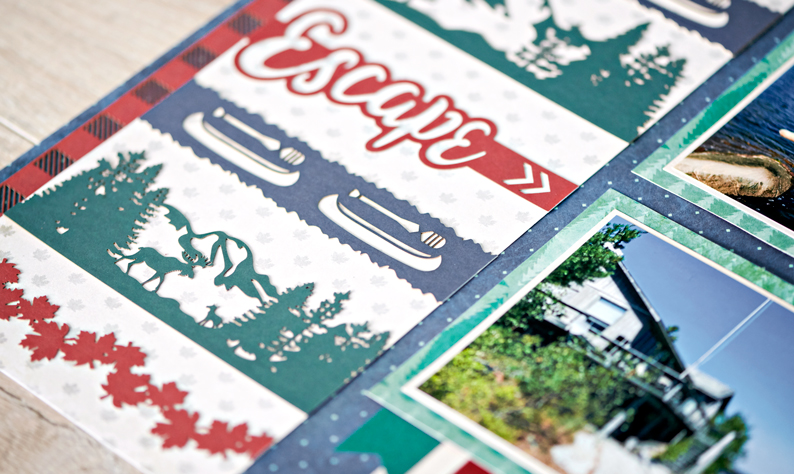
Step 2: Cut a 5″ x 12″ strip of cream leaf patterned paper and adhere it along the left side of the layout, about 3/4″ in from the edge. Trim 5″ sections of several Great Escape Laser Cut Borders and adhere them at regular intervals on the cream strip as shown.
Step 3: Trim one section from the buffalo check laser-cut border about 1/2″. Adhere it along the left side of the cream strip.
Step 4: Cut two 5-3/4″ x 4-1/4″ mats from green patterned paper. Cut two 5-1/4″ x 4″ mats from Beige Cardstock. Mount two 5″ x 3-3/4″ photos, first on the beige mats, then on the green mats. Adhere them to the layout as shown.

Step 5: Trim a 3-1/2″ x 2-1/2″ section of the cream maple leaf mat. Round the bottom corners with the 2-Way Corner Rounder and tuck behind the lower photo. Punch one flag from each of the Beige, Evergreen and Crimson Cardstock. Tuck the flags under the lower photo as shown. Journal as desired.
Step 6: To create the second page of this layout, use the navy dot patterned paper as the base.
Step 7: Cut a 2″ x 12″ strip of cream leaf patterned paper and adhere it about 3/4″ in from the right edge. Trim one section from the buffalo check laser-cut border about 1/2″. Adhere it along the right side of the cream strip.
Step 8: Cut a 4-1/2″ x 12″ strip of mountain-scene patterned paper and adhere it to the left of the cream strip.
Step 9: Cut a 4-1/4″ x 5-3/4″ mat from green patterned paper. Cut a 4″ x 5-1/4″ mat of Beige Cardstock. Mount a 3-3/4″ x 5″ photo, first on the beige mat, then on the green mat. Adhere it to the layout as shown.


Step 10: Cut three 4-1/4″ x 4-1/4″ squares of Crimson Cardstock. Mount three 4″ x 4″ square photos on top of the squares and adhere them to the layout as shown.
Step 11: Using the Banner Flag Punch, punch one flag from both Crimson and Evergreen Cardstock. Tuck the flags behind the upper right photo.
Whether you call Canada home or just love passing through, this outdoor scrapbook layout is a great way to look back on all the memories you make during your time there. What do you like most about this layout? Let us know in the comments below!

I wish the Cityscape didn’t suggest which city it is showing. It looks like Toronto or Vegas. Another nondescript building might help the punch sell better.
Oh, I see it IS supposed to be Toronto!