July 30, 2019
Make the Rock-a-Byes Rock with these Baby Scrapbook Borders
Creating a scrapbook layout for a bouncing bundle of joy is truly a magical gift. You’re documenting their earliest moments for them — those precious ones they won’t remember. It’s one of the sweetest and most thoughtful things you can do for a little one, and though they may not know how to show it now, they’ll definitely appreciate it later. No baby layout is complete without a cute baby scrapbook border and these three ideas are perfect for all those early memories. Check them out!

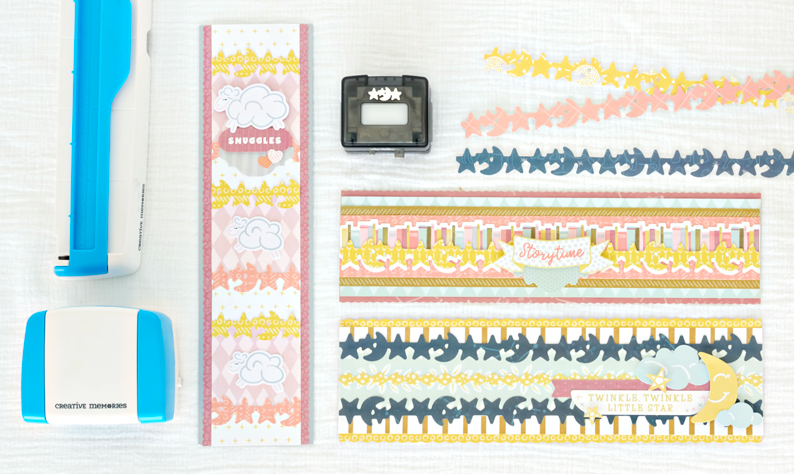
To create these borders, you will need:
- Storytime Paper Pack or (Shop Canada | Shop Australia)
- Storytime Tone-on-Tone Paper Pack or (Shop Canada | Shop Australia)
- Storytime Stickers or (Shop Canada | Shop Australia)
- Storytime Border Stickers or (Shop Canada | Shop Australia)
- Storytime Embellishments or (Shop Canada | Shop Australia)
- Platinum Shimmer and White Cardstock or (Shop Canada | Shop Australia)
- Original Border Maker System with Moon & Stars Border Maker Cartridge or (Shop Canada | Shop Australia)
- 12-inch Trimmer with Straight, Wave & Scallop Blades or (Shop Canada | Shop Australia)
- All-Purpose Scissors or (Shop Canada | Shop Australia)
- Tape Runner with Repositionable Tape Runner Refill or (Shop Canada | Shop Australia)
- Foam Squares or (Shop Canada | Shop Australia)
Check out the Storytime collection in the video below!
Storytime Scrapbook Border
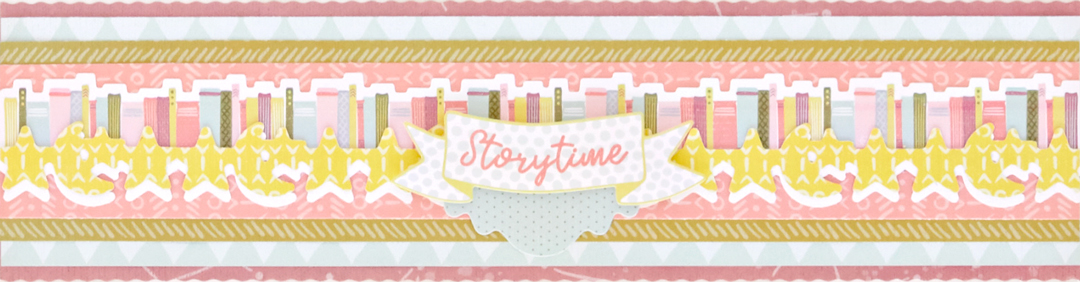
Step 1: Using the 12-inch Trimmer Wave Blade, cut a 3-1/4″ x 12″ strip of purple tone-on-tone paper for the base. Make sure to cut each side to create the waves.
Step 2: Switch to the 12-inch Trimmer Straight Blade and cut a 2-3/4″ x 12″ strip of aqua argyle tone-on-tone paper, a 2-1/4″ x 12″ strip of olive tone-on-tone paper and a 1-3/4″ x 12″ strip of coral tone-on-tone paper. Layer them on the base as shown.
Step 3: Adhere the books border sticker on the coral strip, near the top. Punch a border using the Moon and Stars Border Maker Cartridge with White Cardstock and again with yellow tone-on-tone paper. Mount the yellow border just over the white one and then add it to the border underneath the books sticker as shown.
Step 4: Mount the “Storytime” banner sticker with Foam Squares on top of the aqua scalloped sticker and add it to the middle of the border.
Twinkle, Twinkle Little Star Scrapbook Border
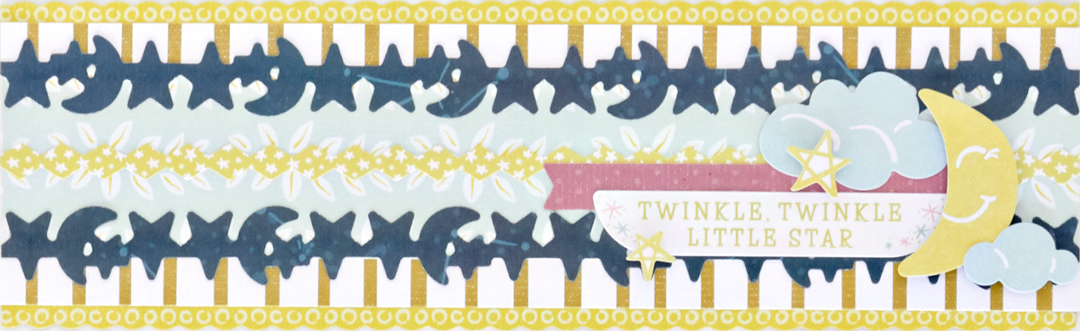
Step 1: Using the 12-inch Trimmer Scallop Blade, cut a 3-1/2″ x 12″ strip of yellow tone-on-tone paper for the base. Make sure to cut each side to create the scallops.
Step 2: Switch to the 12-inch Trimmer Straight Blade and cut a 3″ x 12″ strip of olive striped patterned paper and a 2″ x 12″ strip of aqua leaf patterned paper. Add them to the border as shown. Adhere the yellow stars border sticker down the middle of the border.
Step 3: Punch two borders using the Moon and Stars Border Maker Cartridge with navy tone-on-tone paper. Adhere them to the top and bottom of the aqua leaves strip as shown.
Step 4: Apply the purple ribbon and “Twinkle, Twinkle Little Star” stickers to the right side of the border. Add clouds embellishments and then the moon and stars embellishments with Foam Squares.
Snuggles Scrapbook Border
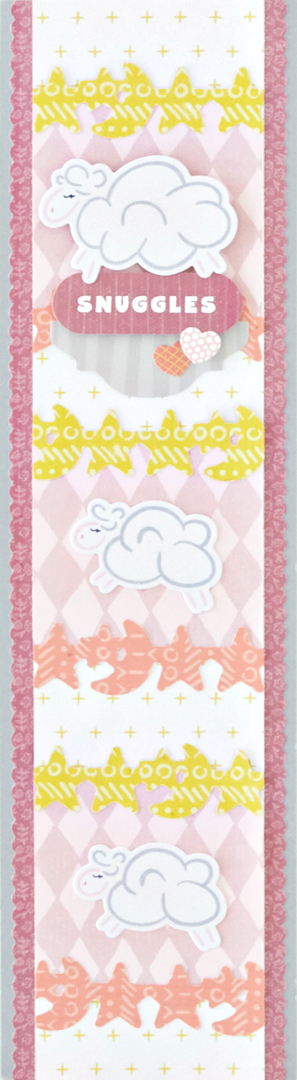
Step 1: Cut a 3-1/4″ x 12″ strip of Platinum Shimmer Cardstock for the base. Adhere a purple scallop border sticker down each side about 1/8″ in from the edges.
Step 2: Cut a 2-1/2″ x 12″ strip of white and yellow cross patterned paper. Cut another 2-1/2″ x 12″ strip with purple argyle tone-on-tone paper. Trim the purple argyle tone-on-tone paper into three 2-1/2″ x 2-1/2″ squares. Mount the squares at regular intervals along the white and yellow cross patterned strip.
Step 3: Punch a border using the Moon and Stars Border Maker Cartridge with each of the yellow and coral tone-on-tone papers. Cut them into 2-1/2″ strips. Mount the yellow ones on top of the purple argyle patterned squares and the coral ones on the bottom of the squares.
Step 4: Add small sheep embellishments to the bottom squares and larger sheep (with Foam Squares) to the top square. Add the “Snuggles” and gray scallop and hearts stickers as shown.
All of your baby-themed layouts are about to get a cuteness boost when you add these borders! Which of these baby scrapbook borders gives you the warm-and-fuzzies the most? Comment below and let us know!

How big are the fast fab albums? Don’t like the really big ones!
On Tue, Jul 30, 2019 at 4:53 PM Creative Memories Blog wrote:
> Krislyn Mattei posted: ” Creating a scrapbook layout for a bouncing bundle > of joy is truly a magical gift. You’re documenting their earliest moments > for them — those precious ones they won’t remember. It’s one of the > sweetest and most thoughtful things you can do for a little on” >