August 2, 2019
Focus on the Big Picture with this Scrapbook Layout Stencil
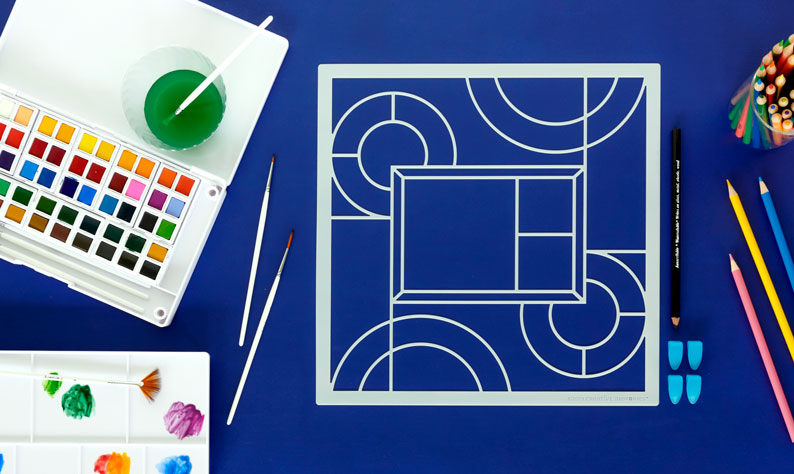
Have you ever found yourself wanting a bit of guidance when you sit down to create a layout? Maybe you want some help designing layouts that look polished and professional? Allow us to offer a helping hand with our collection of Recipe Templates! The latest and greatest one, the Frame It Up Recipe Template, is the perfect way to put together layouts worthy of the spotlight — check out these three examples and see for yourself!
To create this layout, you will need:
- Rainbow Rush Decorative Bundle or (Shop Canada | Shop Australia)
- Frame It Up Recipe Template Bundle or (Shop Canada | Shop Australia)
- Dark Green, Royal Blue & White Cardstock or (Shop Canada | Shop Australia)
- Custom Cutting System with Circle Patterns or (Shop Canada | Shop Australia)
- 12-inch Trimmer or (Shop Canada | Shop Australia)
- All-Purpose Scissors or (Shop Canada | Shop Australia)
- Tape Runner with Repositionable Tape Runner Refill or (Shop Canada | Shop Australia)
- Foam Squares or (Shop Canada | Shop Australia)
- Black Dual-Tip Pen or (Shop Canada | Shop Australia)
- Pencil
Learn how to use the Frame It Up Recipe Template in the video below!

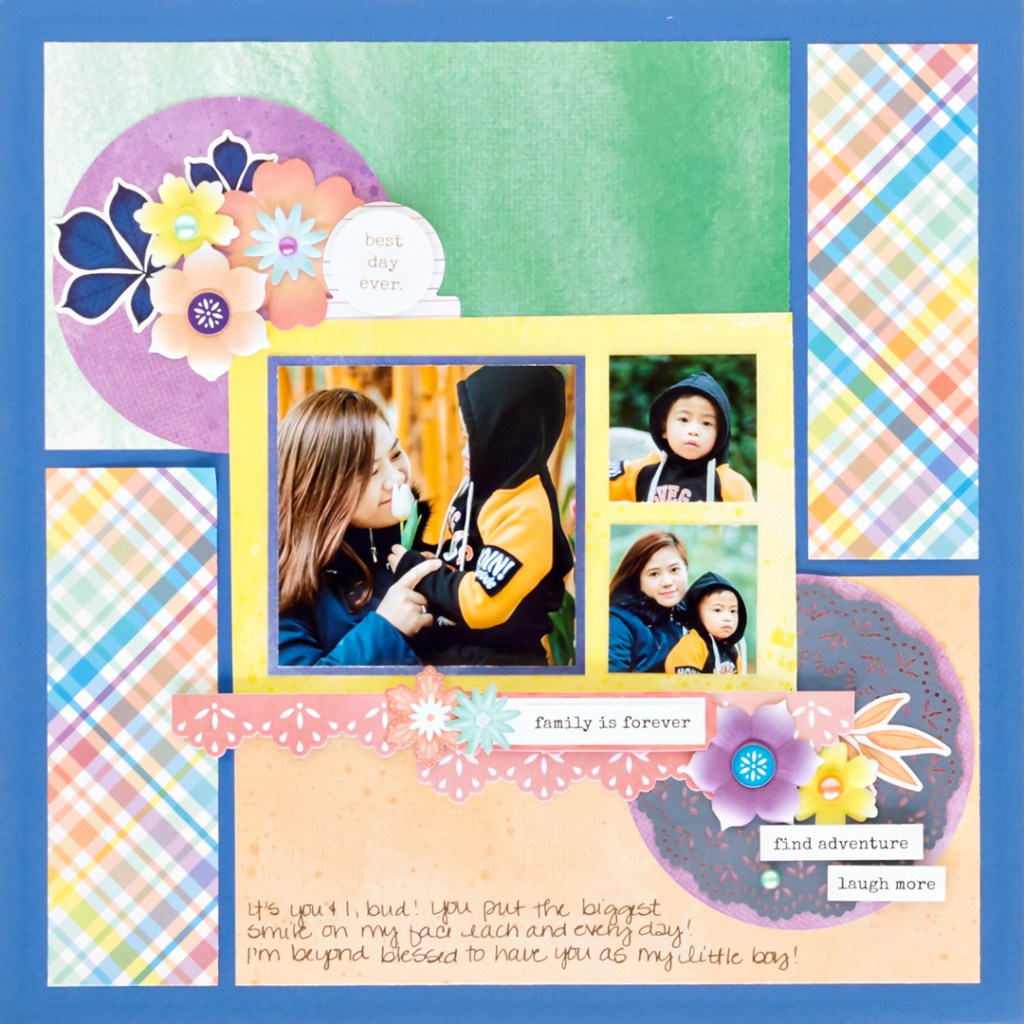
Step 1: Use a piece of Royal Blue Cardstock as the base for this layout.
Step 2: Using a pencil, trace and cut out all of the pieces with All-Purpose Scissors or the 12-inch Trimmer.
Step 3: To cut the purple circles, use the outside of the smallest Custom Cutting System Circle Pattern with the Green Blade.
Step 4: Adhere stickers and embellishments, popping up some with Foam Squares for added dimension. Journal as desired.
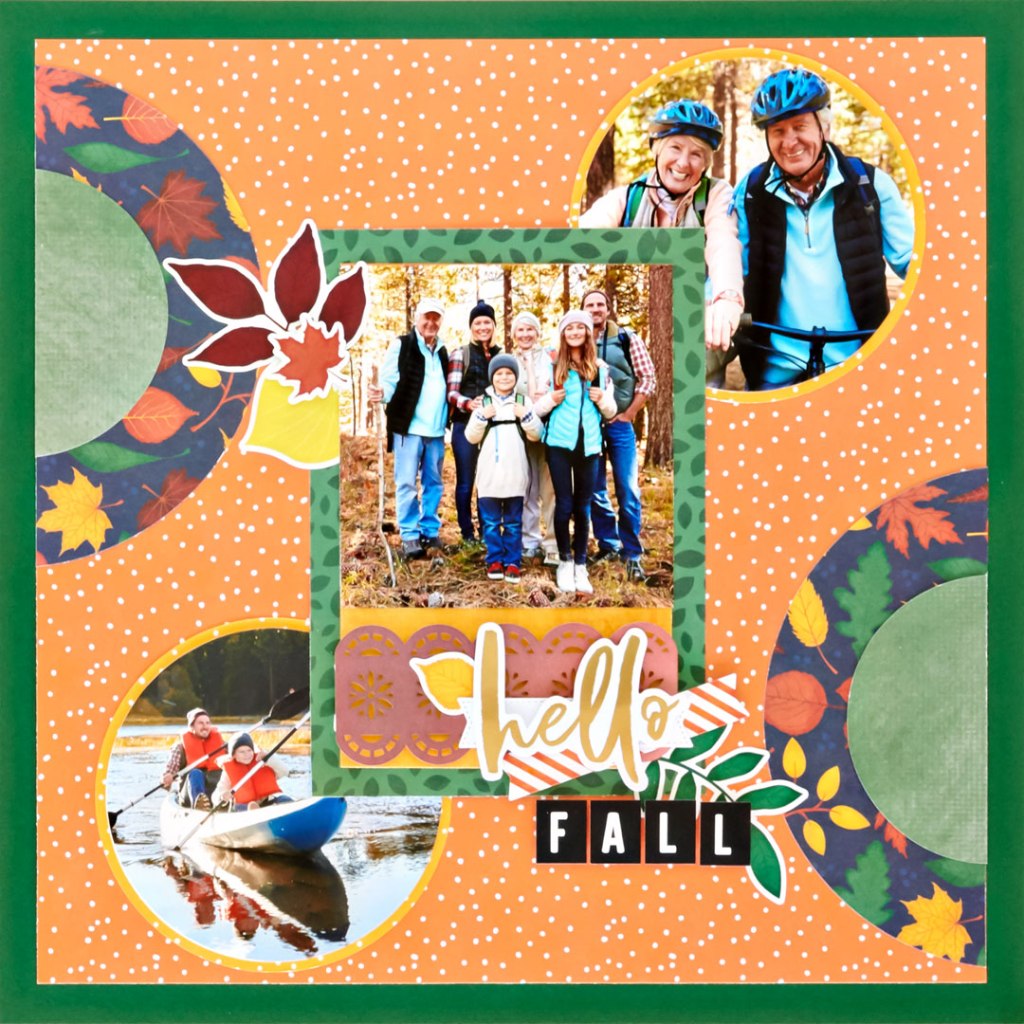
Step 1: Use Dark Green Cardstock as the base for this layout.
Step 2: Cut a piece of orange patterned paper to measure 11″ x 11″ and adhere it to the layout.
Step 3: Trace the desired pieces with a pencil and cut them out with All-Purpose Scissors or the 12-inch Trimmer.
Step 4: To cut the circle shapes:
- Top left and bottom right circles: Use the outside of the largest Custom Cutting System Circle Pattern with the Red Blade and the inside of the largest Custom Cutting System Circle Pattern with the Red Blade.
- Gold circles: Use the outside of the smallest Custom Cutting System Circle Pattern with the Green Blade.
- Photo circles: Use the outside of smallest Custom Cutting System Circle Pattern with the Red Blade.
Step 5: Adhere stickers and embellishments, popping up some with Foam Squares for added dimension. Journal as desired.

Step 1: Use a piece of purple patterned paper as the base for this layout.
Step 2: Cut a piece of White Cardstock to measure 11″ x 11″ and adhere it to the purple paper.
Step 3: Trace desired pieces with a pencil and cut them out with All-Purpose Scissors or the 12-inch Trimmer.
Step 4: To cut the circle shapes:
- Blue circles: Use the outside of the smallest Custom Cutting System Circle Pattern with the Green Blade.
- Photo circles: Use the inside of the largest Custom Cutting System Circle Pattern with the Red Blade.
Step 5: Adhere stickers and embellishments, popping up some with Foam Squares for added dimension.
Step 6: Journal and doodle along outer edge of White Cardstock as desired.
See? With the Frame It Up Recipe Template, you’ll be creating layouts like a total pro in no time! It’s a versatile scrapbook layout stencil that helps you create an array of projects – simply flip it around or turn it over and use any of the spaces you like! What will you make with it? Let us know in the comments below!

Love these ideas!!
like all of them but am partial to the fall layout – thanks for teaching us variety!!