August 22, 2019
Sample Grade A Shades with this Vibrant Scrapbook Layout

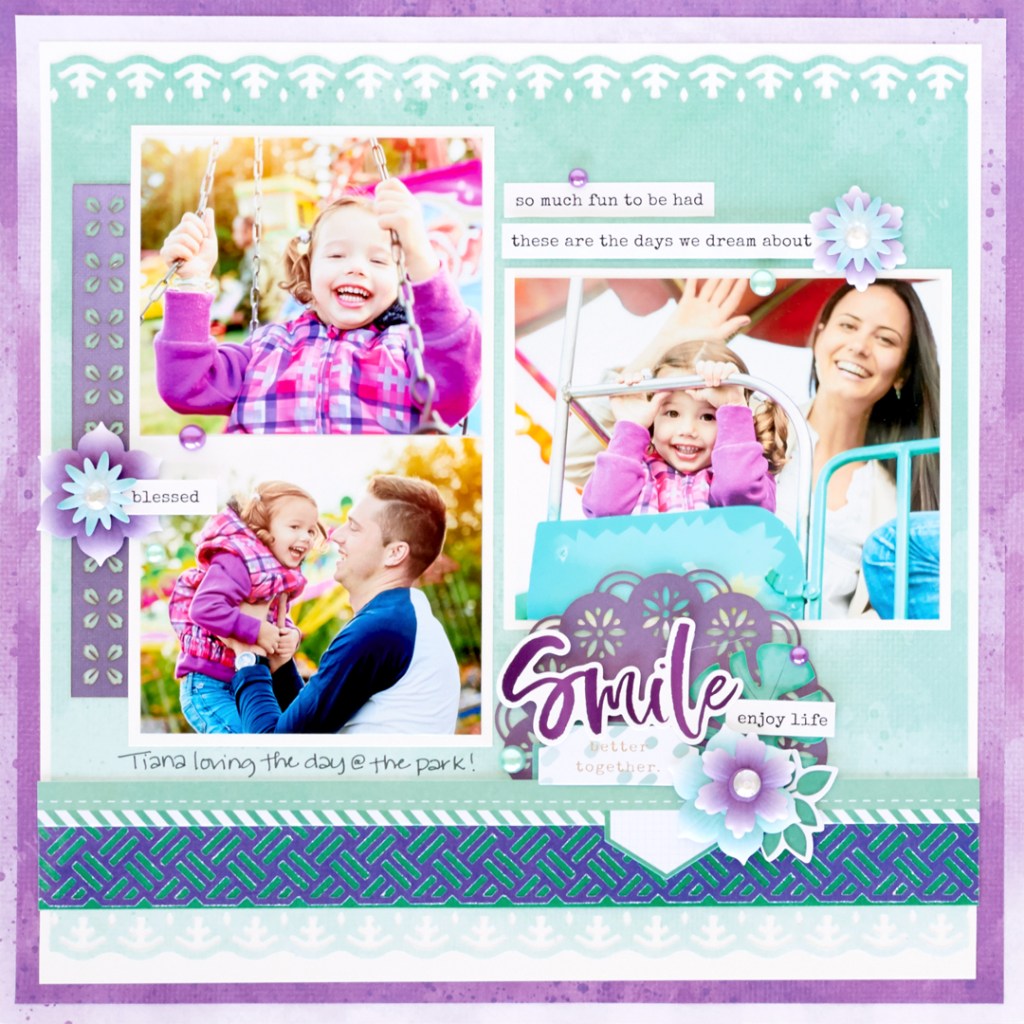
The Rainbow Rush collection is meant for layouts that stand out in an album and catch the eye of everyone flipping through the pages. Bland and boring, it’s not! It’s a collection that stops people in their tracks as all the happy hues and trendy tones boast a big-time wow-factor. This vibrant scrapbook layout is another example of the jaw-dropping projects you can make with Rainbow Rush. Check it out!
To create this layout, you will need:
- Rainbow Rush Soft Paper Pack or (Shop Canada | Shop Australia)
- Rainbow Rush Cheerful Paper Pack or (Shop Canada | Shop Australia)
- Rainbow Rush Layered Title Embellishments or (Shop Canada | Shop Australia)
- Rainbow Rush Layered Border Embellishments or (Shop Canada | Shop Australia)
- Rainbow Rush Flower Embellishments or (Shop Canada | Shop Australia)
- Rainbow Rush Laser Border Embellishments or (Shop Canada | Shop Australia)
- Rainbow Rush Word & Tag Stickers or (Shop Canada | Shop Australia)
- Rainbow Rush Leaf & Icon Stickers (or Shop Canada | Shop Australia)
- White Cardstock or (Shop Canada | Shop Australia)
- Basketweave and Lace Trim Border Punches or (Shop Canada | Shop Australia)
- Original Border Maker System with Dips & Diamonds Border Maker Cartridge or (Shop Canada | Shop Australia)
- 12-inch Trimmer or (Shop Canada | Shop Australia)
- Tape Runner or (Shop Canada | Shop Australia)
- Repositionable Tape Runner Refill or (Shop Canada | Shop Australia)
- Foam Squares or (Shop Canada | Shop Australia)
- Black Dual-Tip Pen or (Shop Canada | Shop Australia)
Step 1: Use the purple patterned paper as the base for this layout.
Step 2: Cut a piece from the purple patterned paper to measure 11-1/2″ x 11-1/2″ and adhere it to the base.
Step 3: Cut a piece of White Cardstock to measure 11″ x 11″ and adhere it to layout.
Step 4: Cut a piece of the soft green patterned paper to measure 10-3/4″ x 10-3/4″. Punch the top and bottom edges with the Dips & Diamonds Border Maker Cartridge. Adhere it to the layout.
Step 5: From the Cheerful Paper Pack, cut a piece of the green patterned paper to measure 10-3/4″ x 1-1/2″ and adhere it to the layout.
Step 6: Punch a border using the Basketweave Border Punch to measure 10-3/4″. Adhere it to the top of the green patterned paper.
Step 7: Cut a piece of White Cardstock to measure 4-1/4″ x 7-1/4″. Use this piece to adhere two photos measuring 4″ x 3-1/2″.
Step 8: Cut a piece of White Cardstock to measure 5-1/4″ x 4-1/4″. Use this piece to mat a photo that measures 5″ x 4″.
Step 9: Adhere stickers and embellishments, using Foam Squares on some for added dimension. Journal as desired.
You’ll be feeling like the ace of shades in no time when you create this rainbow scrapbook layout! What excites you most about vivid layouts like these? Let us know in the comments below!

Love this!