November 26, 2019
Make Your Mark with DIY 3D Christmas Tree Gift Tags
How much thought do you put into gift wrapping? You spend so much time thinking about what gifts to give, but do you ever spend time thinking about how you’re going to present the gift? With a little bit of creativity, you can spruce up any gifts with perfectly-patterned wrapping paper or personalized gift tags. Check out these DIY 3D Christmas tree gift tags and get inspired to step up your gift-giving game!
Tina’s Inspiration
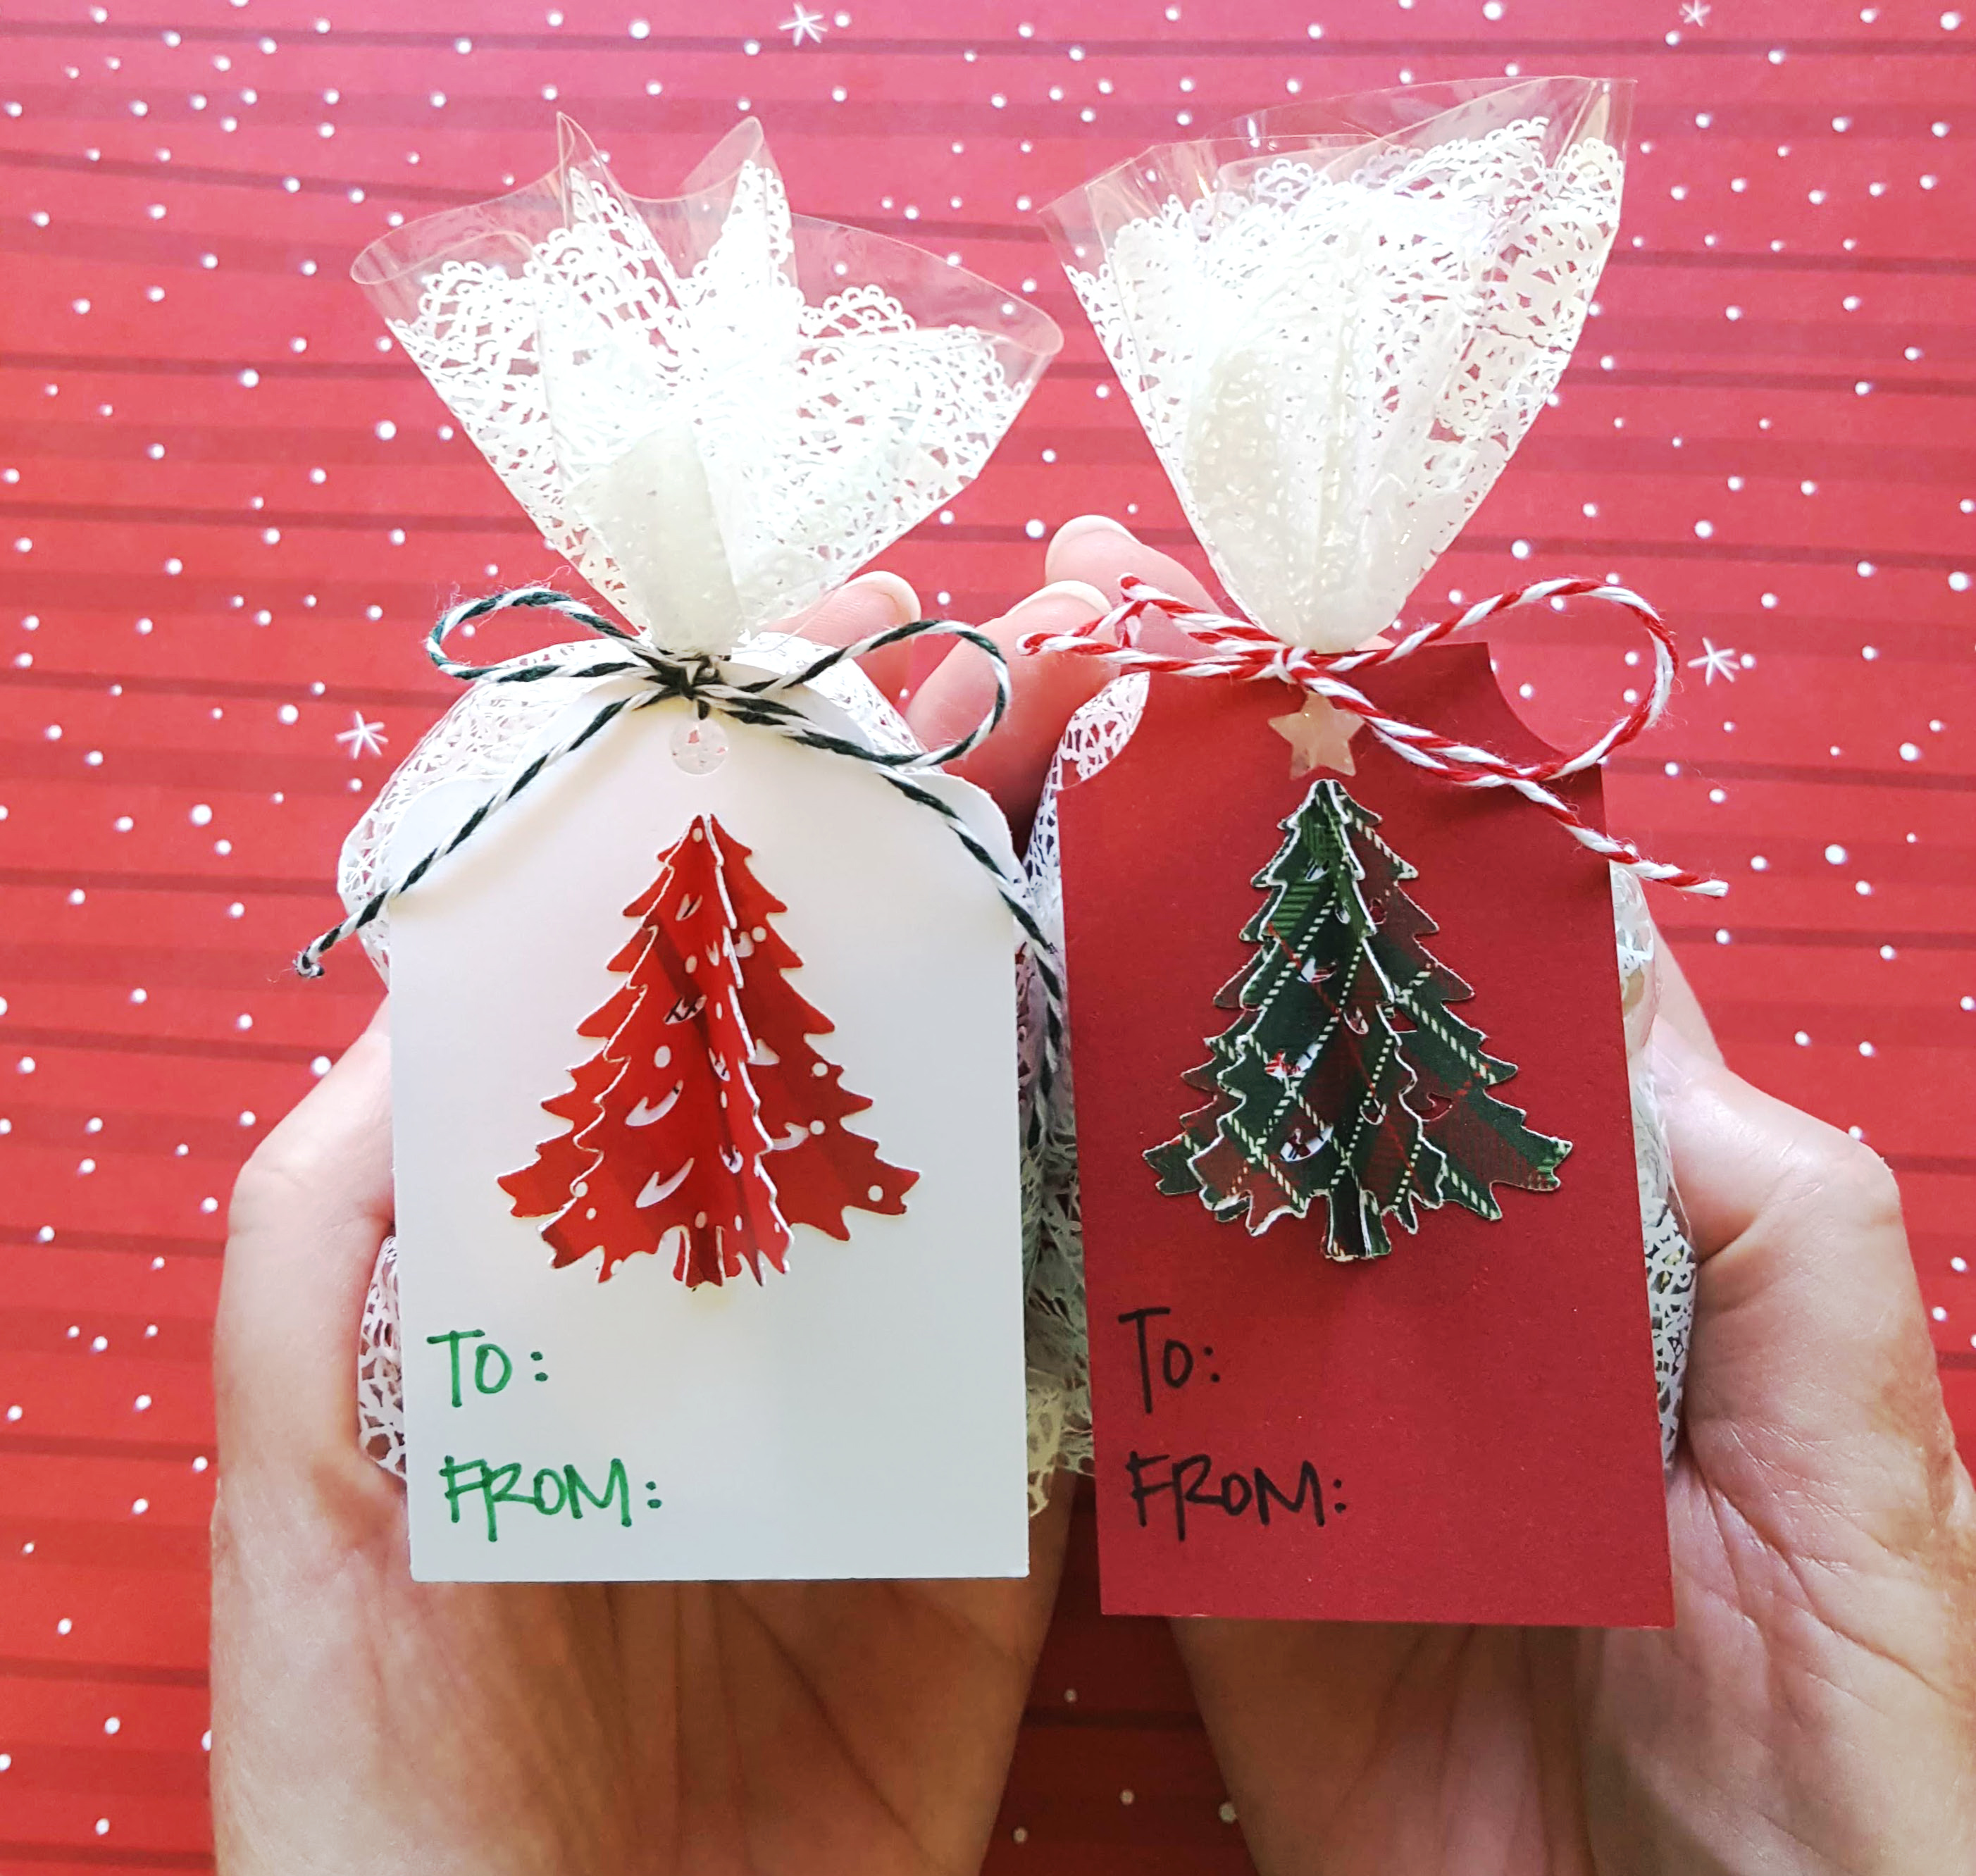
I was inspired to create a festive gift tag to add to holiday gifts, holiday treats and host gifts. I wanted to make them extra special!

For this this project, you will need:
- Merry Little Christmas Paper Pack or (Shop Canada | Shop Australia)
- Festive Plaid Paper Pack or (Shop Canada | Shop Australia)
- Red and White Cardstock or (Shop Canada | Shop Australia)
- 3-in-1 Scallop Tag Punch or (Shop Canada | Shop Australia)
- 4-Way Hearts and Stars Corner and Hole Punch or (Shop Canada | Shop Australia)
- Pine Tree Punch or (Shop Canada | Shop Australia)
- 2-Way Corner Rounder or (Shop Canada | Shop Australia)
- 12-inch Trimmer or (Shop Canada | Shop Australia)
- Multi-Purpose Tool or (Shop Canada | Shop Australia)
- Custom Cutting System with Oval Patterns or (Shop Canada | Shop Australia)
- Tape Runner or (Shop Canada | Shop Australia)
- Repositionable Tape Runner Refill or (Shop Canada | Shop Australia)
- Dual-Tip Pens or (Shop Canada | Shop Australia)
- Hole Punch
Take a closer look at the 3-in-1 Scallop Tag Punch in the video below!

Step 1: Punch three trees from patterned paper.
Step 2: Fold each tree in half, being sure to have the pattern you want the final tree to be on the inside. Crisp the edges with your Multi-Purpose Tool.
Step 3: To create the 3D tree, adhere three trees back-to-back using Repositionable adhesive.
Step 4: Adhere the 3D tree to the tag using Repositionable adhesive. (Hint: Keep reading to find steps for how to make the tags!)
Step 5: Add To: and From: using a Dual-Tip Pen.


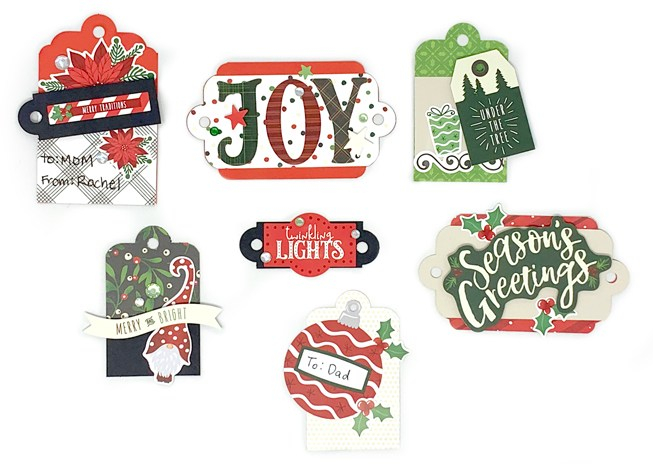
Tag #1:
- Using the Blue Blade on the inside of the largest Custom Cutting System Oval Pattern, cut out one oval.
- Punch a hole at the top of the tag and adhere the 3D tree.
Tag #2:
- Using the 3-in-1 Scallop Tag Punch, punch a tag at the 2″ width.
- Adhere the 3D tree to the tag.
Tag #3:
- Cut out a rectangle measuring 3″ x 1-3/4″.
- Using the 2-Way Corner Rounder, punch out the reverse-curve at the top corners of the tag.
- Punch a star using the 4-Way Hearts and Stars Corner and Hole Punch.
- Adhere the 3D tree under the star.
This project is so simple that kids can join in and make them, too! There are endless possibilities and you’re only limited by your imagination.
Love the 3-in-1 Scallop Tag Punch? Here are some other ideas made by Home Office staff!


Your gifts are sure to stand out under the tree when they have these 3D Christmas tree gift tags attached to them! How do you add your crafty touch to the gift-giving process? Comment below!

I love, love, love the 3-D tag!! Brilliant!
Love these tags! So cool, and with different punches and papers, idea can be used for any holiday or birthday. Thanks for the inspiration!
the video shows no CC.
Hi Cindy – There is only music in the video!
Love! Wrapping is always my favorite and I love homemade tags!
Thank you so much!
Thank you for sharing. The tags are adorable and so are all the other ideas.
Just a quick question, I do love these tags. But has anyone tried making the 3d trees with cricut cut trees rather than the punch. That is one punch I don’t have..