December 30, 2019
Bring On New Beginnings with this Graduation Scrapbook Layout

Graduation day is such a special moment. It signifies the culmination of years of hard work and sacrifice, while also opening the door to an endless amount of exciting new possibilities. The day itself represents the ending of one chapter and the beginning of many to come. The Graduation Day Theme Pack takes all the glitz of this milestone moment and packages it in a way that will make your layouts as special as the memory. Check out how this theme pack accentuates this graduation scrapbook layout!

To create this layout, you will need:
- Graduation Day Theme Pack or (Shop Canada | Shop Australia)
- Dazzle Border Punch or (Shop Canada | Shop Australia)
- Original Border Maker System with Crystal Chain Border Maker Cartridge or (Shop Canada | Shop Australia)
- Custom Cutting System with Circle Patterns or (Shop Canada | Shop Australia)
- 12-inch Trimmer or (Shop Canada | Shop Australia)
- All-Purpose Scissors or (Shop Canada | Shop Australia)
- Tape Runner or (Shop Canada | Shop Australia)
- Repositionable Tape Runner Refill or (Shop Canada | Shop Australia)
- Foam Squares or (Shop Canada | Shop Australia)
- Black Dual-Tip Pen or (Shop Canada | Shop Australia)
Take a look at the Graduation Day Theme Pack in the video below!
Step 1: Use the yellow patterned paper as the base for this layout.
Step 2: Cut a piece from the white patterned paper to measure 12″ x 3-1/4″. Adhere along the top edge.
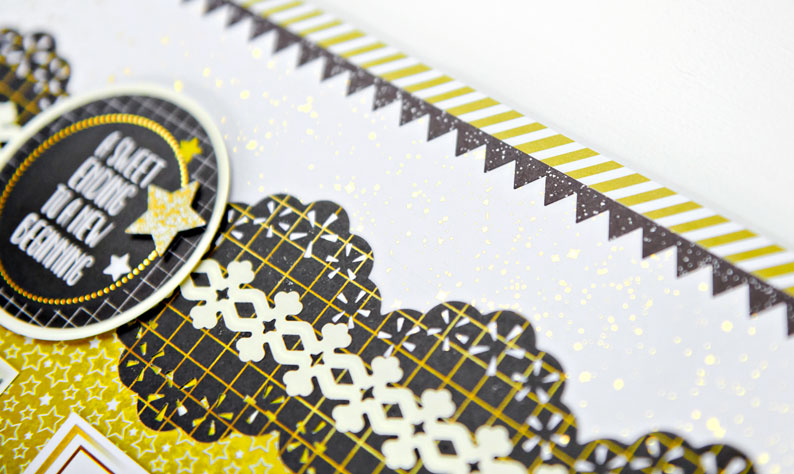
Step 3: Cut a piece of black patterned paper to measure 12″ x 3-1/2″. Punch one edge using the Dazzle Border Punch. Flip over, punching from the back side, so the design lines up. Adhere to the layout.
Step 4: Using the Border Maker System and the Crystal Chain Border Maker Cartridge, punch one border from the Cream Cardstock.
Step 5: Using the inside of the large Circle Custom Cutting System Pattern with the Green Blade, cut a circle from the Cream Cardstock.
Step 6: Using the inside of the large Circle Custom Cutting System Pattern with the Blue Blade, cut out the title from the mat patterned paper. Adhere this circle on top of the previous circle. Adhere to the layout with Foam Squares.
Step 7: Cut three photo mats from the Cream Cardstock that measure: 4-1/4″ x 6-1/4″ and (2) 3-3/4″ x 4-1/4″. Adhere photos to the mats that measure: 4″ x 6″ and (2) 3-1/2″ x 4″.
Step 8: Tuck and adhere the “mats” behind the smaller photos.
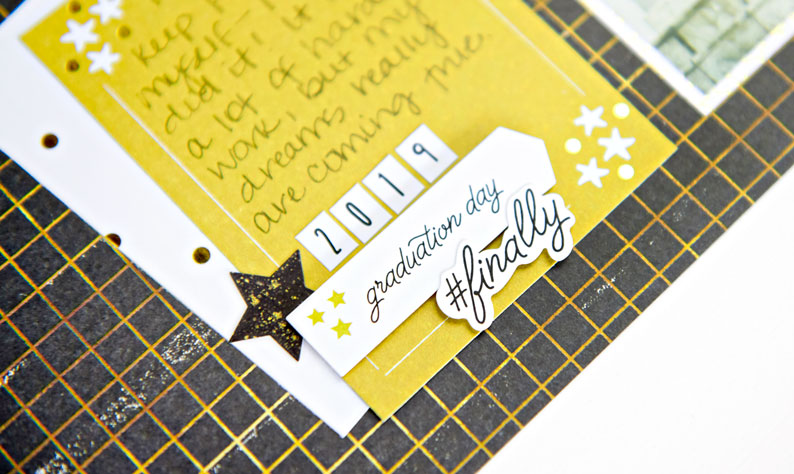
Step 9: Adhere stickers, some with Foam Squares for added dimension. Journal as desired.
Does this graduation scrapbook layout inspire you and fill you with bold and bright ideas? Let us know in the comments below!

[…] Get instructions to create the “Bring On New Beginnings With this Graduation Scrapbook Layout” […]
[…] Layout Instructions […]