March 3, 2020
Punch Your Creative Tickets with this Theme Park Layout

Being at an amusement park is the closest thing to cloud nine that a child can reach. It’s a whole place that’s built for them — from the rides to the food to the prizes. Some of the biggest smiles you’ll ever see from a child will come from a theme park, so it’s important that you have a collection like Magic Awaits standing by. Check out this amusement park layout and start thinking of the photos you’ll fill it with!

To create this layout, you will need:
- Magic Awaits Paper Pack or (Shop Canada | Shop Australia)
- Magic Awaits Tone-on-Tone Paper Pack or (Shop Canada | Shop Australia)
- Magic Awaits Variety Mat Pack or (Shop Canada | Shop Australia)
- Magic Awaits Stickers or (Shop Canada | Shop Australia)
- Custom Cutting System with Gemstone Patterns or (Shop Canada | Shop Australia)
- Original Border Maker System with Crystal Chain Border Maker Cartridge or (Shop Canada | Shop Australia)
- 12-inch Trimmer or (Shop Canada | Shop Australia)
- All-Purpose Scissors or (Shop Canada | Shop Australia)
- Tape Runner or (Shop Canada | Shop Australia)
- Repositionable Tape Runner or (Shop Canada | Shop Australia)
- Foam Squares or (Shop Canada | Shop Australia)
- Black Dual-Tip Pen or (Shop Canada | Shop Australia)
Step 1: Use a plaid patterned paper as the base for this layout.
Step 2: Cut a black polka dot patterned paper to measure 10-7/8″ x 10-7/8″. Mount on the base at an angle. Cut a white heart patterned paper to measure 10-1/2″ x 10-1/2″. Mount on top of the black piece.
Step 3: Cut an 11-1/4″ x 4-1/4″ piece of gold patterned paper. Top with two 5-1/2″ x 4″ photos. Mount to the layout as shown.


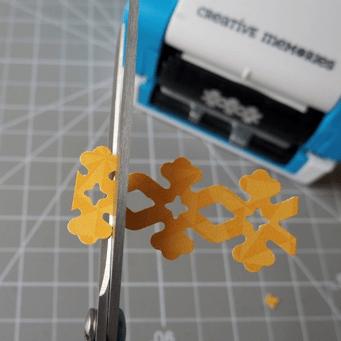
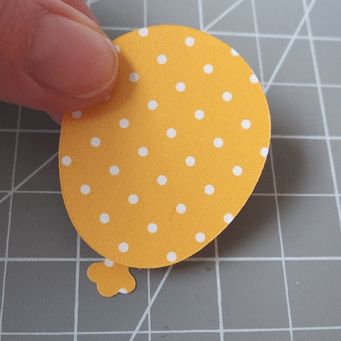
Step 4: Cut nine ovals from various paper scraps using the inside of the smallest Custom Cutting System Pattern and the Red Blade. Punch several shapes with the Crystal Chain Border Maker Cartridge from those same paper designs. Trim out nine small scalloped shapes and adhere them to the bottom of the ovals to create balloons with balloon ties.
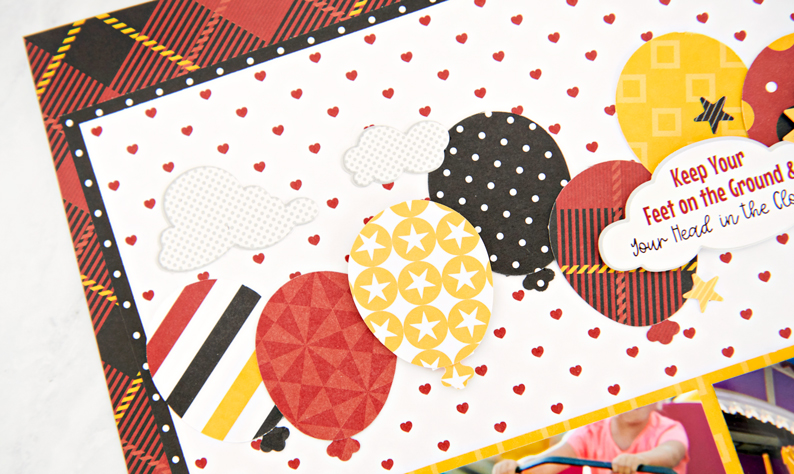
Step 5: Adhere the balloons to the layout as shown, popping a couple of them up with Foam Squares for added dimension. Add cloud and star stickers.
Step 6: Trim out a gray journal box from a mat and tuck it just under the left photo. Add stickers and journal as desired.
What types of theme park-related memories stick with you the most? What stands out to you when you spend a day at the amusement park? Let us know how you’ll fill this theme park layout in the comments below!

Really cute!
I love the balloons. What a great idea.
So creative. Just shows all the possibilities with Creative Memories!!!
I LOVE THIS LAYOUT!!!!