March 6, 2020
Water Your Creative Ideas with these Garden Scrapbook Borders
The photographic imagery of the Glowing Gardens and Mellow Meadows Paper Packs are perfect for adding vibrancy to any project. When combined with other collections, they add texture and interest to your projects — especially borders! Blog contributor Krislyn Mattei made a variety of garden scrapbook borders using these new paper packs — check them out!
Krislyn’s Inspiration:
Below are three different border recipes I’ve created using the Textures papers combined with a variety of collections, along with variations to show their versatility. Try these recipes out with any collection and any Textures papers combination!
To create these borders you’ll need:
- Glowing Gardens Paper Pack or (Shop Canada | Shop Australia)
- Mellow Meadows Paper Pack or (Shop Canada | Shop Australia)
- Daydreamer Paper, Embellishments and Stickers or (Shop Canada | Shop Australia)
- Harvest Delight Paper and Stickers or (Shop Canada | Shop Australia)
- Rainbow Rush Soft Paper, Bold Paper, Layered Border Embellishments, Layered Title Embellishments, Flower Embellishments and Title & Icon Stickers or (Shop Canada | Shop Australia)
- Travel Log Paper and Stickers or (Shop Canada | Shop Australia)
- Ever After Paper and Stickers or (Shop Canada | Shop Australia)
- Petal Frame Punch or (Shop Canada | Shop Australia)
- Scallop and Lace Trim Border Punches or (Shop Canada | Shop Australia)
- 3-in-1 Scallop Tag Punch or (Shop Canada | Shop Australia)
- Original Border Maker System with Picket Fence Cartridge or (Shop Canada | Shop Australia)
- Custom Cutting System with Circle Patterns or (Shop Canada | Shop Australia)
- 12-inch Trimmer with Straight, Victorian and Deckle Blades or (Shop Canada | Shop Australia)
- All-Purpose Scissors or (Shop Canada | Shop Australia)
- Tape Runner or (Shop Canada | Shop Australia)
- Repositionable Tape Runner Refill or (Shop Canada | Shop Australia)
- Foam Squares or (Shop Canada | Shop Australia)
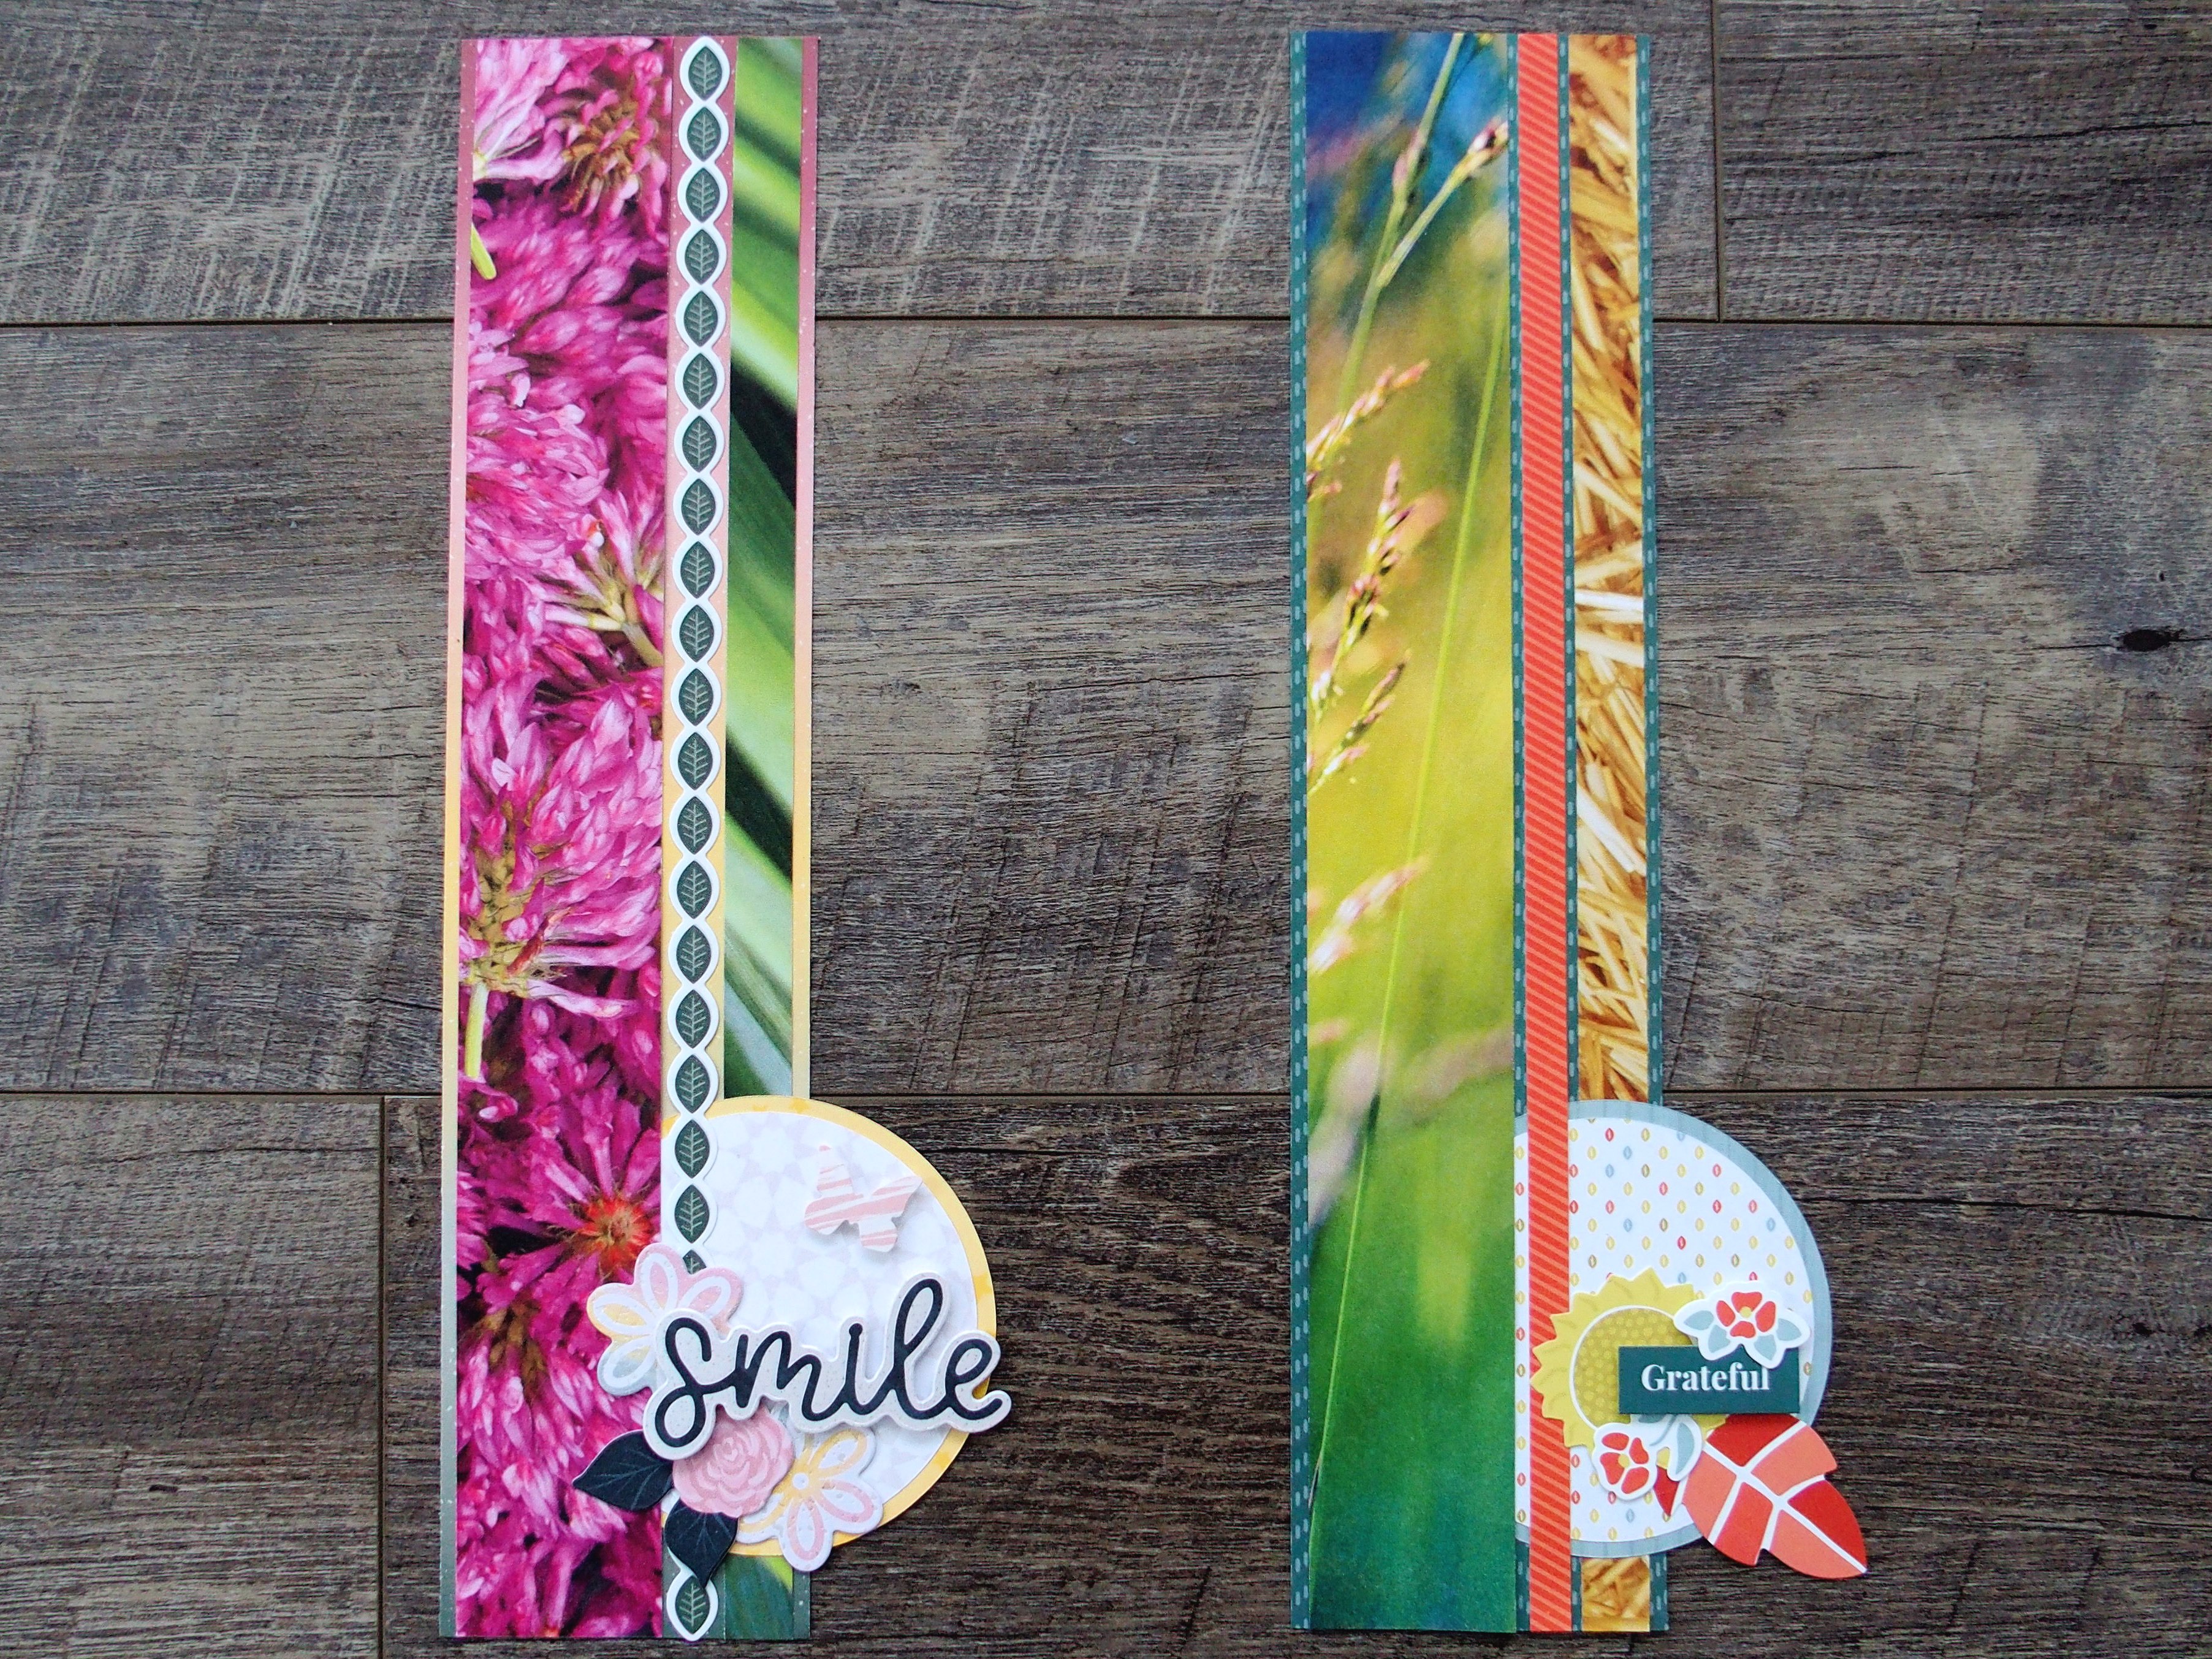
Border Recipe #1
Step 1: Cut a 2-3/4″ x 12″ strip of Daydreamer patterned paper for the base.
Step 2: Cut a 1-1/2″ x 12″ strip of Glowing Gardens floral patterned paper and adhere it to the left side of the base, about 1/8″ from the edge. Cut a 1/2″ x 12″ strip of Glowing Gardens green stem patterned paper and adhere it to the right side of the base, about 1/8” from the edge. Place a Daydreamer leaf border sticker along the gap near the middle, adhering just lightly.
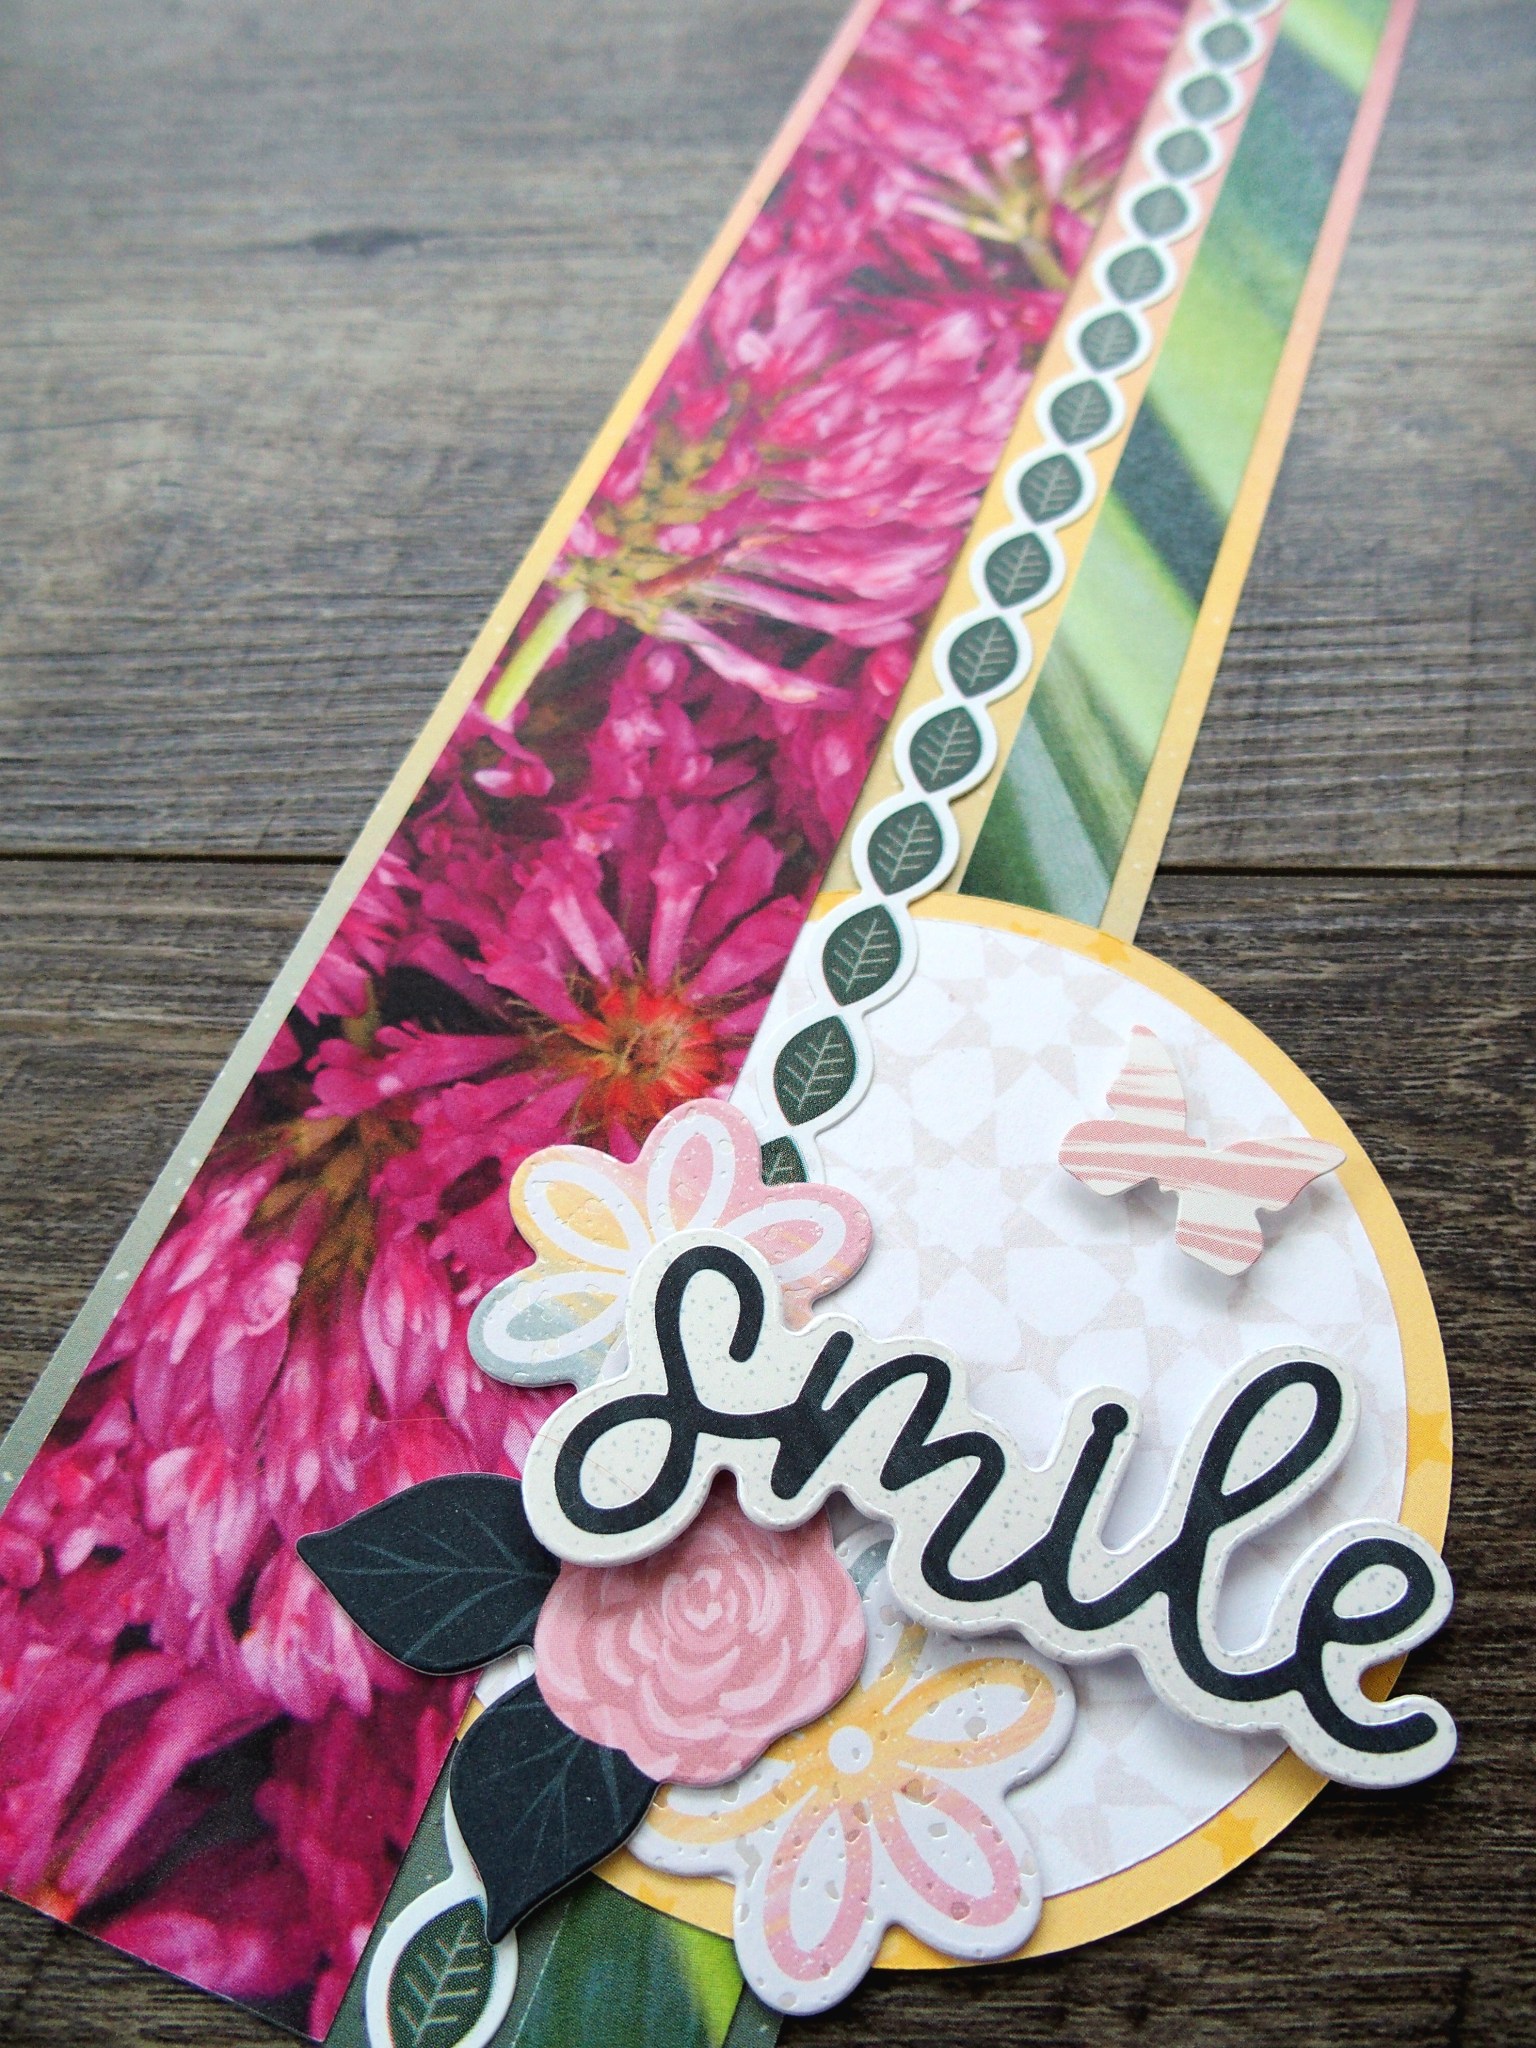
Step 3: Using the inside of the largest Custom Cutting System Circle Pattern and the Red Blade, cut a circle with Daydreamer yellow star patterned paper. With the Green Blade, cut a circle with Daydreamer white patterned paper and mount it on top of the yellow circle. Tuck the circle underneath the floral strip and border sticker so that 3/4 of it sticks out, as shown.
Step 4: Top with stickers and embellishments, popping some up with Foam Squares.
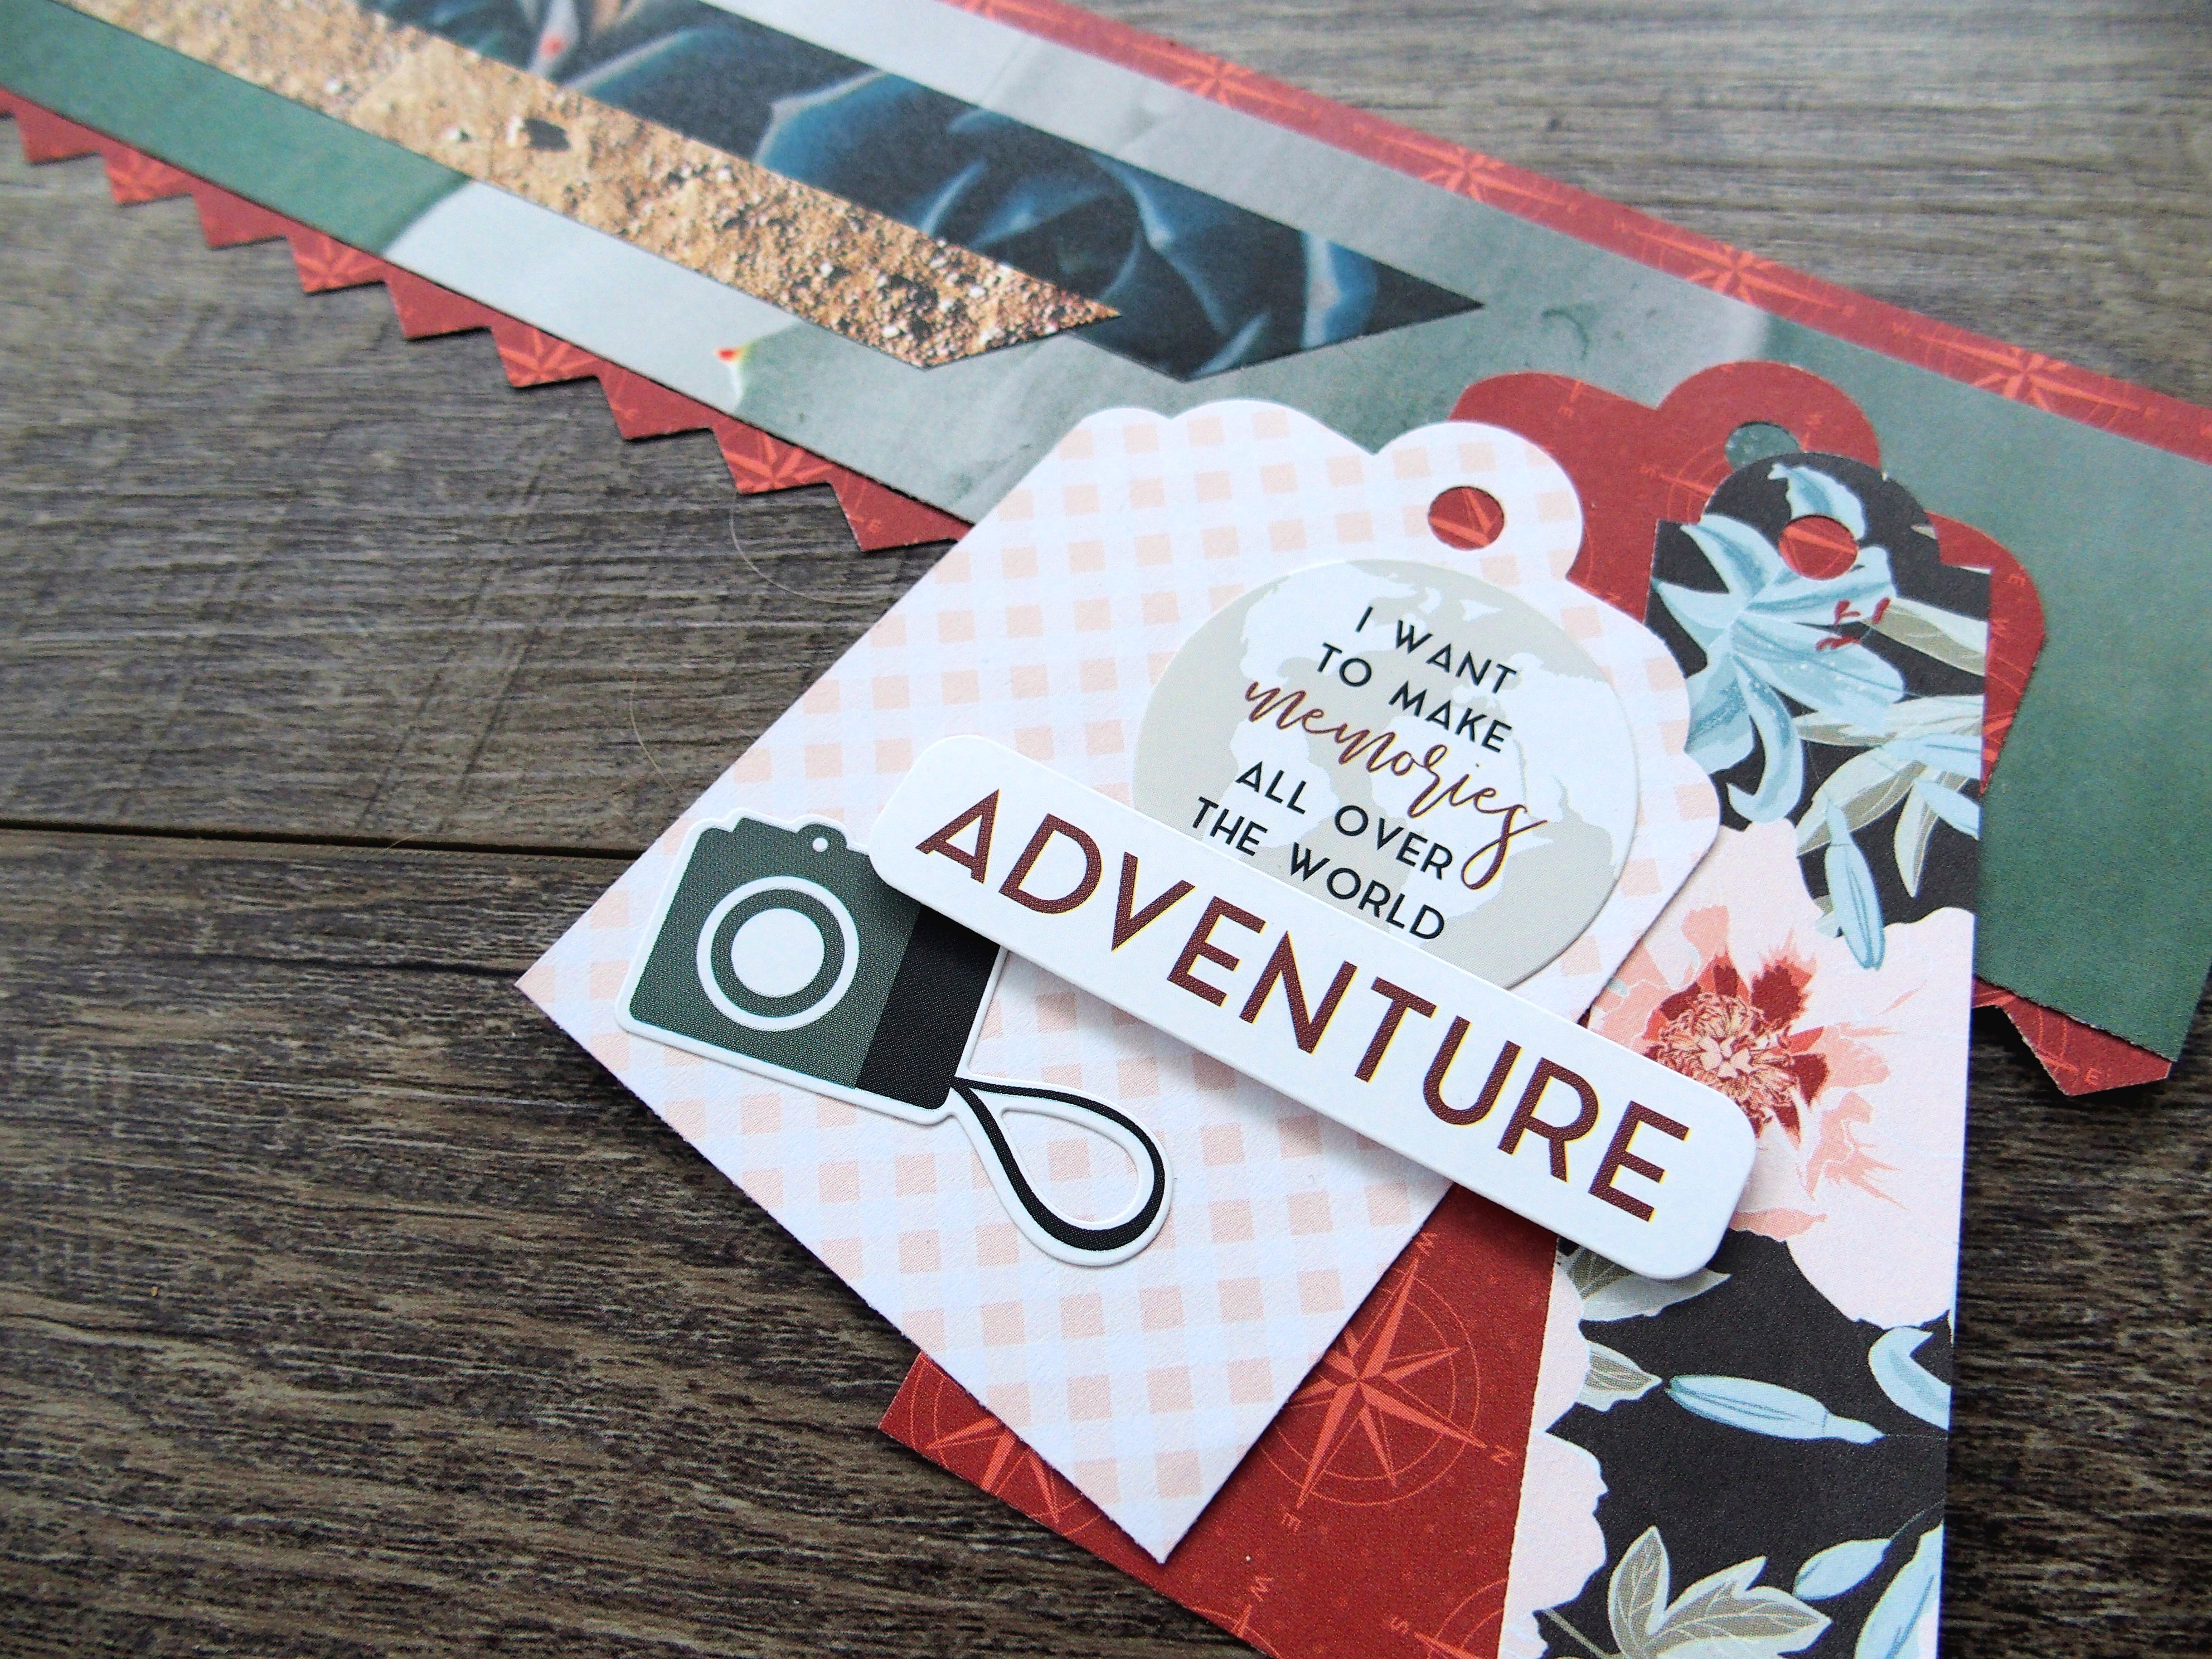
Border Recipe #2
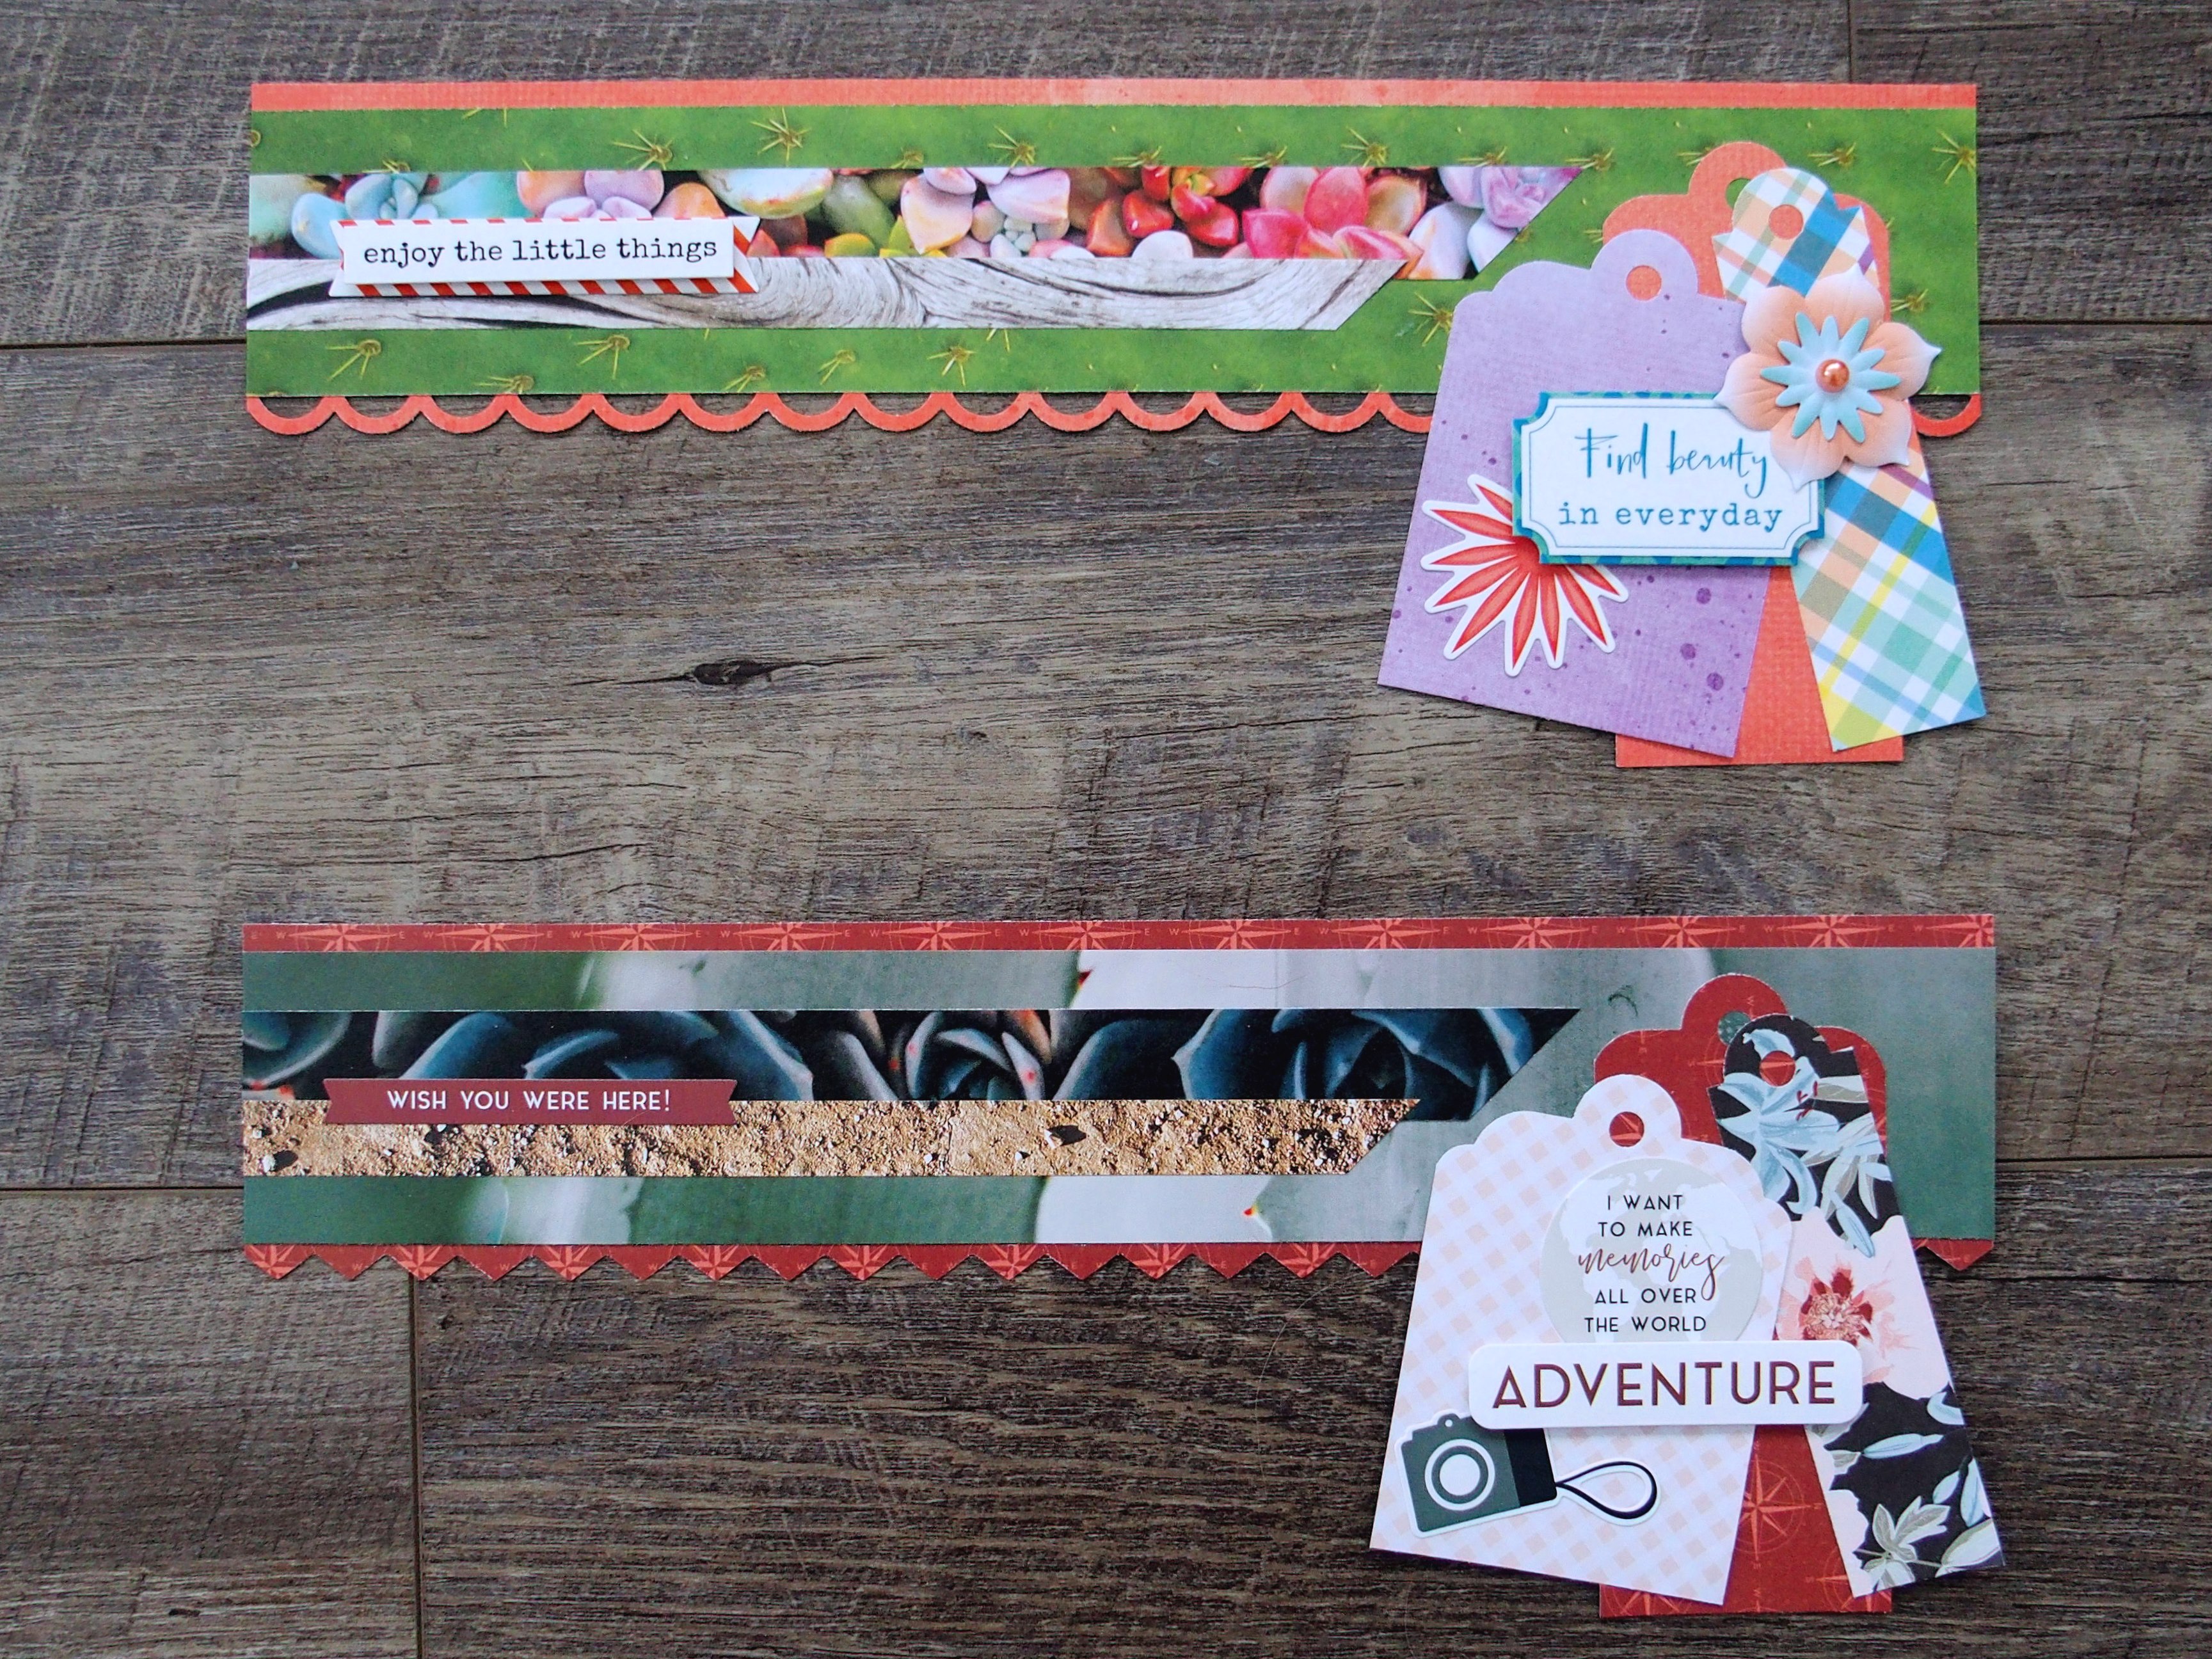
Step 1: Using the Scallop Border Punch, punch a border with a piece of coral paper from the Rainbow Rush Soft Paper Pack. Trim to measure 12″ x 2-1/2″ to create the base.
Step 2: Cut a 12″ x 2″ strip of Glowing Gardens cactus patterned paper and adhere to the base. Cut a 9-1/2″ x 3/4″ strip of Glowing Gardens succulent patterned paper and an 8″ x 1/2″ strip of Glowing Gardens wood patterned paper. Trim off one short end of each at an angle and adhere the strips on the border, aligned at the left side, as shown.
Step 3: Using the 3-in-1 Scallop Tag Punch, punch a 2-1/2″ x 3-1/2″ tag with a piece of purple paper from the Rainbow Rush Soft Paper Pack, a 2″ x 4-1/4″ tag with a piece of coral paper from the Rainbow Rush Soft Paper Pack and a 1″ x 4″ tag with a piece of plaid patterned paper from the Rainbow Rush Soft Paper Pack. Layer and adhere the tags on the right side of the border as shown.
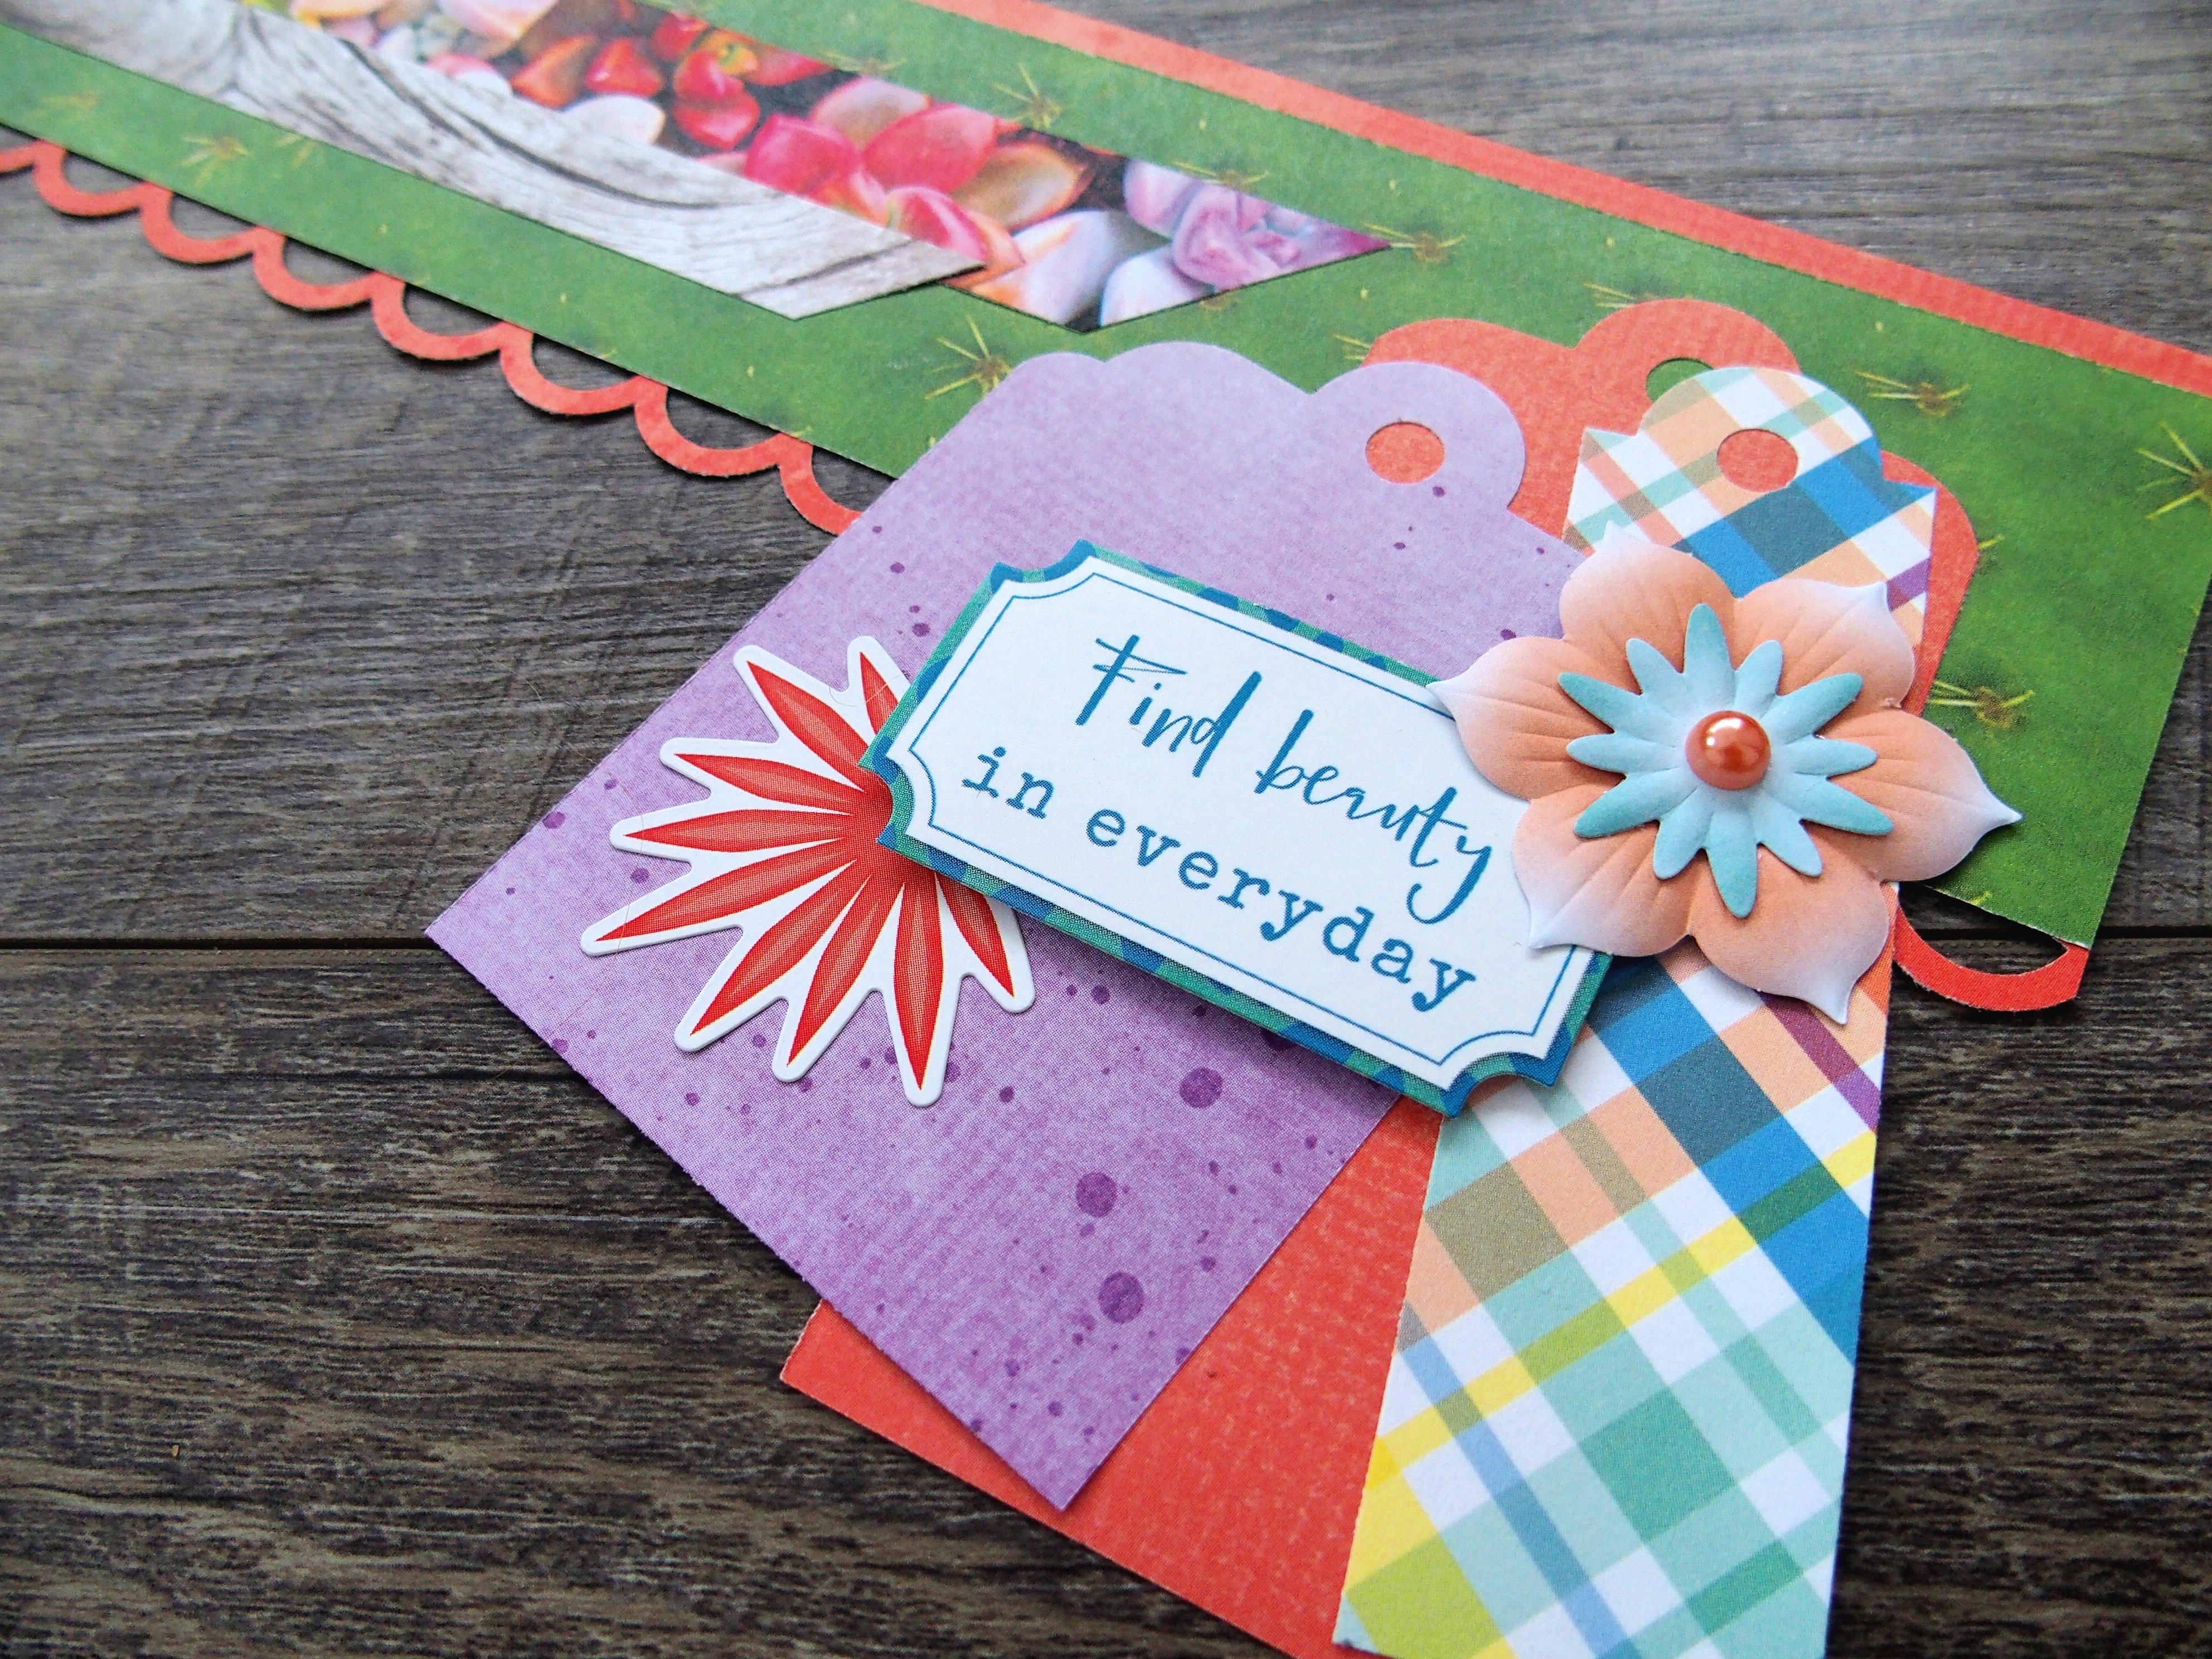
Step 4: Add stickers and embellishments, popping some up with Foam Squares.
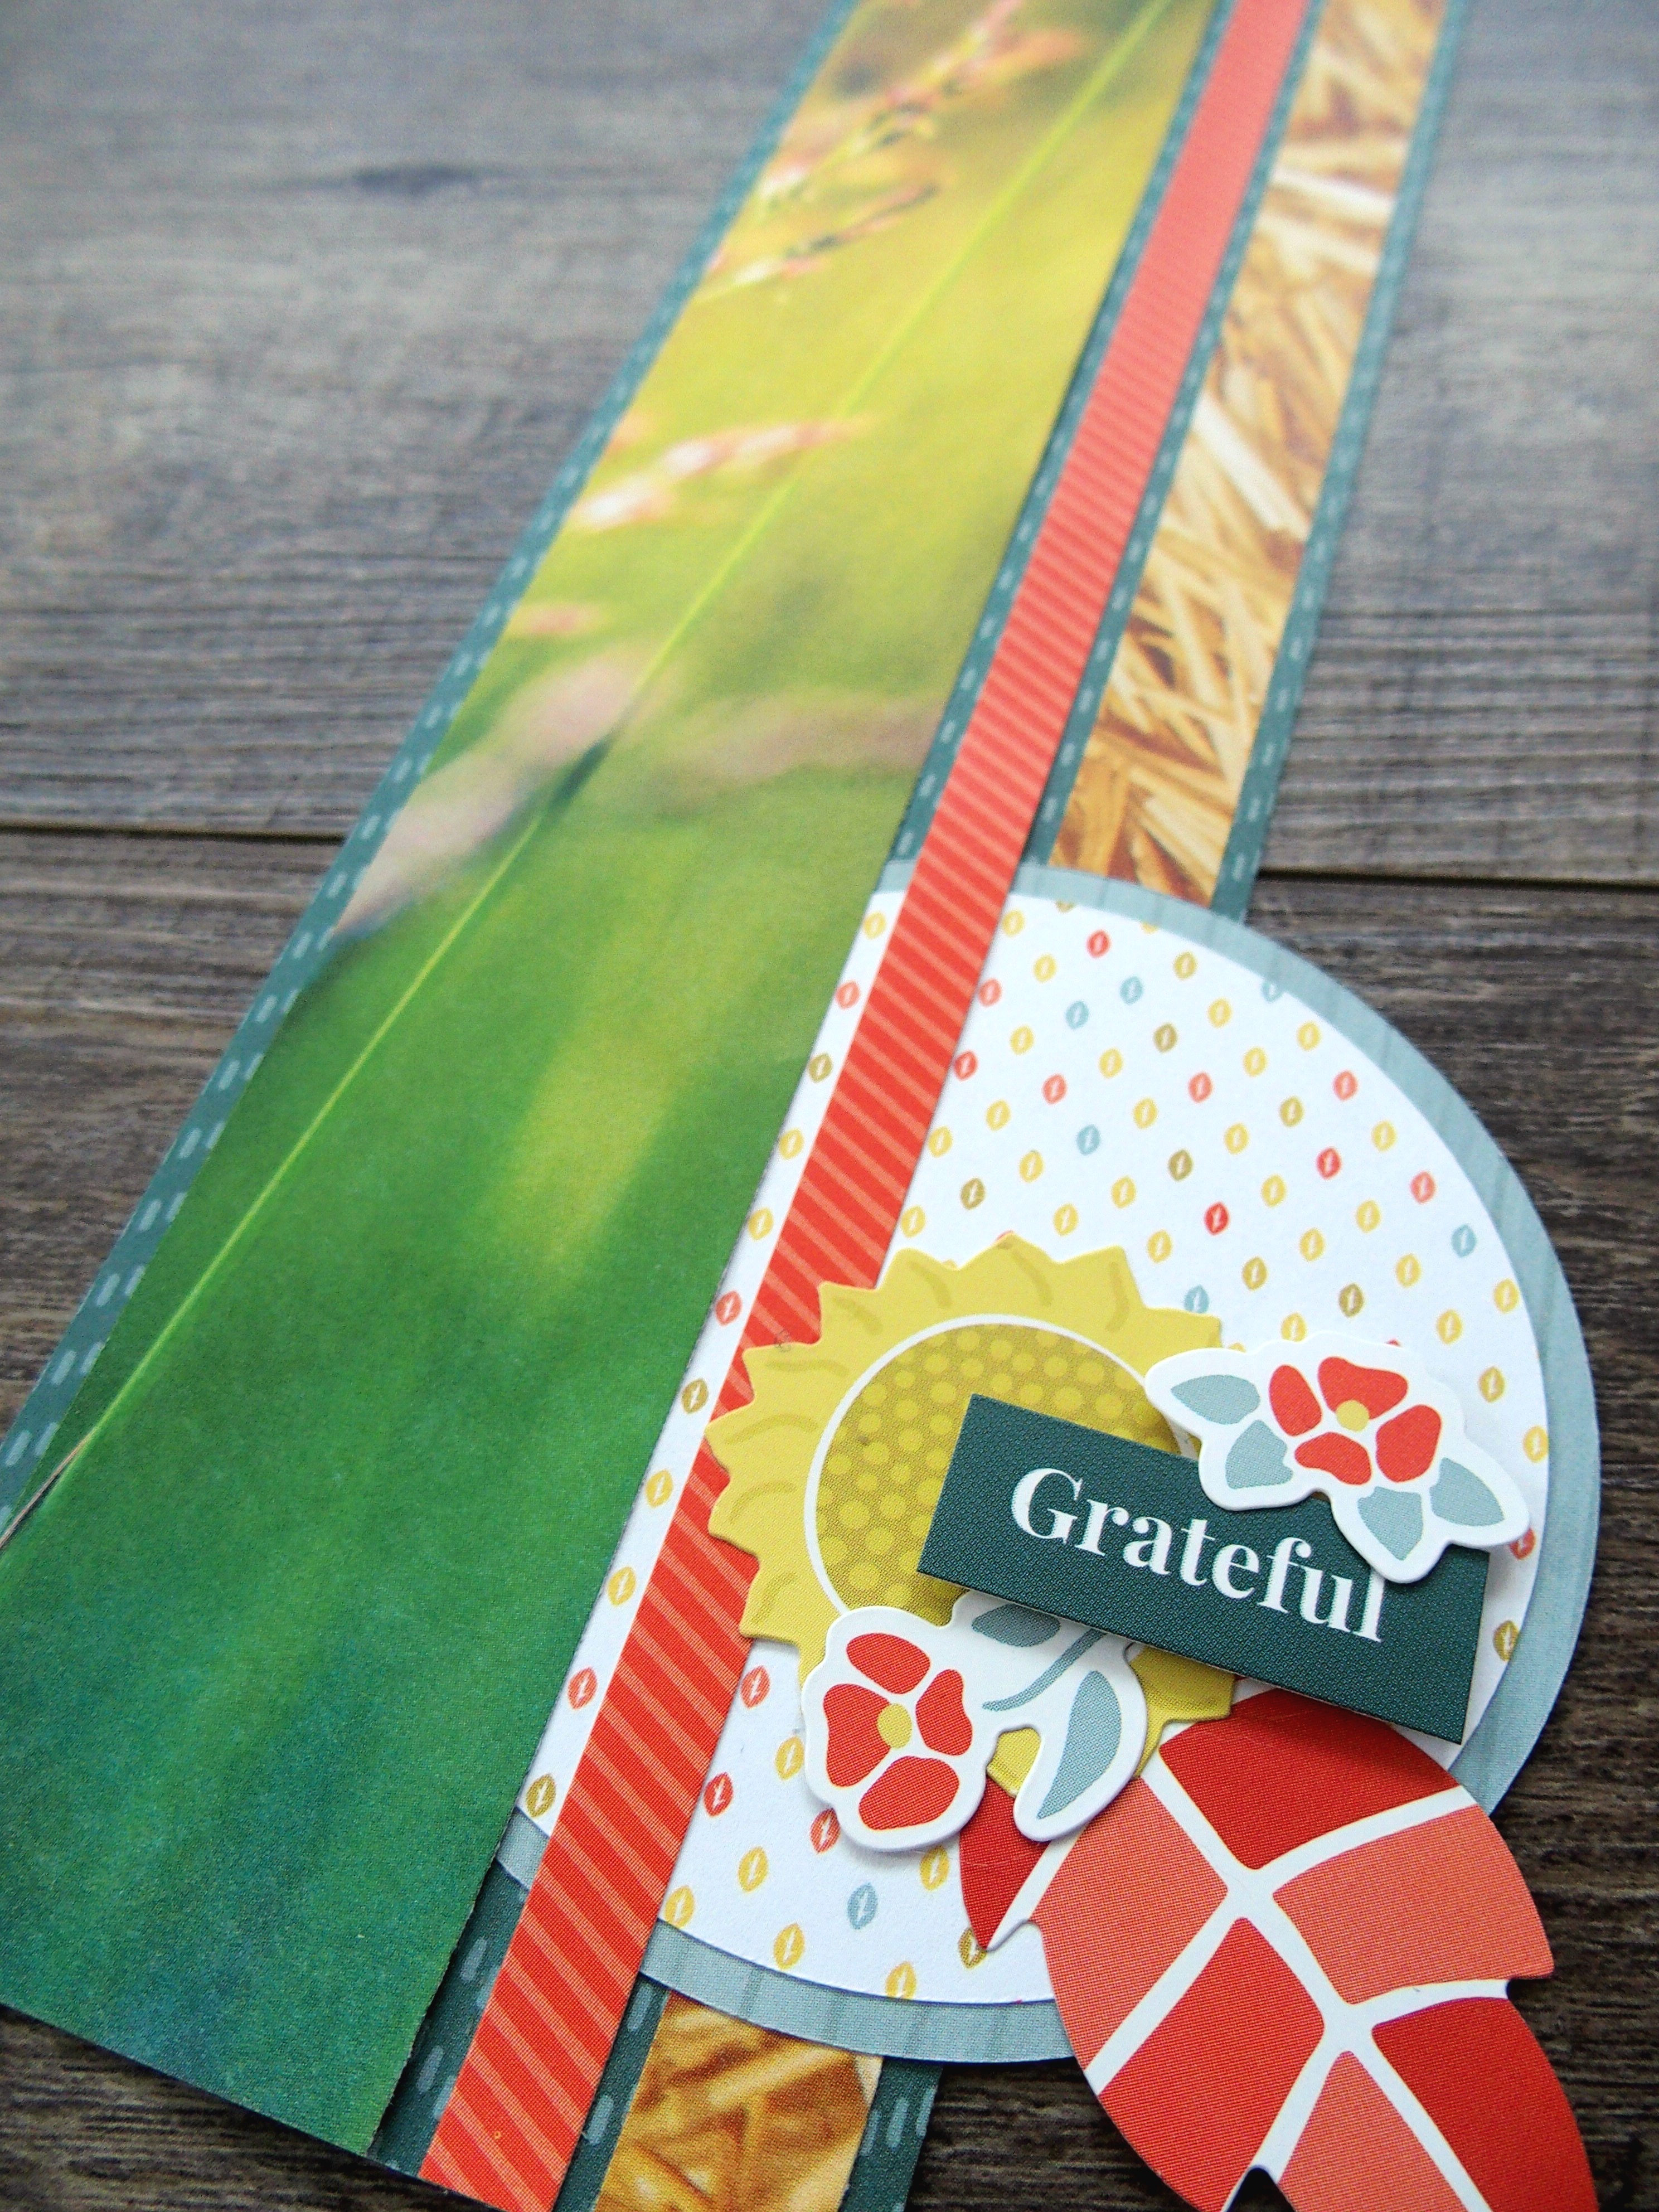
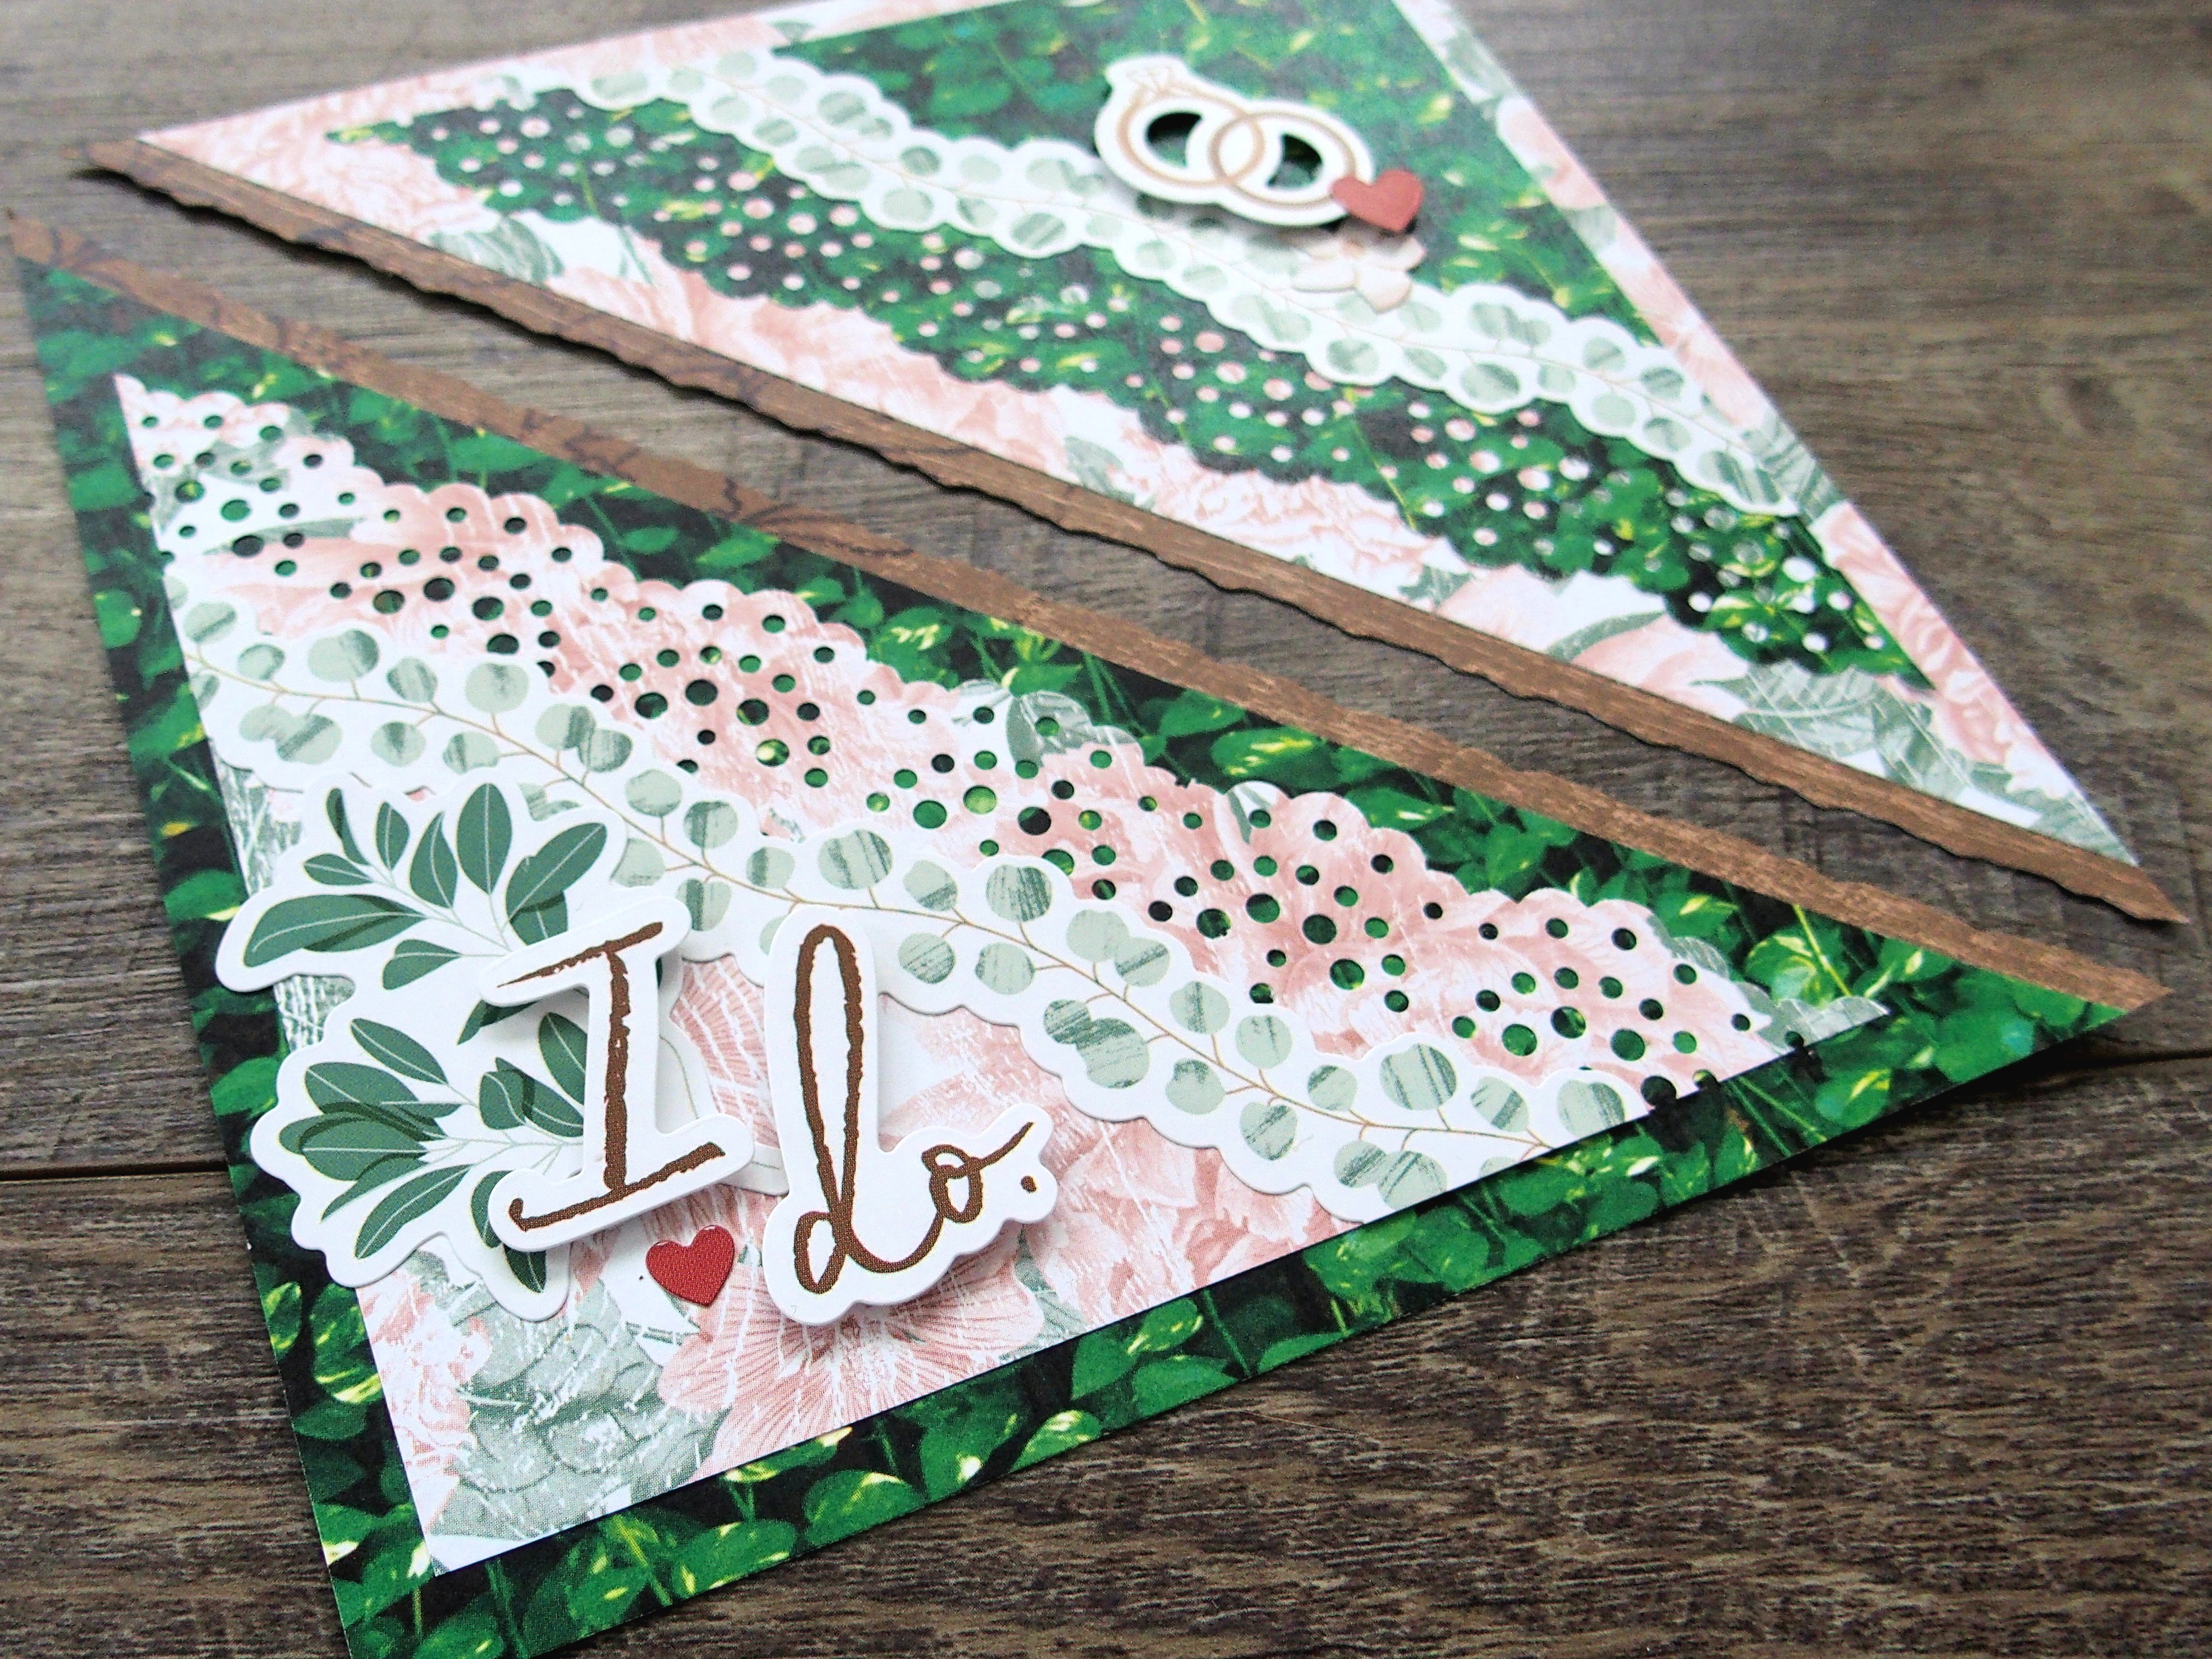
Border Recipe #3 – Corner Borders

Step 1: Cut a 6″ x 6″ square from a piece of Mellow Meadows patterned paper, then cut it in half corner to corner to make two triangles. Do the same with gold patterned paper from the Rainbow Rush Bold Paper Pack. Make one triangle of each paper a base.
Step 2: Starting in the middle, put the long side of each triangle in the Petal Frame Punch and punch. Move it both directions to punch the rest of the edges. Trim 1/4″ off of each of the straight sides. Mount the gold punched triangle on the meadow triangle and the meadow punched triangle on the gold triangle, as shown.
Step 3: Using the 12-inch Trimmer Victorian Blade, cut two 3/4″ strips of purple paper from the Rainbow Rush Bold Paper Pack. Put each in the middle along the straight edges of the base triangles and adhere to the back so just the victorian edge shows. Trim the excess.

Step 4: Cut two 4-1/4″ sections of a Rainbow Rush Layered Border Embellishment and adhere to the borders. Top with additional embellishments or stickers.
Out of all these different borders, which one do you like the most?! Comment below and let us know which variations you’ll be trying out!


Absolutely wonderful, Krislyn! These borders and corners bring out the combined beauty of so many CM Paper Packs. But asking me to choose a favorite one is like asking me to choose a favorite child! No can do.
I am going to use the last idea combining the Mellow Meadows with the Ever After Pack to make a wedding card…the dark green just brings out the tones in Ever After so effectively. Thanks for these ideas!
These are great ideas for creating interesting borders. It really doesn’t matter which paper packs or border punches you use. I just created the first idea using items from the Enchanted collection (probably been in my stash for 10 years). Thanks for giving us some lovely border ideas which have always been a great way to compliment photos.
I totally agree with Jeanne! I don’t like this series at all. It is garish and gaudy! I love borders and usually like the idea projects but these are over the top. And I have noticed that CM is leaning towards more garish prints and papers all the time. The photos are supposed to be the focus and some of the examples you can barely see the pictures. The trick for scrappers is to use these ideas and substitute some of your own papers and embellishments. If I bought every theme that CM brings out I’d drown in paper worse than I do now. Oh and probably have a divorce too, after 59 years married. LOL I do love the colors of cardstock though. Kudos for that.
Love the corner borders! I love the punches used for the corner borders.
I love these ideas. Photographic papers are so stunning and here is a way I can use them MORE on my layouts. Especially love the corners. This will help when I get to my photos of the Philly Flower Show.