June 10, 2020
Transform the What a Zoo Flip Card Kit Into a Fun DIY Mini Album
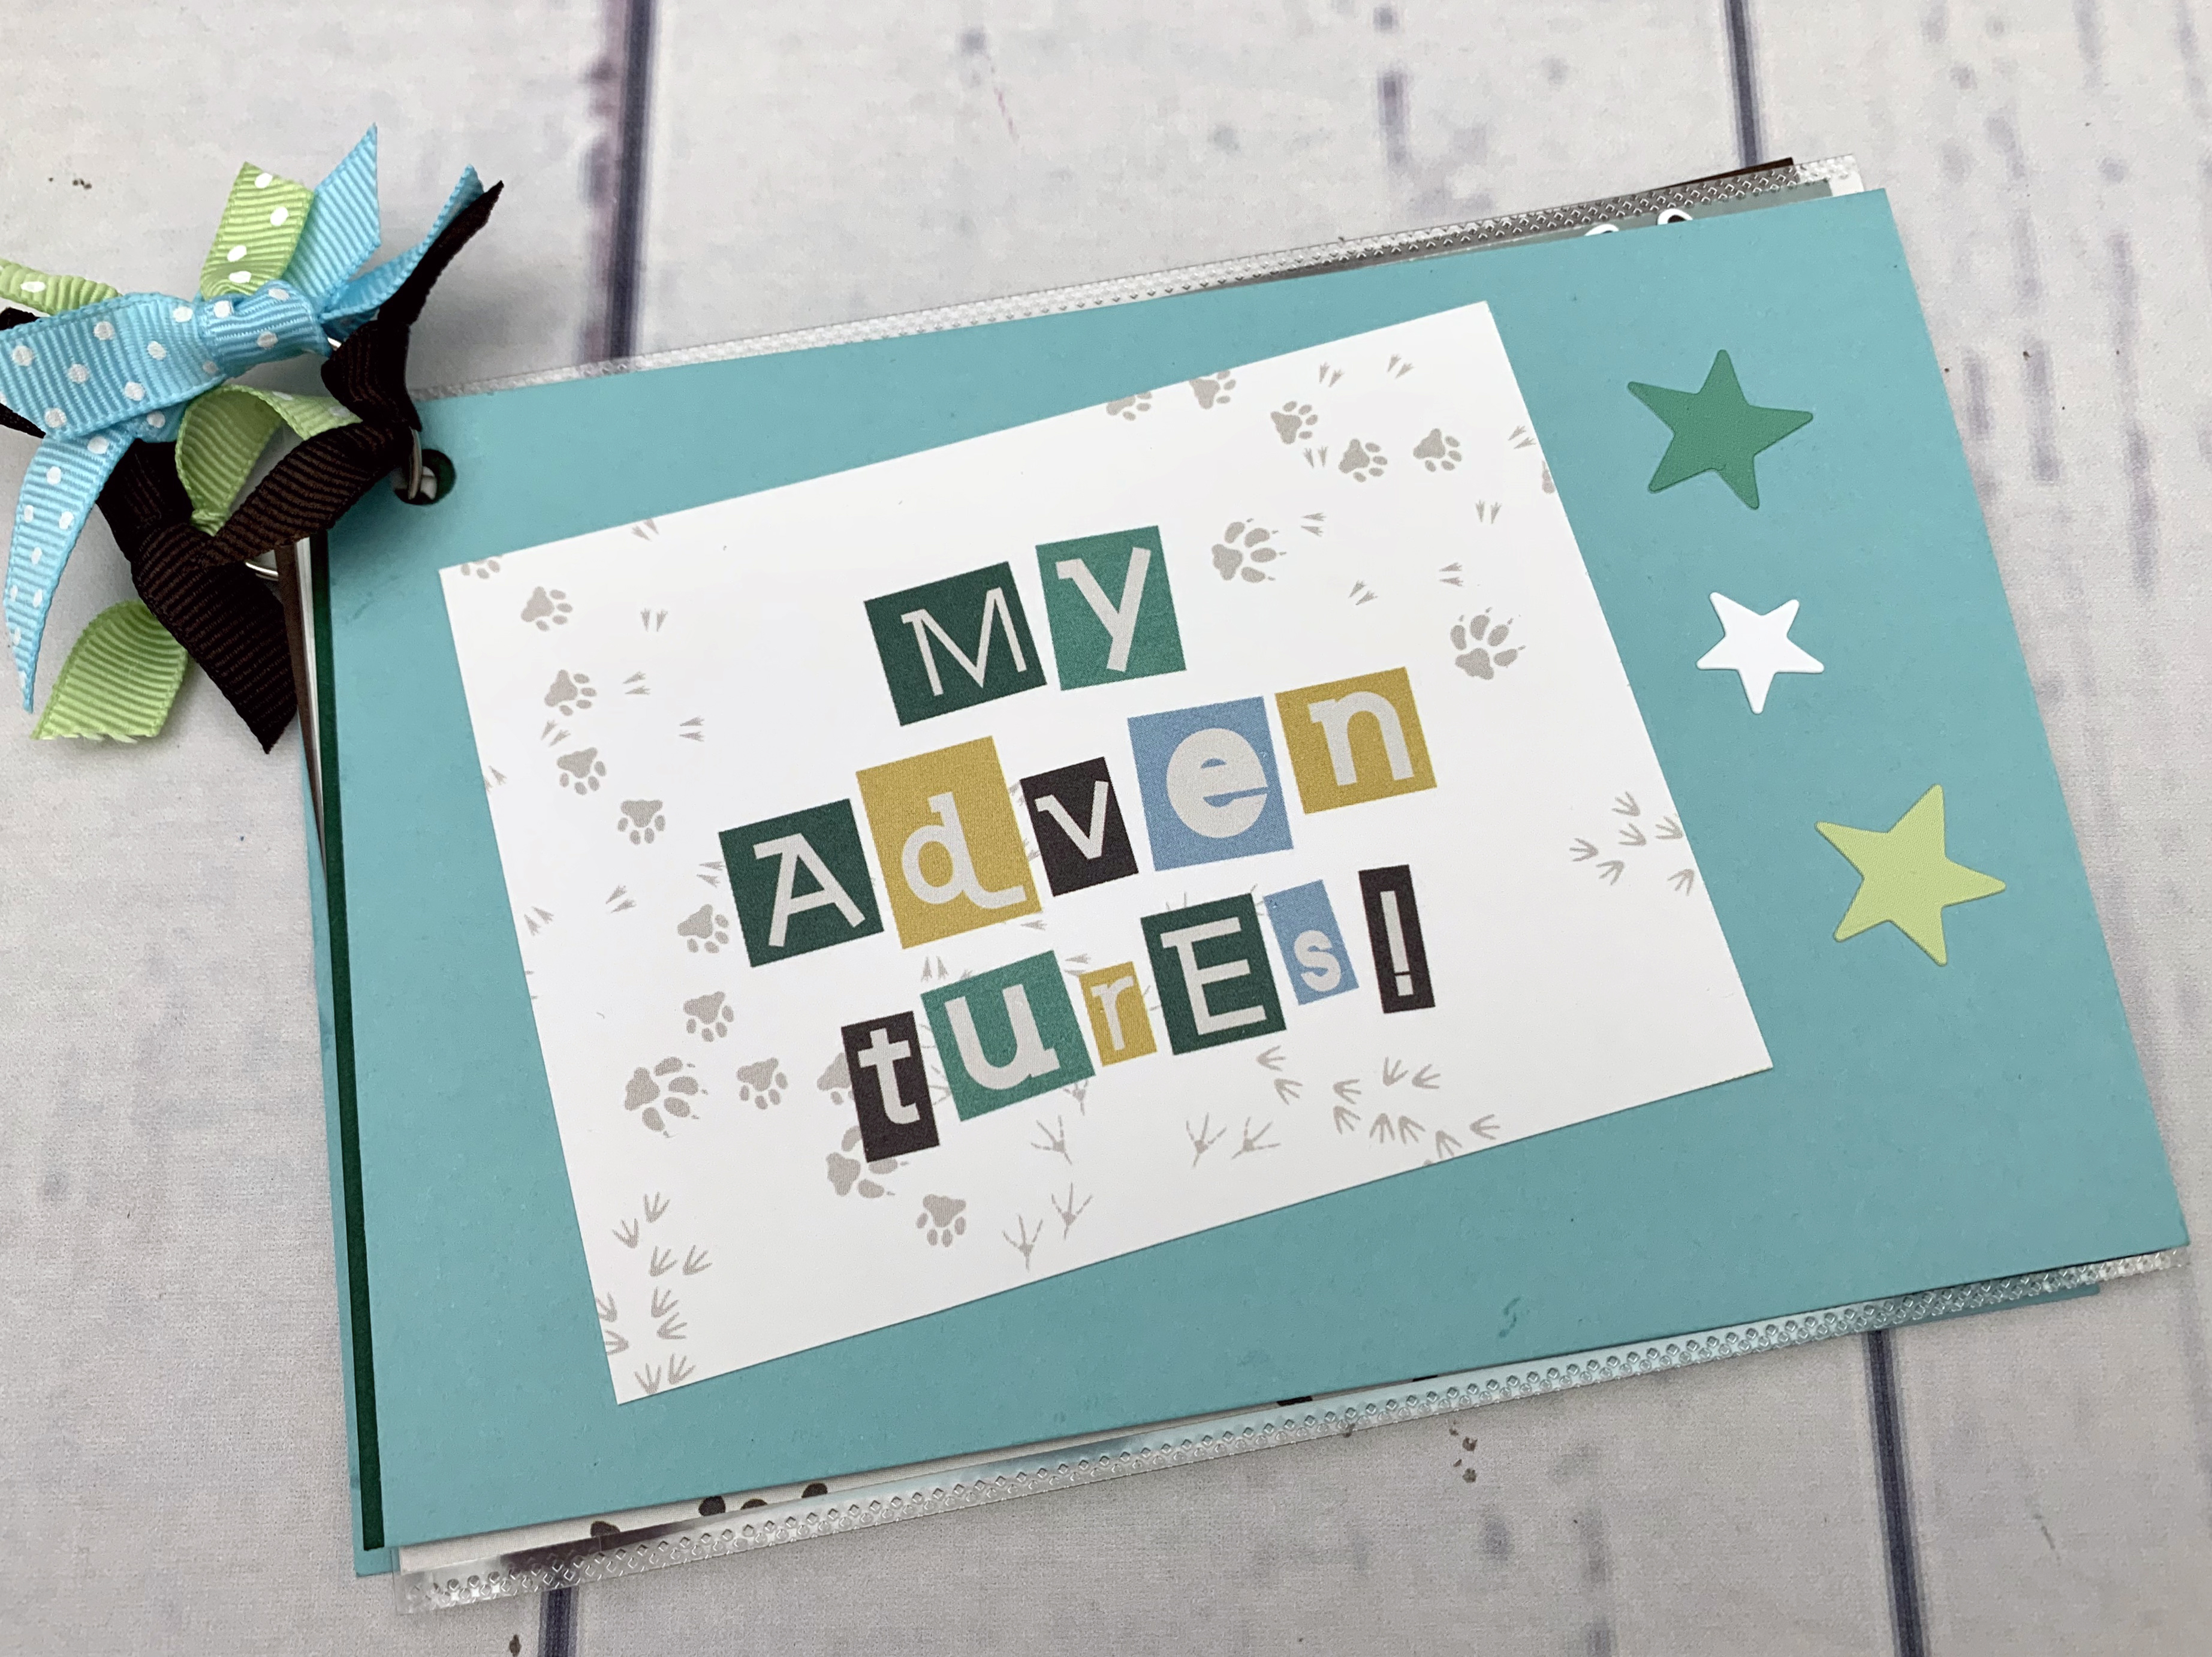
Have you ordered the What a Zoo Flip Card Kit yet? It’s wildly awesome — perfect for kiddos of all ages and comes with everything needed (including easy instructions) to create a fun card they can make and send to a loved one. What’s even cooler is by adding just a few more basic supplies, you can transform the card kit into your own DIY mini album! Check out the video or follow the instructions below to learn how!
To create this mini album, you will need:
- What a Zoo Flip Card Kit or (Shop Canada | Shop Australia)
- Coordinating Cardstock or (Shop Canada | Shop Australia)
- Three 4″ x 6″ pieces (White, Dark Green and Rich Brown were used in the sample)
- 12-inch Trimmer or (Shop Canada | Shop Australia)
- All-Purpose Scissors or (Shop Canada | Shop Australia)
- Tape Runner or (Shop Canada | Shop Australia)
- Hole Punch
- Small Key Ring or Binder Ring
- Coordinating Ribbon
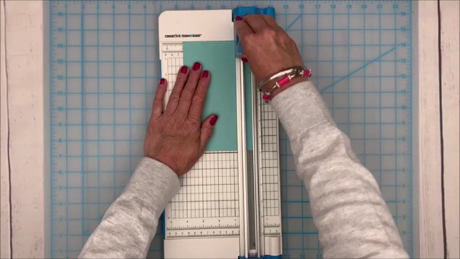
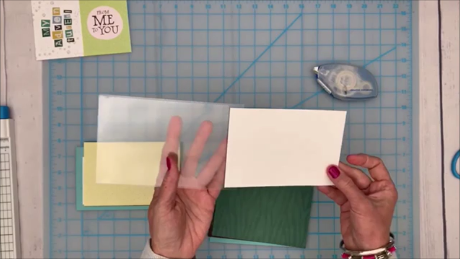
Step 1: Cut the Aqua Cardstock base from the kit into two 4″ x 6″ pieces with the 12-inch Trimmer. Keep the leftover scraps for decorating your mini album.
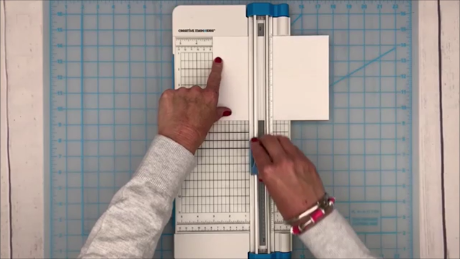
Step 2: Seal the envelope flap, then cut the closed envelope into two pockets. Place the upper edge of the envelope along the top of the 12-inch Trimmer and cut at 3″. Turn the remaining piece of the envelope 180 degrees and cut again at 3″. Discard the leftover middle piece.
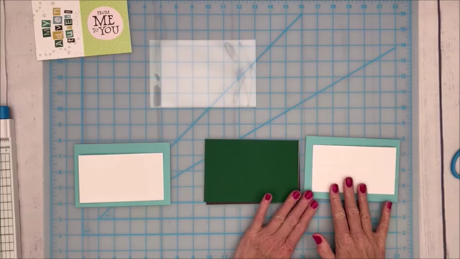
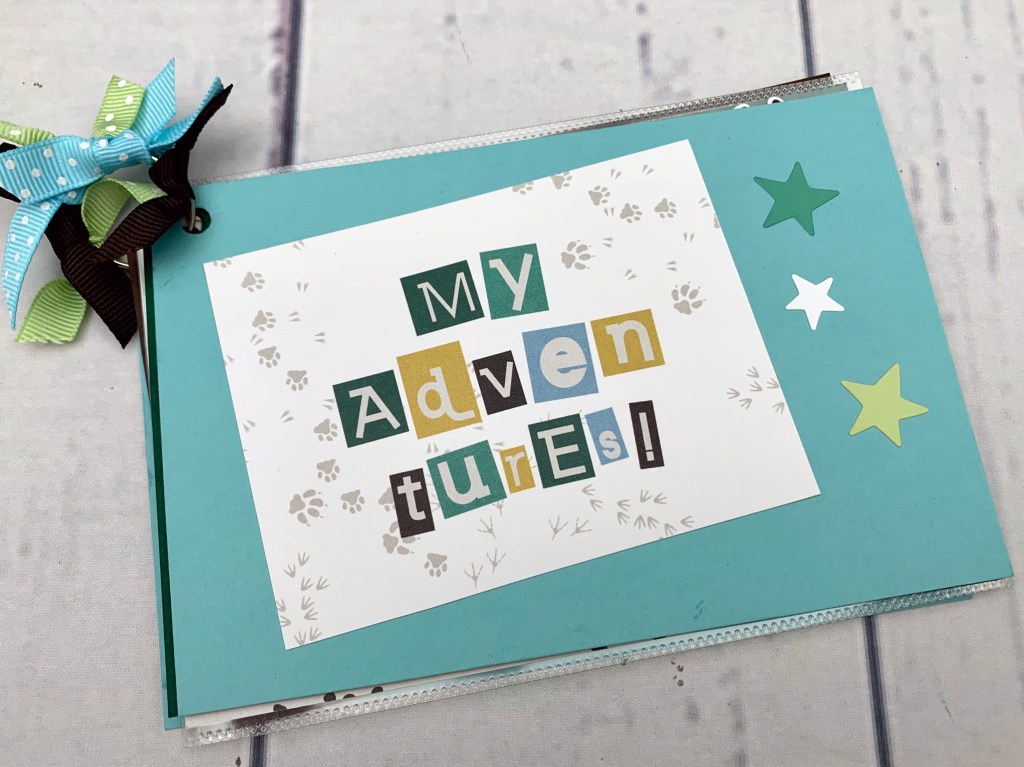
Step 3: Arrange and stack all your cardstock pieces and decorative cards in the page order you’d like for your album. Note: Set aside the card that has the “My Adventures”, “Hello”, “Love Hugs and Kisses” and “From Me to You” images on it to use later for decorating the mini album.
Step 4: Decide which pages you will adhere the envelope pockets to and which piece you will add the Peekaboo Pocket™ to. Adhere envelope pockets with a Tape Runner…
…and adhere the Peekaboo Pocket™ by removing the protective piece over the self-adhesive strip on the flap and place the adhesive strip along the back side of the card or cardstock.
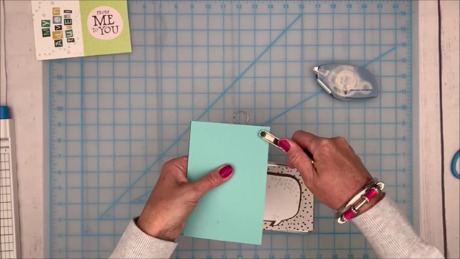
Step 5: Punch a hole in the upper left-hand corner of the album cover page. Use this as a template for all the other pages in your album.
Step 6: Once all pages are hole-punched, add them to the key ring/binder ring by opening the ring, placing it through the hole on each page and then closing the ring securely.

Step 6: Decorate! Add one of the smaller cards to the front page of the mini album as a title. Use the stickers, leftover, strips of Aqua Cardstock and the other small card to decorate each page inside of your mini album. Tie small lengths of ribbon onto the key ring/binder ring and trim each end on an angle with scissors for a fun finishing touch.
Kids can add their photos, tickets, memorabilia, notes and more to the DIY mini album to create a special handmade keepsake! What’s your favorite part about this mini album? Let us know in the comments below!

What a perfect little project!! Really really cute – thanks!!!
What a great kid’s class too! I can’t tell how the peek a boo pocket is opened to insert a photo in from the video sonar it is attached to the cardstock. How is the working?