July 30, 2020
Create Projects You’re Shore to Love With These Seashell Scrapbook Borders

Warm, summery weather can attract many people to the beaches and accompanying waterfronts for lots of activities — from sailing to jet skiing, surfing to lounging on a towel atop the sand. But some of us also like to stroll along the seashore looking for and discovering seashells! So to shell-ebrate these precious find-and-seek moments, check out these fun seashell scrapbook borders made by blog contributor Melissa Ullmann -— they’re the perfect accents to wave in more creativity!
To create this layout, you’ll need:
- Vitamin Sea Paper Pack or (Shop Canada | Shop Australia)
- Vitamin Sea Tone-on-Tone Paper Pack or (Shop Canada | Shop Australia)
- Vitamin Sea Stickers or (Shop Canada | Shop Australia)
- Vitamin Sea Embossed Embellishments or (Shop Canada | Shop Australia)
- 12×12 White Solid Cardstock or (Shop Canada | Shop Australia)
- 12×12 Navy Solid Cardstock or (Shop Canada | Shop Australia)
- Seashells Border Punch or (Shop Canada | Shop Australia)
- Double Heart Punch or (Shop Canada | Shop Australia)
- Medallion Frame Chain Border Maker Cartridge or (Shop Canada | Shop Australia)
- Original Border Maker System or (Shop Canada | Shop Australia)
- Circle Custom Cutting System Patterns or (Shop Canada | Shop Australia)
- Rectangle Custom Cutting System Patterns or (Shop Canada | Shop Australia)
- 12-inch Trimmer or (Shop Canada | Shop Australia)
- 12-inch Trimmer Wave Blade or (Shop Canada | Shop Australia)
- Tape Runner or (Shop Canada | Shop Australia)
- Repositionable Tape Runner Refill or (Shop Canada | Shop Australia)
- Foam Squares or (Shop Canada | Shop Australia)

Sky Above Border

Step 1: Cut a piece from Navy Cardstock to measure 12? x 3-3/4?.
Step 2: Cut a piece from White Cardstock to measure 12? x 3-1/4?.
Step 3: Punch five borders using the Seashells Border Punch from a variety of different shades of paper. Starting at the top, adhere the first border, then continue to adhere leaving about 1/4? or so off set between each of them as you layer.
Step 4: Trim the White Cardstock piece with the borders to clean up the ends. Adhere to the Navy Cardstock.
Step 5: With the Rectangle Custom Cutting System, cut a piece using the inside of the square with the Red Blade from the Navy Cardstock.
Step 6: Using the Rectangle Custom Cutting System, cut a piece using the inside of the square with the Green Blade from the “sand” paper. Adhere to the Navy Cardstock. Adhere to the border at and angle.
Step 7: Adhere a sticker to the top of the square using Foam Squares.
Step 8: Adhere gems.
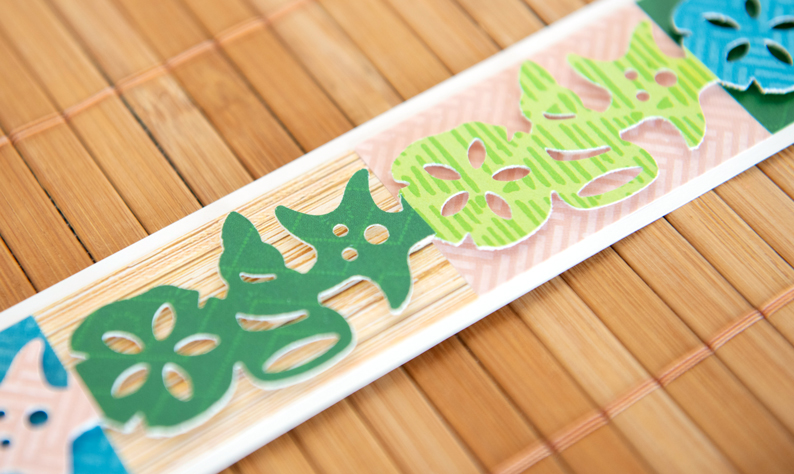
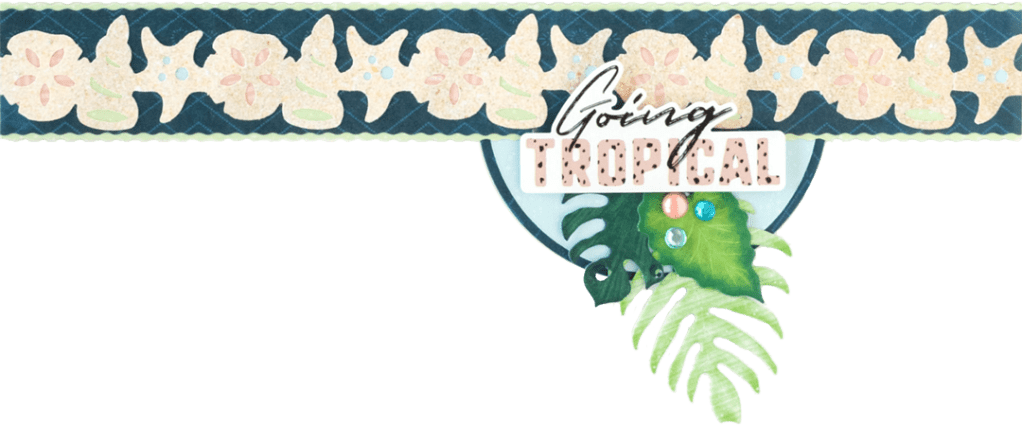
Going Tropical Border
Step 1: Cut a piece of light green paper with the Wave Blade on the Trimmer to measure 12? x 1-3/4?.
Step 2: Cut a piece of dark blue paper to measure 12? x 1-1/2? with the Wave Blade on the Trimmer. Adhere this piece to the light green piece.
Step 3: Using the Seashells Border Punch, punch a border from the “sand” paper.
Step 4: With the Circle Custom System Patterns, cut five pieces from the small circle pattern with the Blue Blade from the salmon-hued paper. Adhere these pieces behind the round shells.
Step 5: Using the Double Heart Punch, punch five hearts from the light green paper. Cut each heart in half. Back each of the long shells with a half of heart.
Step 6: Using the Medallion Frame Chain Border Maker Cartridge, punch a border from the light blue paper. Using the middle punched pieces, back the “star” seashells.
Step 7: Adhere to the border.
Step 8: With the Circle Custom System Patterns, cut on the outside of the small circle pattern with the Red Blade from the dark blue paper.
Step 9: With Circle Custom System Patterns, cut on the outside of the small circle pattern with the Green Blade from the light blue paper. Adhere to the dark blue circle. Trim about 2? from the top of the circle. Adhere behind the border.
Step 10: Adhere stickers and embellishments, using Foam Squares on some for added dimension.
Seashell Border

Step 1: Cut a piece of White Cardstock to measure 12? x 1-3/4?.
Step 2: Cut five pieces of paper from various shades to measure 2-7/16? x 1-1/2?. Adhere to the border.
Step 3: Using the Seashells Border Punch, punch a border from White Cardstock. Adhere to the border.
Step 4: Using the Seashells Border Punch with the five shades of previously used paper, punch one section of “punch” from each color. Adhere to the top of the White Cardstock border using Foam Squares. Vary the shades that are on top of each other.
Which one of these seashell scrapbook borders do you like the most? Comment below and let us know!

I really love the Going Tropical border . It has a great variety of depth to it!
What FUN shore borders to do and so creative!!! Love them!! I spent the afternoon making them and had so much fun!!! Thank you once again for your creative ideas Melissa Ullmann.
I like #3 the best. Simple and not too wide.
[…] Sketches #2 and #3 have us yearning for some sandy beaches! Want to learn how to create these tropical borders? Find out how in this blog post! […]
What FUN shore borders to do and so creative!!! Love them!! I spent the afternoon making them and had so much fun!!! Thank you once again for your creative ideas Melissa Ullmann.
[…] Border 3 (Vitamin Sea) on the CM Blog […]