October 15, 2020
Oh “Deer” — Christmas Is Here With These Reindeer Scrapbook Projects

We all know Dasher, Dancer, Prancer, Vixen, Comet, Cupid, Donner and Blitzen (and don’t forget Rudolph!), but which reindeer do you like best? Can’t decide? Why not create some reindeer scrapbook borders and a DIY reindeer card while you mull it over?
To create these projects you’ll need:
- Christmas Spirit Paper Pack or (Shop Canada | Shop Australia)
- Christmas Spirit Laser Cut Borders or (Shop Canada | Shop Australia)
- Christmas Spirit Embellishments or (Shop Canada | Shop Australia)
- Christmas Spirit Stickers or (Shop Canada | Shop Australia)
- Black, Crimson, Rich Brown, Scarlet & White Cardstock or (Shop Canada | Shop Australia)
- Reindeer Punch or (Shop Canada | Shop Australia)
- Santa’s Sleigh Punch or (Shop Canada | Shop Australia)
- 12-inch Trimmer with Deckle, Scallop, Scoring & Straight Blades or (Shop Canada | Shop Australia)
- 2-Way Corner Rounder or (Shop Canada | Shop Australia)
- Micro-Tip Scissors or (Shop Canada | Shop Australia)
- Tape Runner or (Shop Canada | Shop Australia)
- Foam Squares or (Shop Canada | Shop Australia)

Joy Border

Step 1: Using the 12-inch Trimmer with the Deckle Blade, cut a 12″ x 3-1/4″ strip of evergreen patterned paper for the base. With the Straight Blade, cut a 12″ x 2-3/4″ strip of Santa hat patterned paper and adhere on top of the base.
Step 2: Cut an 11-3/4″ x 2-1/8″ strip of wood grain patterned paper. Cut an 11-1/2″ x 1-7/8″ strip of music note patterned paper and adhere on top of wood grain strip. Adhere at an angle to the base as shown.
Step 3: Punch one sleigh and seven reindeer from Black Cardstock. Adhere to the border.
Step 4: Add stickers, popping the holly up with Foam Squares.
Here Comes Santa Claus Border

Step 1: Using the 12-inch Trimmer with the Scallop Blade, cut a 12″ x 3-3/8″ strip of medium green patterned paper for the base. With the Straight Blade, trim out the village scene from designer paper. Adhere to the base, 1/8″ from the top. Cut a 12″ x 1/4″ strip of candy stripe patterned paper and a 12″ x 1/2″ strip of wood grain patterned paper. Add both to the border as shown.
Step 2: Punch a sleigh from Scarlet and Crimson Cardstock. Layer and adhere to the border. Punch three reindeer from Rich Brown Cardstock and adhere to the border.
Step 3: Add stickers with Foam Squares.
Merry Christmas Card
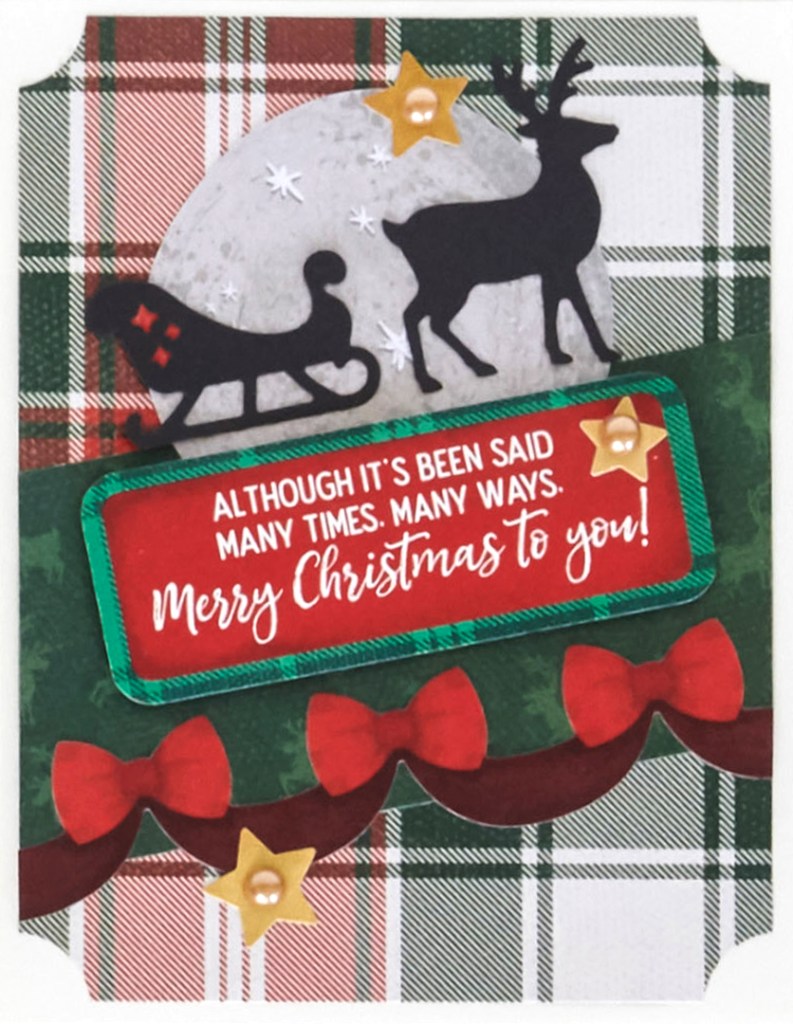
Step 1: Create the card base. Cut an 8-1/2″ x 5-1/2″ piece of White Cardstock. Using the 12-inch Trimmer with the Scoring Blade, score along the long edge at 4-1/4″ and fold in half.
Step 2: Cut a 4″ x 5-1/4″ piece of plaid patterned paper. Notch the corners with the 2-Way Corner Rounder. Cut a 4-1/2″ x 2″ piece of dark green patterned paper. Adhere to the plaid piece at an angle. Apply a 4-1/2″ section of ribbons sticker to the bottom of the piece. Trim the edges. Adhere to the card.
Step 3: Adhere the moon embellishment. Punch a sleigh with Black Cardstock (Optional: Adhere a little piece of Scarlet Cardstock behind the black sleigh as shown). Punch a reindeer with Black Cardstock and adhere to the border.
Step 4: Add stickers and gems as desired.
Which one of these reindeer scrapbook borders do you like the most? Also, will you be creating the DIY reindeer card this holiday season? Let us know in the comments below!

I love the card!
[…] Prance right into this blog post so you can get the instructions for making this card! […]
Some very thin strips of brown paper from the sleigh to the reindeer would enhance.
[…] comes Santa Claus… and here comes a beauty of a border for you to try […]