October 23, 2020
Prance Toward New Projects With These Reindeer Scrapbook Borders and Card

Who is excited about the Reindeer Punch? (We sure are!) This punch creates a reindeer-shaped cutout that swiftly prances (and adds festive detail!) on many projects. Take a look at these delightful reindeer scrapbook borders and DIY reindeer card and start coming up with your own ideas for how you can use the Reindeer Punch!

To create these borders and card, you will need:
- Christmas Spirit Paper Pack or (Shop Canada | Shop Australia)
- Christmas Spirit Embellishments or (Shop Canada | Shop Australia) — Returning December
- Christmas Spirit Stickers or (Shop Canada | Shop Australia)
- Christmas Spirit Laser Cut Borders or (Shop Canada | Shop Australia) — Returning December
- Dark Green, Rich Brown, Scarlet & Bronze Shimmer Solid Cardstocks or (Shop Canada | Shop Australia)
- Reindeer Punch or (Shop Canada | Shop Australia)
- Santa’s Sleigh Punch or (Shop Canada | Shop Australia)
- Custom Cutting System with the Circle Patterns or (Shop Canada | Shop Australia)
- 12-inch Trimmer with Straight & Scoring Blades or (Shop Canada | Shop Australia)
- Micro-Tip Scissors or (Shop Canada | Shop Australia)
- Tape Runner or (Shop Canada | Shop Australia)
- Repositionable Tape Runner or (Shop Canada | Shop Australia)
- Foam Squares or (Shop Canada | Shop Australia)
- Brown Dual-Tip Pen or (Shop Canada | Shop Australia)
Take a peek at how to use the Reindeer Punch in the video below!

’Tis The Season

Step 1: Cut a piece of Scarlet Solid Cardstock to measure 12″ x 3-1/4″.
Step 2: Cut a piece of the Rich Brown Solid Cardstock to measure 11-3/4″ x 3″. Using the Reindeer Punch, punch the reindeer from the cardstock, spaced evenly.
Step 3: Cut five pieces of various patterned papers. Adhere from the back side of the cardstock. Adhere this whole piece to the Scarlet Solid Cardstock base.
Step 4: Cut a piece from the candy stripe patterned paper to measure 12″ x 1/2″. Adhere just below the reindeer.
Step 5: Adhere stickers and embellishments, using Foam Squares on some for added dimension.
Joy Mantle Border

Step 1: Cut a piece from the Dark Green Solid Cardstock to measure 12″ x 2-1/2″.
Step 2: Cut a piece of the wood grain patterned paper to measure 12″ x 2″. Adhere to the border.
Step 3: Adhere the mantle laser cut border along the bottom edge of the wood grain patterned paper.
Step 4: Punch with the Santa’s Sleigh and Reindeer Punches, adhering behind the mantle slightly as shown.
Step 5: Adhere the bows and ribbons border sticker along the bottom edge of the mantle laser cut using Foam Squares.
Step 6: Using the Custom Cutting System with the small Circle Pattern, cut eight circles from the inside with the Red Blade with Dark Green Solid Cardstock. Adhere from the back side of the border, so the circle is behind each ribbon swoop.
Step 7: Adhere title sticker and gems.
Happy Holidays Card
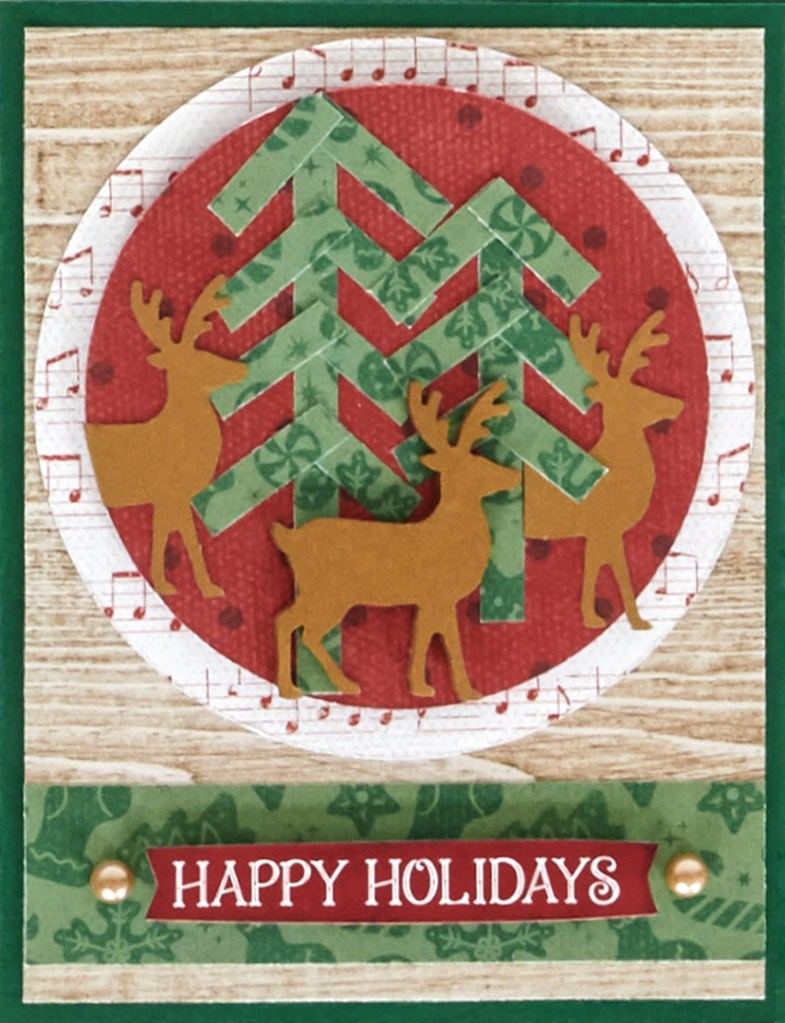
Step 1: Cut a piece of the Dark Green Solid Cardstock to measure 5-1/2″ x 8-1/2″. Score and fold in half.
Step 2: Cut a piece from the wood grain patterned paper to measure 4″ x 5-1/4″. Adhere to the card.
Step 3: Using the Custom Cutting System with the outside of the small Circle Pattern and the Red Blade, cut a circle from the white music patterned paper. Adhere to the card.
Step 4: Using the Custom Cutting System with the inside of the large Circle Pattern and Red Blade, cut a circle from the red dot patterned paper.
Step 5: Cut several strips from the medium green patterned paper to measure 1/4″ wide. Trim to your desired length and use the strips to create two trees as shown.
Step 6: Punch three reindeer using the Reindeer Punch from Bronze Shimmer Cardstock. Adhere to the card, trimming off any excess that hangs off the circle.
Step 7: Cut a strip from the medium green patterned paper to measure 4″ x 1″. Adhere to the card.
Step 8: Adhere sticker title and gems.
Which one of these reindeer scrapbook borders do you like most? Will you be trying out the DIY reindeer card? Tell us in the comments below!

[…] another border! Take a look at this blog post to give it a jolly […]
[…] Here’s another beautiful border! Bring on some reindeer romp to your layouts by following the instructions in this blog post! […]