June 17, 2026
A Bloom-Worthy Layout Using the Hydrangea Haven Collection
The Hydrangea Haven collection is a beautiful match for everyday memories you don’t want to forget. Think garden walks, time spent outdoors, family gatherings in the backyard, or those quiet in-between moments that don’t always get a photo album of their own. The soft florals and layered details make it easy to let your memories “bloom” on the page, from big celebrations to the everyday moments in between.
To create this layout, you will need:
- Hydrangea Haven Designer Paper
- Hydrangea Haven Tone-on-Tone Paper
- Hydrangea Haven Mat Pack
- Hydrangea Haven Stickers
- Hydrangea Haven Embellishments
- Embossed Leaves Punch
- Hydrangea Blossoms BMC
- Parakeet Shimmer Paper
- Original Border Maker System
- CCS Bundle
- 12-inch Trimmer
- 2-Way Corner Rounder
- Repositionable Tape Runner
- Precision Point Adhesive Pen
- Foam Squares
- Navy Dual-Tip Pen
- All-Purpose Scissors
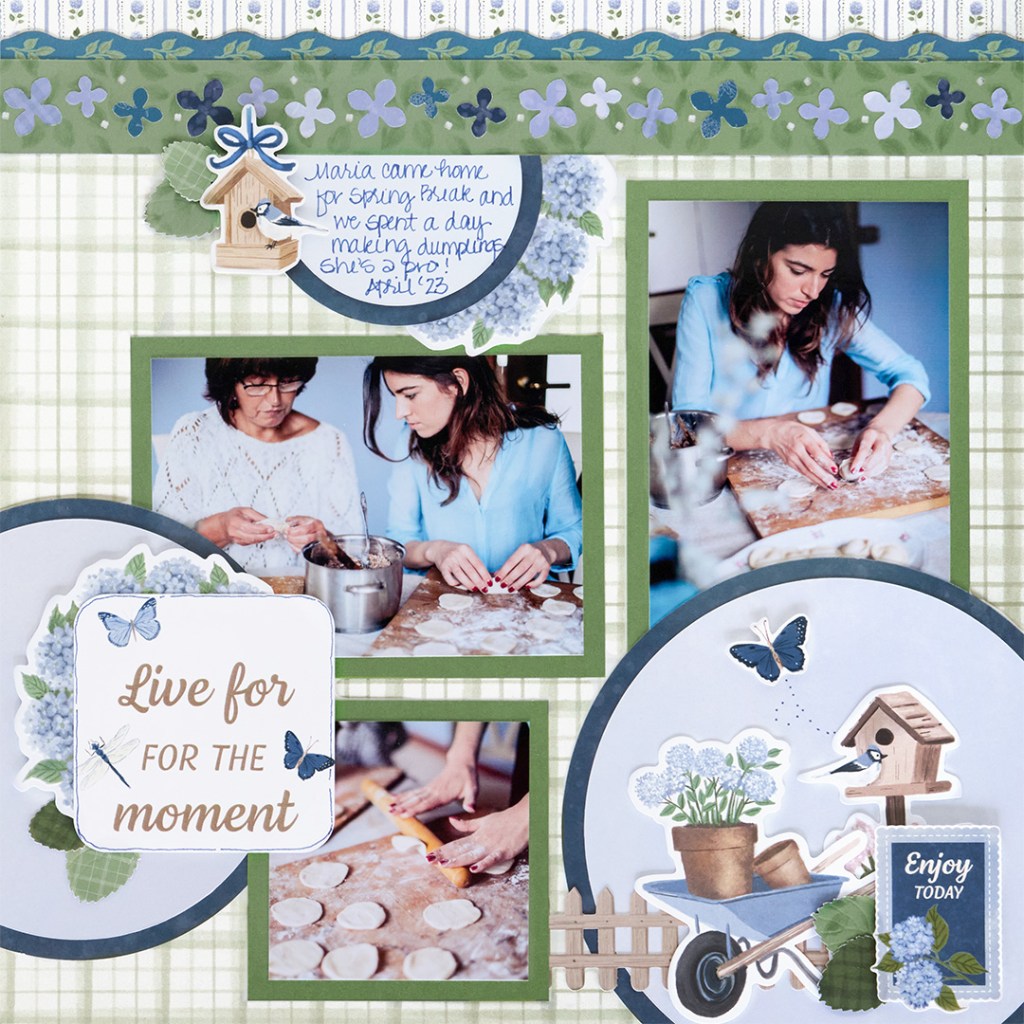

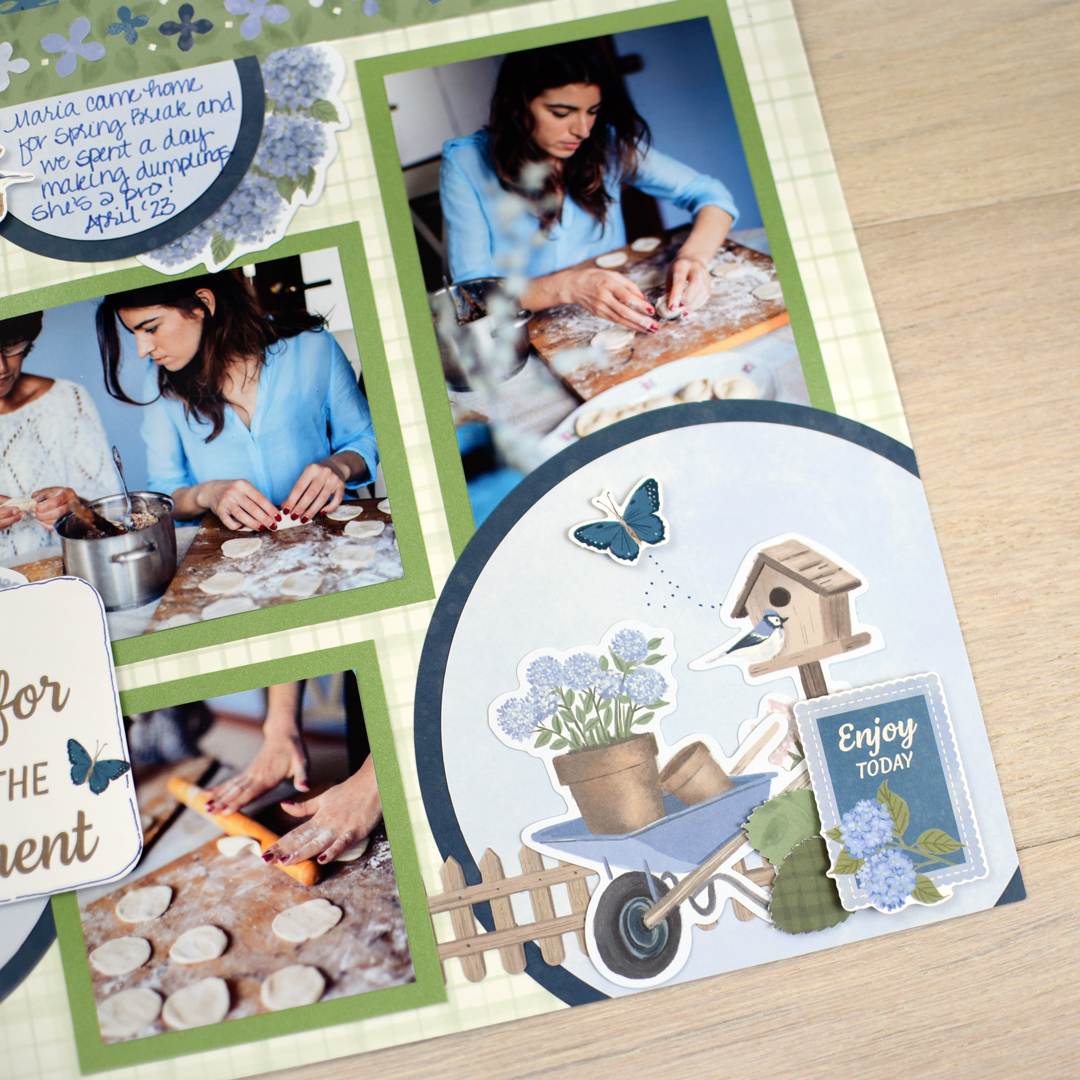
Step 1: Use a piece of light green grid designer paper for the base for this layout.
Step 2: Cut a 12″ x 3/4″ strip of floral designer paper and adhere it along the top edge of the layout. Place a border sticker over the seam where the papers meet to create a clean, finished line.
Step 3: Using green leaf designer paper, punch a border along the edge using the Hydrangea Blossoms Border Maker Cartridge. Trim the border to 1-1/8″ wide and adhere it below the floral strip. Punch additional borders from assorted designer papers, then use the knock-out pieces to fill in and layer onto the border using the Precision Point Adhesive Pen for added detail.
Step 4: Using the navy tonal paper cut a circle using the outside of the large CCS circle pattern, using the blue blade.
Step 5: Using the light blue tonal paper, cut a circle using the outside of the large CCS circle pattern with a red blade. Adhere this circle to the larger circle, then adhere to the lower right corner of the layout as shown. Cut off any excess using a scissors.
Step 6: Using navy tonal paper, cut a circle using the outside of the medium CCS circle with the blue blade. Using the light blue tonal paper, cut a circle using the outside of the medium CCS circle with the red blade. Adhere this circle to the larger circle, then adhere to the left side of the layout as shown. Cut off any excess using scissors.
Step 7: Using the navy tonal paper, cut a circle using the inside of the large CCS circle with the red blade. Using the light blue tonal paper, cut a circle using the inside of the large CCS circle with the blue blade. Adhere this circle to the larger circle, then cut in half. Adhere this piece to the lower edge of the border about 2/3 of the way from the left edge of the layout as shown.
Step 8: Cut photo mats using the Parakeet Shimmer Paper to measure: (1) 5-1/2″ x 4″, (1) 4″ x 5-1/2″ and (1) 3-1/2″ x 3-1/2″. Place and adhere mats on the layout as shown, then add photos sized 5″ x 3-1/2″, 3-1/2″ x 5″, and 3″ x 3″ to complete each mat.
Step 9: Cut a 3″ x 3″ title mat, round the corners using the 2-Way Corner Rounder, and adhere the title to the layout.
Step 10: Finish by adding stickers and embellishments as shown. Use the Embossed Leaves Punch to punch several leaves from assorted green designer papers, then tuck and adhere them into embellishment clusters for added texture and dimension. Journal as desired.
This layout is a great way to capture everyday memories with a fresh, garden-inspired feel. A creative way to let your memories grow into a page you’ll want to cherish forever. Happy scrapping!
P.S. Are YOU a member of the Virtual Crop Group? It’s your go-to place for MONTHLY Virtual Crops, MONTHLY Completed Album Challenges, QUARTERLY Secret Box Openings with project tutorials and so much more! We hope you’ll join our community of more than 50,000 fellow memory-keeping enthusiasts — you’ll feel right at home!

