February 5, 2021
Sprinkle in Sweetness With These Cake Scrapbook Projects
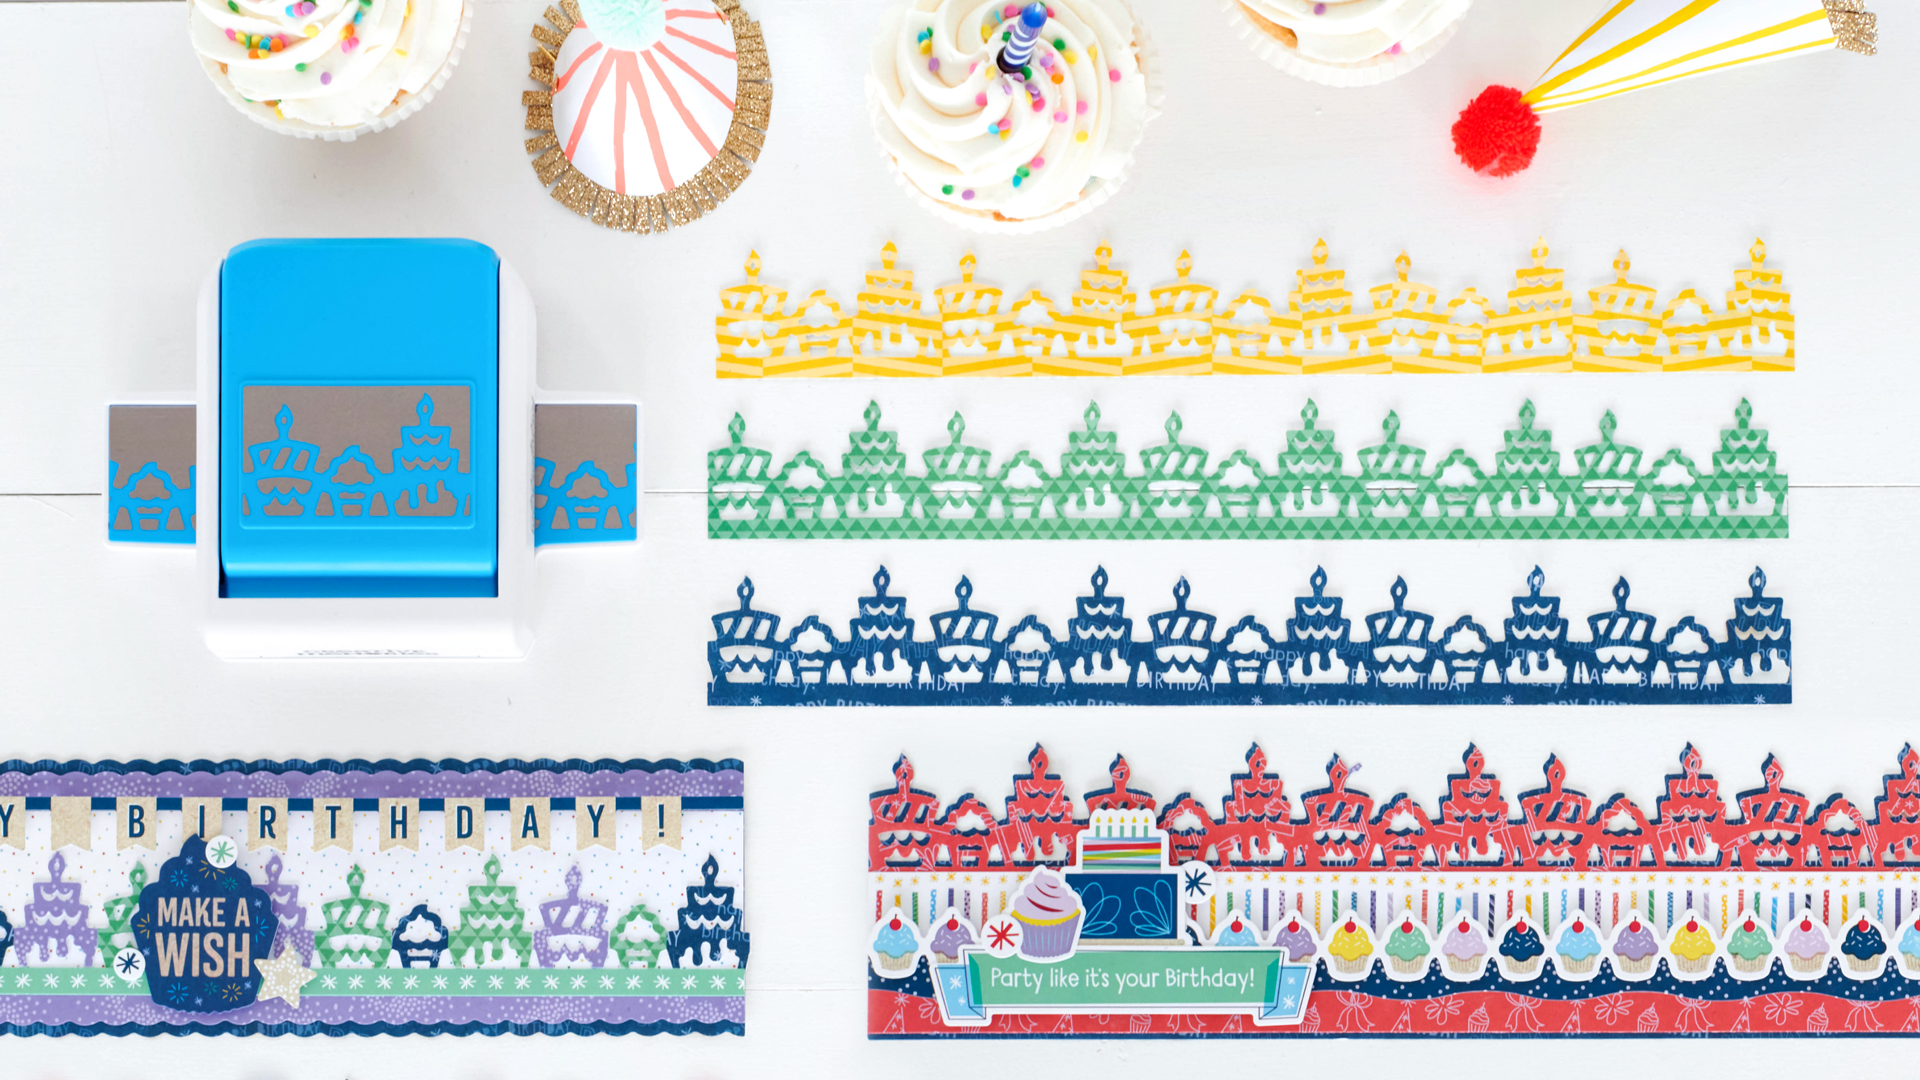
When you’re creating and designing a layout, experienced crafters know that a good-looking border is the icing on the cake. And with the new Cake Border Punch, you’re in for some extra sweet surprises that will light up your layouts! Get ready, for today’s blog features three cake scrapbook borders and a DIY birthday card to whisk in innovative ideas for your next layout or project! (P.S. They’re all a piece of cake to make!!
To create these borders and card, you will need:
- Party Time! Bright Paper Pack or (Shop Canada | Shop Australia)
- Party Time! Blue Paper Pack or (Shop Canada | Shop Australia)
- Party Time! Variety Mat Pack or (Shop Canada | Shop Australia)
- Party Time! Stickers or (Shop Canada | Shop Australia)
- Party Time! Border Stickers or (Shop Canada | Shop Australia)
- Party Time! Embellishments or (Shop Canada | Shop Australia)
- Aqua, Goldenrod, Navy, Scarlet & White Solid Cardstocks or (Shop Canada | Shop Australia)
- Cake Border Punch or (Shop Canada | Shop Australia)
- Custom Cutting System with Circle Patterns or (Shop Canada | Shop Australia)
- 12-inch Trimmer with Straight, Scallop & Scoring Blades or (Shop Canada | Shop Australia)
- Micro-Tip Scissors (Shop Canada | Shop Australia) — Returning March
- Tape Runner or (Shop Canada | Shop Australia)
- Repositionable Tape Runner or (Shop Canada | Shop Australia)
- Foam Squares or (Shop Canada | Shop Australia)
Check out the Cake Border Punch in action in the video below!
Happy Birthday Border
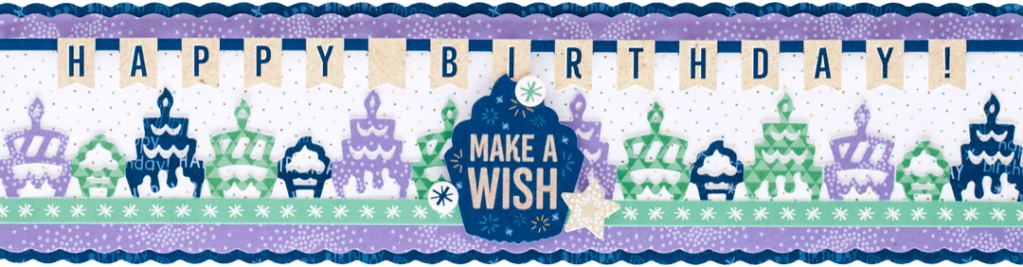
Step 1: Using the 12-inch Trimmer with the Scallop Blade, cut a 12″ x 3″ strip of blue Happy Birthday wishes patterned paper for the base. Again using the Scallop Blade, cut a 12″ x 2-3/4″ strip of purple stars paper and adhere on top of the base. With the 12-inch Trimmer with the Straight Blade, cut a 12″ x 2″ strip of white “confetti” dots paper and mount on top. Adhere a mint green border sticker at the bottom edge of the white confetti dots strip.
Step 2: Punch a border using the Cake Border Punch with White Solid Cardstock. Trim off just the cakes. Punch a border using the Cake Border Punch with green triangles, purple stars and blue Happy Birthday wishes papers. Trim out individual cakes and adhere them to the cardstock border, alternating shades. Adhere to the border, just above the mint green border sticker.
Step 3: Add additional stickers, popping them up with Foam Squares for added dimension.
Party Like It’s Your Birthday Border
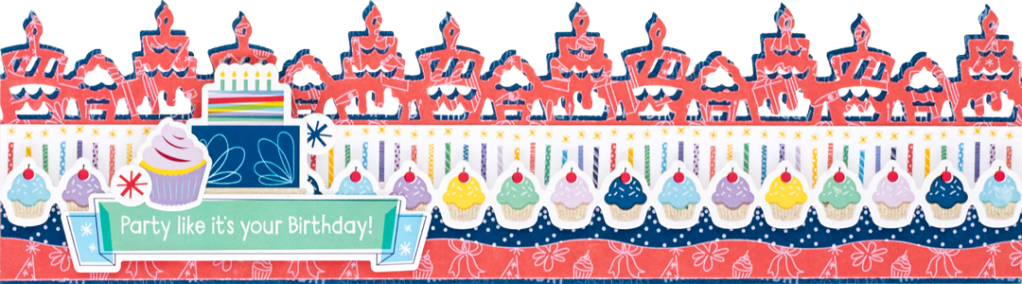
Step 1: Punch a border using the Cake Border Punch with blue Happy Birthday wishes patterned paper. Trim to measure 12″ x 3-1/4″ to create the base. Punch a border using the Cake Border Punch with red party icons patterned paper. Trim to measure 12″ x 3-1/8″ and adhere on top of the base, slightly offset.
Step 2: Cut a row of candles from the candles paper and adhere on the border. Place a blue wavy border sticker underneath.
Step 3: Top with additional stickers, popping them up with Foam Squares for added dimension.
Make a Wish Border
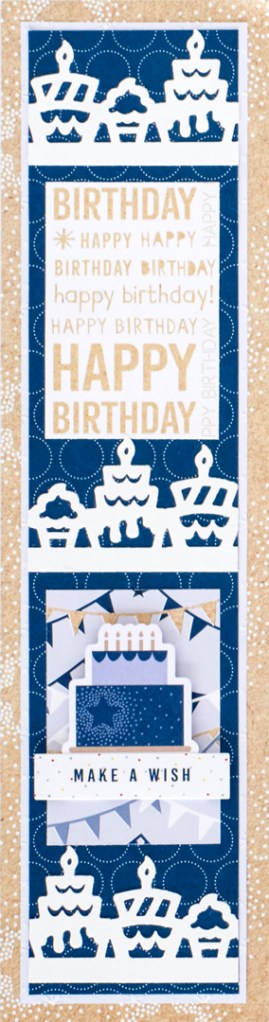
Step 1: Cut a 12″ x 3″ strip of kraft star dots patterned paper for the base.
Step 2: Cut a 2-5/8″ x 11-1/2″ strip of periwinkle patterned paper and adhere to the base. Cut a 2-3/8″ x 11-1/4″ strip of navy circles patterned paper and mount on top.
Step 3: Punch a border using the Cake Border Punch with White Solid Cardstock. Cut out three 2-3/8″ sections and mount on the border as shown.
Step 4: Cut out a 2″ x 3″ section of kraft Happy Birthday wishes patterned paper and a 2″ x 3″ section of periwinkle bunting patterned paper and adhere to the border, in between cake sections as shown.
Step 5: Add stickers, popping them up with Foam Squares for added dimension.
Treat Yo’Self Card
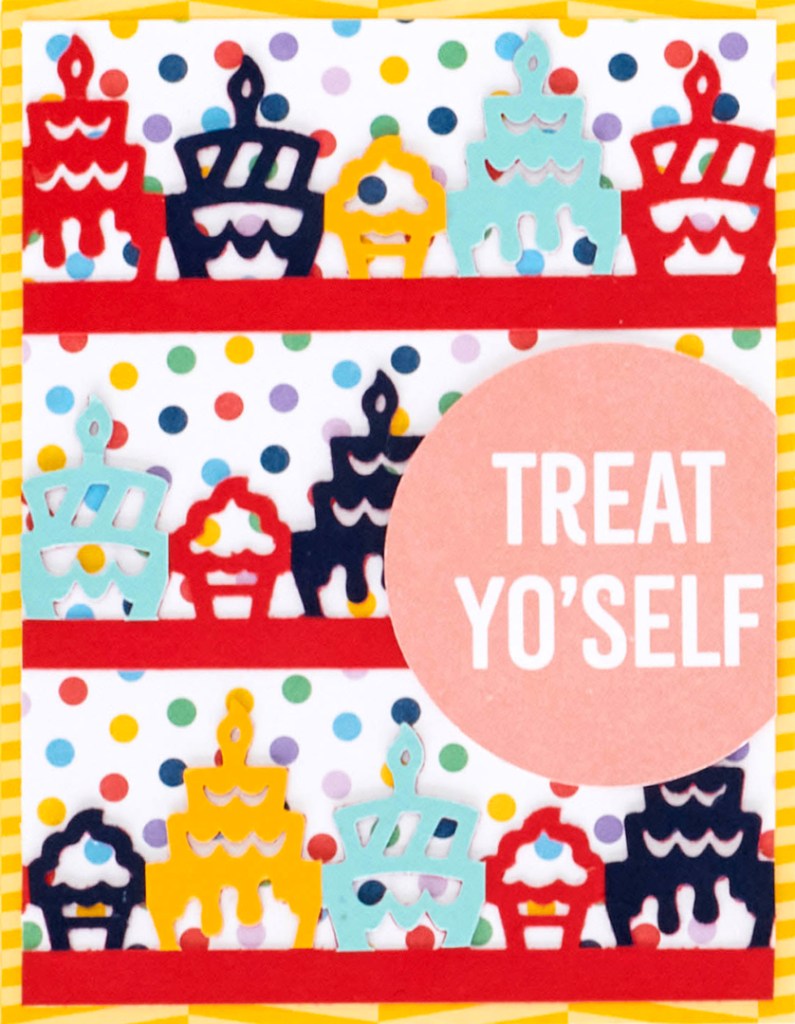
Step 1: Create the card base. Cut an 8-1/2″ x 5-1/2″ piece of White Solid Cardstock. Using the 12-inch Trimmer with the Scoring Blade, score along the long edge at 4-1/4″ and fold in half.
Step 2: Cut a 4-1/4″ x 5-1/2″ piece of yellow chevron patterned paper and adhere to the front of the card. Cut a 4″ x 5-1/4″ piece of bold polka dots patterned paper and mount on top.
Step 3: Punch a border using the Cake Border Punch with Scarlet Solid Cardstock. Punch a border using the Cake Border Punch with Navy, Goldenrod and Aqua Cardstocks and trim out individual cakes. Adhere to the scarlet border, alternating hues as shown. Cut scarlet border in 4″ segments and adhere to the card.
Step 4: Using the inside of the medium Custom Cutting System Circle Pattern and the Red Blade, cut out the “Treat yo’self” section of the variety mat. Trim off the right edge and adhere to the card as shown.
Which one of these cake scrapbook projects do you like the most? Do you prefer the cake scrapbook borders or the DIY birthday card? Let us know in the comments below!

[…] This border is the icing on the creative cake for your next layout! You can learn how to create it (and more!) by checking out this blog post! […]
Is there anywhere I can find the specific sizes of circles the Custom Cutting system can make? I am considering buying the circle kit, but I need to know what the actual possible sizes are. Thank you!
Cute
[…] Now these are some crafty treats! Find instructions to create this border and card by following along to this blog post! […]