May 7, 2021
Take a Mom-ent to Celebrate a Wonder Woman — Mother’s Day Scrapbook Layout and DIY Mother’s Day Card
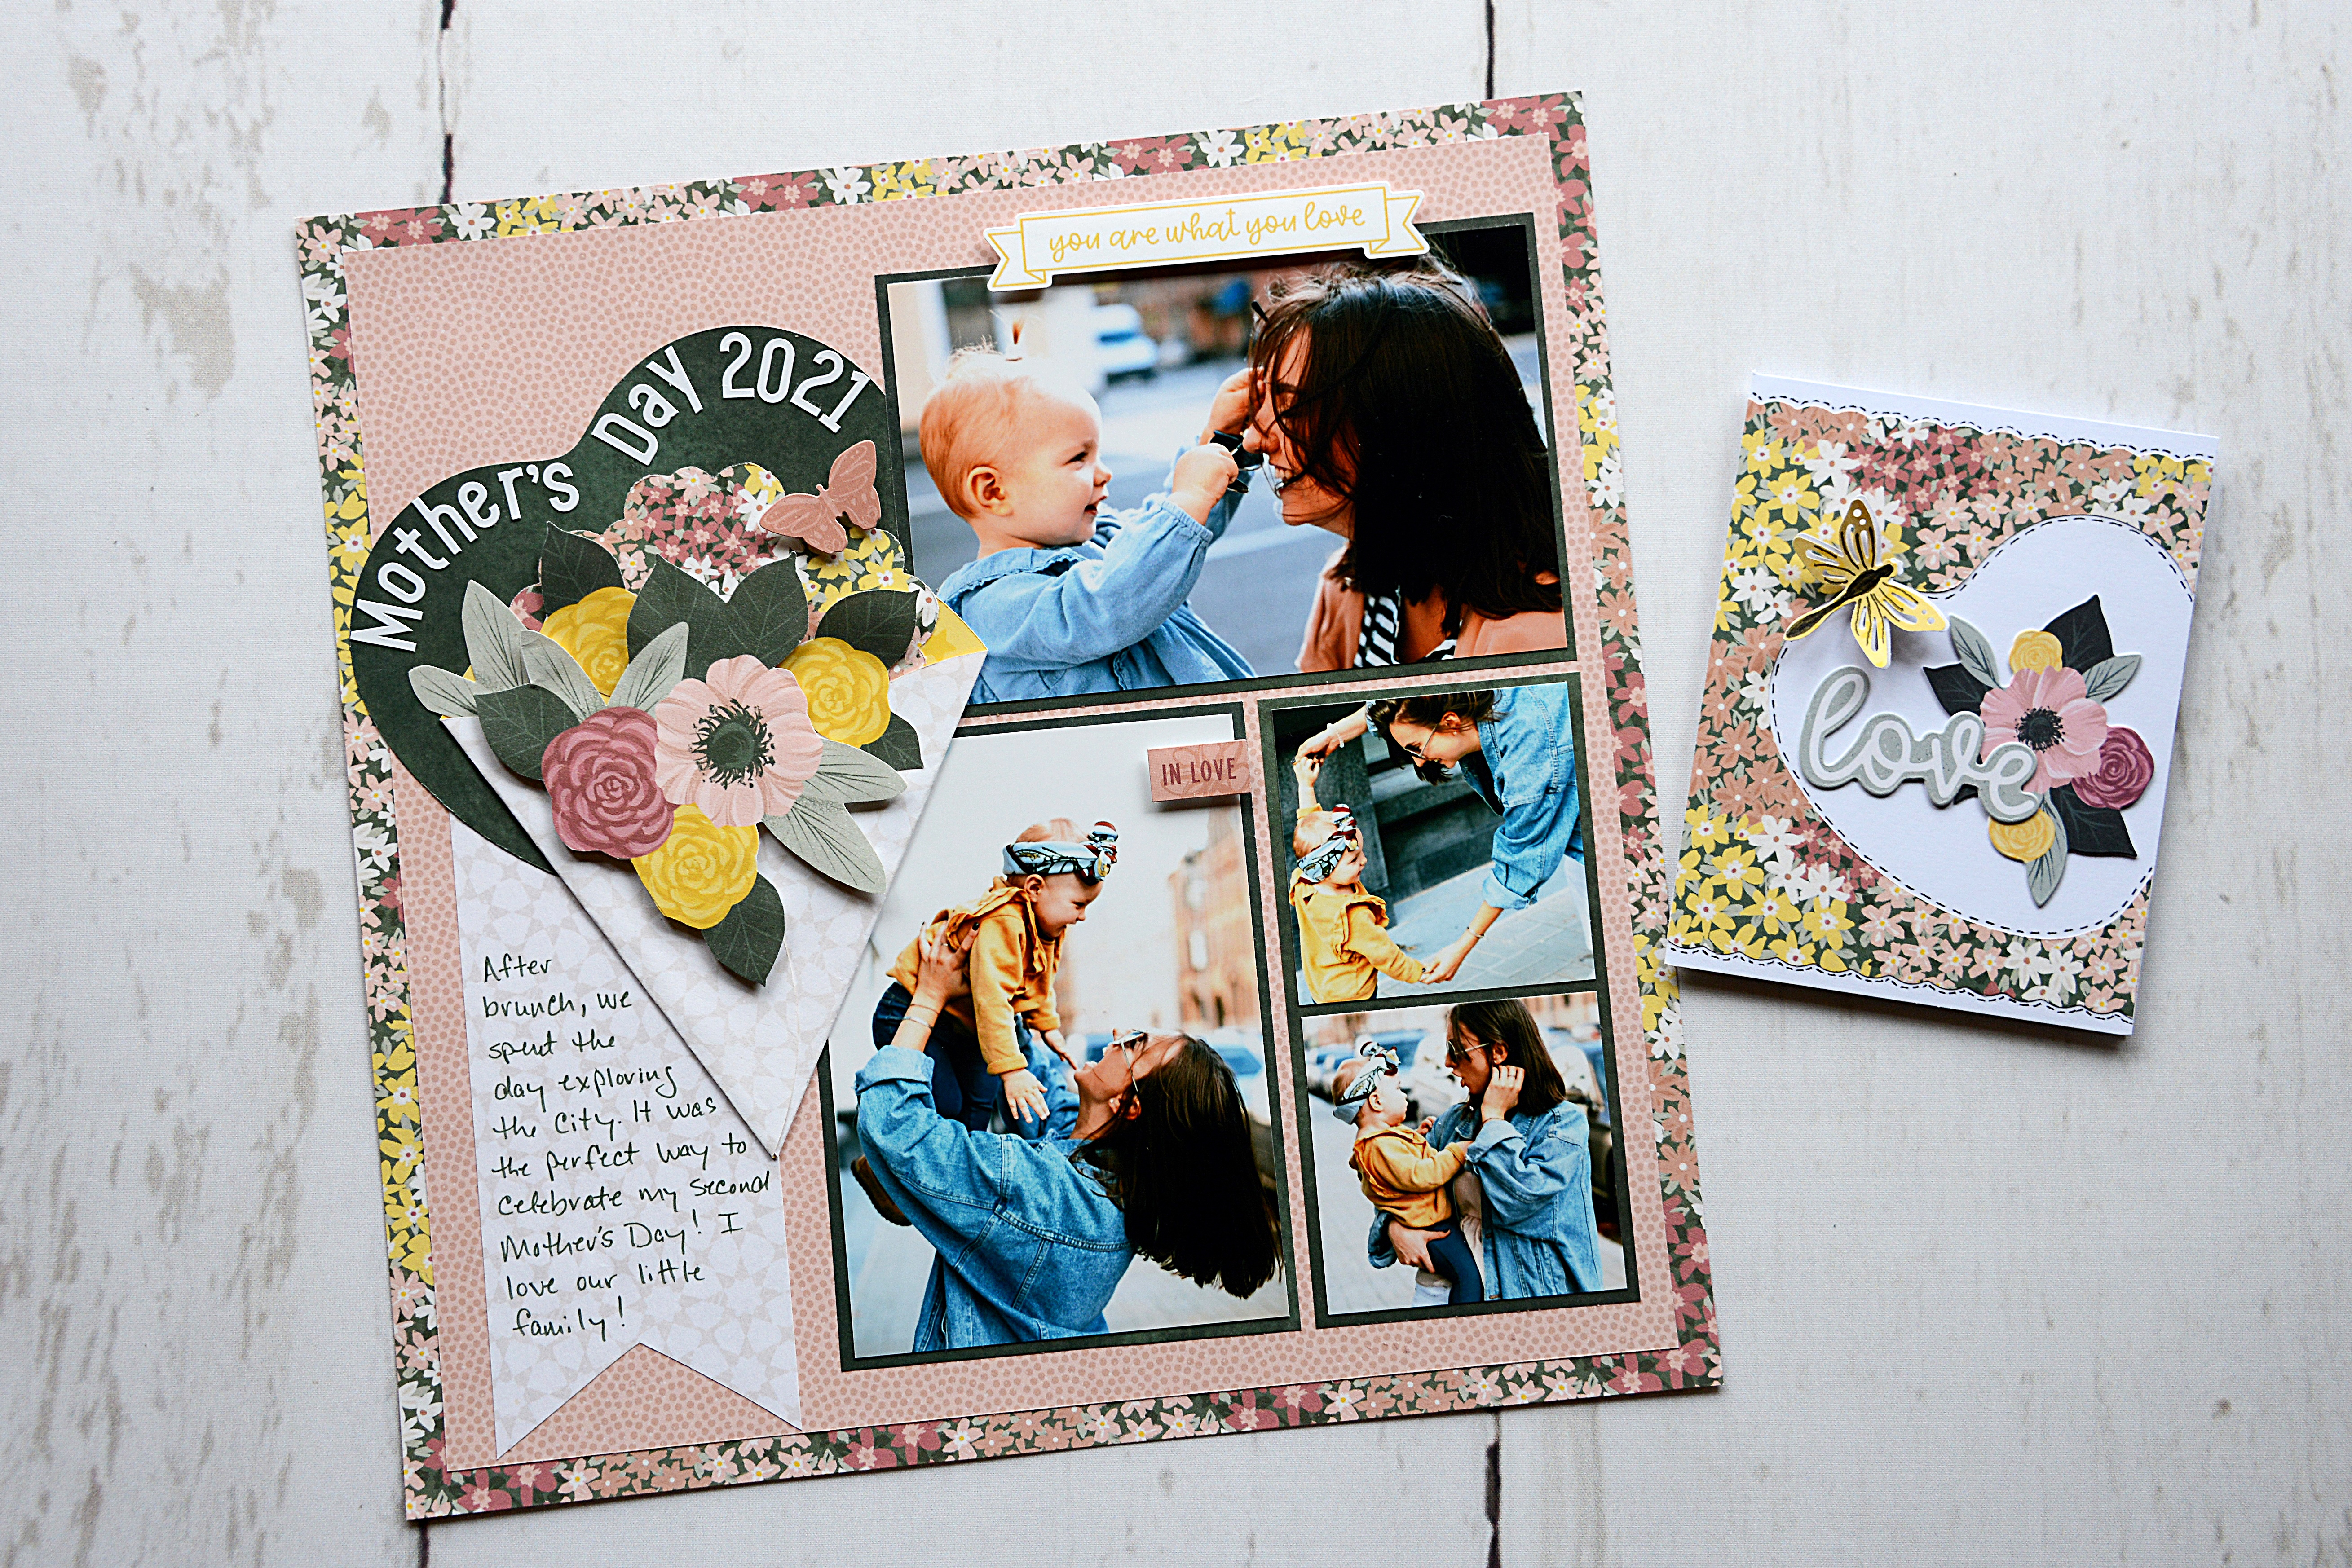
Let’s be honest, mothers are superheroes and deserve to be showered with love all year round — but there’s no denying they deserve it a little bit more on Mother’s Day. (Hint, hint: Mother’s Day is this Sunday!) Whether it’s the mom or stepmom who raised you, the mother figure who made a meaningful impact on your life or even a close friend who is a first-time mama, it’s time to stop and say “thank you” to the wonder women in your life! And while generic cards or store-bought gifts can do the trick for the upcoming Mother’s Day celebration, how about trying out this Mother’s Day scrapbook layout or DIY Mother’s Day card (or both!) to really show how much she means to you (and to show off your creativity at the same time)! Happy Mother’s Day!
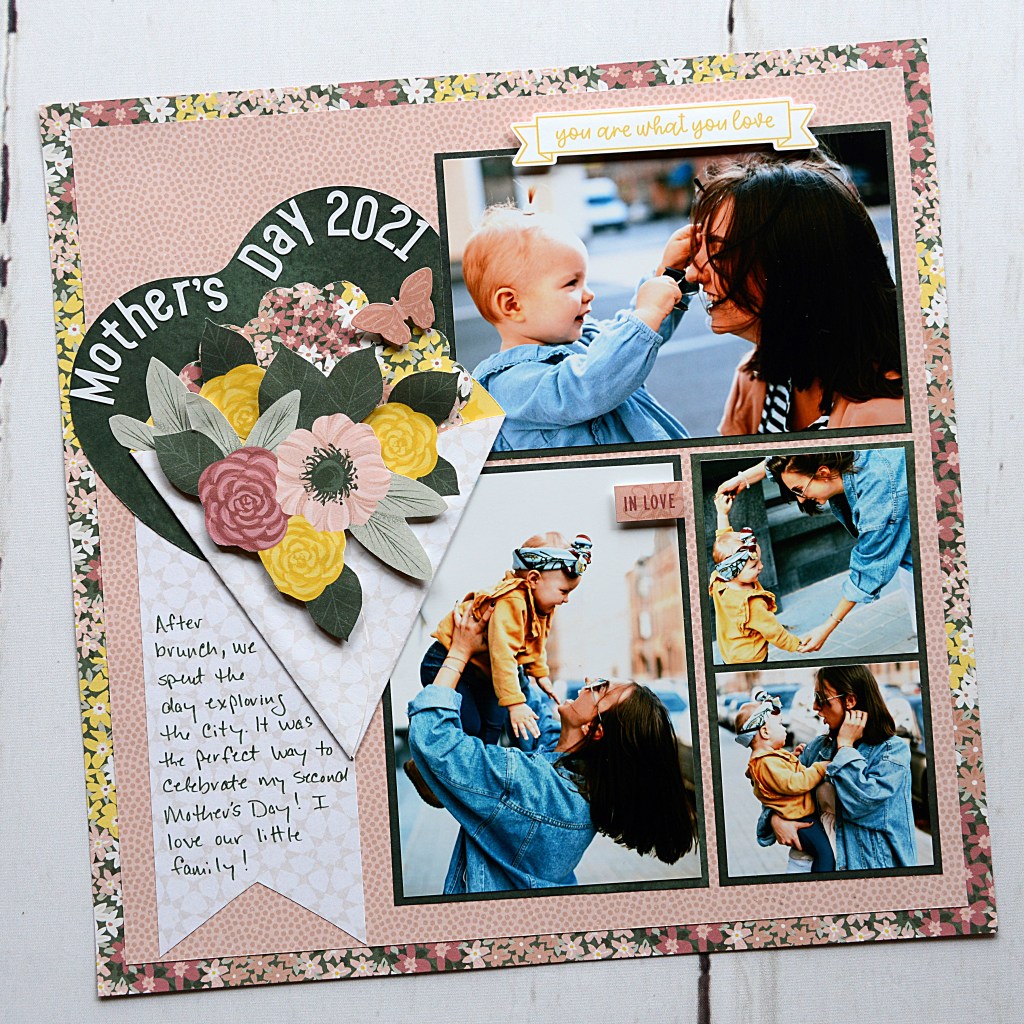
Mother’s Day Layout
To create this layout you will need:
- Daydreamer Paper Pack or (Shop Canada | Shop Australia)
- Daydreamer Stickers or (Shop Canada | Shop Australia)
- White Sans Serif ABC/123 Letter Stickers or (Shop Canada | Shop Australia)
- Custom Cutting System with Circle & Gemstone Patterns or (Shop Canada | Shop Australia)
- Original Border Maker System with Clouds Border Maker Cartridge or (Shop Canada | Shop Australia)
- 12-inch Trimmer or (Shop Canada | Shop Australia)
- Micro-Tip Scissors (Shop Canada | Shop Australia)
- Tape Runner or (Shop Canada | Shop Australia)
- Foam Squares or (Shop Canada | Shop Australia)
- Dual-Tip Pen or (Shop Canada | Shop Australia)

Step 1: From ditsy florals paper, cut a 1-1/2″ hollow frame. Cut a mauve dots paper to measure 11-1/4″ x 11-1/4″ and adhere to the hollow frame.
Step 2: From dark green paper, cut the following photo mats: 6-1/8″ x 4-1/8″, 4-1/8″ x 5-3/4″ and 3″ x 5-3/4″/ Crop photos to fit the mats and adhere to the layout as shown.
Step 3: With the largest heart from the Custom Cutting System Gemstone Patterns and the Red Blade, cut on the outside edge with the dark green paper. Adhere White Sans Serif ABC/123 Letter Stickers to the top edge of the heart to create a title.

Step 4: Using the smallest Custom Cutting System Circle Pattern and the Blue Blade, cut on the outside edge with the ditsy floral paper. Use the cartridge housing unit of the Original Border Maker System with the Clouds Border Maker Cartridge as a handheld punch and punch around the circle. Trim with scissors if necessary.

Step 5: Using the largest Custom Cutting System Circle Pattern and the Red Blade, cut on the outside edge with the yellow stars paper. Fold two ends of the circle on top of each other as shown.
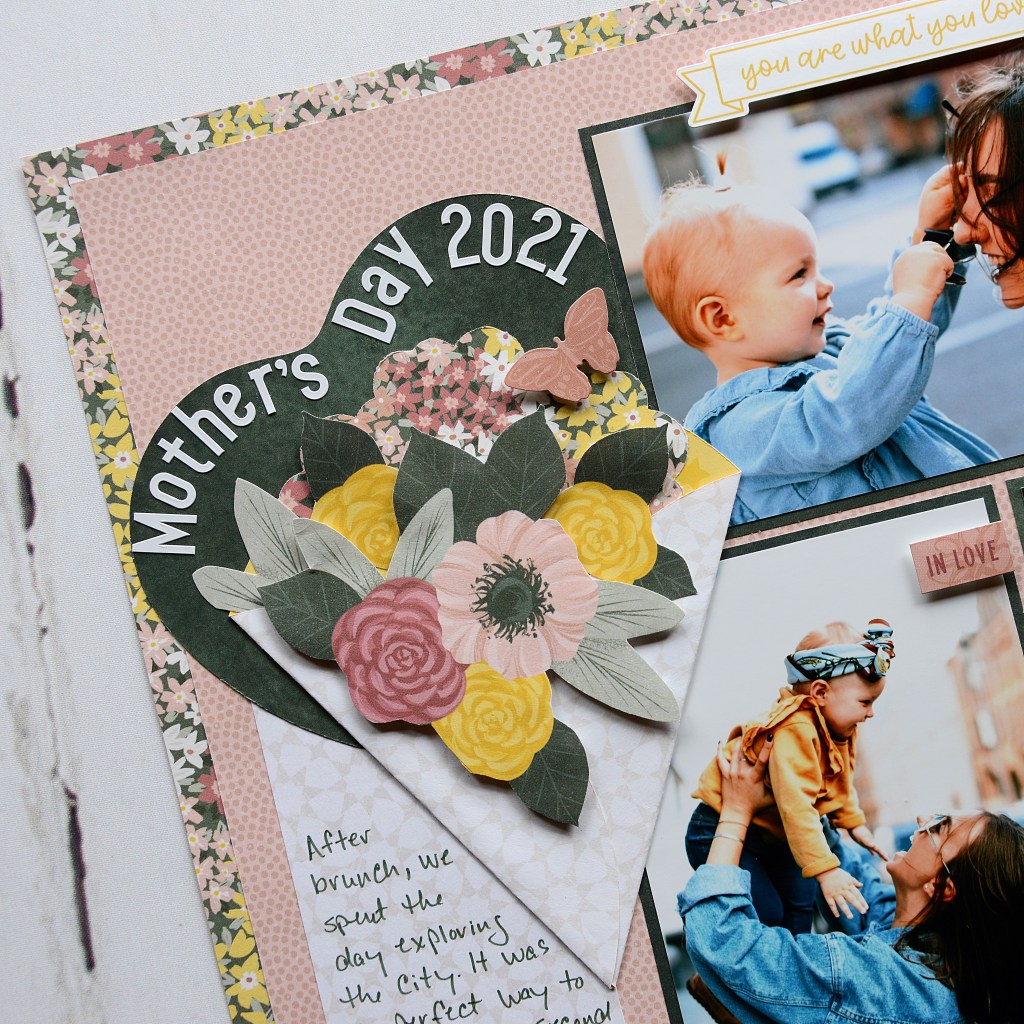
Step 6: From the large florals paper, fussy-cut a flower cluster and some individual flowers. Layer these pieces with the ditsy florals circular piece and the folded circle to create a “bouquet.” Adhere the large floral flowers with Foam Squares.
Step 7: From the white tiles paper, cut a 2-3/4″ x 6″ strip and notch one end to create a “ribbon.”
Step 8: Layer the heart, bouquet and ribbon pieces to create a large embellishment. Adhere to the layout as shown.
Step 9: Add additional stickers with Foam Squares and journal as desired.
Mother’s Day Card

To create this layout you will need:
- Daydreamer Paper Pack or (Shop Canada | Shop Australia)
- Daydreamer Embellishments or (Shop Canada | Shop Australia)
- Black Sans Serif ABC/123 Letter Stickers or (Shop Canada | Shop Australia)
- White Solid Cardstock or (Shop Canada | Shop Australia)
- Blank Card Kit or (Shop Canada | Shop Australia)
- 12-inch Trimmer with Straight & Scallop Blades or (Shop Canada | Shop Australia)
- Custom Cutting System with Gemstone Patterns or (Shop Canada | Shop Australia)
- Dragonfly Punch or (Shop Canada | Shop Australia)
- Sunny Days Journal Template or (Shop Canada | Shop Australia)
- Tape Runner or (Shop Canada | Shop Australia)
- Foam Squares or (Shop Canada | Shop Australia)
- Black Dual-Tip Pen or (Shop Canada | Shop Australia)
Step 1: Cut a 4-1/4″ x 5-1/2″ piece from ditsy florals paper. Use the 12-inch Trimmer with the Scallop Blade to trim about a 1/4″ from the top and bottom edges.

Step 2: Using the smallest heart Custom Cutting System Gemstone Patterns and the Red Blade, cut on the outside edge to create a partial heart shape from the ditsy florals piece. Adhere the rectangular piece to the front of the card.
Step 3: Use a Black Dual-Tip Pen to add tiny faux stitching marks on the front of the Blank Card Kit — the top and bottom scalloped edges, as well as the inside the heart shape.
Step 4: Use the Dragonfly Punch to punch dragonflies from White Solid Cardstock and yellow stars paper. Adhere the yellow dragonfly to the white dragonfly and use the Black Dual-Tip Pen to add details. Adhere to the card with a Foam Square.
Step 5: Add embellishments to the heart.

Step 6: Adhere the partial ditsy florals heart piece to the inside left panel of the card. Use the Black Dual-Tip Pen to add faux stitching around the heart.
Step 7: Add a sentiment with Black Sans Serif ABC/123 Letter Stickers and additional embellishments.
Step 8: Use the Sunny Days Journal Template and the Black Dual-Tip Pen to add straight journal lines to the right inside panel of the card.

By the way, with Mother’s Day happening this weekend, we have some bountiful bundles to pay homage to the important ladies in your life, including TWO limited-time Mother’s Day Bundles that are specially priced at 20% OFF their retail value!
Each bundle contains an assortment of products she’ll love to help document her extraordinary legacy or to be able to look back on photos of her kids growing up. Better yet, the products are conveniently packaged together (with that special pricing!), but will only be available until June 1 at noon CT (AU: 1 June at midnight AET) or while supplies last.
To check out the bundles and specials: US | CA | AU

Beautiful!
This is beautiful and I am so glad we can “scraplift” these ideas! Happy Mother’s Day to all the moms out there!.
Both the layout and the card are beautiful! Love the bouquet.
Clever way to make the card! Thanks for sharing!
Sent from Mail for Windows 10
hey you just made my day! I read it the whole blog and will make this beautiful card for my mother. Thank you so much for a unique mother’s day card idea.
Your blog is very interesting and informative. If anyone searching for the best gifiting platform for Mother’s day then Visit Indiagift and order online Mother’s Day Gifts. Link to explore Mother’s day gifts–>>https://bit.ly/2Hnem8i
So cute & clever, thank you for sharing. I would live to link it in my next Mother’s day DIY post if you do not mind.
https://titusjoy.com/25-more-free-or-low-cost-mothers-day-ideas/
[…] This Mother’s Day layout has a heart with curves title behind a posey of flowers made with a folded cone of paper and pretty flowers added. Find step by step instructions as well as a matching card on the Creative Memories blog. […]
[…] This Mom’s Day structure has a coronary heart with curves title behind a posey of flowers made with a folded cone of paper and fairly flowers added. Discover step-by-step directions in addition to an identical card on the Creative Memories blog. […]
[…] This Mom’s Day structure has a coronary heart with curves title behind a posey of flowers made with a folded cone of paper and fairly flowers added. Discover step-by-step directions in addition to an identical card on the Artistic Reminiscences weblog. […]
[…] Este diseño del Día de la Madre tiene un título de corazón con curvas detrás de un ramillete de flores hecho con un cono de papel doblado y lindas flores añadidas. Encuentre instrucciones paso a paso, así como una tarjeta correspondiente en el Weblog de recuerdos creativos. […]
[…] This Mother’s Day layout has a heart with curves title behind a posey of flowers made with a folded cone of paper and pretty flowers added. Find step by step instructions as well as a matching card on the Creative Memories blog. […]
[…] This Mom’s Day format has a coronary heart with curves title behind a posey of flowers made with a folded cone of paper and fairly flowers added. Discover step-by-step directions in addition to an identical card on the Creative Memories blog. […]
[…] This Mom’s Day format has a coronary heart with curves title behind a posey of flowers made with a folded cone of paper and fairly flowers added. Discover step-by-step directions in addition to an identical card on the Inventive Reminiscences weblog. […]
[…] This Mother’s Day layout has a heart with curves title behind a posey of flowers made with a folded cone of paper and pretty flowers added. Find step by step instructions as well as a matching card on the Creative Memories blog. […]
[…] Este diseño del Día de la Madre tiene un título de corazón con curvas detrás de un ramillete de flores hecho con un cono de papel doblado y lindas flores añadidas. Encuentre instrucciones paso a paso, así como una tarjeta correspondiente en el Weblog de recuerdos creativos. […]