May 13, 2021
Bring on a Paper Party With These DIY Birthday Cards
The lights dim and suddenly a cake, aglow with candles, is brought out and melodious singing fills the air. The recipient’s face lights up as a sweetly decorated cake is placed in front of him or her. The song ends and someone yells “Make a wish!” The recipient closes their eyes momentarily — huff! The candles are blown out… and it’s time to get the birthday party started!
Just as important as the candles and cake are on birthdays, so are cards! For a special handmade touch, opt to make your next birthday card rather than picking up a generic store-bought card — your friends and family members will surely appreciate the beautiful keepsake and be awestruck by your crafty talent. (Shhh, no need to tell them just how easy it was to make!) Blog contributor Tina Kistinger shows off three DIY birthday cards that look like they could be presents themselves! Take a look below — it’s time for a cardmaking celebration!
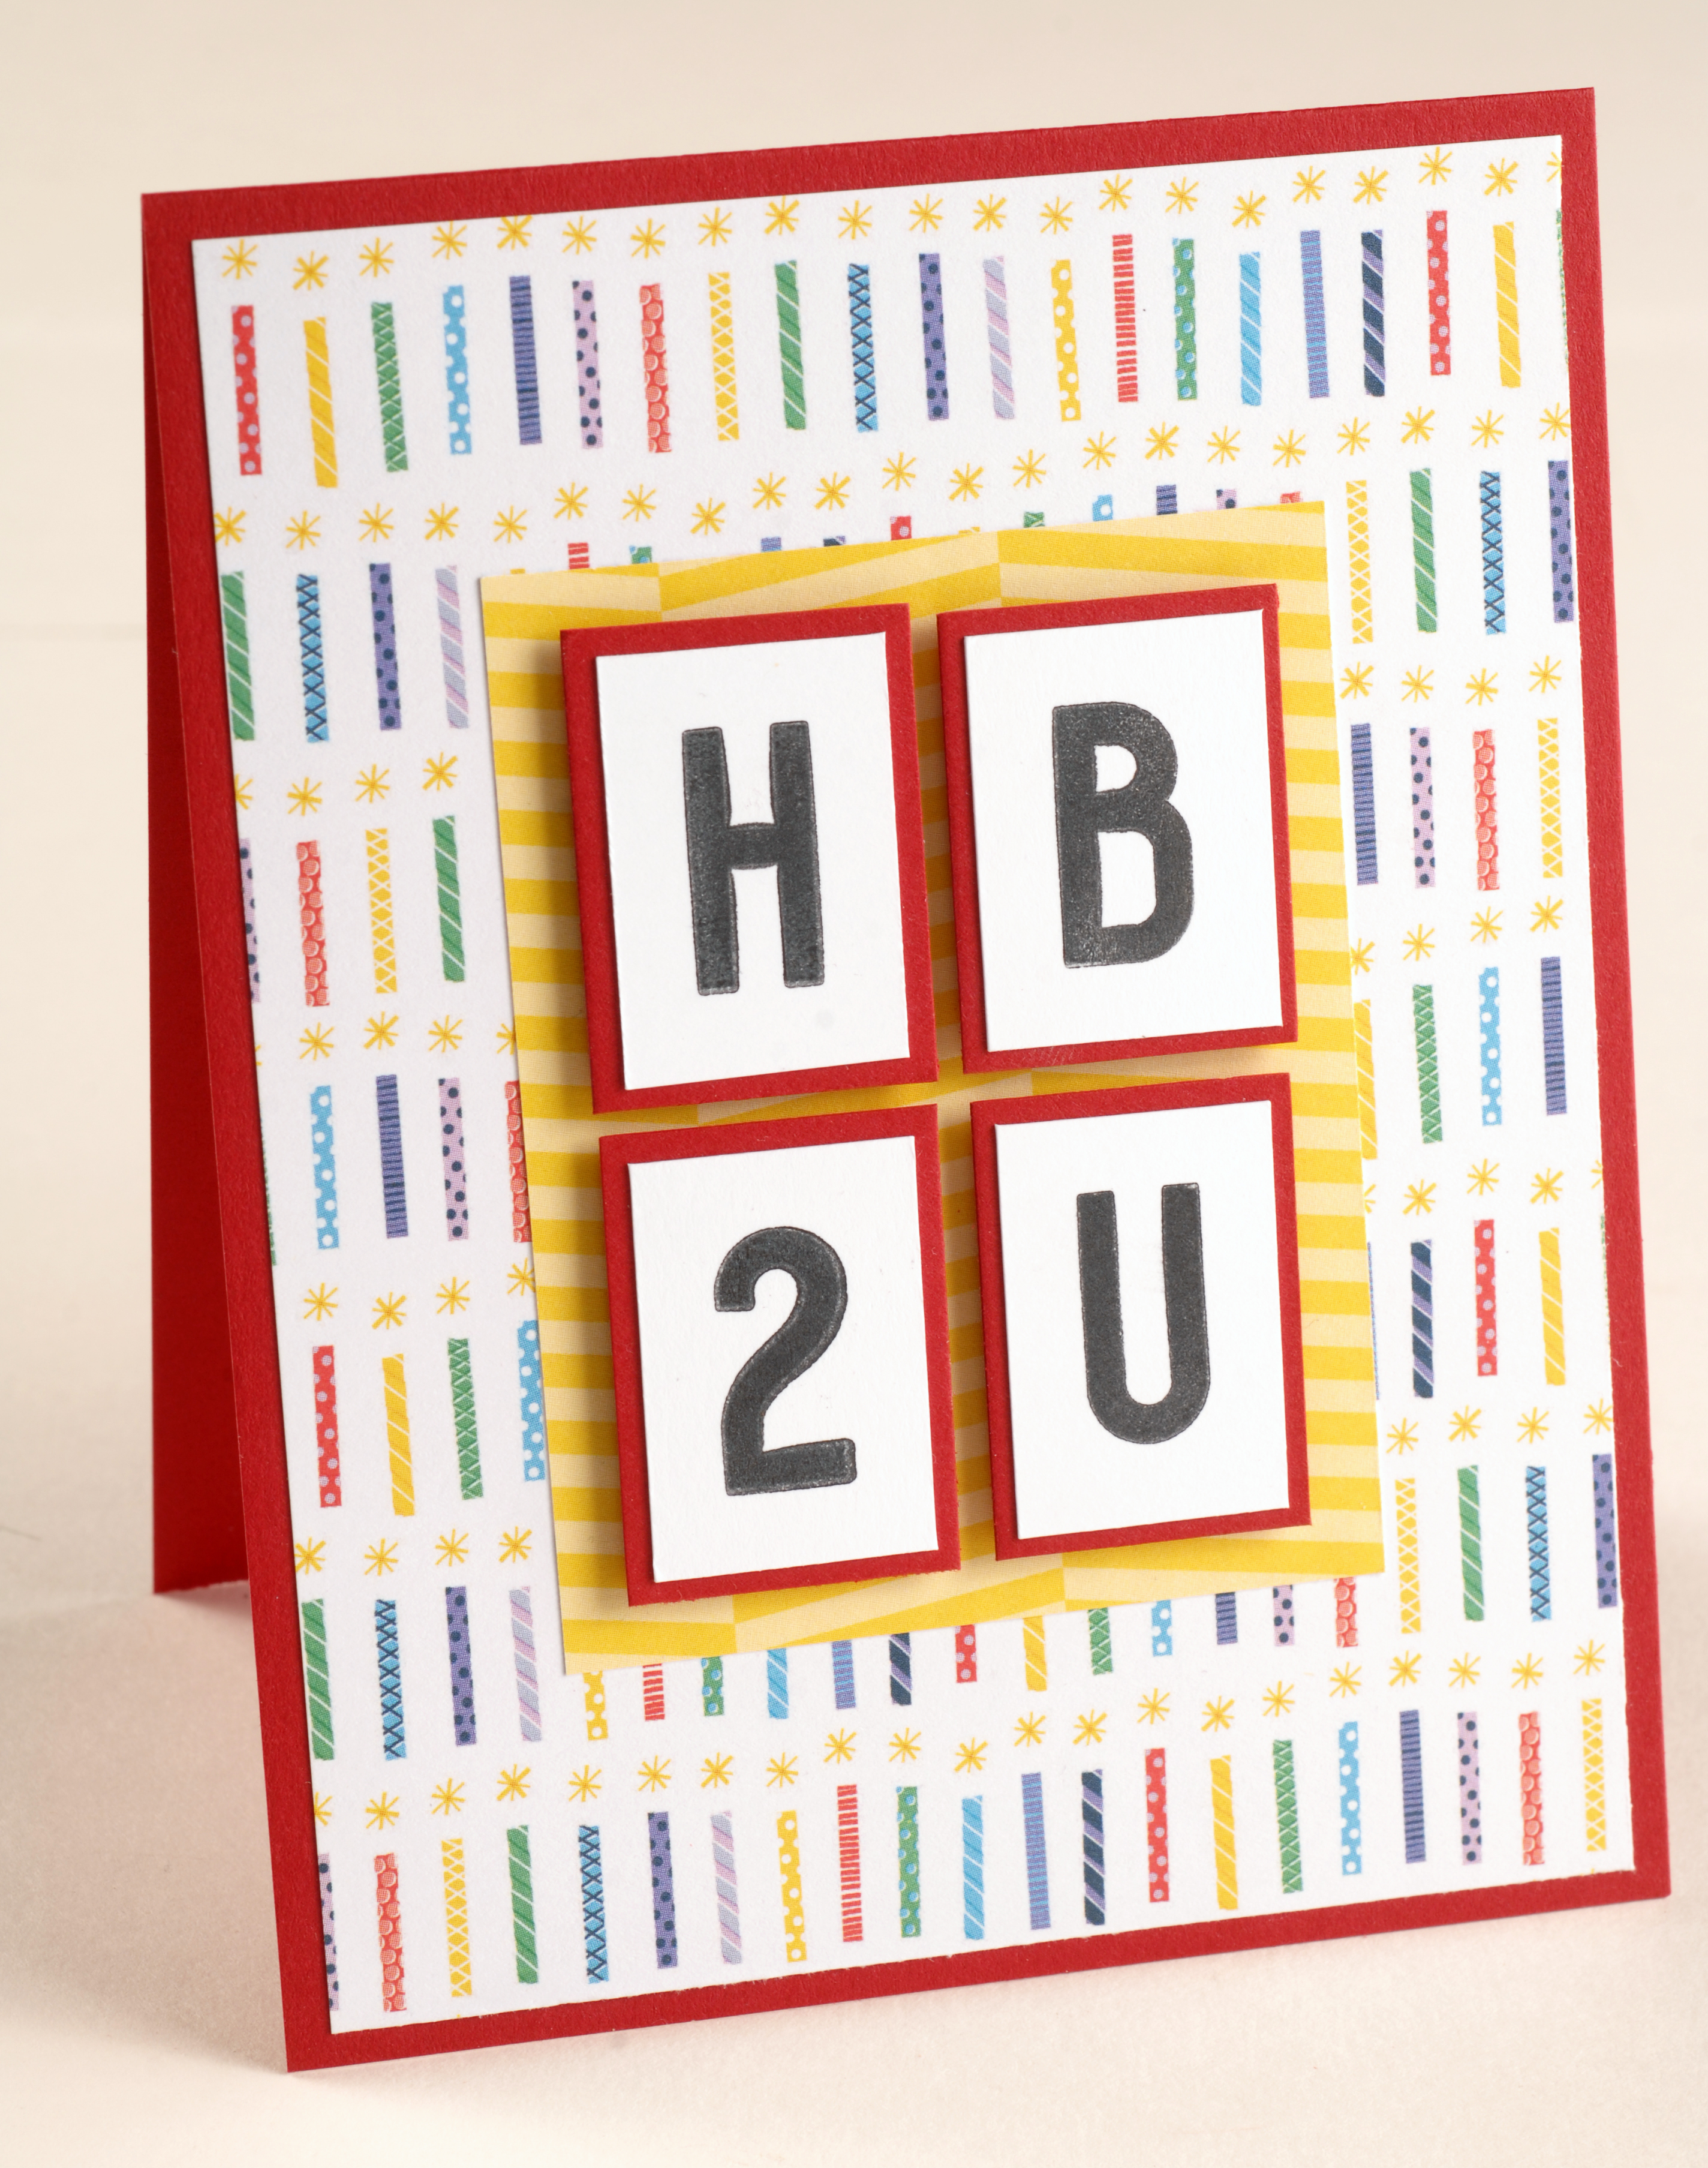
HB 2 U Card
A fun birthday card using the Alphabet Stamp Kit System. I know I’m not alone when I say one can never have too many birthday cards on hand.

To create this card you’ll need:
- Party Time! Bright Paper Pack or (Shop Canada | Shop Australia)
- Red-hued (any shade of your choosing) & White Solid Cardstocks or (Shop Canada | Shop Australia)
- Alphabet Stamp Kit System or (Shop Canada | Shop Australia)
- 12-inch Trimmer with Straight & Scoring Blades or (Shop Canada | Shop Australia)
- Tape Runner or (Shop Canada | Shop Australia)
- Repositionable Tape Runner or (Shop Canada | Shop Australia)
- Foam Squares or (Shop Canada | Shop Australia)

Step 1: Cut a piece of red-hued cardstock to measure 4 1/4″ x 11″. Score at 5 1/2″ and fold to make a top folding card.
Step 2: Cut the candles paper to measure 4″ x 5 1/4″. Cut bright yellow chevron paper to measure 2 1/2″ x 3 1/4″.
Step 3: Stamp H, B, 2, U on White Solid Cardstock using the Alphabet Stamp Kit System and mat onto red-hued cardstock.
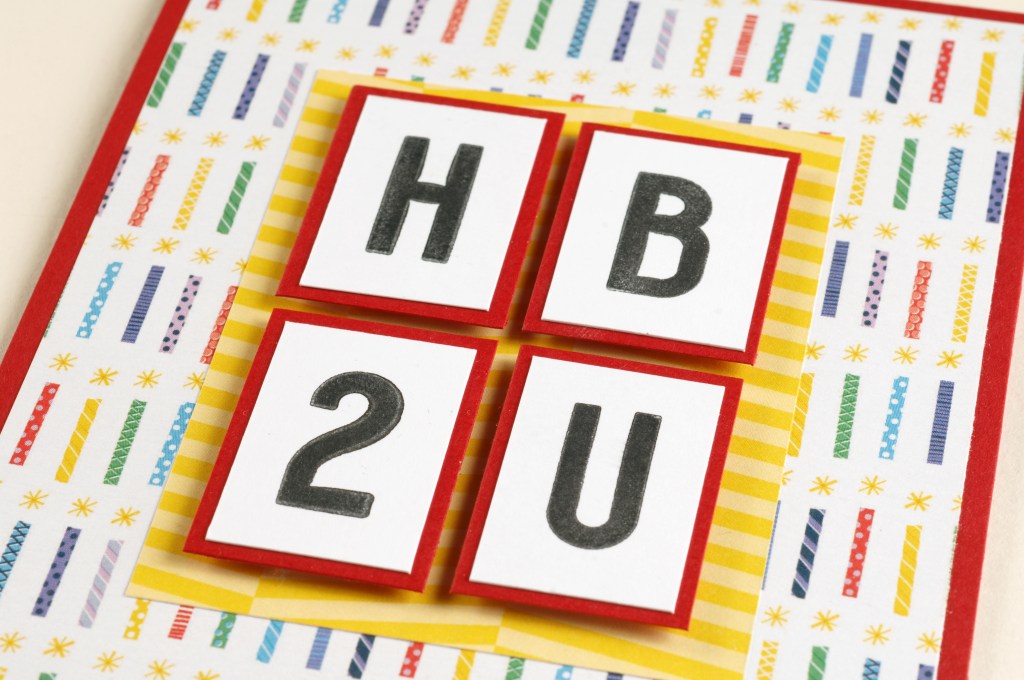
Step 4: Adhere the bright yellow chevron block to the middle of the candles paper. Adhere H, B, 2, U blocks to the card using Foam Squares.
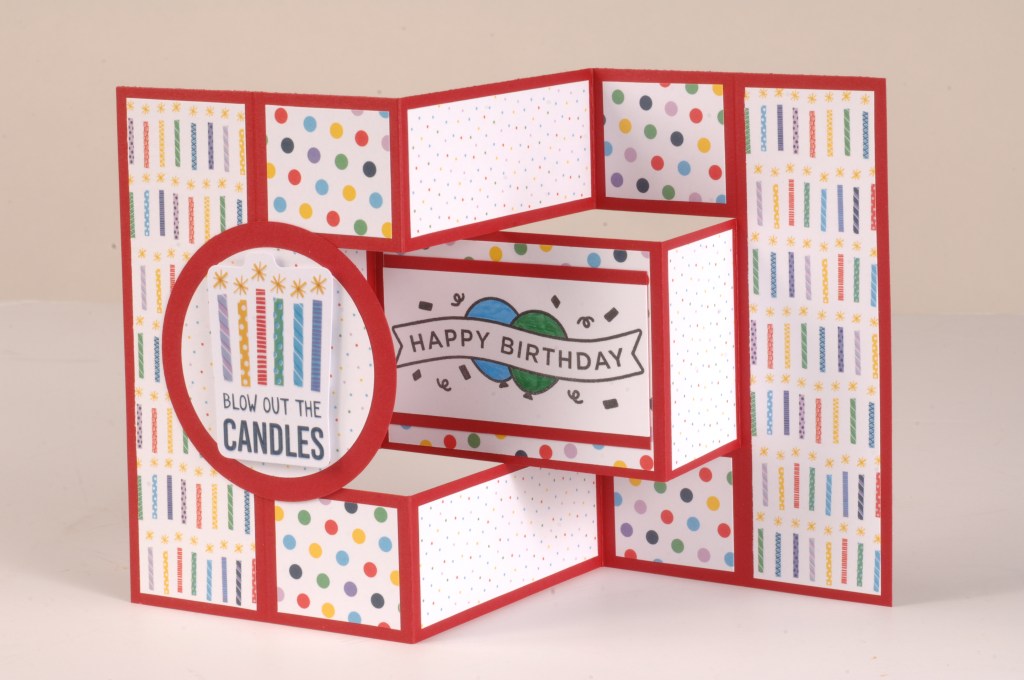
Magical Expanding Birthday Card
I make A LOT of birthday cards and am always looking for new designs to expand my collection. This is a great card to mail and I love its surprise element. Who wouldn’t?!
To create this card you’ll need:
- Party Time! Bright Paper Pack or (Shop Canada | Shop Australia)
- Party Time! Embellishments or (Shop Canada | Shop Australia)
- Red-hued (any shade of your choosing) & White Solid Cardstocks or (Shop Canada | Shop Australia)
- Celebration Title Stamp or (Shop Canada | Shop Australia)
- Custom Cutting System with Circle Patterns or (Shop Canada | Shop Australia)
- 12-inch Trimmer with Straight & Scoring Blades or (Shop Canada | Shop Australia)
- Dual-Tip Pens or (Shop Canada | Shop Australia)
- Repositionable Tape Runner or (Shop Canada | Shop Australia)
- Foam Squares or (Shop Canada | Shop Australia)
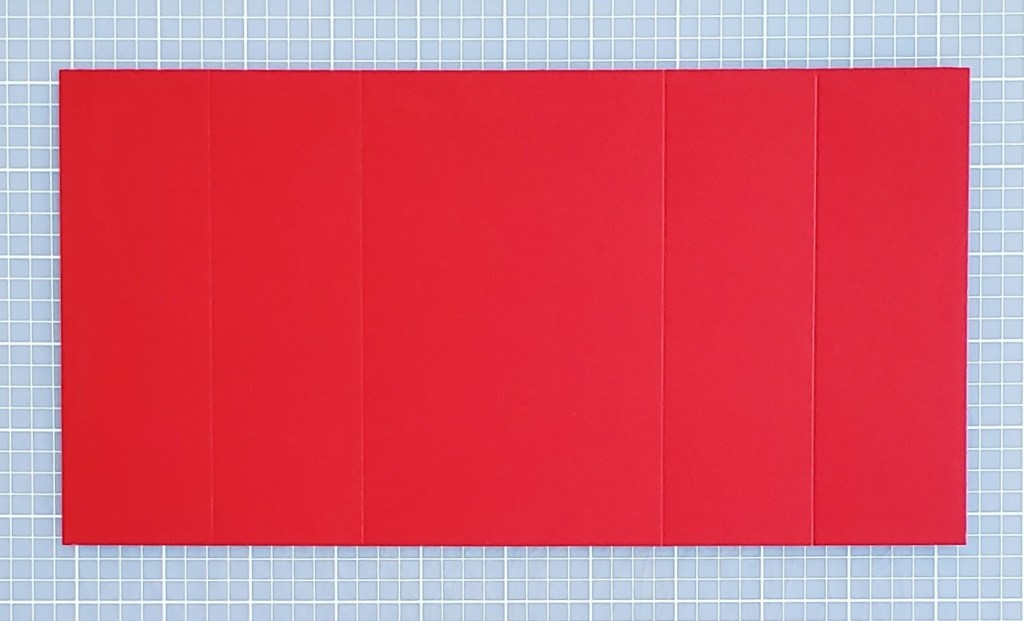
Step 1: Cut a piece of red-hued cardstock to measure 10-1/2″ x 5-1/2″.
Step 2: Score on the long side at 1-3/4″, 3-1/2″, 7″ and 8-3/4″.
Step 3: Measure down 1-1/2″ on the first score line and make a cut using the 12-inch Trimmer to the last score line. Repeat measuring 1-1/2″ from the bottom of the card up and make another cut.
Step 4: Using three different patterned papers, cut the following: (2) 1-1/2″ x 5-1/4″, (4) 1-1/2″ x 1-1/4″, (2) 3-1/4″ x 1-1/4″, (2) 1-1/2″ x 2-1/4″. Adhere to the card in the appropriate places.

Step 4: Cut a 3″ circle using largest Custom Cutting System Circle Pattern with the Blue Blade. Cut a 2-1/2″ circle using medium Custom Cutting System Circle Pattern with Red Blade. Adhere together.
Step 5: Stamp the “Happy Birthday” title on White Solid Cardstock. Trim to measure 3-1/4″ x 2-1/4″. Fill in the balloons using your favorite CM pens. Adhere to the card. Optional: Trim down and mat the White Solid Cardstock stamped piece with both red and patterned paper as shown.
Step 5: Fold the card so the inside panel is opposite to the top and bottom panels.

Step 6: Adhere the circle to the first panel only. Attach an embellishment to the circle medallion using Foam Squares.
Step 7: Fold card into thirds to fit into an A2 envelope (4-3/8″ x 5-3/4″).
Explosion Box Birthday Card
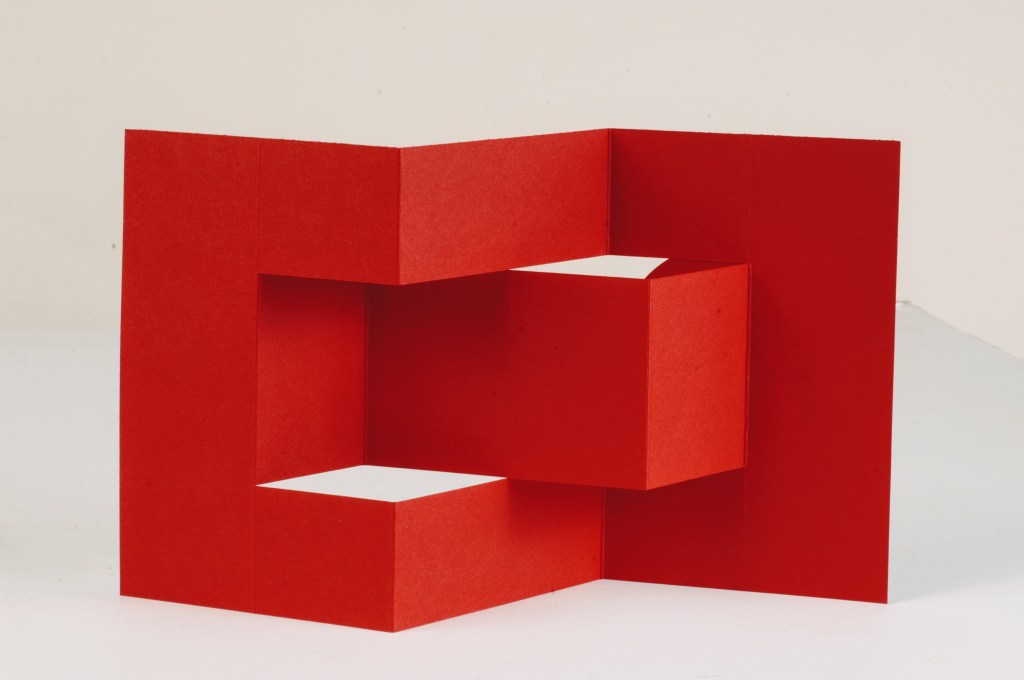
This birthday card has a big wow factor. Explosion boxes have been popular for some time, but this is a simpler version that still has lots of impact. Once the technique is mastered, it can be used for any theme.

Card by Tina Kistinger – CM Independent Advisor 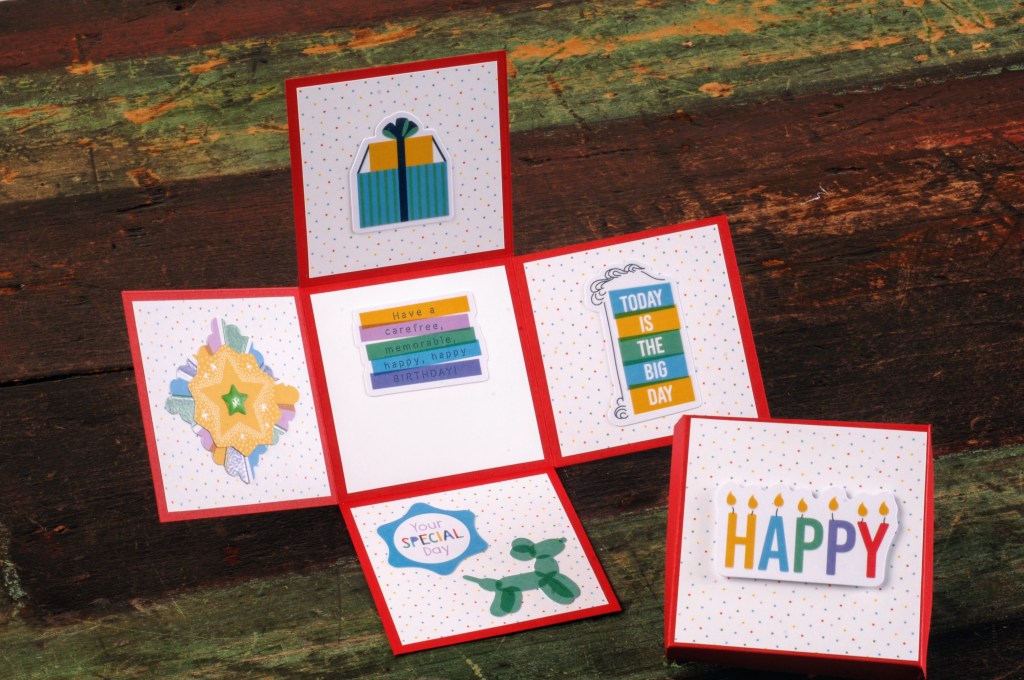
To create this card you’ll need:
- Party Time! Bright Paper Pack or (Shop Canada | Shop Australia)
- Party Time! Embellishments or (Shop Canada | Shop Australia)
- Red-hued (any shade of your choosing) & White Solid Cardstocks or (Shop Canada | Shop Australia)
- 12-inch Trimmer with Straight & Scoring Blades or (Shop Canada | Shop Australia)
- Micro-Tip Scissors or (Shop Canada | Shop Australia)
- Repositionable Tape Runner or (Shop Canada | Shop Australia)
- Foam Squares or (Shop Canada | Shop Australia)
Step 1: Cut 2 pieces of red-hued cardstock to measure 9″ x 9″ and 4-1/8″ x 4-1/8″.

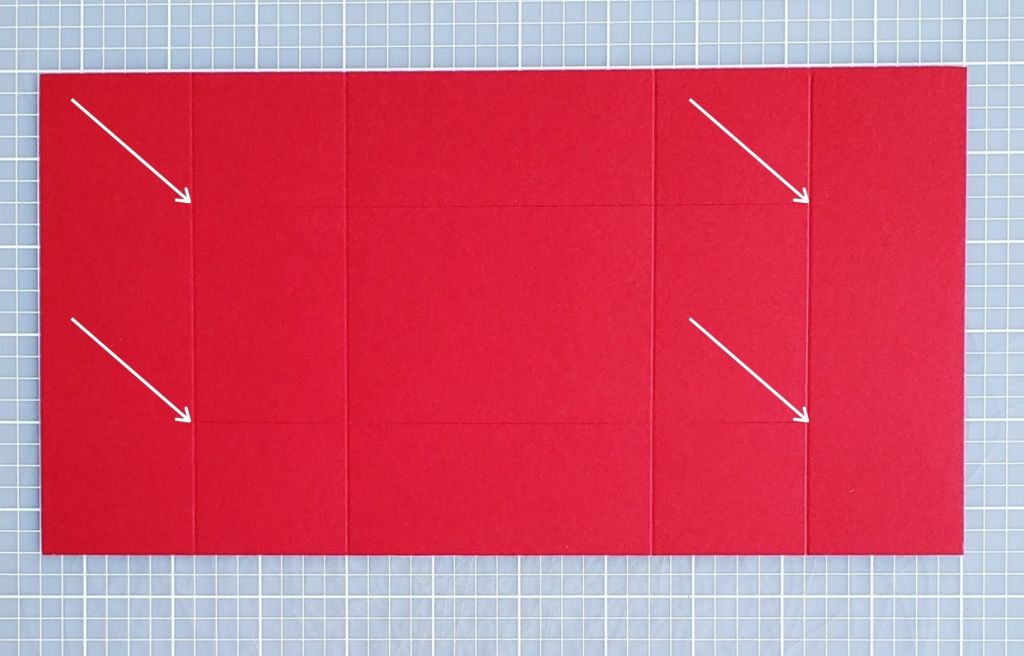
Step 2: Score the 9″ base at 3″ and 6″. Turn and score again at 3″ and 6″ so you have 9 squares scored on your card base. Cut out each corner. The card base will now look like a plus sign.
Step 3: Pick patterned papers and cut (4) 2-3/4″ x 2-3/4″ squares for interior sides and (4) 2-3/4″ x 2-3/4″ squares for exterior sides of the box. With White Solid Cardstock, cut to measure a 2-3/4″ x 2-3/4″ square. Adhere all pieces to the interior and exterior of the box.

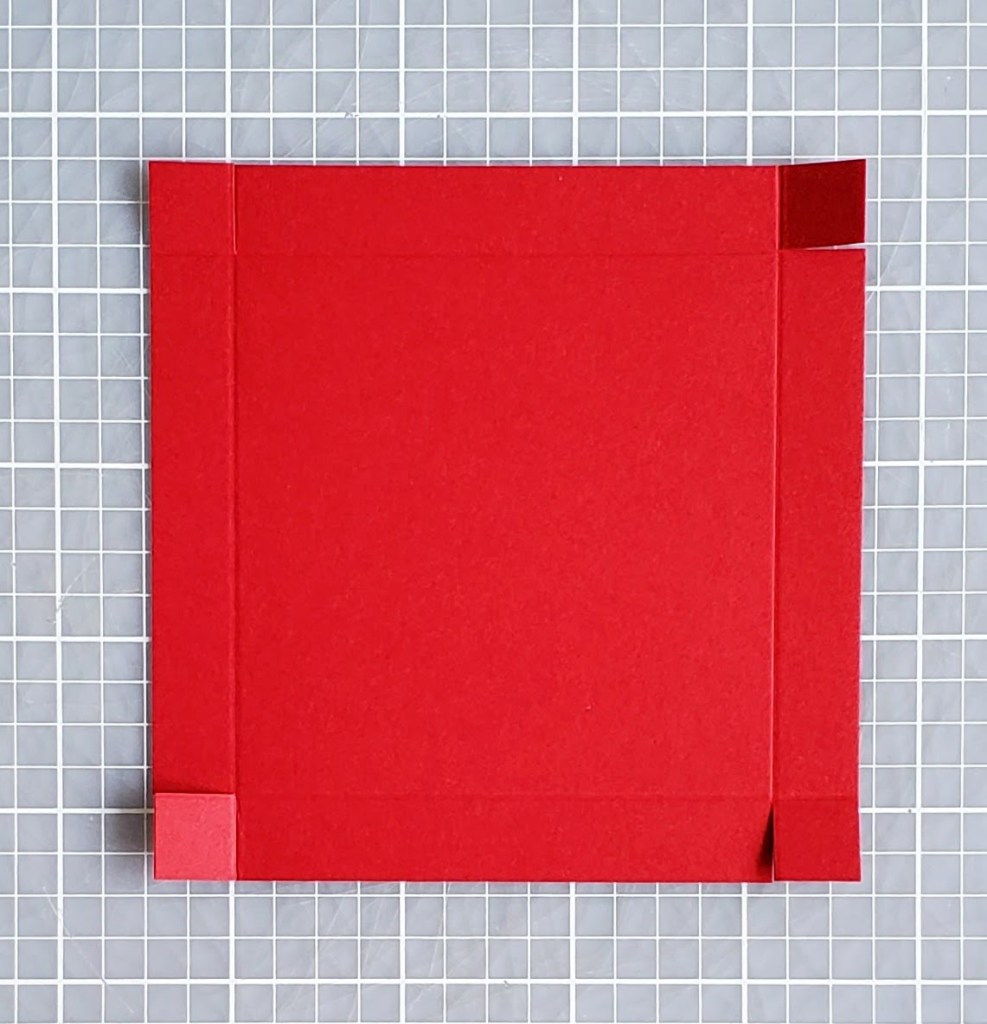
Step 4: Score the 4-1/8″ square at 1/2″ on each side. Cut a slit on the score line at each corner as shown.
Step 5: Cut (2) 3″ x 3″ squares of patterned paper for the box top (interior and exterior). Adhere and add embellishments. Make the top by applying Tape Runner Adhesive to each topside corner tab and fold up to meet it on the inside.

Step 6: Add embellishments to each panel of the card. Fold up and add the top to finish it.
Do you have birthdays coming coming up? These awesome DIY birthday cards would be a great treat to give to friends and family! What do you think?

Wow! This is just too cute!!
Love this
I love, love, love them all. Thank you for such excellent directions. I haven’t made cards for a couple of years, these definitely inspire me to get back to it!