June 16, 2021
Be Somewhere Over the Rainbow With This Spring Scrapbook Layout
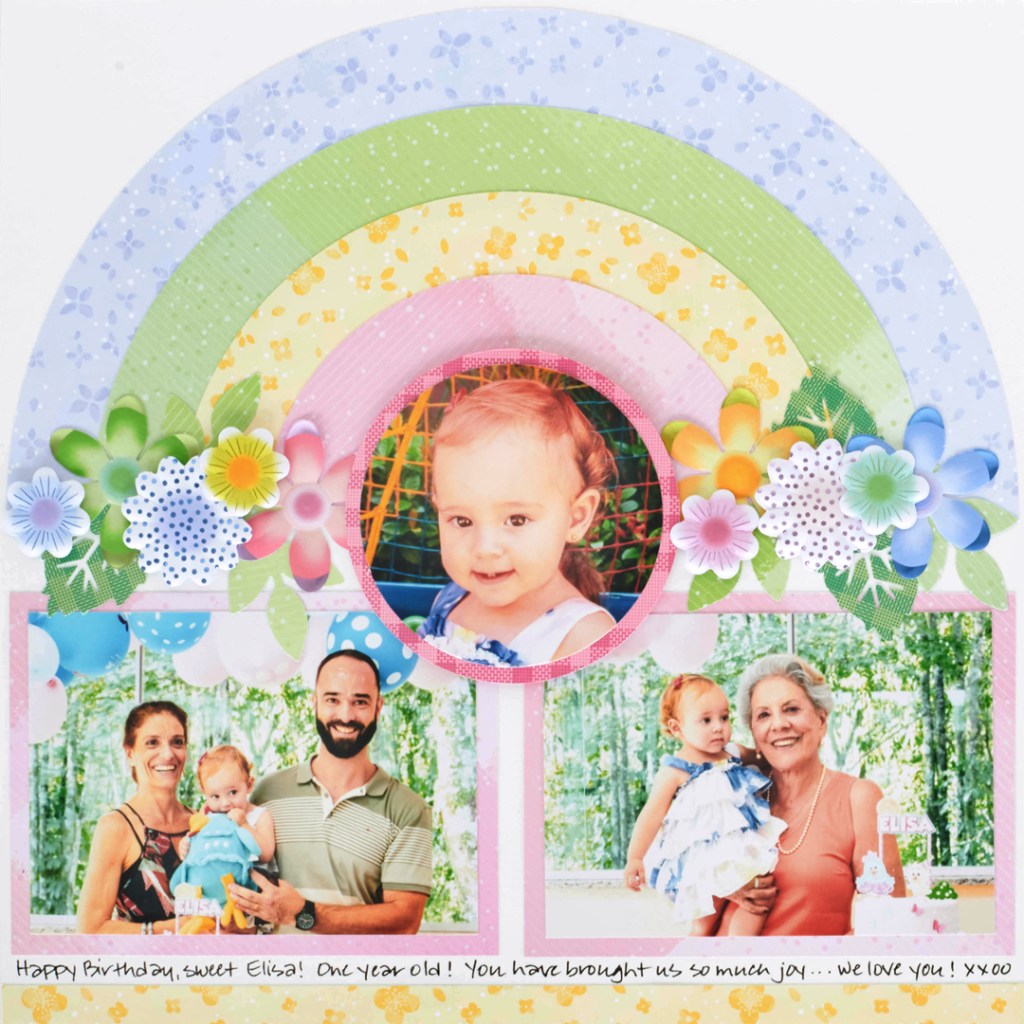
A fresh rain drizzles down onto Earth. You look outside and see the sun peeking through the misty clouds. It’s then when you witness an arc of hues stretched across the sky — this sight to behold is a rainbow! A rainbow’s refracting radiance has inspired art, poetry, songs and myths… and let’s add layouts to the list! Make your own hue-tiful rainbow with this spring scrapbook layout!
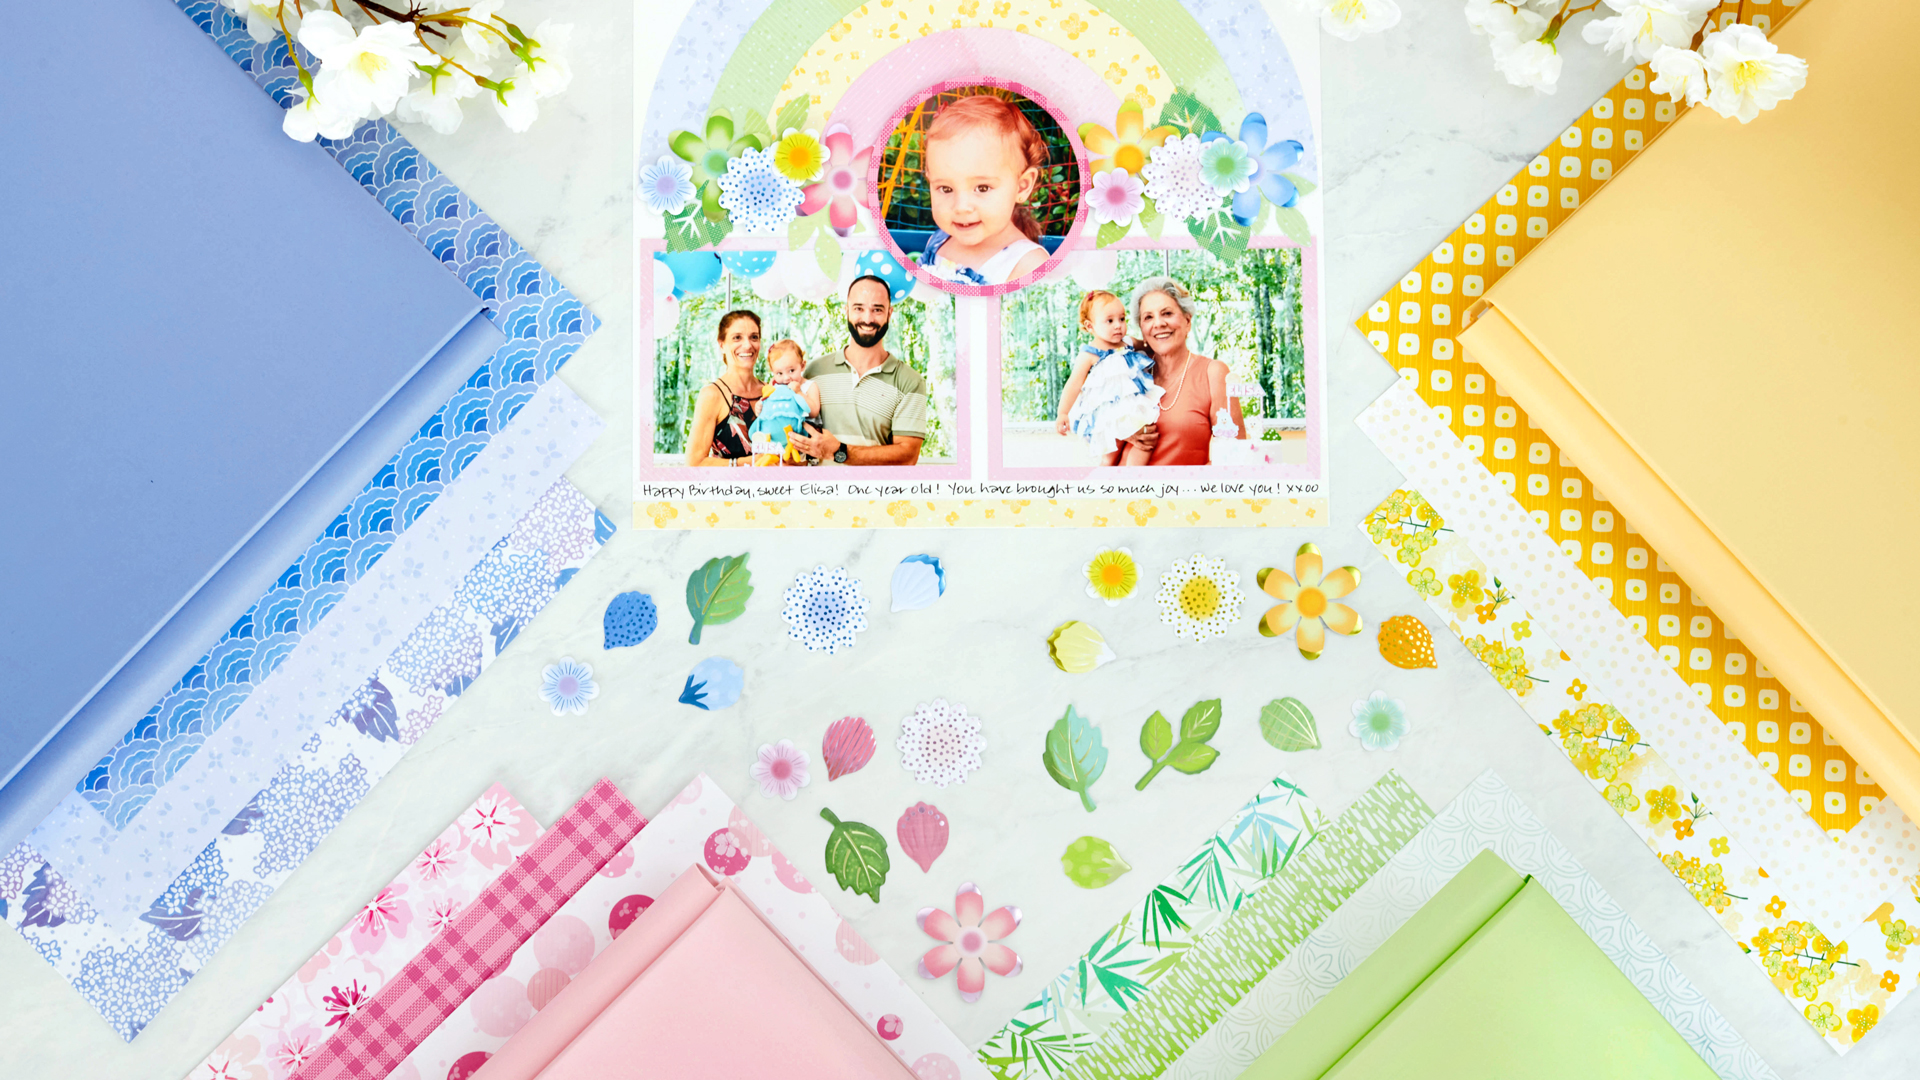
To create this layout you will need:
- Botanical Burst Yellow, Pink, Blue and Green Designer Paper or (Shop Canada | Shop Australia)
- Botanical Burst Yellow, Pink, Blue and Green Petal & Leaves Foiled Embellishments or (Shop Canada | Shop Australia) — Expected late June
- White Solid Cardstock or (Shop Canada | Shop Australia)
- Spring Leaf Punch or (Shop Canada | Shop Australia)
- Five Leaf Punch or (Shop Canada | Shop Australia)
- Circle Cutter or (Shop Canada | Shop Australia) — Returning September
- 12-inch Trimmer or (Shop Canada | Shop Australia)
- Tape Runner or (Shop Canada | Shop Australia)
- Repositionable Tape Runner or (Shop Canada | Shop Australia)
- Foam Squares or (Shop Canada | Shop Australia)
- Black Dual-Tip Pen or (Shop Canada | Shop Australia)
Step 1: Use a piece of White Solid Cardstock (or a White Refill Page) as the base for this layout.
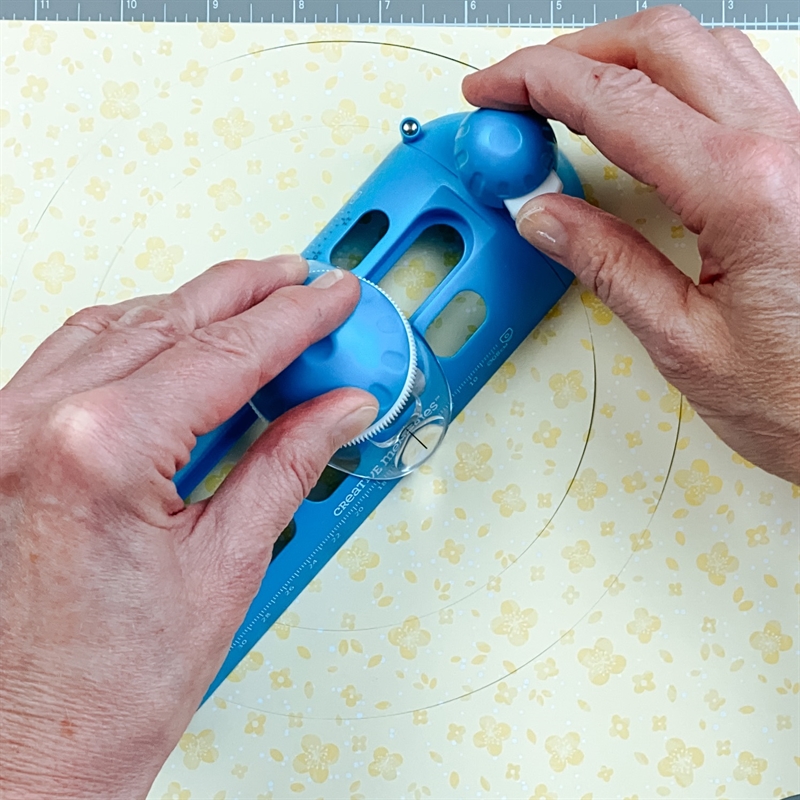

Step 2: Create the rainbow using the Circle Cutter. Set the Circle Cutter at its largest size (about 11-3/4″) and cut a circle with blue tonal hydrangeas paper. Without moving the Circle Cutter, mark your spot with a pencil. Set the size to 9-1/2″, align with your mark and cut out the inner circle. Repeat with the green layered blocks paper, setting the outer circle at 9-3/4″ and the inner circle at 7-1/2″. Repeat with the yellow tonal scattered field mustard paper, setting the outer circle at 7-3/4″ and the inner circle at 5-1/2″. Finally, repeat with the pink layered blocks paper, setting the outer circle at 5-3/4″ and the inner circle at 3-1/2″. Layer and adhere the circles: pink on yellow on green on blue. Cut the rainbow in half. Place one half on the upper half of the layout. (Save the other half for another layout!)
Step 3: Cut two 5-3/4″ x 4-1/4″ pieces of pink layered blocks paper and mount two 5-1/4″ x 3-3/4″ photos. Adhere to the layout.
Step 4: Set the Circle Cutter to 4″ and cut a circle with pink plaid paper. Cut a photo into a 3-1/2″ circle and mount on the pink plaid circle. Adhere to the layout.
Step 5: Cut a 12″ x 1/2″ strip of yellow tonal scattered field mustard paper and adhere to the bottom of the layout.
Step 6: Punch several leaves from various green papers using the Spring Leaf Punch and Five Leaf Punch. Adhere to the bottom of the rainbow along with foiled flower embellishments as shown. Use Foam Squares on some foiled flower embellishments for added dimension.
Step 7: Journal as desired.
What are your thoughts on this spring scrapbook layout? Do you want to make a rainbow for yourself? Give us your feedback in the comments below!

This layout is adorable; the colors and composition are perfect.
If you do not use the circle cutter – but you have the CCS circles or the Jumbo circle what would be the dimensions to cut this layout? Very pretty.
Thank you! The dimensions of each circle are above. If you’re using the custom cutting system instead, you can use the guides that come with the patterns to determine which blades and patterns to use that will be closest.
Thank you so much! I really like this layout and I want to give it a try, Have a good week.
[…] This sweet page features a large rainbow made from pastel pattern papers cut with a circle cutter with the cute round baby pic in the middle and two square photos underneath. Find directions over on the Creative Memories blog. […]
[…] This candy web page options a big rainbow made out of pastel sample papers minimize with a circle cutter with the lovable spherical child pic within the center and two sq. images beneath. Discover instructions over on the Inventive Recollections weblog. […]
[…] This candy web page options a big rainbow made out of pastel sample papers lower with a circle cutter with the lovable spherical child pic within the center and two sq. images beneath. Discover instructions over on the Artistic Reminiscences weblog. […]
[…] This candy web page options a big rainbow constructed from pastel sample papers reduce with a circle cutter with the lovable spherical child pic within the center and two sq. photographs beneath. Discover instructions over on the Creative Memories blog. […]
[…] This sweet website page features a large rainbow designed from pastel sample papers slash with a circle cutter with the sweet round baby pic in the middle and two square pictures beneath. Obtain instructions more than on the Artistic Memories blog. […]
[…] This sweet page features a large rainbow made from pastel pattern papers cut with a circle cutter with the cute round baby pic in the middle and two square photos underneath. Find directions over on the Creative Memories blog. […]