November 3, 2021
Snow Much Fun: Scallop Borders for Winter Scrapbook Projects
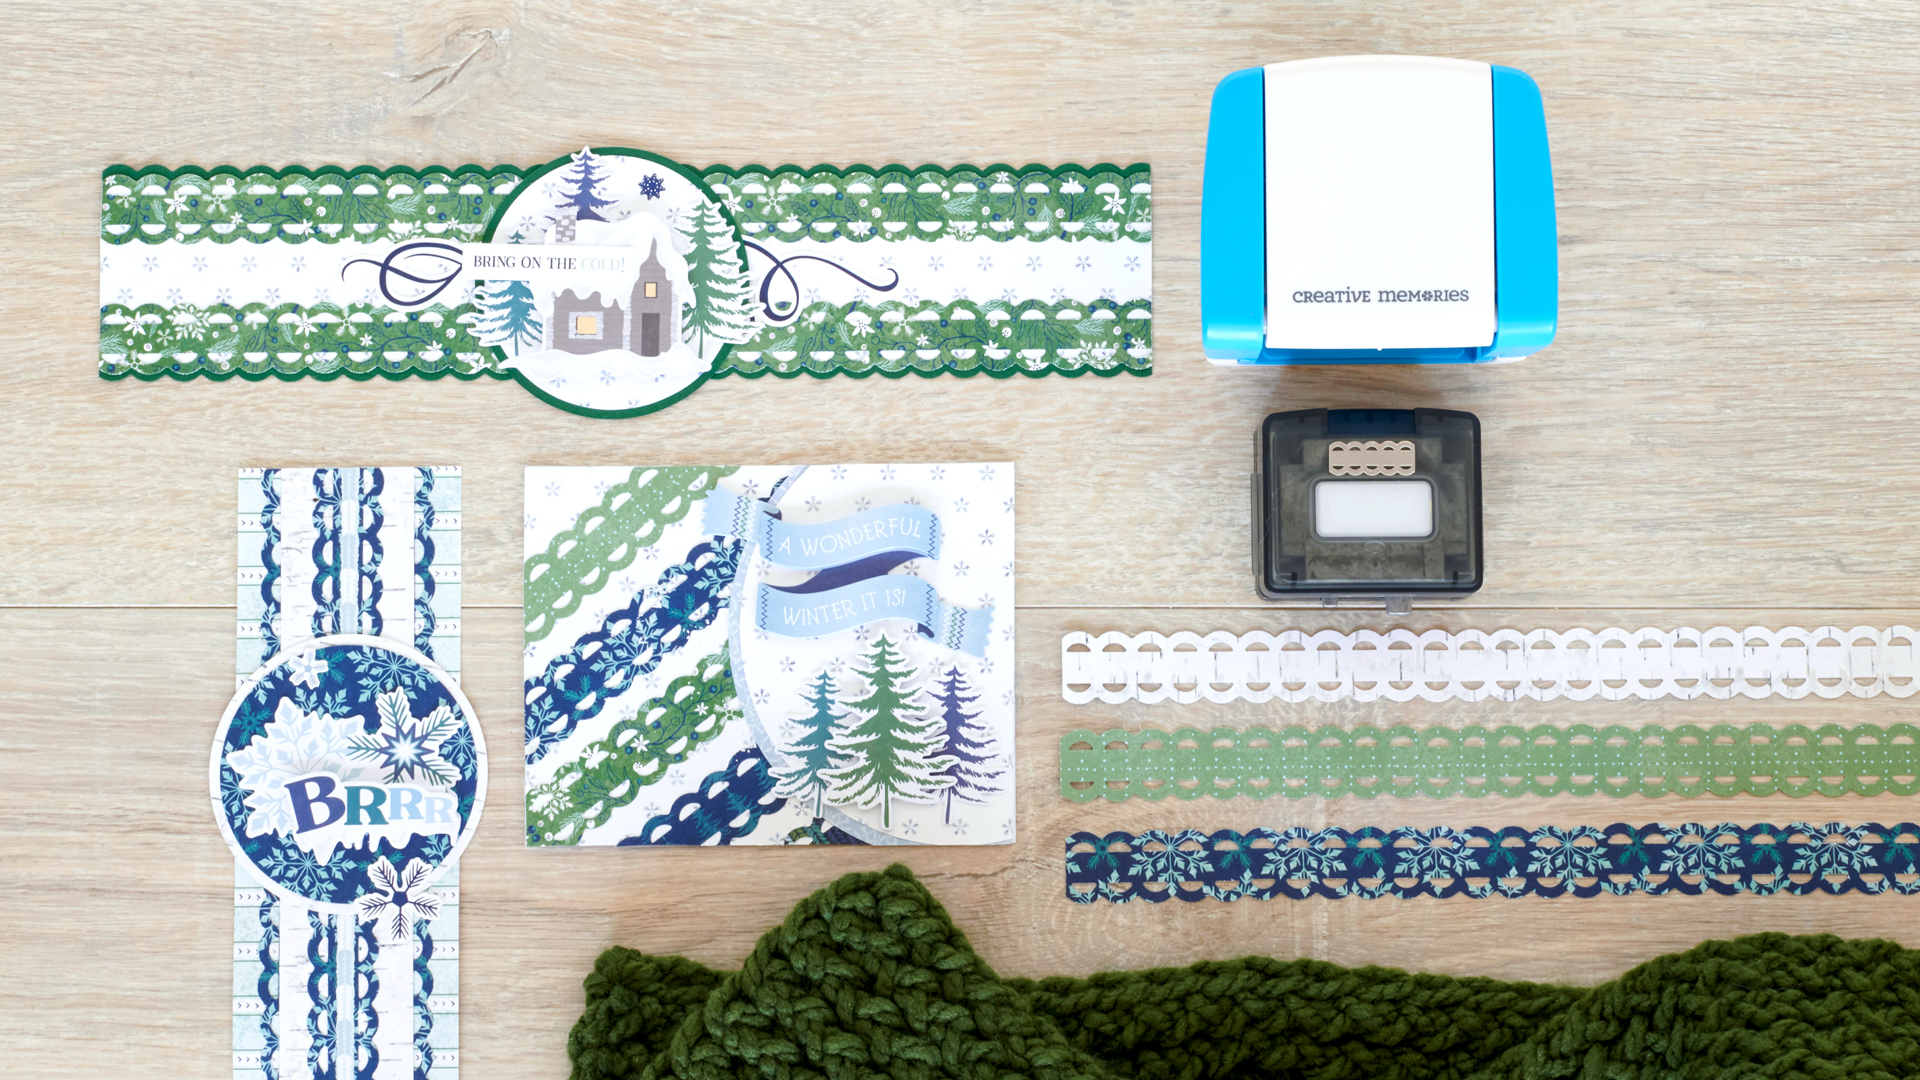
More elegant that a wave and more entrancing than a simple geometric pattern, the repeated series of arcs and curvaceous shapes of scallops make it a subtle yet also bold design impression. And if you want to double down on this dynamic detail, then the Mirrored Scallops Chain Border Maker Cartridge is your aesthetic answer. Make these brr-illiant winter scrapbook projects, featuring scallop borders, that are snow much fun to make. (The scalloped designs almost mimic snowball shapes or mounds of skiable snow, too!)

To create these borders and card, you will need:
- Snowbound Paper Pack or (Shop Canada | Shop Australia)
- Snowbound Stickers or (Shop Canada | Shop Australia)
- Snowbound Layered Embellishments or (Shop Canada | Shop Australia)
- Dark Green Solid Cardstock or (Shop Canada | Shop Australia)
- Blank Card Kit or (Shop Canada | Shop Australia)
- 12-inch Trimmer or (Shop Canada | Shop Australia)
- Original Border Maker System with Mirrored Scallops Chain Border Maker Cartridge or (Shop Canada | Shop Australia)
- Custom Cutting System with Circle Patterns or (Shop Canada | Shop Australia)
- All-Purpose Scissors or (Shop Canada | Shop Australia)
- Tape Runner or (Shop Canada | Shop Australia)
- Repositionable Tape Runner Refill or (Shop Canada | Shop Australia)
- Foam Squares or (Shop Canada | Shop Australia)
Check out the Mirrored Scallops Chain Border Maker Cartridge in action in the video below!

Bring on the Cold Border

Step 1: Cut white dainty snowflakes paper to 2″ x 12″.
Step 2: Use Original Border Maker System with the Mirrored Scallops Chain Border Maker Cartridge to punch two borders from Dark Green Solid Cardstock and two borders from green winter berries paper.
Step 3: Adhere the green winter berries borders to the top and bottom on the white dainty snowflakes strip so that the paper shows through the openings in the border pieces.
Step 4: Adhere the cardstock border pieces underneath the top and bottom edges of the border as shown.
Step 5: From the inside edge of the largest Custom Cutting System Circle Pattern and the Green Blade, cut a circle from Dark Green Solid Cardstock. Use the Blue Blade on the inside edge to cut a circle from the white dainty snowflakes paper. Layer and adhere the pieces to the middle of the border.
Step 6: Add embellishments and stickers as shown.
Wonder Winter Card
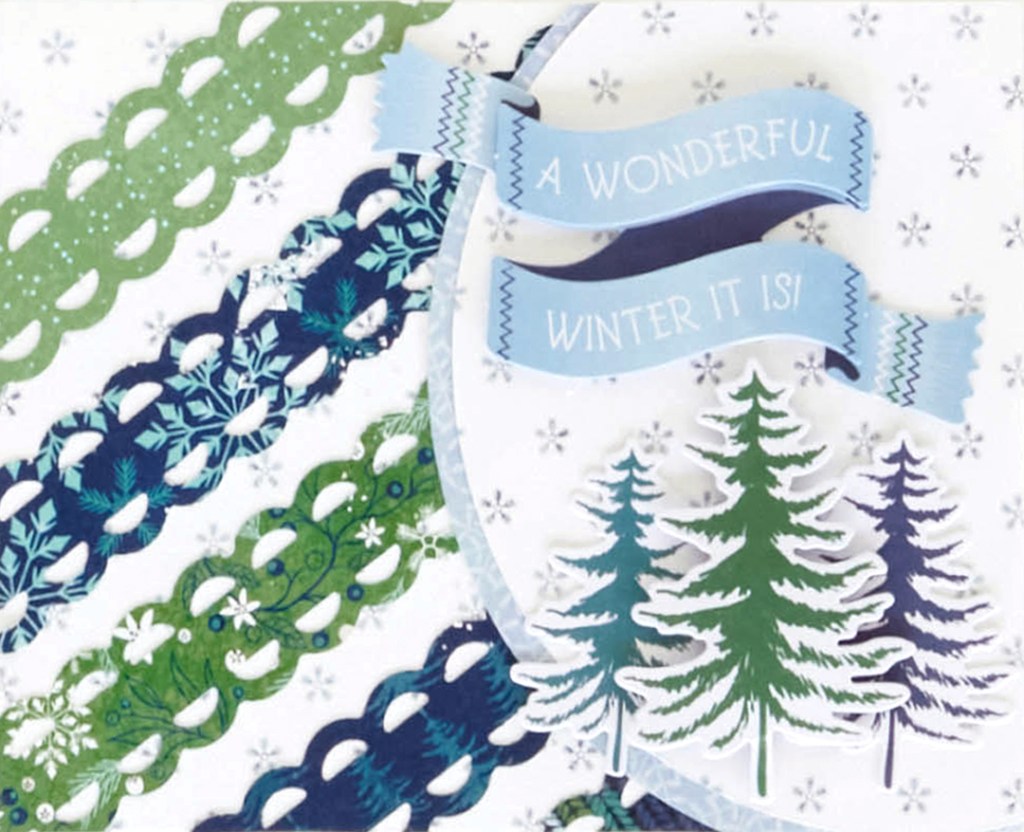
Step 1: Cut white dainty snowflakes paper to 5-1/2″ x 4-1/4″ and adhere to a blank card base.
Step 2: Use Original Border Maker System with the Mirrored Scallops Border Maker Cartridge to punch five borders from a variety of papers Adhere the borders to the card on a diagonal. Trim off the overhang with All-Purpose Scissors.
Step 3: From the outside edge of the medium Custom Cutting System Circle Pattern and the Red Blade, cut a circle from white dainty snowflakes paper. Use the Green Blade on the outside edge to cut a circle from the frosted tiles paper. Layer and adhere the pieces. Adhere the circle to the card as shown. Use All-Purpose Scissors to cut off the overhang.
Step 4: Add embellishments as shown.
Brrr Border
Step 1: Cut the stripes paper to 2-1/2″ x 12″ and birch paper to 1-1/2″ x 12″.
Step 2: Use the Original Border Maker System with the Mirrored Scallops Chain Border Maker Cartridge to punch three borders from royal blue dancing snowflakes paper. Adhere borders to both sides of the birch paper strip and one border to the middle of the strip. Adhere the piece to the middle of the striped strip.
Step 3: Add a sticker strip to the middle of the border.
Step 4: From the inside edge of the largest Custom Cutting System Circle Pattern and the Green Blade, cut a circle from the birch paper. Use the Blue Blade on the inside edge to cut a circle from the royal blue dancing snowflakes paper. Layer and adhere the pieces to the border as shown.
Step 5: Add embellishment and stickers as shown.
Which of these winter scrapbook projects has you most s-mitten? Do you like the design aesthetic of the scallop borders? Share your thoughts in the comments section!

[…] never looked so good! Click here to find out how to make this dazzling […]
[…] by no means appeared so good! Click on right here to learn how to make this dazzling […]