January 6, 2022
A Cut Above The Rest: Piecing Together Prismatic Paper and Prismatic Stickers for Scrapbooking
2022 is off to a hue-tiful, too-hot-to-handle start — for a limited time, you can earn exclusive Prismatic Simple Cuts Paper Packs and Stickers FREE when you purchase any assortment of 8+ Totally Tonal products! Talk about a totally terrific treat!
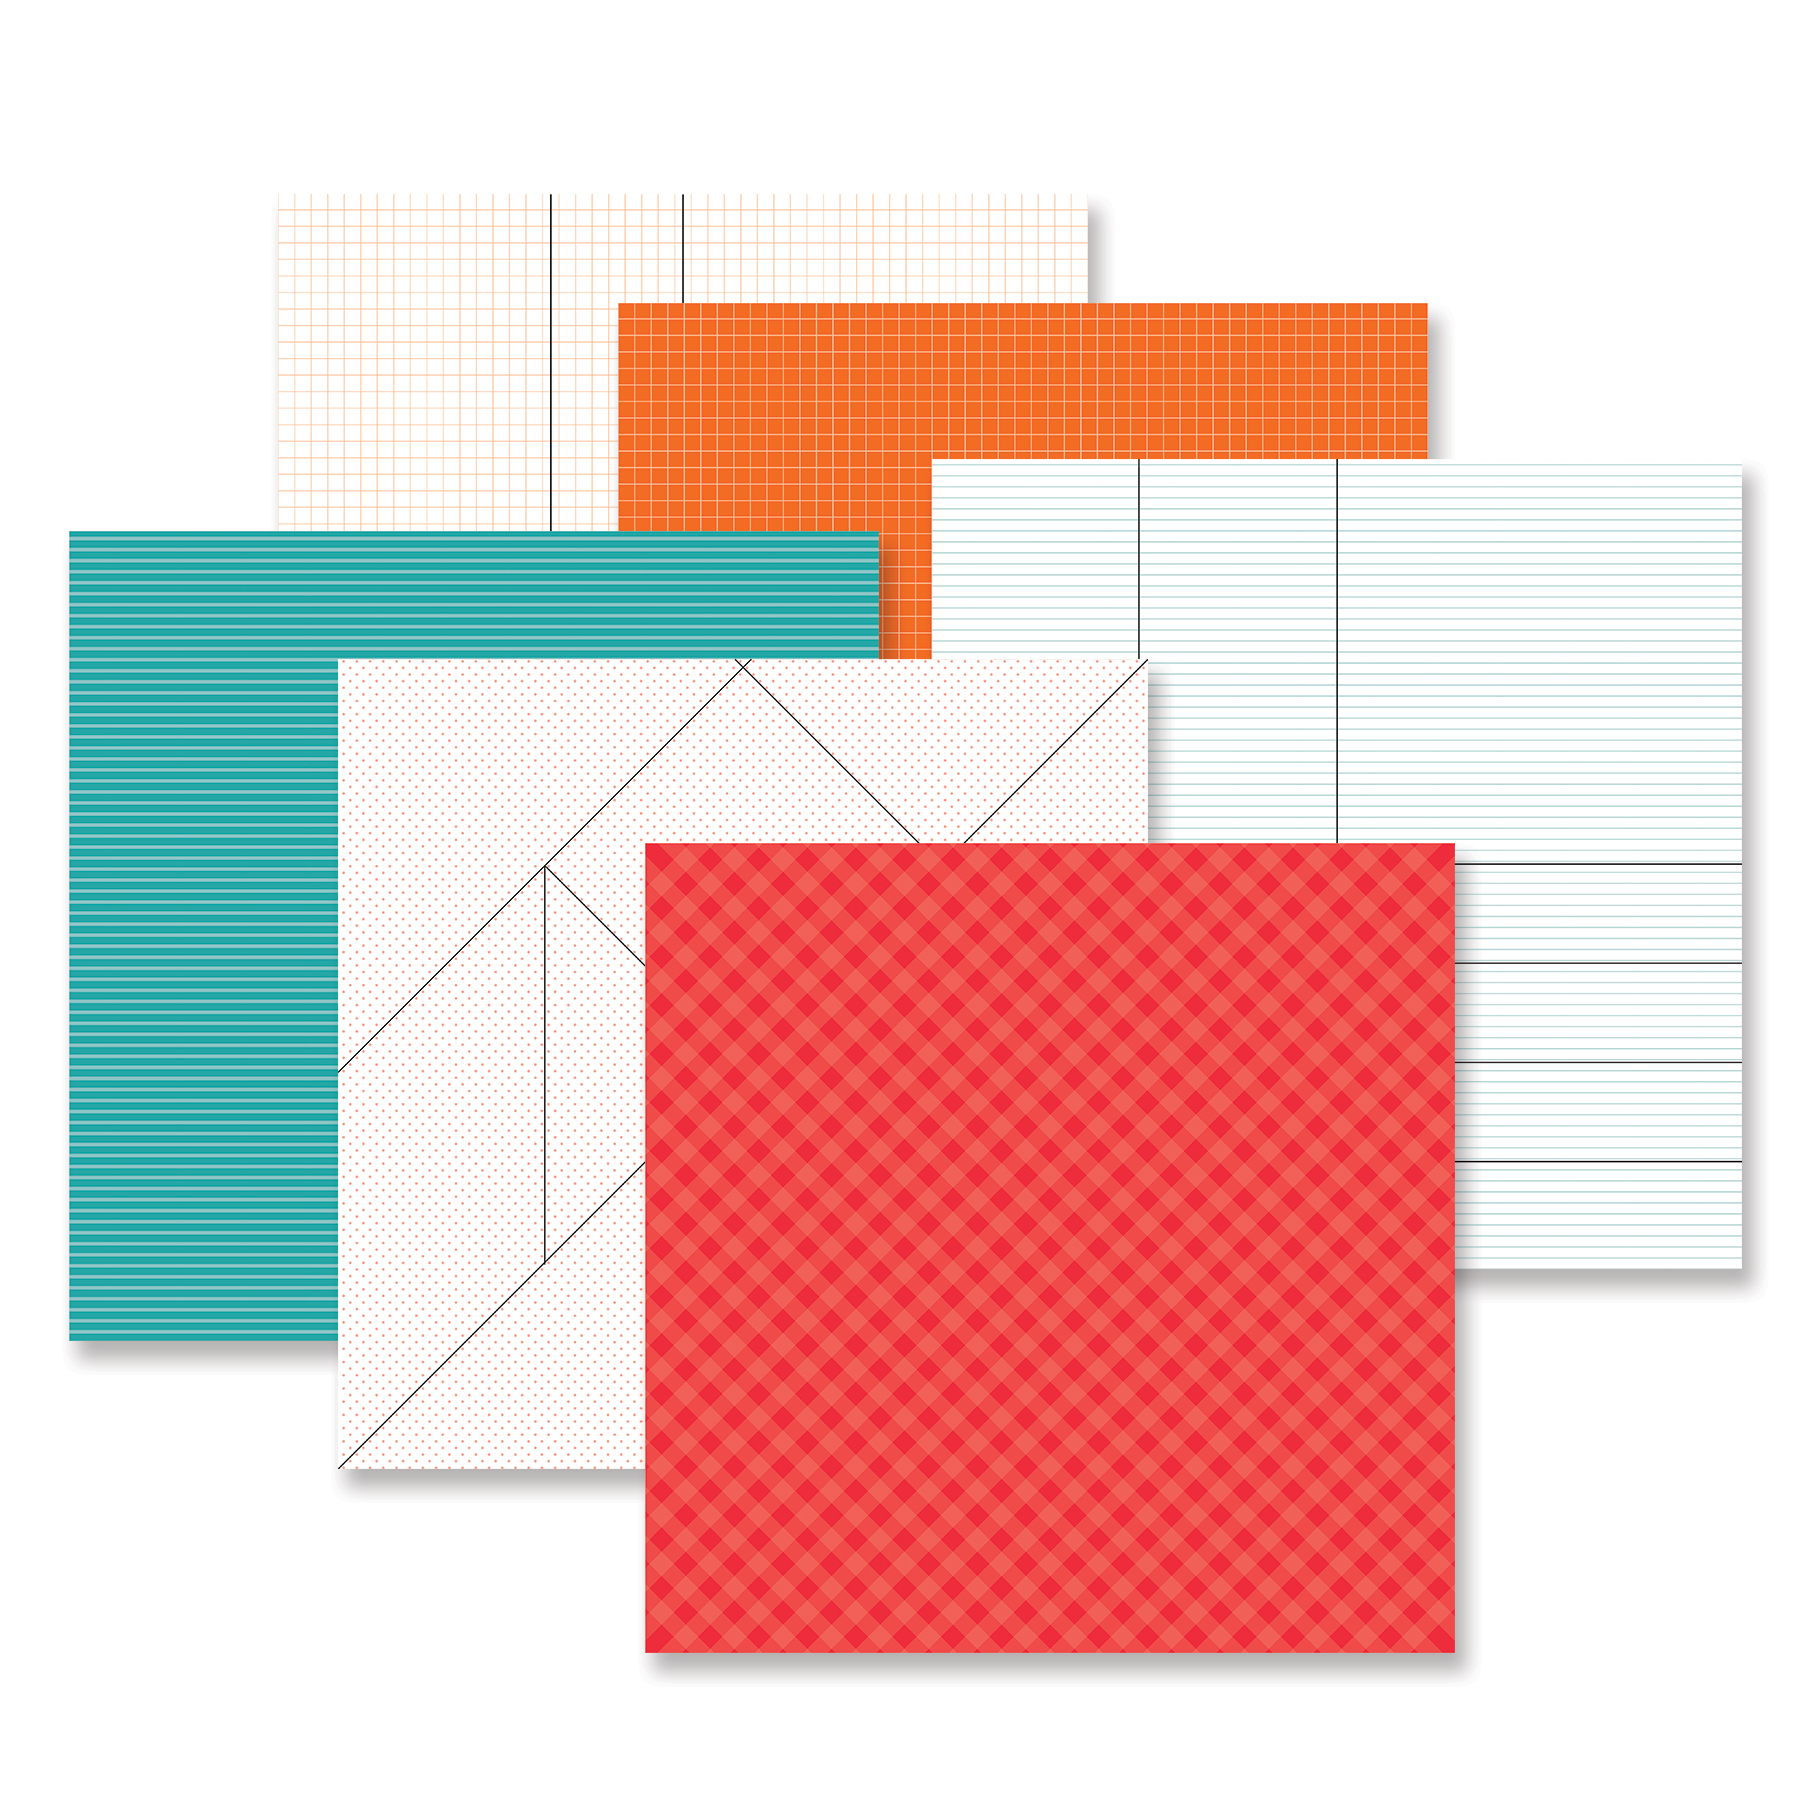
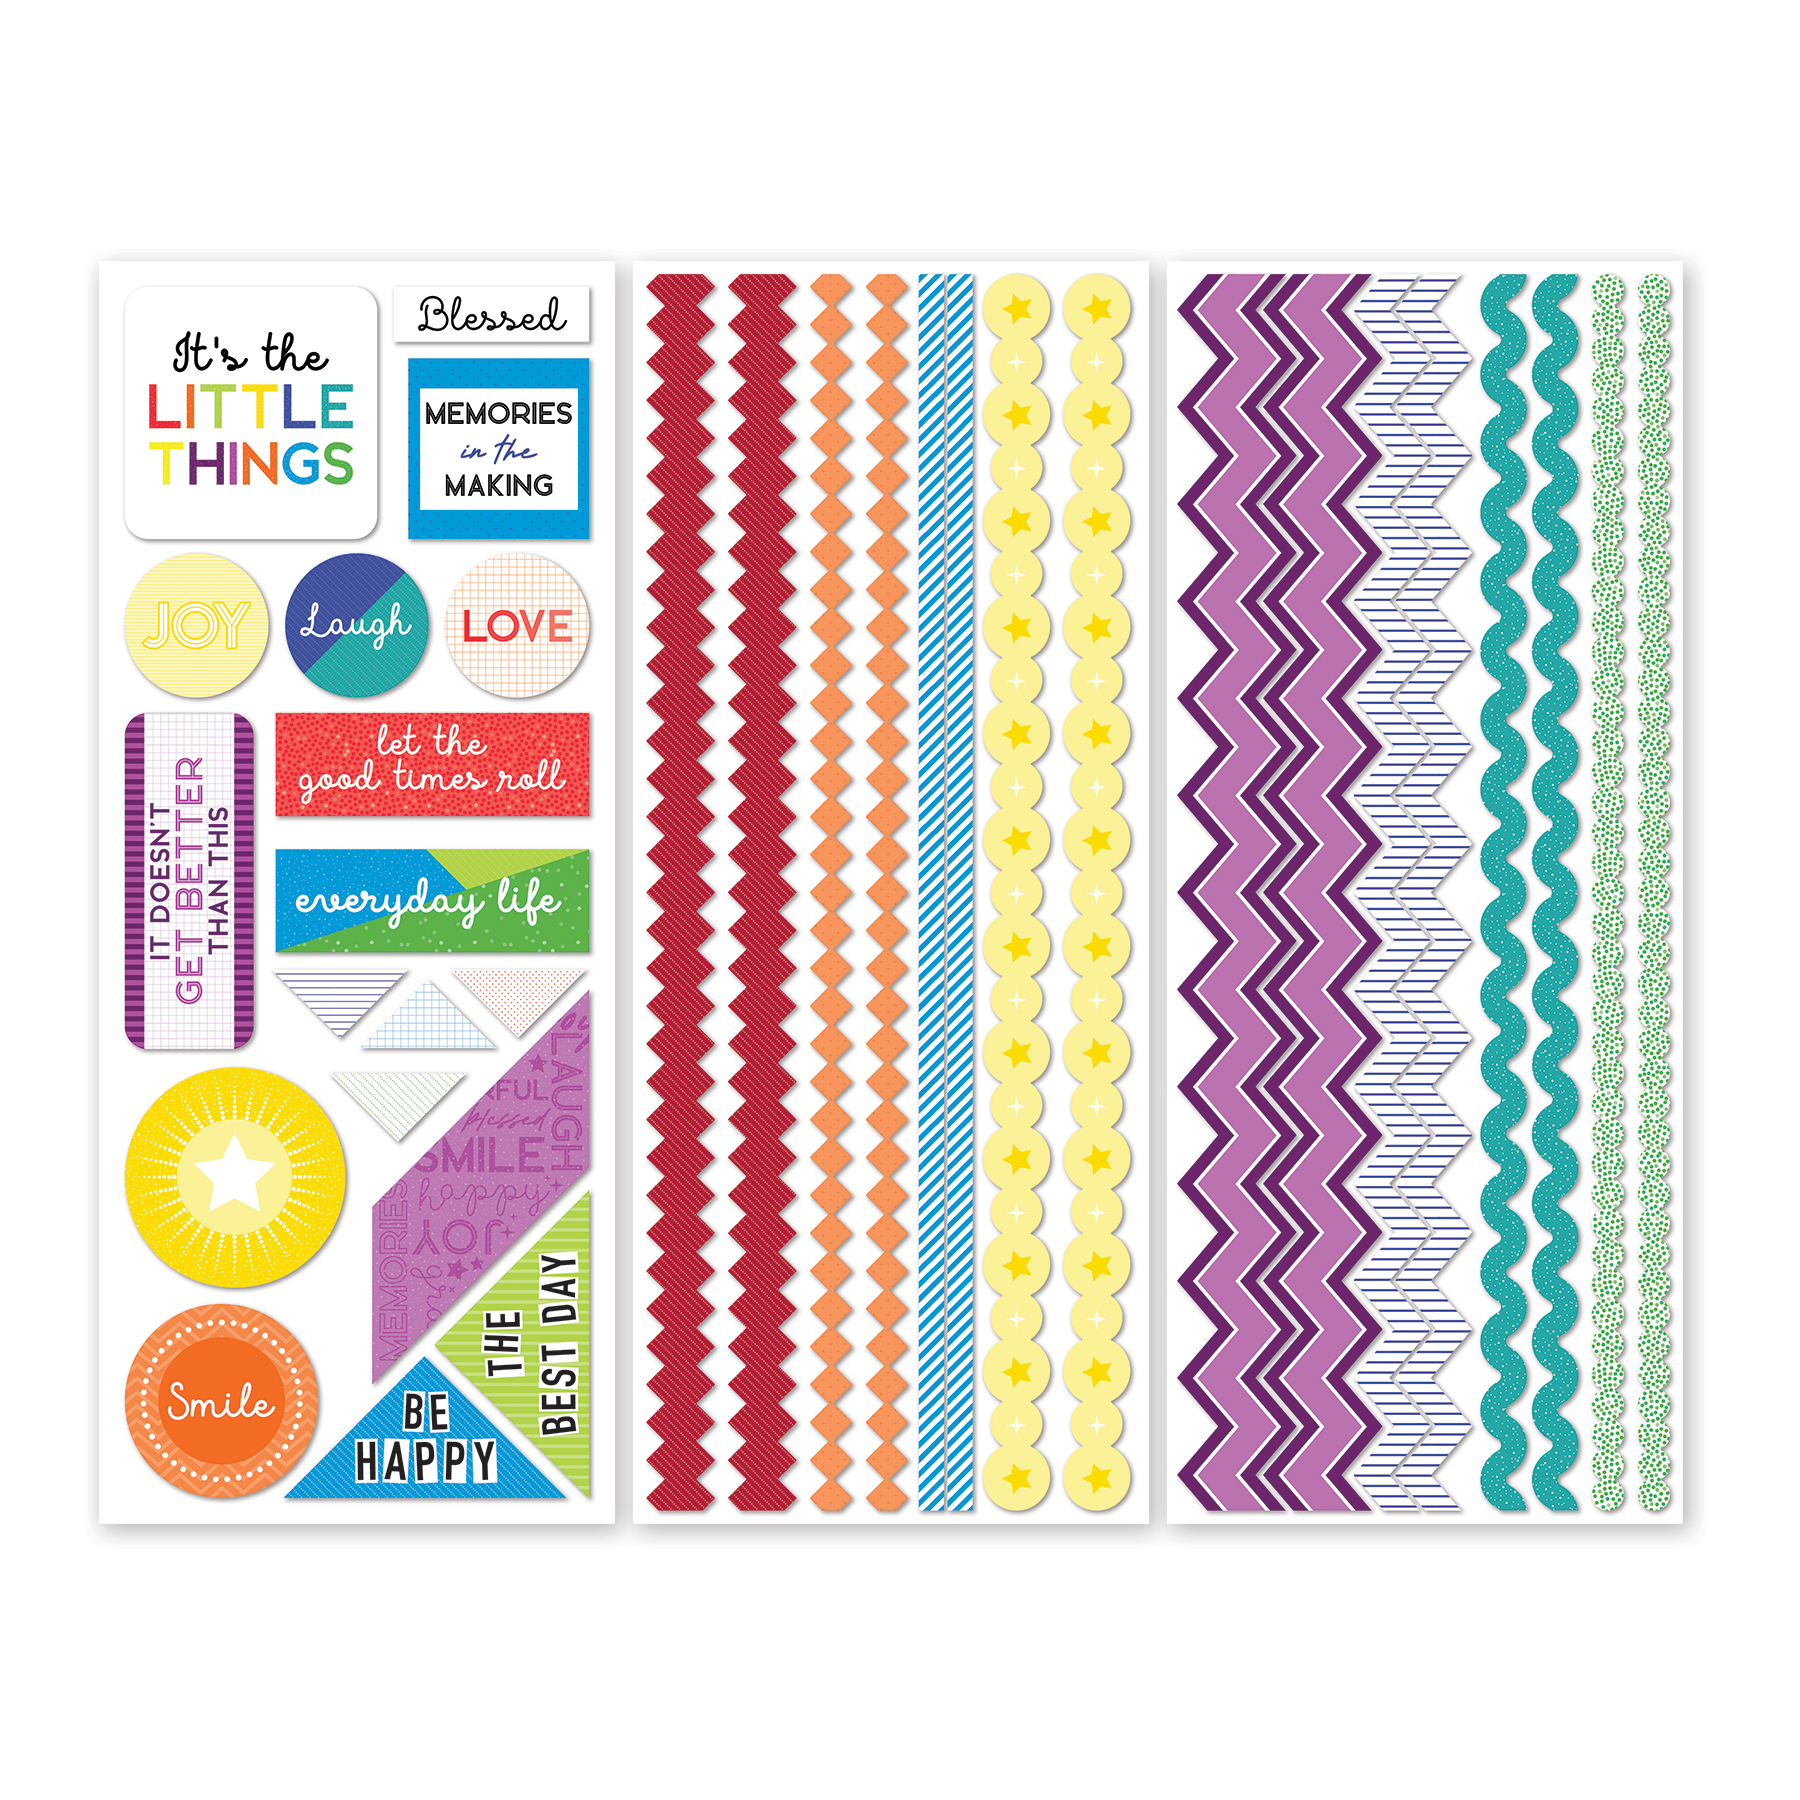
What’s so cool about these Prismatic products? Well, the front side of each sheet in the Prismatic Simple Cuts Paper Pack (6/pk) features general designs like checkers, chevrons and polka dots, and the reverse side has geometric lines you can use as cutting guides to create your own piece-ably perfect and unique layouts! And when you top it all off with the Prismatic Stickers (3/pk), you’re in for pops of personality! A win-win!
For more details, visit: US | CA | AU
Psst, we’ll also have blog posts down the road featuring Totally Tonal products, so stay tuned!
So, now it’s time to mix and match your way to magnificent layouts featuring the Prismatic Paper Pack and Prismatic Stickers — have fun!
Take a Look at the Prismatic Products You Can Earn FREE!
See them in action in this video!
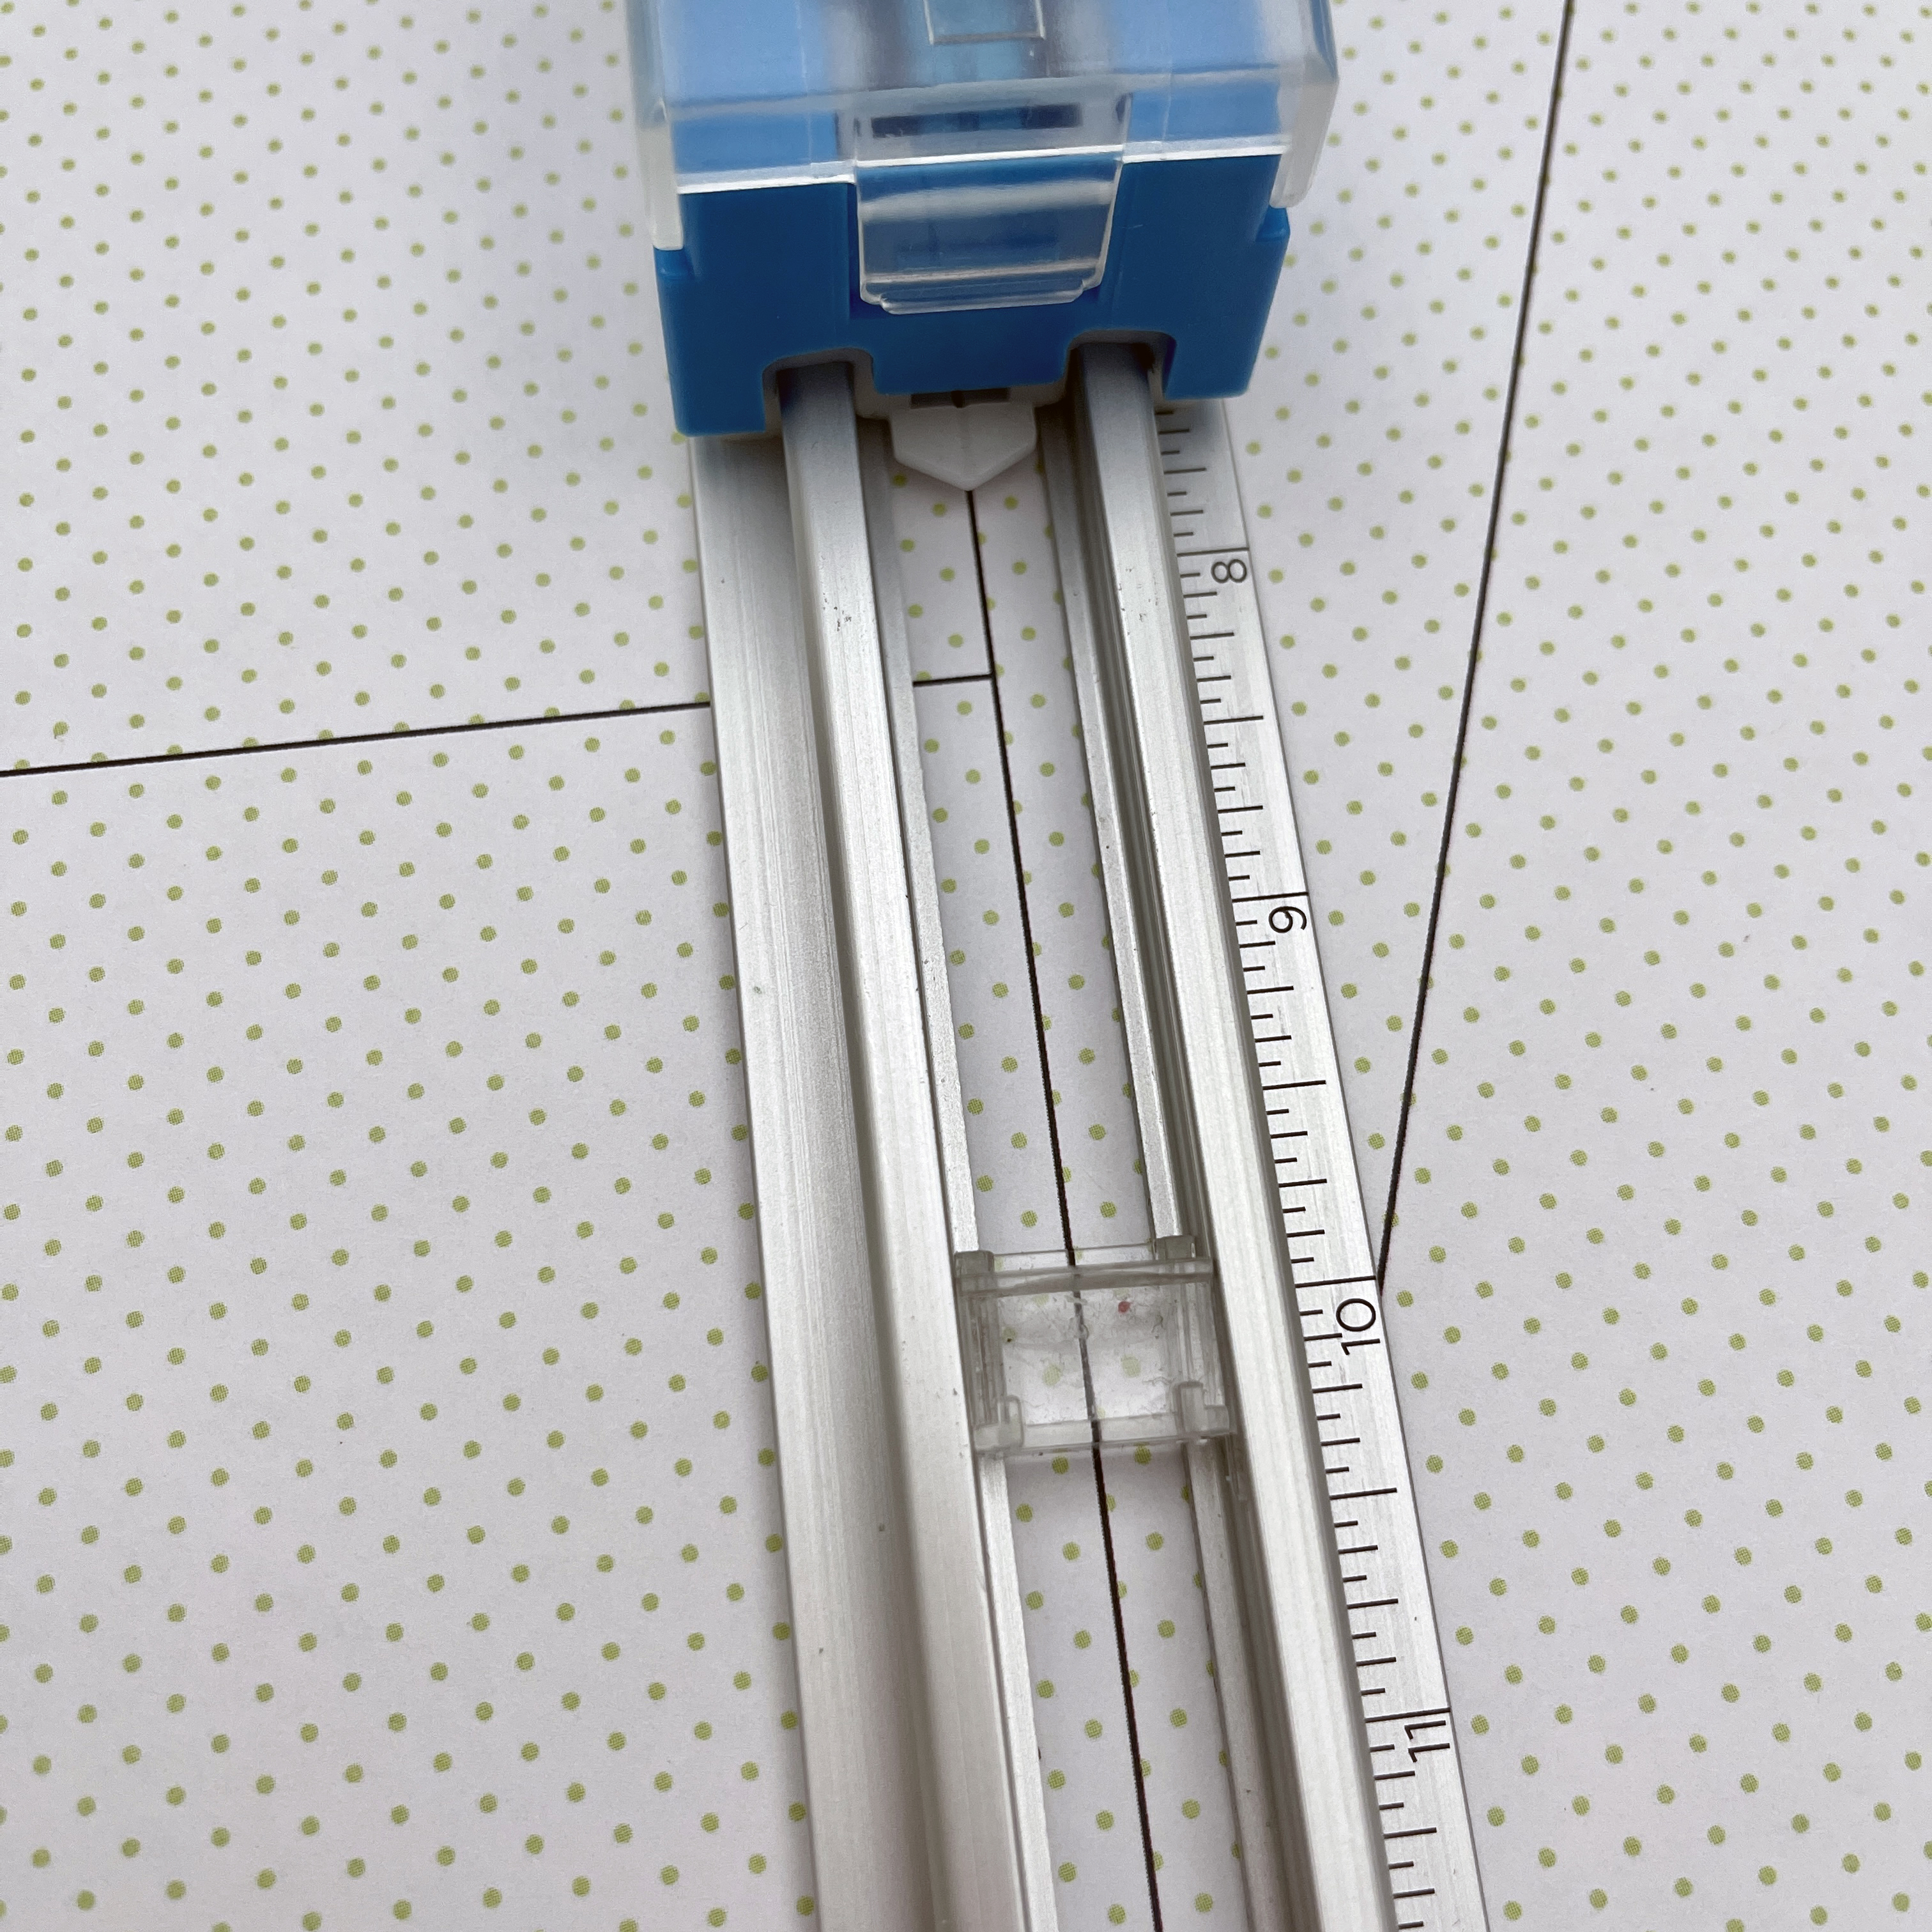
To have a plethora of Prismatic patterned paper pieces to play with, carefully cut along the lines printed on the back of each Prismatic paper. You can use the Sight Line guides on the 12-inch Trimmer to make sure you get the straightest cut possible! (Tip: Start by cutting straight-edged shapes on each paper first so when you need to make a diagonal cut you can easily turn the smaller pieces to fit in the trimmer.) After cutting out all the pieces, you can group them into piles with similar shapes or with similar hues.
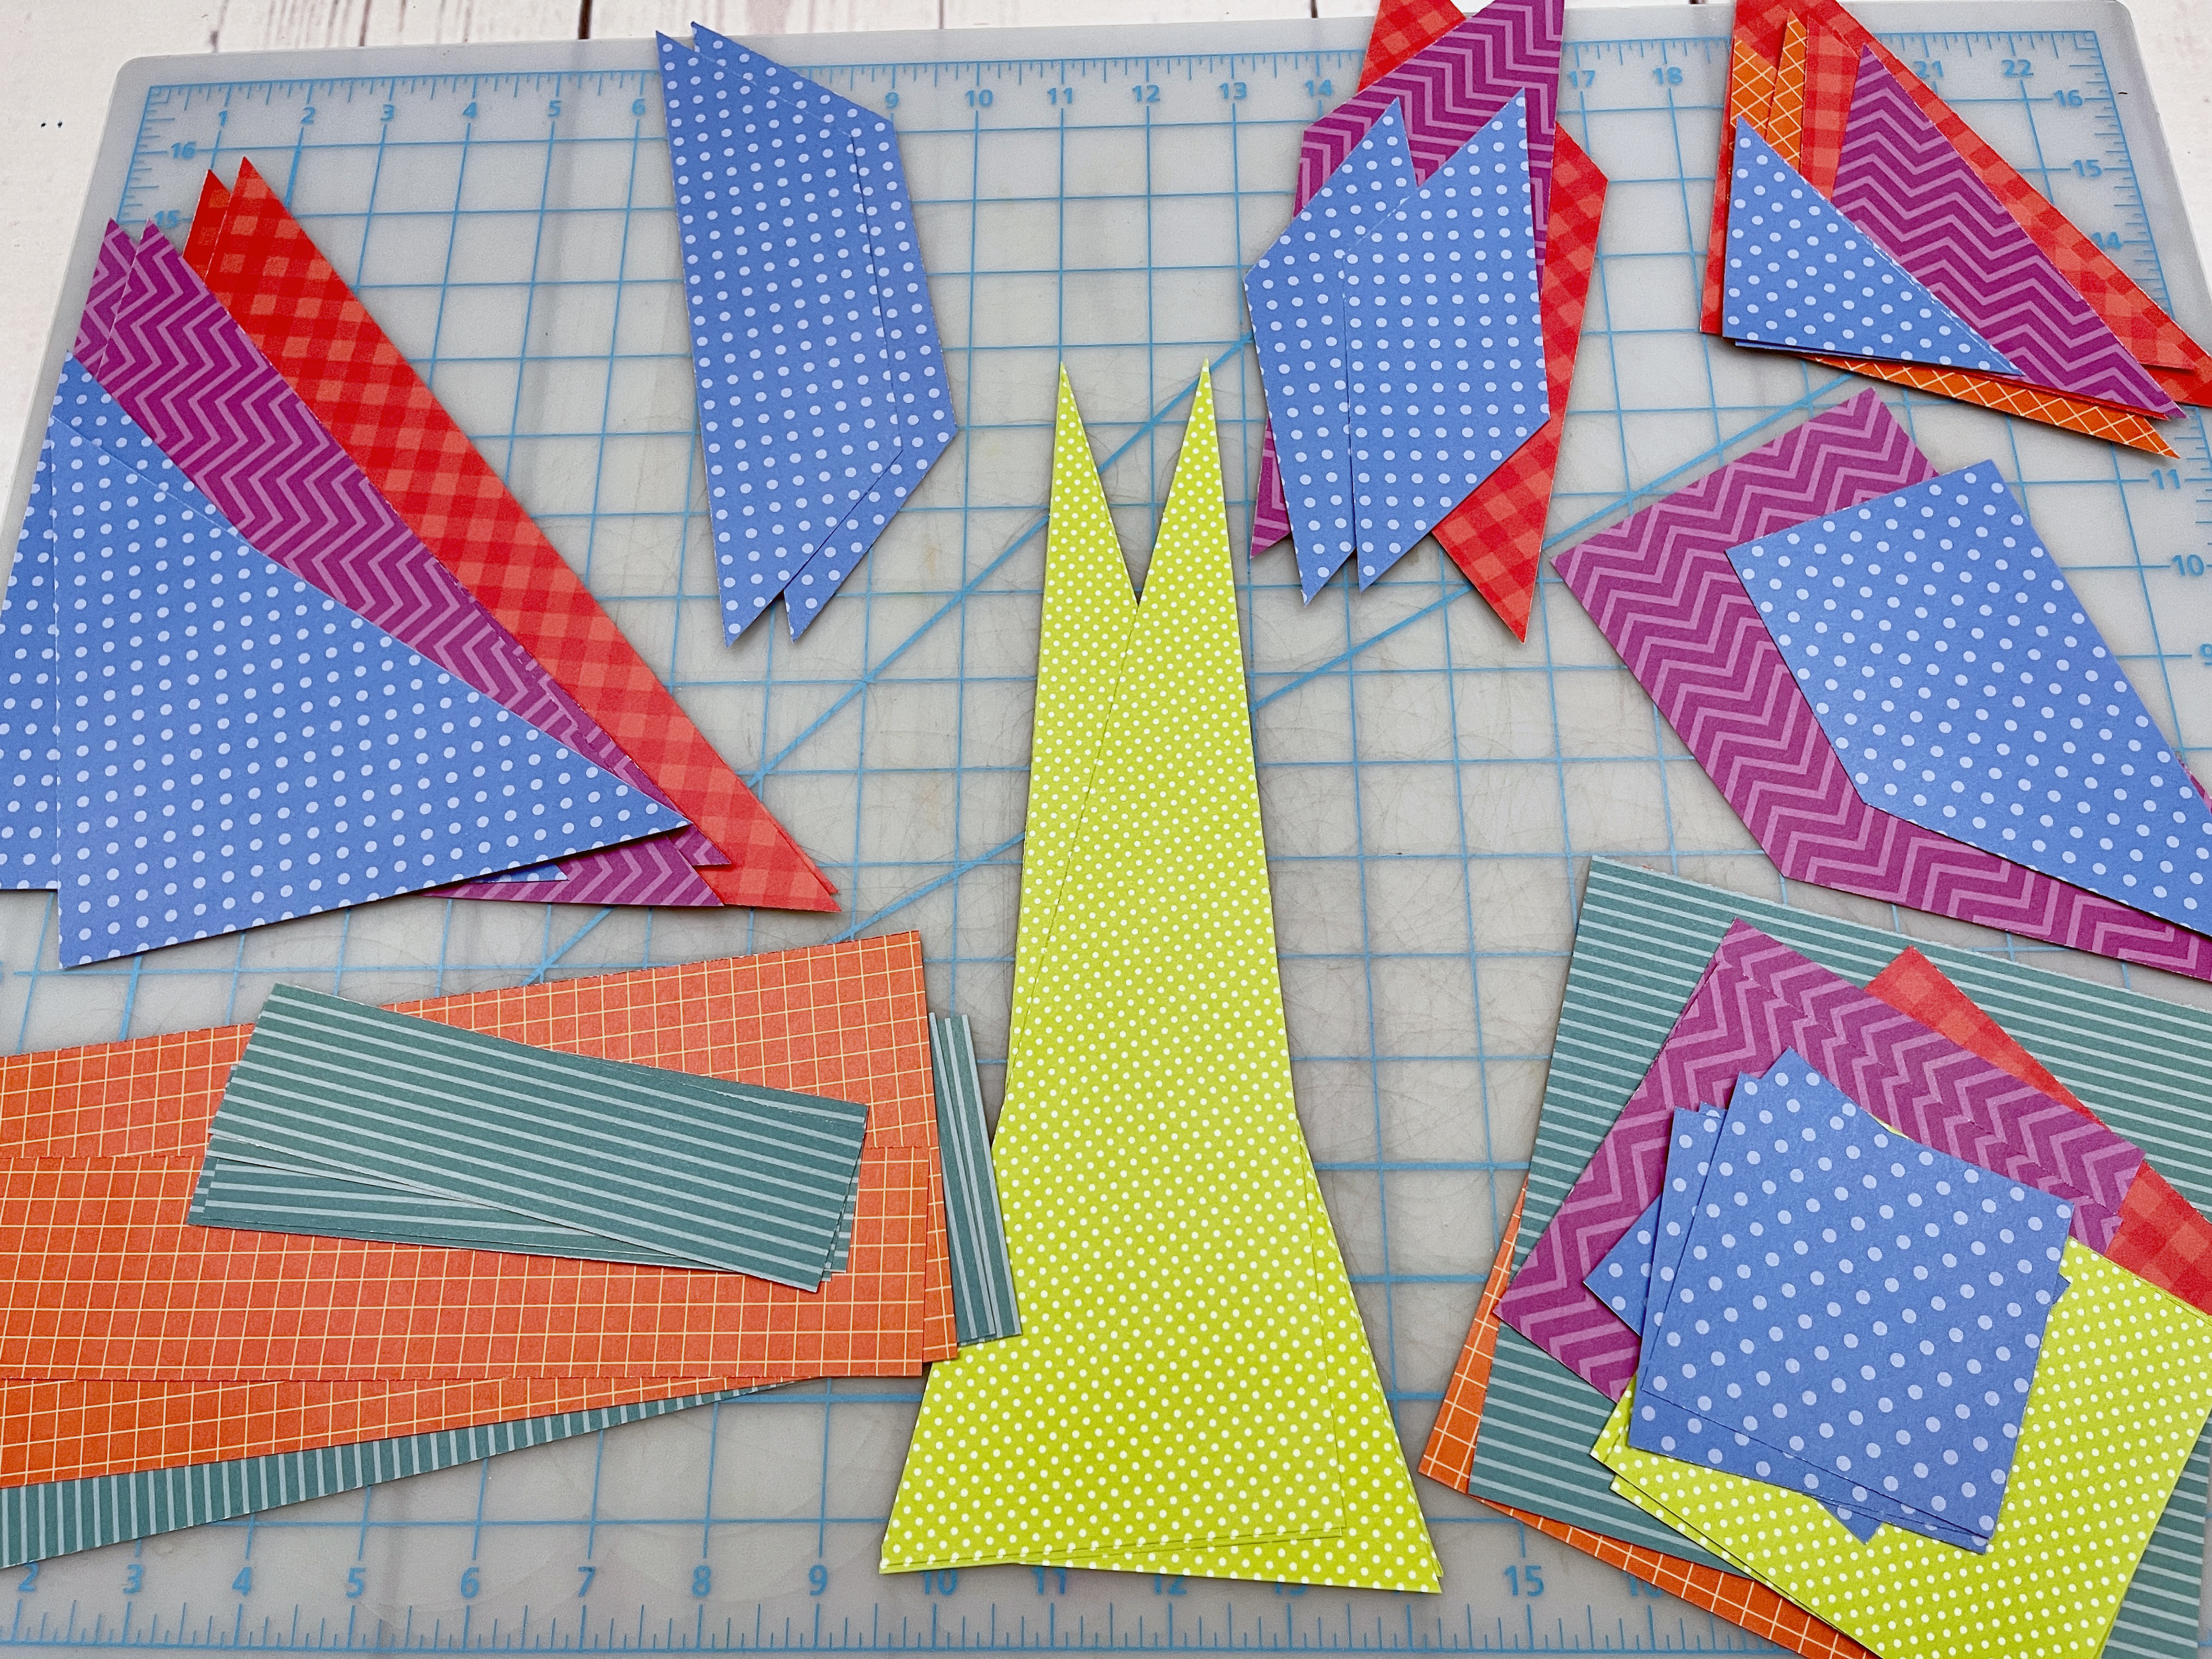
Now it’s time to play! You can mix and match these shapes in so many different ways, but follow these instructions to make the three different layouts.
The Best Day Layout

To create this layout you will need:
- Prismatic Simple Cuts Paper Pack + Sticker Pack — Exclusive in the Totally Tonal Buffet promotion
- White Solid Cardstock or (Shop Canada | Shop Australia)
- 12-inch Trimmer or (Shop Canada | Shop Australia)
- Tape Runner or (Shop Canada | Shop Australia)
- Repositionable Tape Runner Refill or (Shop Canada | Shop Australia)

Step 1: Align and adhere the 4″ orange grid strip to the middle of the White Solid Cardstock (or White Refill Page).
Step 2: Flip over two of the lime green polka dots triangles to show the reverse pattern. Adhere them on both sides of the orange grid strip as shown. Cover the seams between the triangles with coordinating green border stickers and along the sides of the orange grid strip with coordinating orange border stickers.
Step 3: Add photos and title sticker as shown.
Smile Layout

To create this layout you will need:
- Prismatic Simple Cuts Paper Pack + Sticker Pack — Exclusive in the Totally Tonal Buffet promotion
- White Solid Cardstock or (Shop Canada | Shop Australia)
- 12-inch Trimmer or (Shop Canada | Shop Australia)
- Micro-Tip Scissors (Shop Canada | Shop Australia)
- Tape Runner or (Shop Canada | Shop Australia)
- Repositionable Tape Runner Refill or (Shop Canada | Shop Australia)
- Foam Squares or (Shop Canada | Shop Australia)
Step 1: Place the smaller 2″ orange grid strip and 3″ teal stripes strip together on left-hand side of White Solid Cardstock (or White Refill Page), approximately 1/2″ from the edge of the page.
Step 2: Leave a 1/4″ space from the previously adhered strips and adhere the 6″ orange grid and teal stripes squares, leaving approximately 1/2″ space from the right-hand edge of the page.
Step 3: Adhere a teal border sticker strip along the edge of orange grid paper strip and square, and an orange border sticker strip along the edge of the teal stripes strip and square. Trim with a scissors.
Step 4: Create photos mats with White Solid Cardstock: (1) 4″ x 6″ and (2) 4″ x 4″. Add photos that measure (1) 3-1/2″ x 5-1/2″ and (2) 3-1/2″ x 3-1/2″. Adhere to the layout as shown.

Step 5: Add a title sticker with Foam Squares for added dimension.
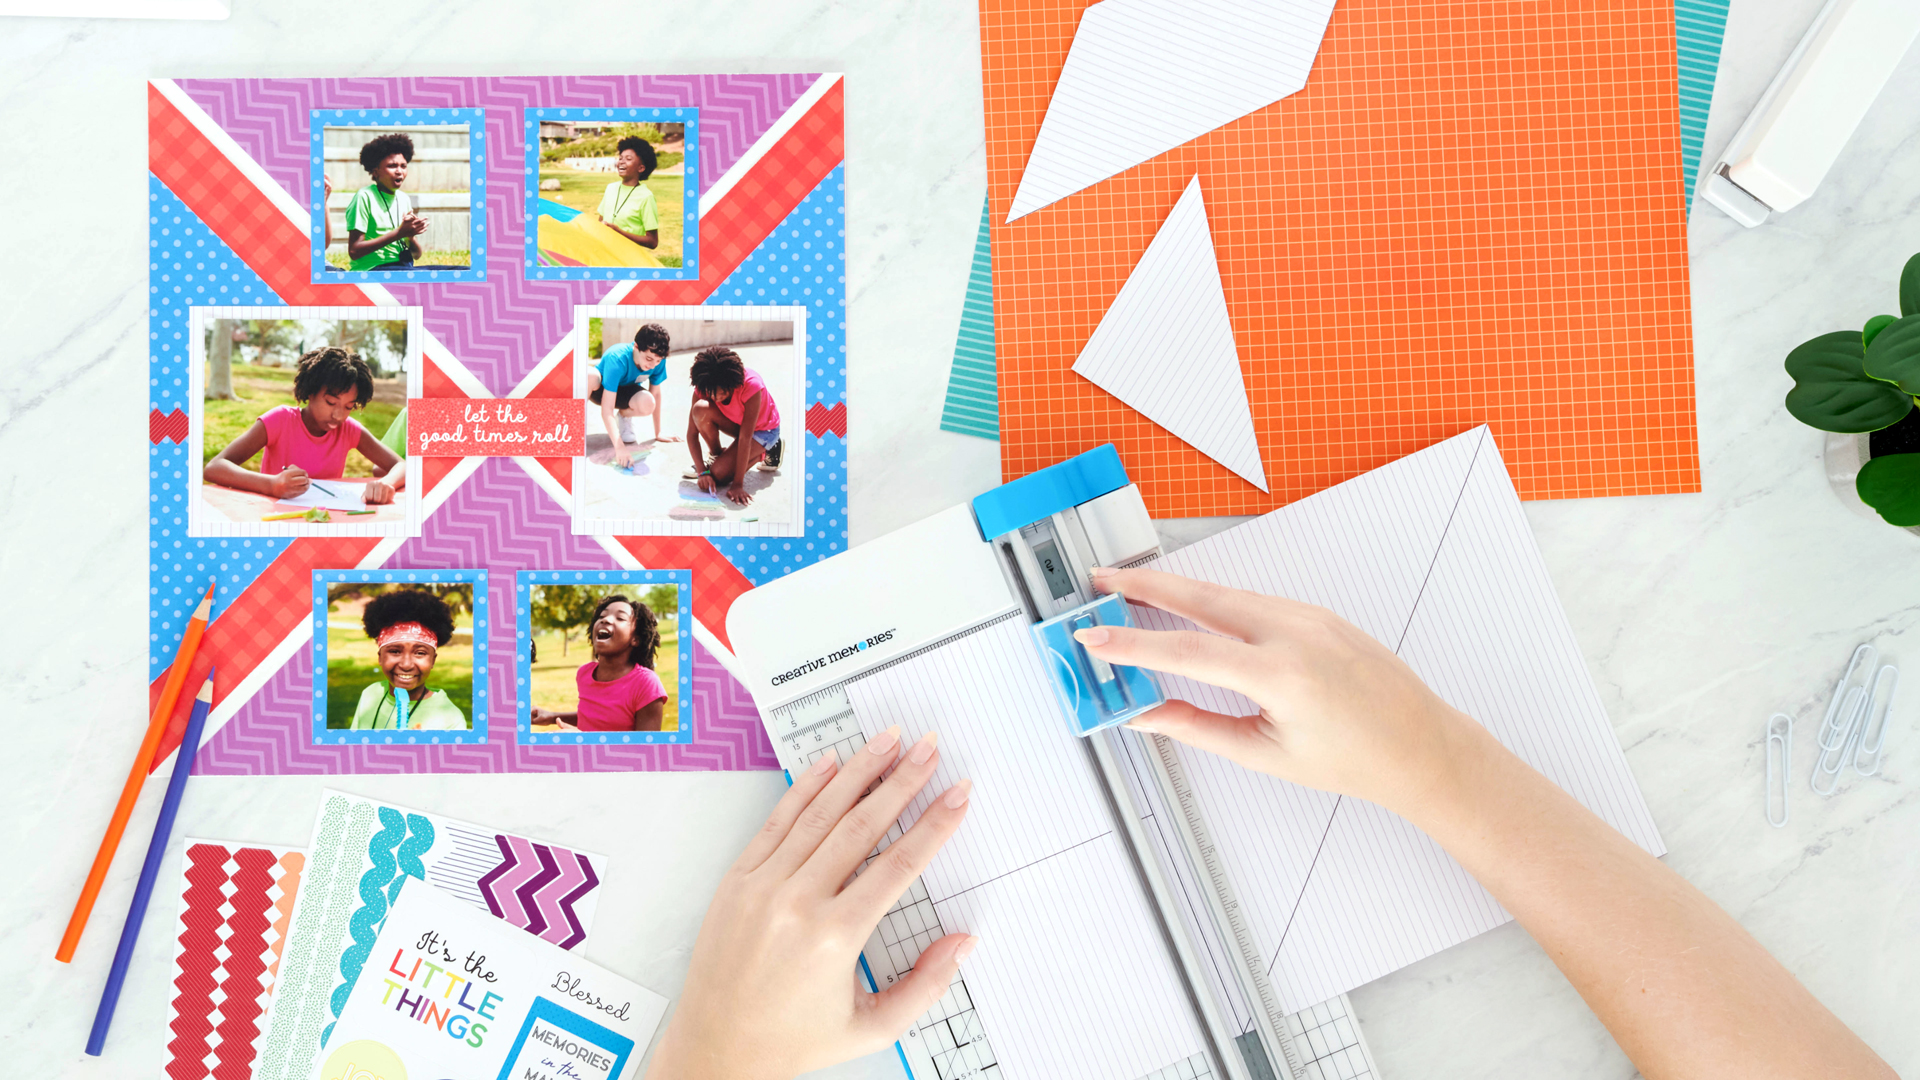
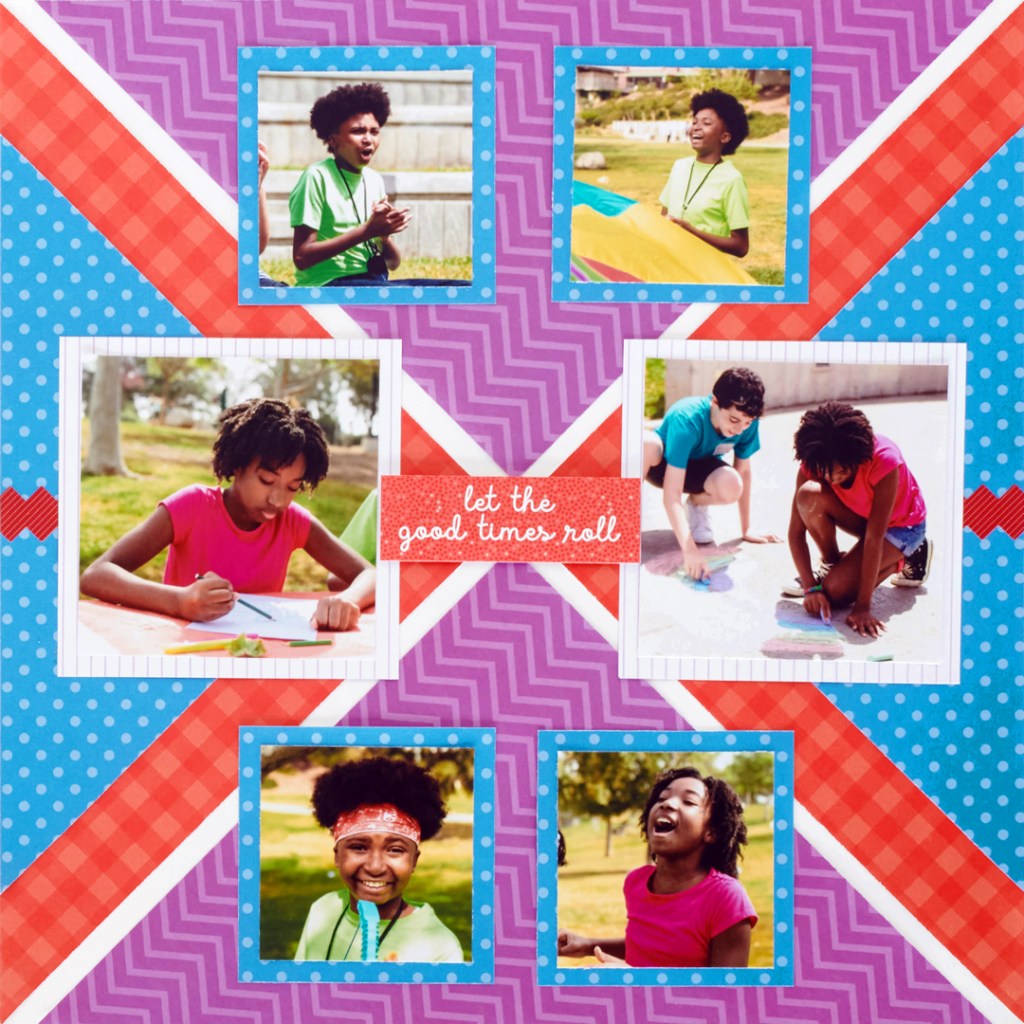
Let the Good Times Roll Layout
To create this layout you will need:
- Prismatic Simple Cuts Paper Pack + Sticker Pack — Exclusive in the Totally Tonal Buffet promotion
- White Solid Cardstock or (Shop Canada | Shop Australia)
- 12-inch Trimmer or (Shop Canada | Shop Australia)
- Tape Runner or (Shop Canada | Shop Australia)
- Repositionable Tape Runner Refill or (Shop Canada | Shop Australia)
- Foam Squares or (Shop Canada | Shop Australia)
Step 1: Place the long edges of the large red gingham triangles along the left and right sides of White Solid Cardstock (or White Refill Page) and adhere. Layer the largest blue polka dots triangles on top of the red gingham triangles and adhere.

Step 2: Align the long edges of the large purple chevrons triangles along the top and bottom edges of the base page and adhere.
Step 3: Add the red border sticker across the middle of the page.
Step 4: Flip over the two purple squares to use as photo mats for two photos that measure 3-1/2″ x 3-1/2″. Adhere over the triangles and border sticker.
Step 5: Trim four photos to measure 2-1/2″ x 2-1/2″ and mount on each of the four small blue polka dots squares. Adhere two above and two below the larger photos as shown.
Step 6: Add a title sticker with Foam Squares over the border sticker in the middle of the layout.
What layouts will you piece together featuring the Prismatic Paper Pack and Prismatic Stickers? If you want a refresher on the details on this promo, visit: US | CA | AU

Love the cool ideas and layouts!
These layouts are super easy and fun!
[…] Simple Cuts Paper Packs and Stickers FREE! For promo details, visit: US | CA | AUAlso, we recently posted a blog that shows how to use the Prismatic Simple Cuts Paper Pack and Stickers — the freebies in this […]