January 25, 2022
Astoundingly Aussie: Australia Scrapbooking Layout
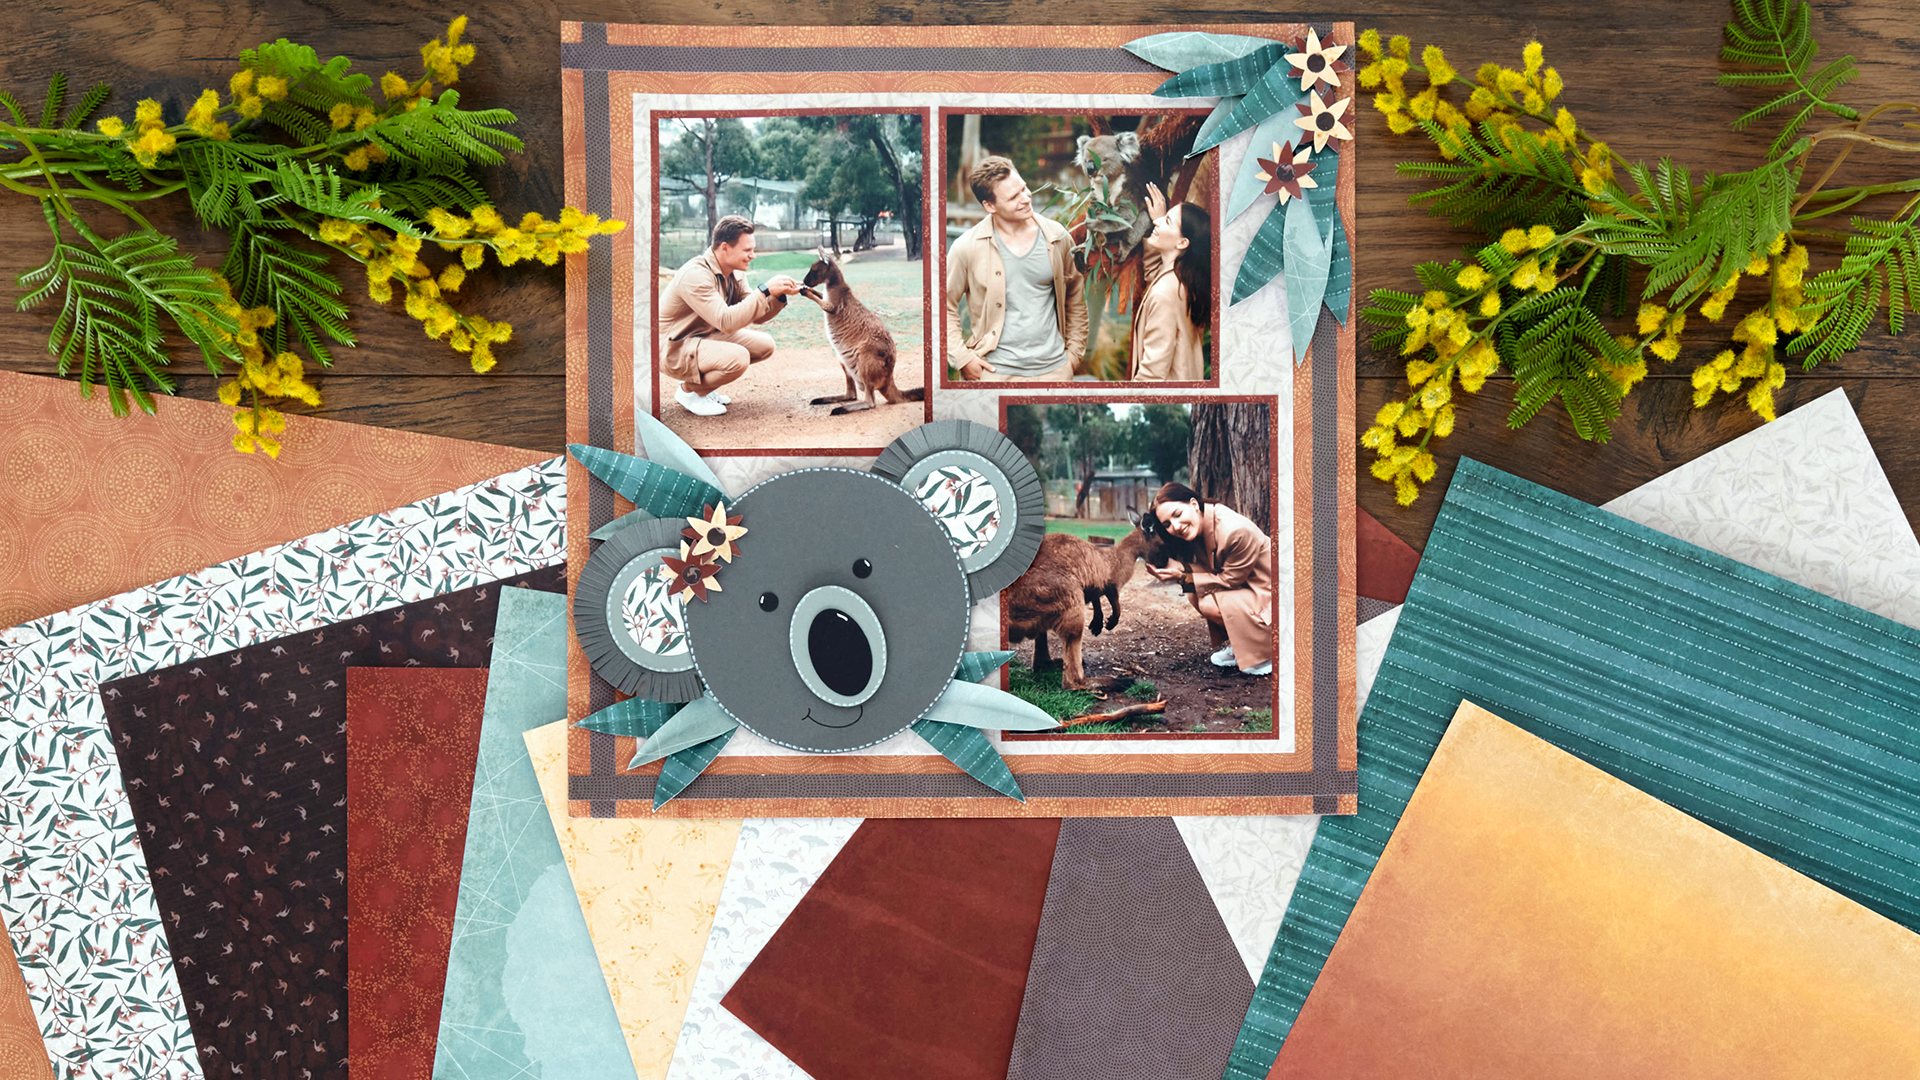
Think of Australia, and some symbols, images and icons may come to mind — the red, hot and dry Outback, the drone of a didgeridoo, unique wildlife like koalas, kangaroos, platypuses, echidnas and emus, the vast Great Barrier Reef, green-and-gold achievements in sporting arenas and much more. And when you pair these sentiments with the latest Sunburnt Country Paper Pack (and the fact that the 26th of January is Australia Day!), you’re in for layouts that are astoundingly Aussie, like this Australia scrapbooking layout that is definitely high in koala-ty!
To create this layout you will need:
- Sunburnt Country Paper Pack or (Shop Canada | Shop Australia)
- Black, Charcoal, & Light Grey Solid Cardstocks or (Shop Canada | Shop Australia)
- Custom Cutting System with Circle & Oval Patterns or (Shop Canada | Shop Australia)
- Piece by Piece Mini Trio Punch Set or (Shop Canada | Shop Australia)
- 12-inch Trimmer or (Shop Canada | Shop Australia)
- Micro-Tip Scissors (Shop Canada | Shop Australia)
- Tape Runner or (Shop Canada | Shop Australia)
- Repositionable Tape Runner Refill or (Shop Canada | Shop Australia)
- Foam Squares or (Shop Canada | Shop Australia)
- Black Dual-Tip Pen or (Shop Canada | Shop Australia)
- White Chalking Pen — Out of stock
Take a look with CM Advisor Kylie Kingham as she talks about the Sunburnt Country papers and the layout she created with them.

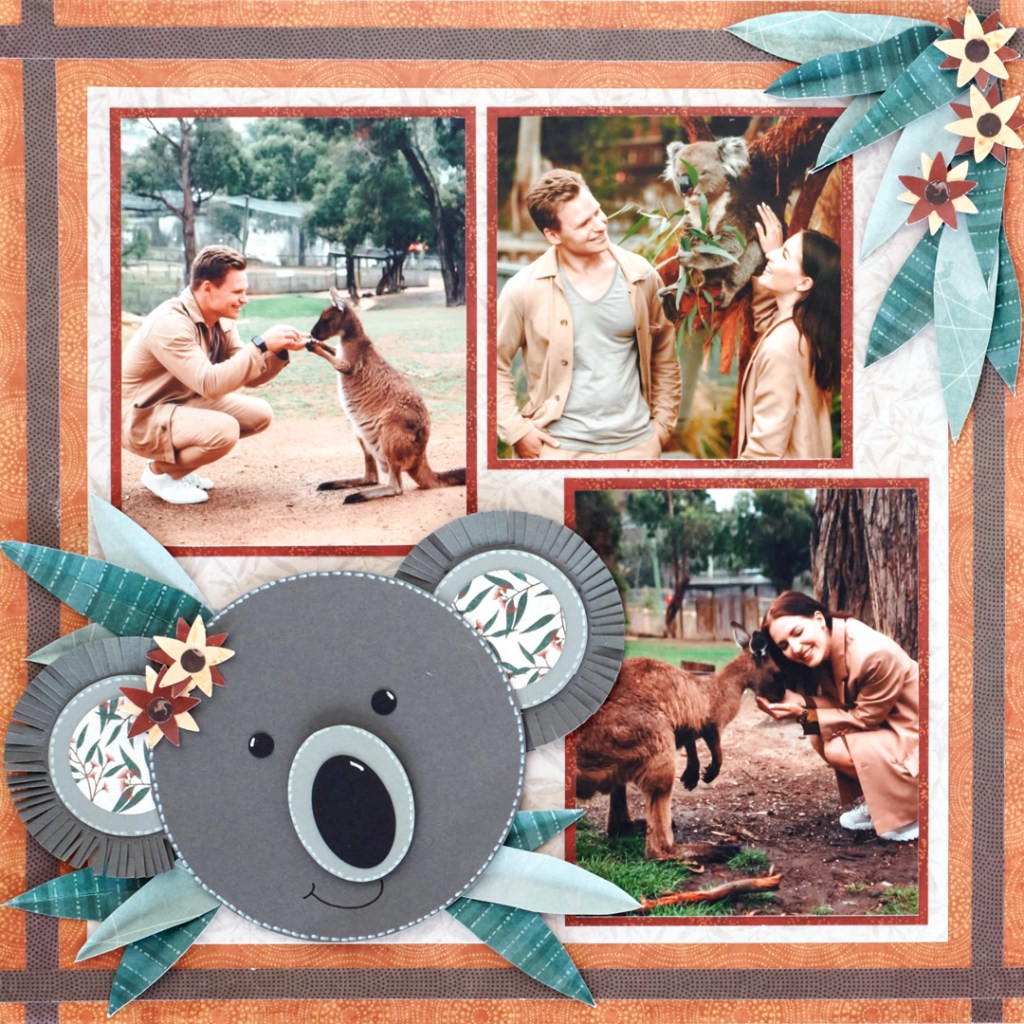
Step 1: Trim the muted beige eucalyptus designer paper to 10″ x 10″ and adhere on top of burnt orange aboriginal circles designer paper.
Step 2: From brown scallop dot designer paper, cut four strips of paper measuring 3/8″ x 12″. Align and adhere on the burnt orange border, overlapping the top and bottom pieces to create a border frame as shown.
Step 3: From fire red eucalyptus floral designer paper, cut 3 photo mats: (2) 4-1/4″ x 5-1/4″ and (1) 4-1/4″ x 4-1/4″. Trim photos to fit each mat: (2) 4″ x 5″ and (1) 4″ x 4″. Adhere the photos to the mats and then adhere them to the layout as shown.
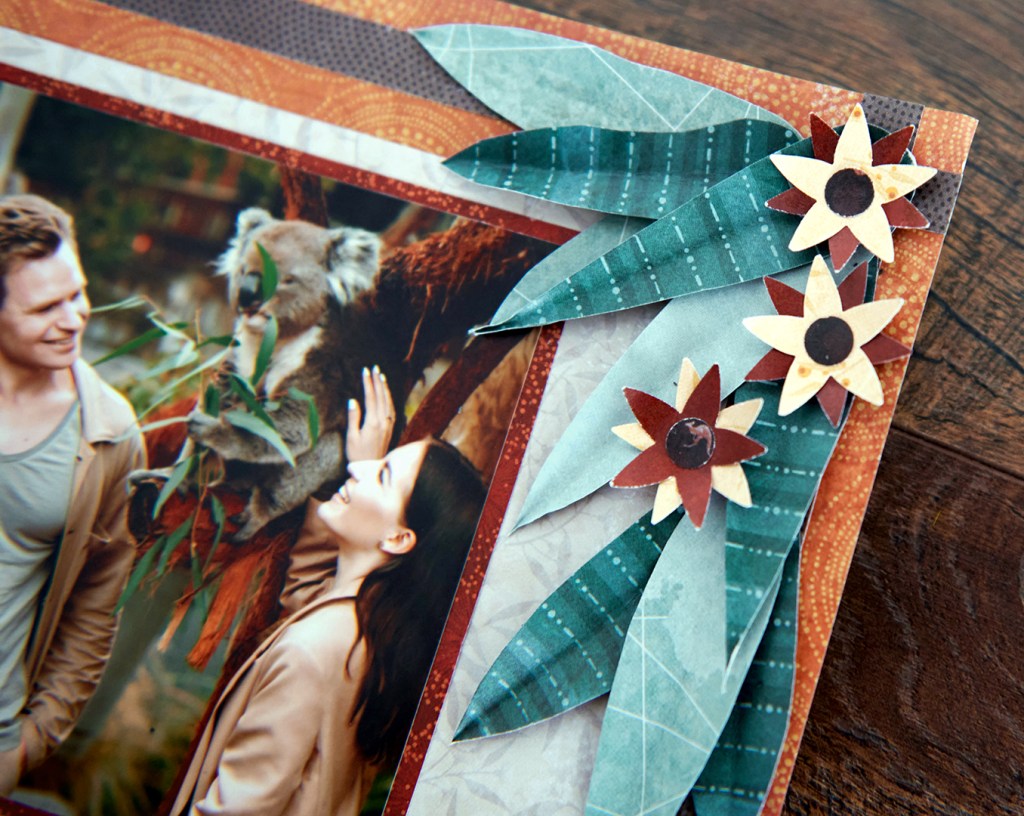
Step 4: Trim two or three strips of 2 ” x 12″ teal water dots designer paper and fold each in half lengthwise. Using the Micro-Tip Scissors, freehand cut some “gum leaves,” cutting along the folded edge so you will end up with a folded leaf. (They do not have to be the same in size or length.) Trim them wider near the base and into a point at the top. Once cut, refold the middle of each leaf for definition. Turn some over leaves so you have a mix of teal water dots and Aussie map patterns. Add them in clusters to the top-right corner and lower-left corners.
Step 5: Using the star cutout from the Piece by Piece Mini Trio Punch Set, punch five stars from golden wattle designer paper and five stars from red rock texture designer paper. Using the small circle punch, punch five circles from brown kangaroos designer paper. Layer two stars together and finish each by adhering a brown circle to the middle of each to make flowers. Adhere three flower clusters to the gum leaves in the top-right corner. Set the two remaining flower clusters aside for the koala.
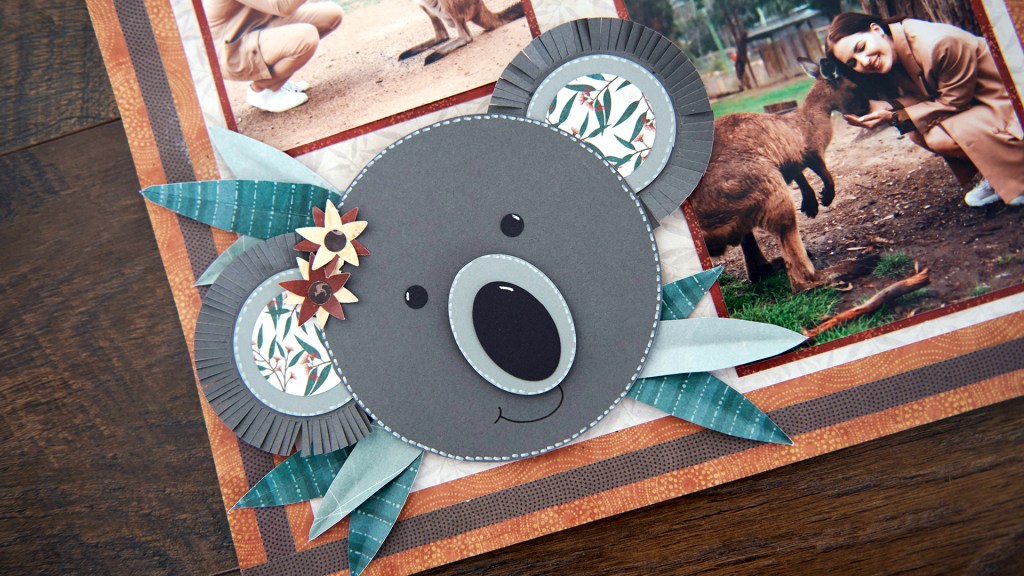
Step 6: To create the koala:
- Using the outside edge of the smallest Custom Cutting System Circle Pattern and the Blue Blade, cut one circle from Charcoal Solid Cardstock. Using the inside edge of the largest Custom Cutting System Circle Pattern and the Blue Blade, cut two circles from Charcoal Solid Cardstock.
- Using the inside edge of the medium Custom Cutting System Circle Pattern and the Blue Blade, cut two circles from Light Grey Solid Cardstock. Using the inside edge of the second-smallest Custom Cutting System Oval Pattern and the Red Blade, cut one oval from Light Grey Solid Cardstock.
- Using the inside edge of the second-smallest Custom Cutting System Oval Pattern, cut one oval from Black Solid Cardstock.
- Using the inside edge of the smallest Custom Cutting System Circle Pattern and the Red Blade, cut from eucalyptus designer paper.
- Adhere the small eucalyptus circles over the light grey circles. Then adhere these over the two charcoal circles. Using the Micro-Tip Scissors, carefully fringe cut all the way around the two charcoal circles to make “fur.” Next, using the White Chalking Pen to add a stitched border around the light grey circle. Adhere these two pieces as ears behind the larger charcoal circle.
- Adhere the black oval slightly tilted and toward the bottom of the light grey oval. Adhere with Foam Squares as the koala’s nose.
- Using the small circle punch from the Piece by Piece Mini Trio Punch Set, punch two circles from Black Solid Cardstock. Adhere as the koala’s eyes.
- Draw a mouth with a Black Dual-Tip Pen. Use the White Chalking Pen to highlight facial features and to add a stitched border around the koala’s head. Adhere on the layout with Foam Squares. Adhere the two remaining flower clusters to the koala’s left ear.
Are you having a g’day after seeing this Australia scrapbooking layout? What Aussie adventures would you showcase? Let us know in the comments — we’d love to hear your ideas!

Love this layout! So creative!
Kylie, this is truly awesome! You are very talented and I enjoy your videos!
Love the Koala! I have so many photos of Koala’s in my Australia album, and now I am wanting to redo the whole thing!
Love the Koala too!
[…] Get layout instructions here. Get layout instructions here. […]