February 1, 2022
Have an Ice Time Creating This Winter Scrapbook Layout With Snowflake Frames
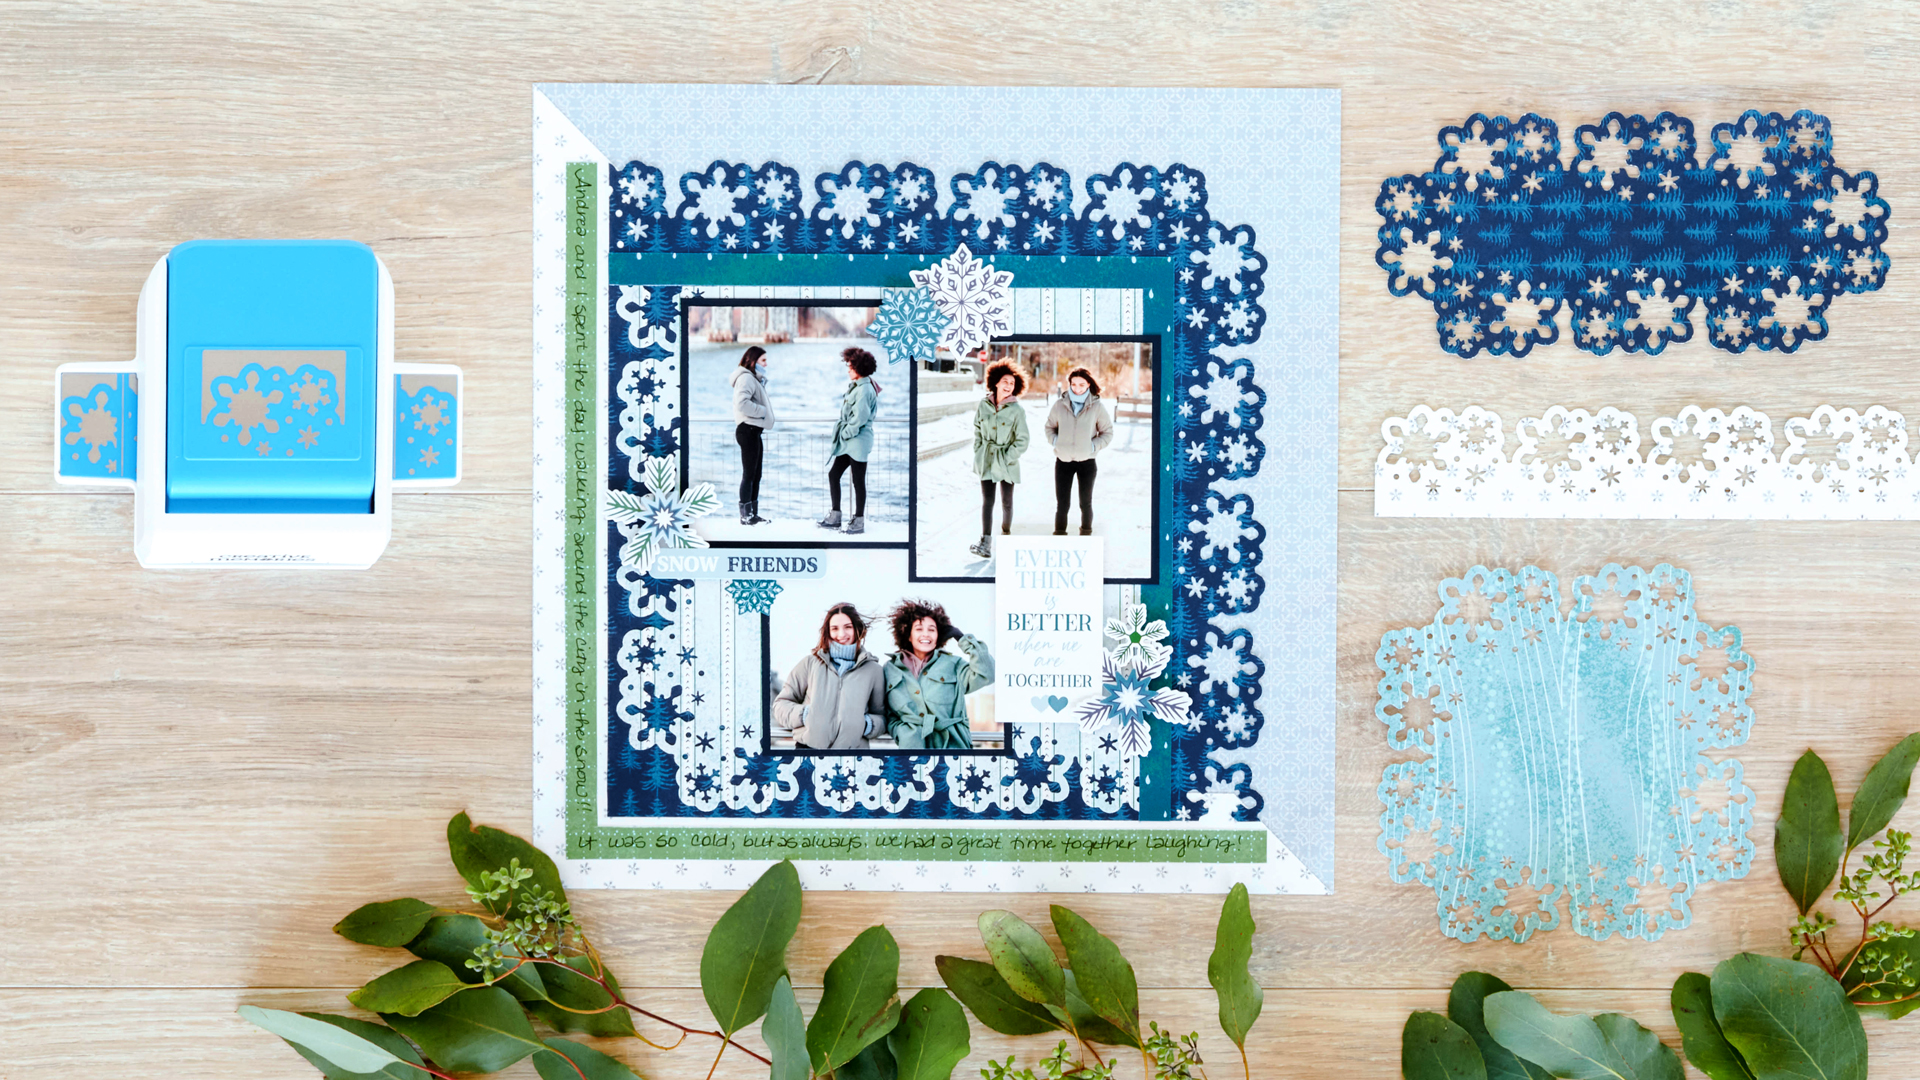
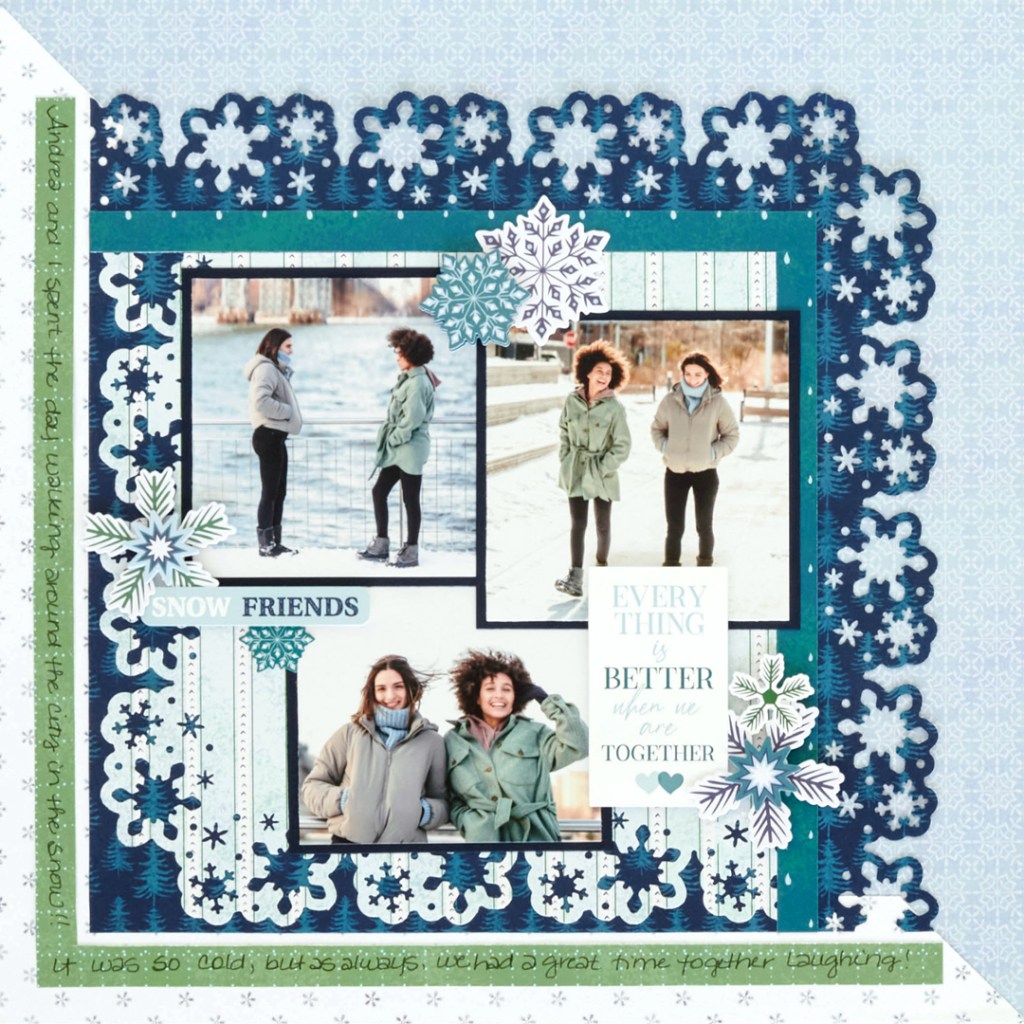
Many of us grew up making piles and piles of paper snowflakes with simple folds and unique cuts, but now you can punch your way to flurries of fun with the Snowflakes Frame Punch! It takes the seasonal motif straight from the frosty windowpane to a scrapbooking frame with its cluster of flakes! Add your own chilly bits of delicate detail to your next to-do project — today’s blog features a winter scrapbook layout with snowflake frames!
To create this layout you will need:
- Snowbound Paper Pack or (Shop Canada | Shop Australia)
- Snowbound Stickers or (Shop Canada | Shop Australia)
- Snowbound Layered Embellishments or (Shop Canada | Shop Australia)
- Navy Solid Cardstock or (Shop Canada | Shop Australia)
- 12-inch Trimmer or (Shop Canada | Shop Australia)
- Snowflakes Frame Punch or (Shop Canada | Shop Australia)
- Tape Runner or (Shop Canada | Shop Australia)
- Foam Squares or (Shop Canada | Shop Australia)
- Navy Dual-Tip Pen or (Shop Canada | Shop Australia)
Check out how to create with the Snowflakes Frame Punch in the video below!

Step 1: Use the frosted tiles patterned paper as the base for this layout.
Step 2: Cut an “L” from the white dainty snowflakes paper that is 1-1/2″ wide. Place ends on the 45-degree angle of the 12-inch Trimmer and cut. Adhere to the layout.

Step 3: Cut a piece of navy/dark teal forest paper to measure 10″ x 10″. With the Snowflakes Frame Punch, punch along the top and right edges of this paper. Adhere so that it slightly overlaps the previous “L” piece.
Step 4: Cut an “L” piece from green grid paper to measure 1/2″ wide, and each end 10-1/2″. Adhere to the layout.
Step 5: Cut a piece from the stripes paper to measure 8″ x 8″. With the Snowflake Frame Punch, punch along the bottom and left sides of the paper. Adhere to the layout.
Step 6: Cut an “L” piece from the dark teal raindrops paper to measure 1/2″ wide, and each end 8-1/2″. Adhere to the layout.
Step 7: Using the 12-inch Trimmer, cut three mats from Navy Solid Cardstock to measure 3-3/4″ x 3-3/4″. Adhere photos to the mats that measure 3-1/2″ x 3-1/2″. Overlap and adhere to the layout.
Step 8: Adhere stickers and embellishments, using Foam Squares on some for added dimension.
Step 9: Journal as desired.
Break the ice and type out your thoughts on this winter scrapbook layout with snowflake frames! And how are you going to use the Snowflakes Frame Punch for your wintertime memories?

I love this page! It is stunning.
[…] fun layout was shared earlier this year on the Creative Memories Blog. The page uses the Snowflake Fram Punch to create a lovely background for three square photos. While […]