March 25, 2022
Outstanding In Their Field: Fence Borders For Scrapbooking
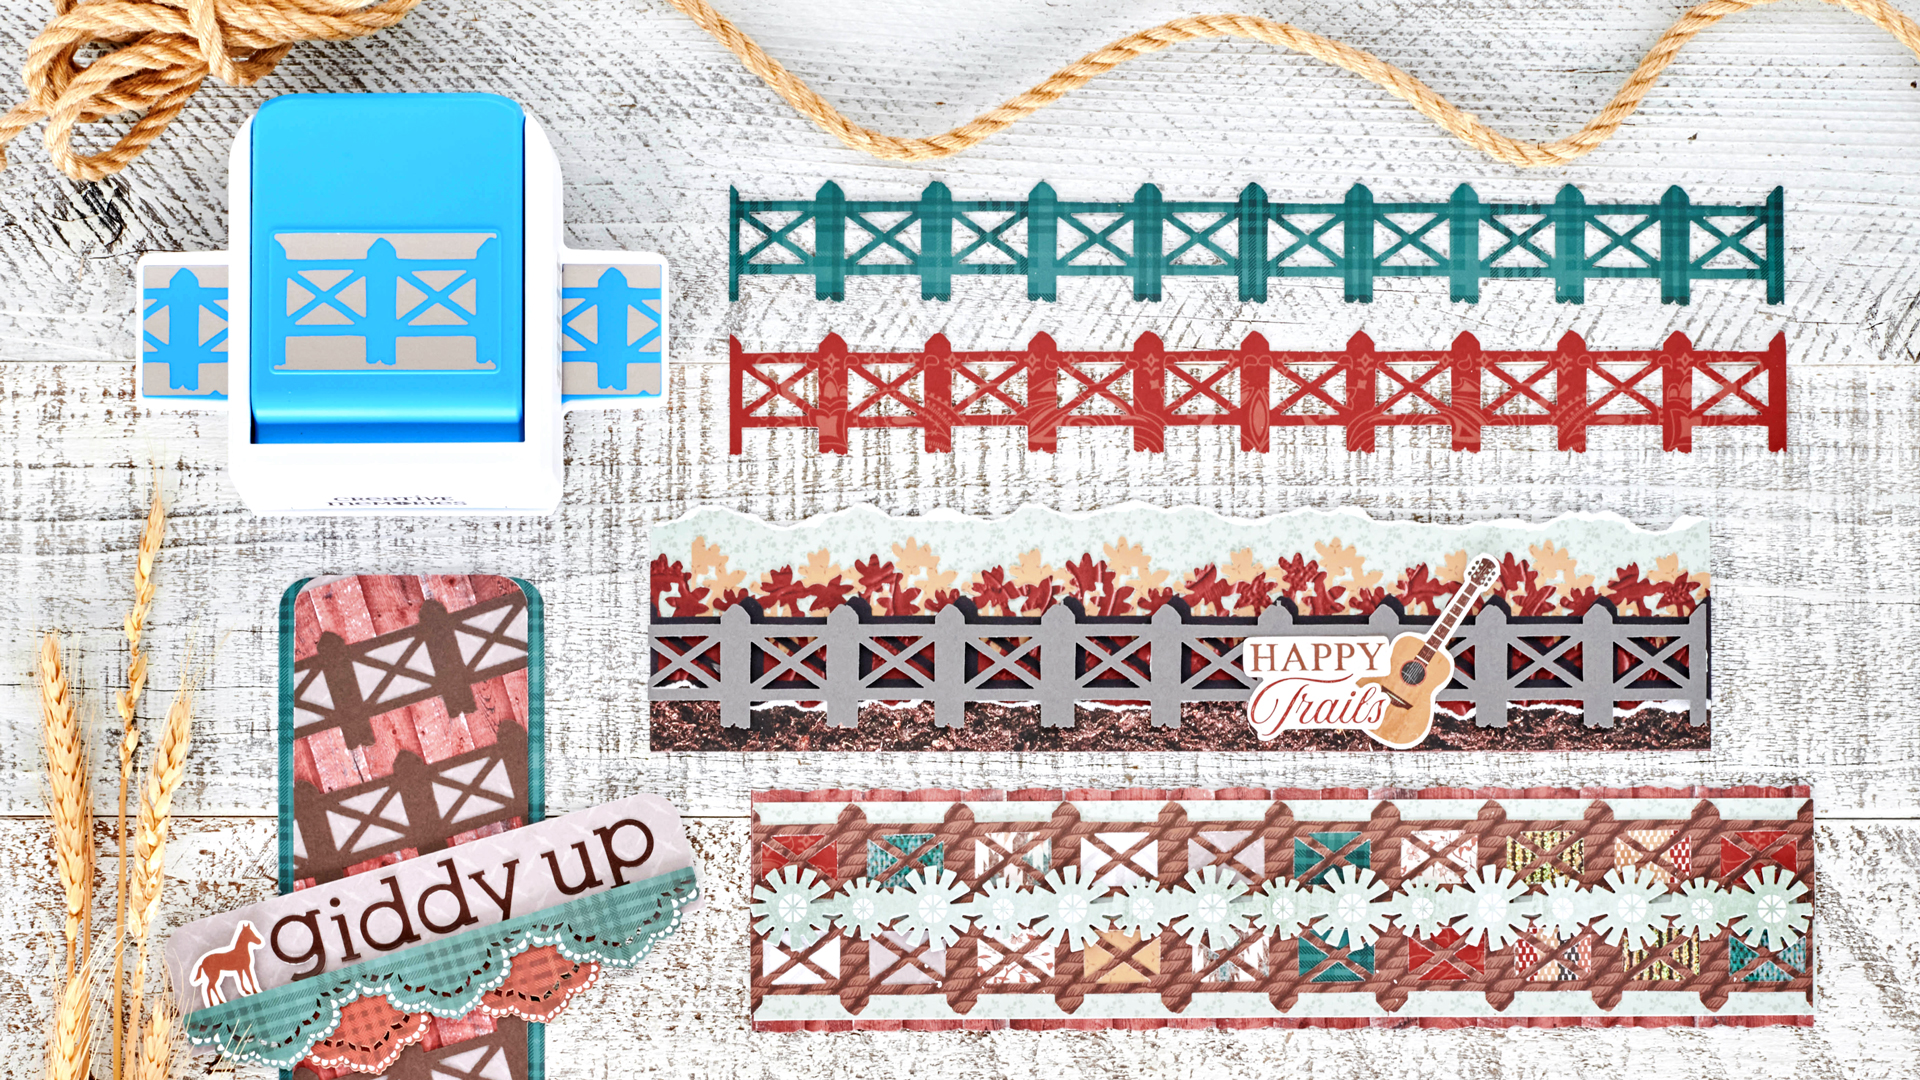
Fences are a vital part of any successful farm or ranch. They delineate property lines. They keep your animals and livestock on your property and separate said animals from your precious crops and grassland. They also enhance security. Well, we’re not on the fence about today’s blog — we’re excited to show you how to corral together borders fit for country scrapbook layouts and projects! Take a giddy-up glimpse at these fence borders for scrapbooking… they’re definitely outstanding in their field.
To create these borders you will need:
- Wide Open Places Paper Pack or (Shop Canada | Shop Australia)
- Wide Open Places Texture Paper Pack or (Shop Canada | Shop Australia)
- Wide Open Places Stickers or (Shop Canada | Shop Australia)
- Wide Open Places Laser Cut Borders or (Shop Canada | Shop Australia)
- Brown Sans Serif ABC/123 Stickers or (Shop Canada | Shop Australia)
- Black, Charcoal & Hot Fudge Solid Cardstocks or (Shop Canada | Shop Australia)
- 2-Way Corner Rounder or (Shop Canada | Shop Australia)
- Field Fence Border Punch or (Shop Canada | Shop Australia)
- Wildflowers Border Punch or (Shop Canada | Shop Australia)
- 12-inch Trimmer with Straight, Deckle & Wave Blades or (Shop Canada | Shop Australia)
- Micro-Tip Scissors (Shop Canada | Shop Australia)
- Tape Runner or (Shop Canada | Shop Australia)
- Repositionable Tape Runner Refill or (Shop Canada | Shop Australia)
- Foam Squares or (Shop Canada | Shop Australia)
Check out the Field Fence Border Punch in action in the video below!

Giddy Up Border

Step 1: Cut a piece of the teal plaid designer paper to measure 3″ x 12″. Round all four corners with the 2-Way Corner Rounder.
Step 2: Cut a piece of the diamond plate metal designer paper to measure 2-3/4″ x 12″.
Step 3: Punch three borders using the Field Fence Border Punch and Hot Fudge Solid Cardstock. Adhere at an angle on the diamond plate metal paper. Cut off excess with a scissors.
Step 4: Cut several strips of red barn wood texture paper to measure 3/4″ high. Adhere along the bottom of the fence.
Step 5: Rotate between the fence and the red paper all the way to the top of the diamond plate metal paper. Round corners using the 2-Way Corner Rounder. Adhere this piece to the middle of the teal plaid strip.
Step 6: Cut a piece of diamond plate metal designer paper to measure 6″ x 1-1/2″. Round the top two corners. Cut the red/teal plaid doily laser-cut border, into three segments and segments segments. Align the two segments along the bottom edge of the diamond plate metal paper, then adhere the three segments, flipping over for the other hue, with Foam Squares.
Step 7: Adhere Brown Sans Serif ABC/123 Stickers for the title. Then adhere horse sticker.
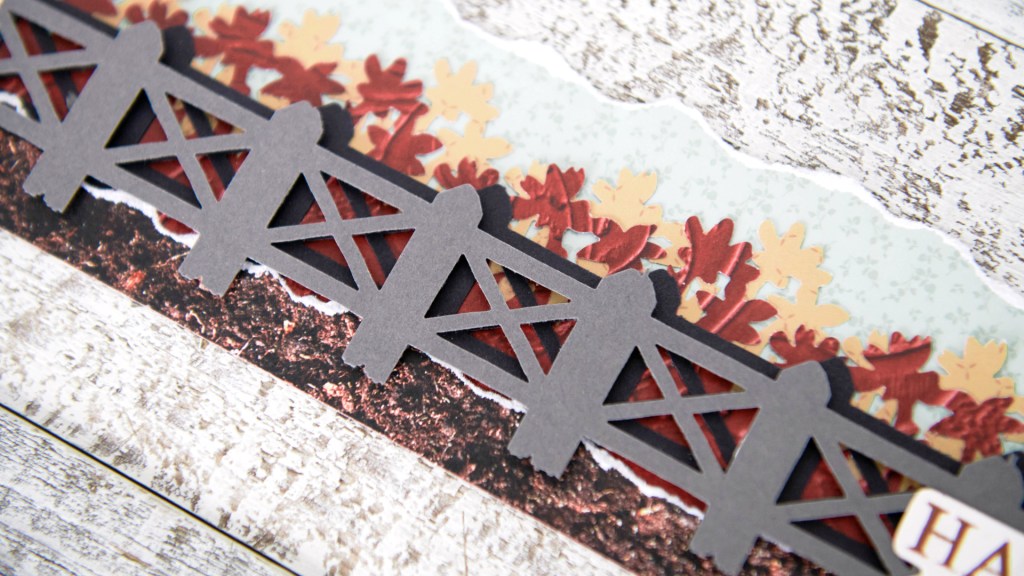
Happy Trails Border

Step 1: Tear the top edge of a piece of light teal dainty florals designer paper to measure 12″ x 3″.
Step 2: Using the Wildflowers Border Punch, punch along the edge of tan windmills designer paper, then cut to measure 2-1/2″. Adhere along the bottom edge of the border.
Step 3: Using the Wildflowers Border Punch, punch along the edge of the red tooled leather texture paper, then cut to measure 2-1/4″. Adhere along the bottom edge of the border.
Step 4: Tear a piece of the soil texture paper to measure 12″ x 1/2″. Adhere along the bottom edge of the border.
Step 5: Punch a fence using the Field Fence Border Punch from Black Solid Cardstock, then one with Charcoal Solid Cardstock.
Step 6: Adhere the black fence to the border. Adhere the charcoal fence offset from the black one with Foam Squares.
Step 7: Adhere stickers for the title.
Peace & Tranquility Border

Step 1: Using the 12-inch Trimmer and the Deckle Blade, cut a piece from the red barn wood texture paper to measure 12″ x 2-3/4.”
Step 2: Cut a piece of the light teal dainty florals paper to measure 12″ x 2-1/2″. Adhere to the border.
Step 3: Punch two borders using the Field Fence Border Punch and the dark brown ropes designer paper.
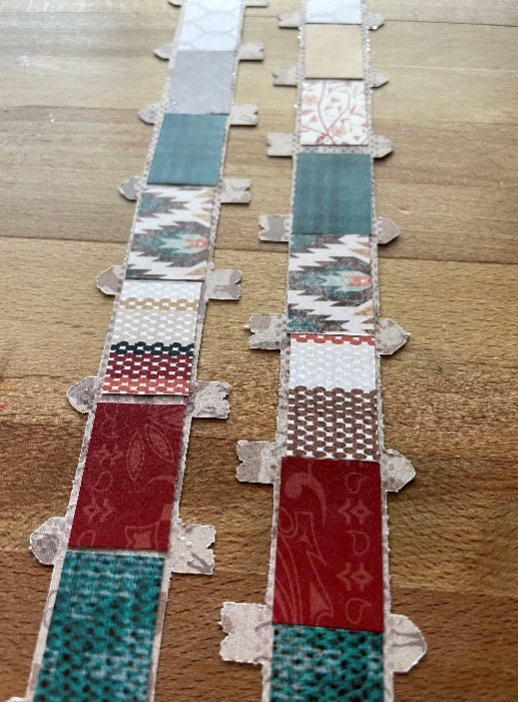
Step 4: Cut 20 pieces from various papers to measure 3/4″ x 1-1/4″. Adhere on the back sides of the fence openings. Adhere fences so that the bottoms of the fences overlap each other in the middle.
Step 5: Adhere the light teal windmill blades laser-cut border over the overlapped pieces with Foam Squares.
Step 6: Adhere stickers for the title.
What are your thoughts on these fence borders for scrapbooking? Will you be making any (or all of them!) soon?

Thank you for supplying such a trouble-free and complete area authority checker! Your device is highly useful for appreciation internet site overall performance and guiding search engine marketing strategies. Keep up the top notch work!