March 29, 2022
Layer On The Love For Your Li’l One With This Baby Scrapbook Layout

Bundle of joy. Sweet pea. Cutie pie. Peanut. Li’l princess or li’l man. Sugarplum. Smiley. Cuddle bunny. Buttercup. Bubba. There are so many nicknames and terms of endearment for baby. In fact, blog contributor Kylie Kingham had her own moniker for her little ones, which inspired this baby scrapbook layout!
Kylie’s Inspiration
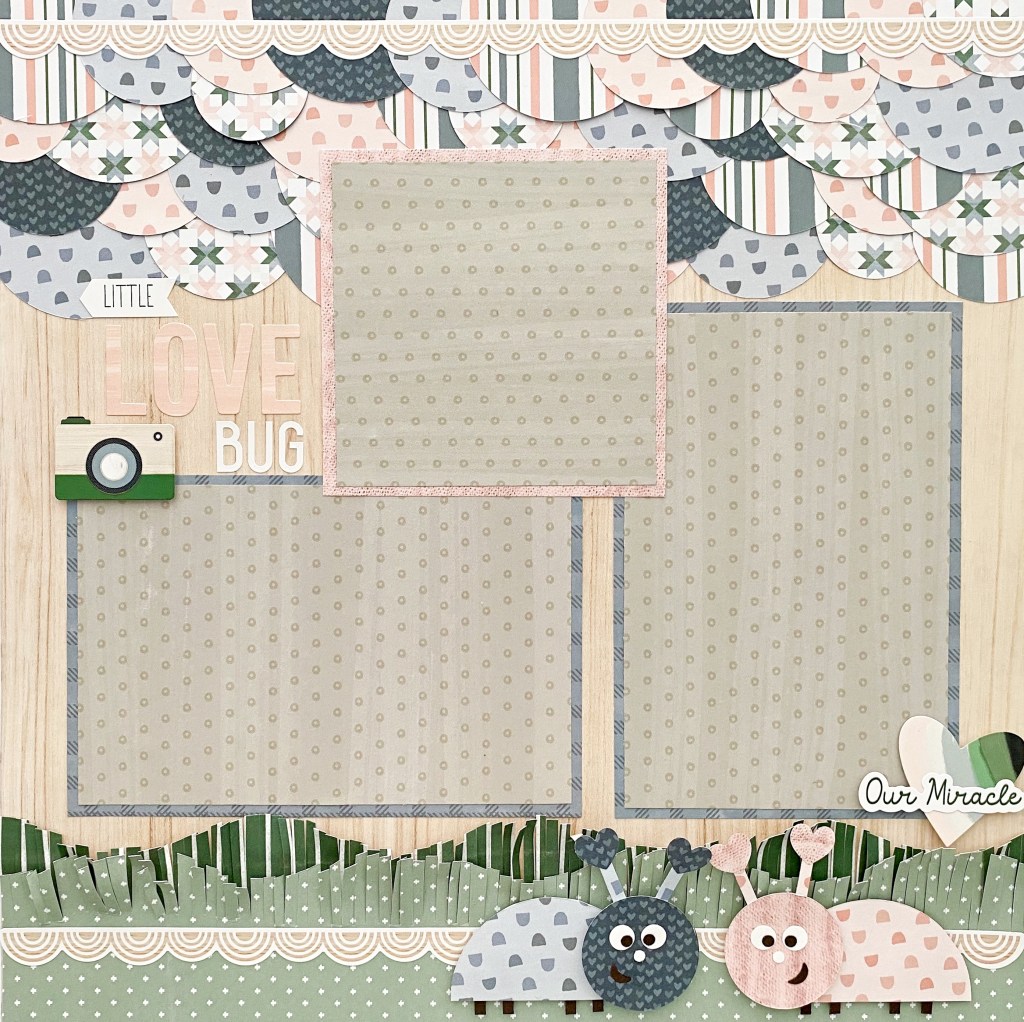
When my children were really small, I used to call them my “little love bugs” as an affectionate nickname. I loved the pastel hues and designs of the Lullaby Lane designer papers and thought it would be fun to create some little paper bugs in a garden scene. I wanted my page to have some character and dimension, so I created scalloped layers from half circles which gave interest and pops of hues throughout my background.
To create this layout you will need:
- Lullaby Lane Paper Pack or (Shop Canada | Shop Australia)
- Lullaby Lane Girl Paper Pack or (Shop Canada | Shop Australia)
- Lullaby Lane Boy Paper Pack or (Shop Canada | Shop Australia)
- Lullaby Lane Stickers or (Shop Canada | Shop Australia)
- Lullaby Lane Border Stickers or (Shop Canada | Shop Australia)
- Hot Fudge & White Solid Cardstocks or (Shop Canada | Shop Australia)
- White Sans Serif ABC/123 Letter Stickers or (Shop Canada | Shop Australia)
- Custom Cutting System with Circle Patterns or (Shop Canada | Shop Australia)
- 12-inch Trimmer or (Shop Canada | Shop Australia)
- 12-inch Decorative Trimmer or (Shop Canada | Shop Australia)
- Micro-Tip Scissors or (Shop Canada | Shop Australia)
- Multi-Purpose Tool or (Shop Canada | Shop Australia)
- Precision Point Adhesive Pen or (Shop Canada | Shop Australia)
- Piece by Piece Mini Trio Punch Set or (Shop Canada | Shop Australia)
- Repositionable Tape Runner or (Shop Canada | Shop Australia)
- Foam Squares or (Shop Canada | Shop Australia)
- Ruler
- Pencil

Step 1: Using a ruler and pencil, measure 2-1/2″ down from the top edge of a base paper and rule a faint line across. Select five or so various papers and begin cutting several circles from each paper using the following templates below. (Tip: You are better to cut not enough circles than too many. You can always cut more. As a guide, I cut around three of each size to begin with.)
- The inside edge of the smallest Custom Cutting System Circle Pattern with the Red Blade
- The inside edge of the medium Custom Cutting System Circle Pattern with the Red Blade
- The inside edge of the medium Custom Cutting System Circle Pattern with the Blue Blade

Step 2: Cut each circle in half and begin layering each half-circle piece across the pencil line. Allow the first half-circle to overlap the sides of the paper — you can trim off the excess once finished. Mix and match hues, patterns and sizes. Continue doing this all the way to the top of the page. Once complete, turn the page over and trim off the overhanging circles/edges with the 12-inch Trimmer.
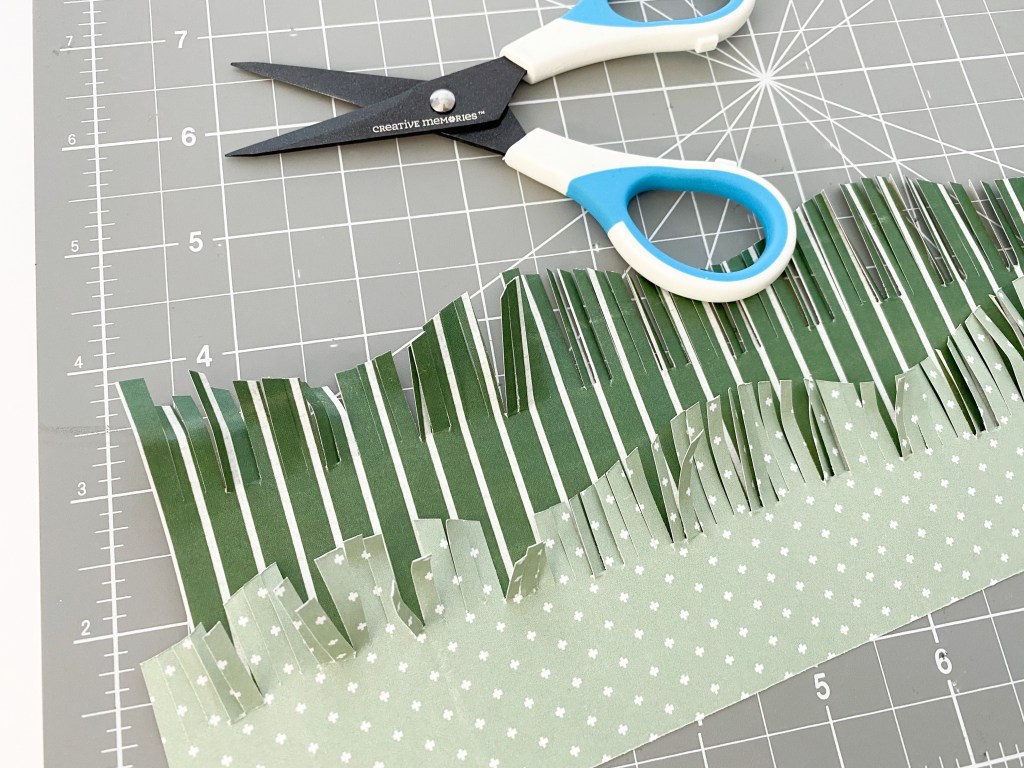
Step 3: Select two different green papers. Using the 12-inch Decorative Trimmer, cut one strip (green side up) to measure approximately 2″ x 12″. Cut the second paper (green side down) to the same measurements. (Turning one piece of paper over produces a different wave effect versus the first piece once they are adhered in place.) Using Micro-Tip Scissors, begin fringe-cutting all the way along the wavy edge on both strips. As a guide, cut into them approximately 1/2″-3/4″ of the way down. Layer one behind the other and adhere them both to the bottom of the page. Add border stickers to the top and bottom of the page.
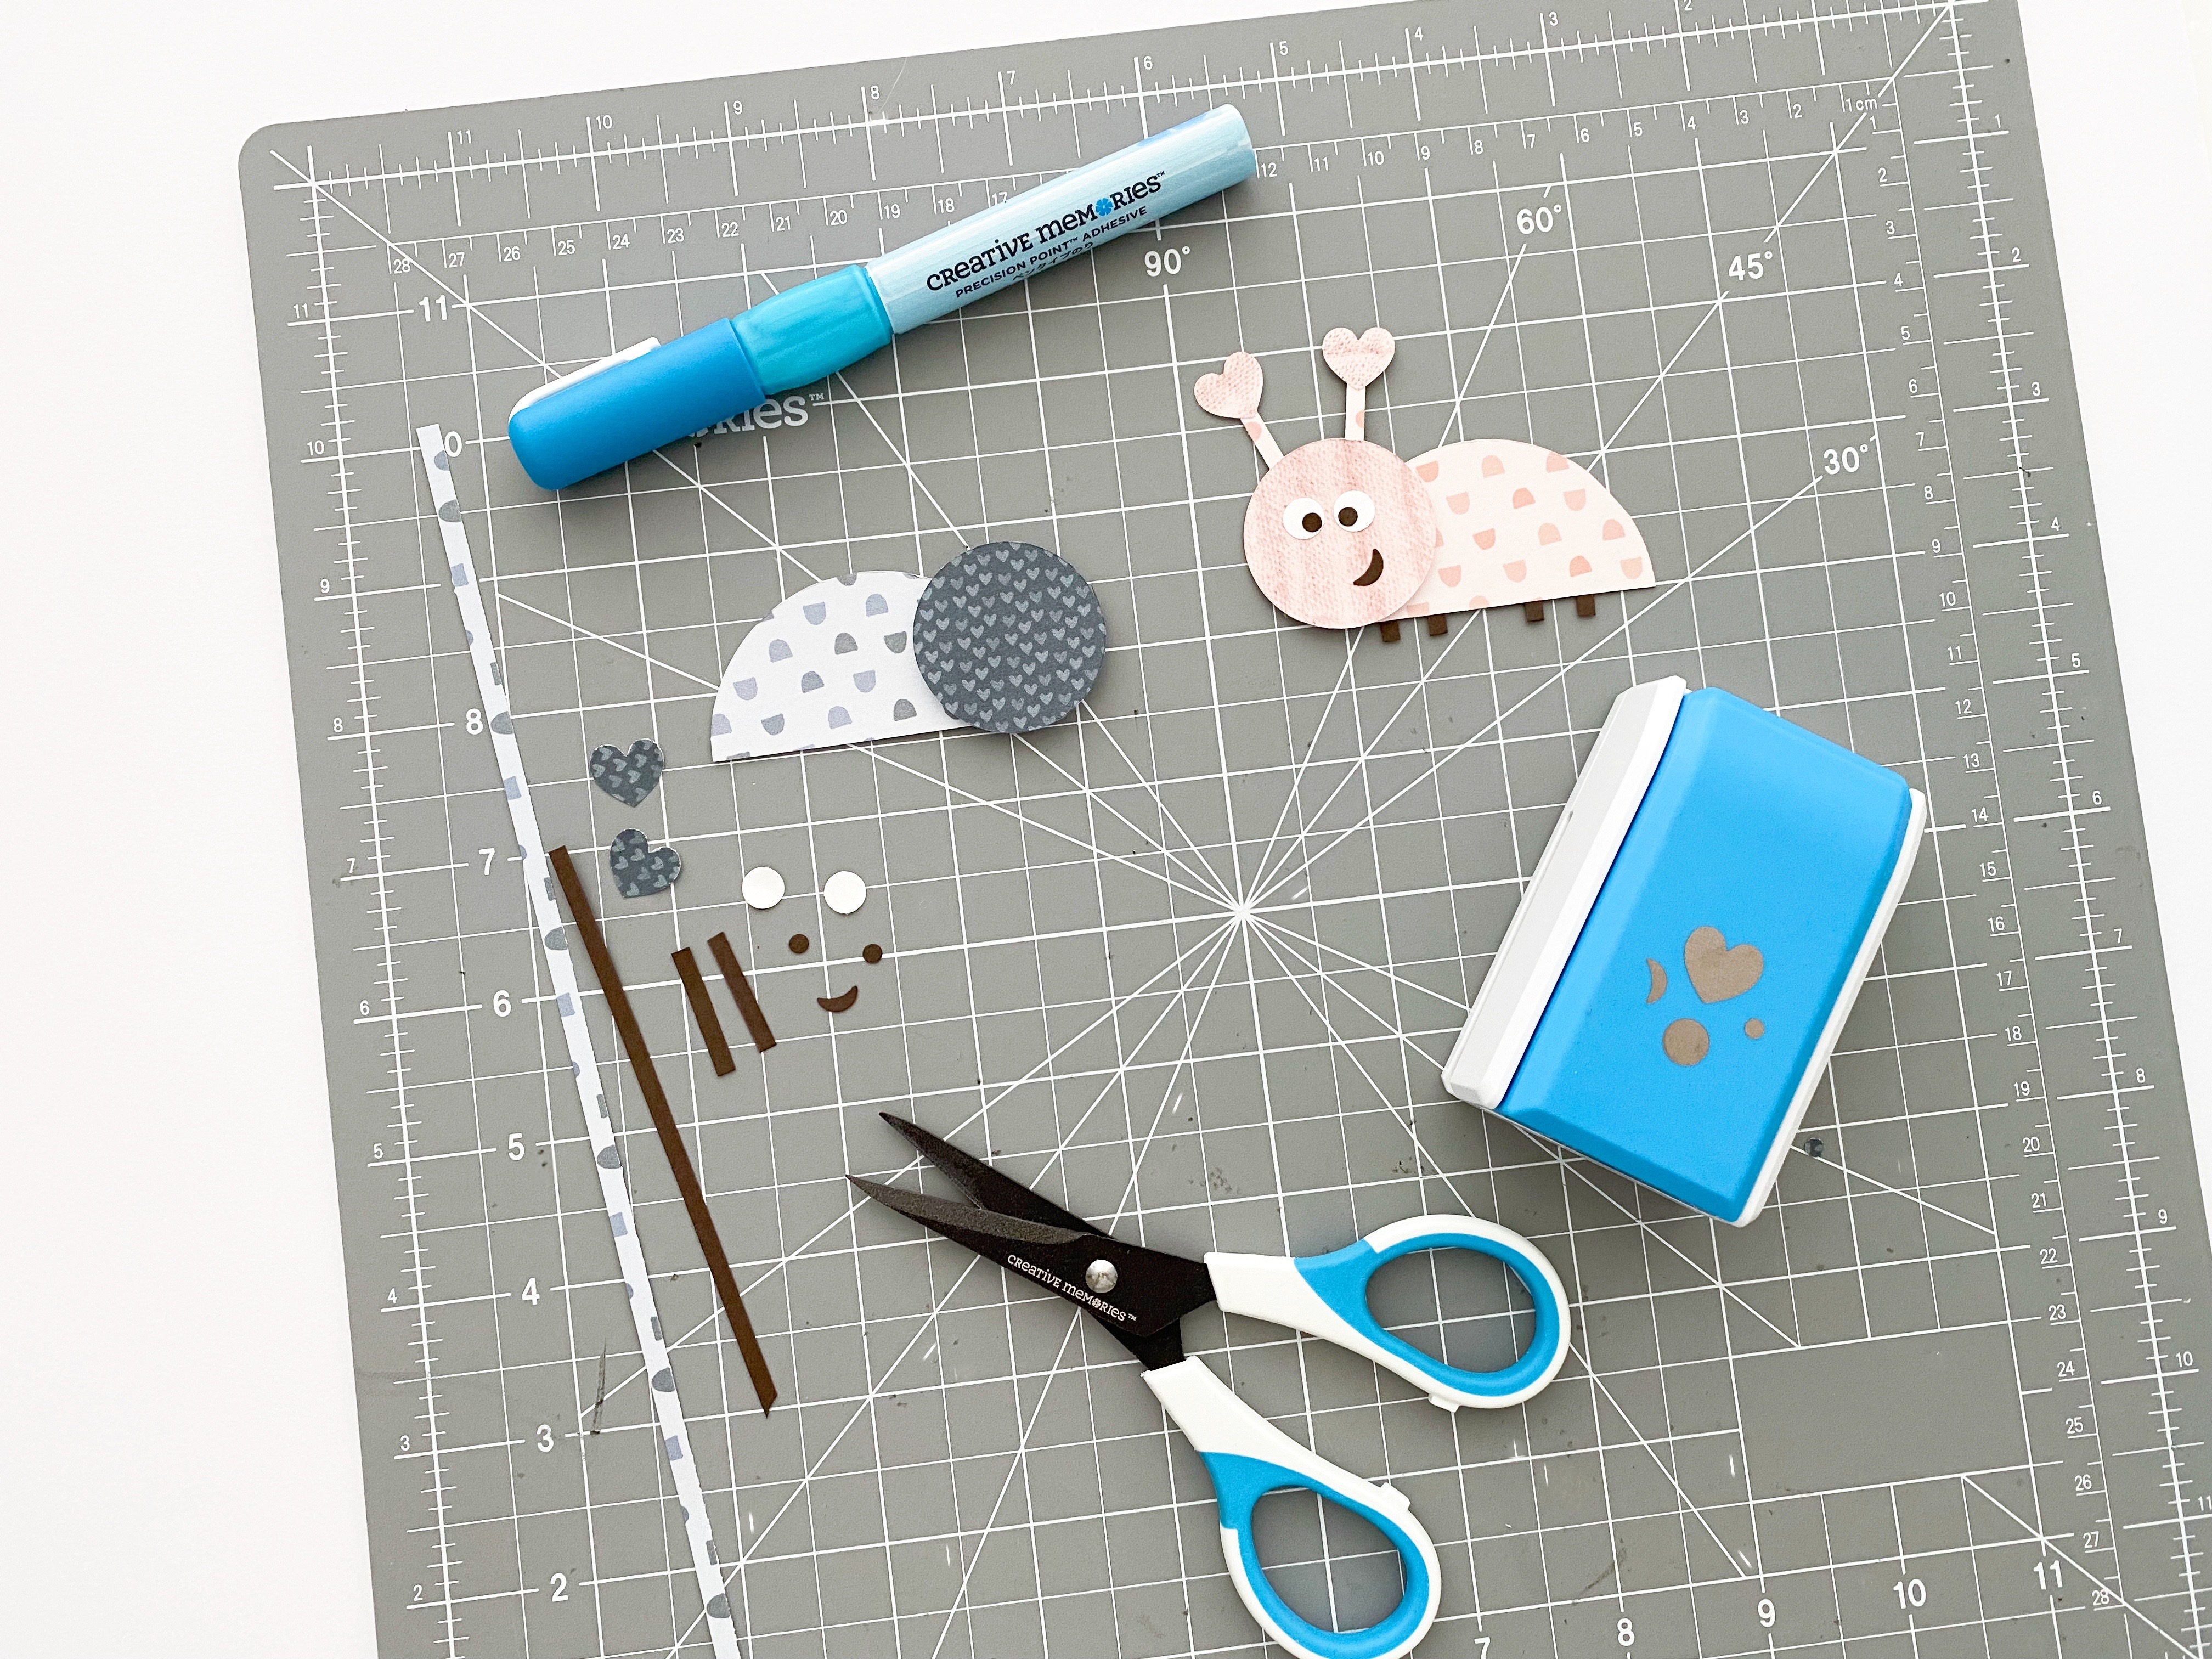

Step 4: To create the bugs:
- With the inside edge of the medium Custom Cutting System Circle Pattern and the Red Blade, cut one circle. From a contrasting paper (but in the same/complementing shade), cut one circle using the inside edge of the smallest Custom Cutting System Circle Pattern and the Red Blade. Cut the larger circle in half, and using a Foam Square, adhere the smaller circle as the “head.”
- From the same paper as the body, cut a very narrow strip. From this piece, cut two strips approximately 1″ long and adhere to the back of the head with the Precision Point Adhesive Pen as “antennae”. From the same paper as the head, punch two hearts from the Piece by Piece Mini Trio Punch Set and adhere to the tips of the antennae.
- Trim a very narrow strip of Hot Fudge Solid Cardstock into 4 x 1/2″ pieces. Glue below the body as “legs.”
- Using the small circle and large circle cutouts from the Piece by Piece Mini Trio Punch Set, punch from White Solid Cardstock so you have two larger circles for “eyes” and a smaller circle for a “nose.” Adhere these in place using the Multi-Purpose Tool as a guide.
- With the small circle and crescent moon cutouts from the Piece by Piece Mini Trio Punch Set, punch with Hot Fudge Solid Cardstock to make “pupils” and a “mouth.” Glue in place.
- Repeat this process again, from different papers if you wish, to produce a second bug. Adhere the head on the opposite side of the body half-circle so you can have them facing each other. Adhere both bugs to the lower-right corner of the page using Foam Squares.

Step 5: Cut three photo mats to measure (2) 6″ x 4″ and (1) 4″ x 4.” Trim photos to measure (2) 5-3/4″ x 3-3/4″ and (1) 3-3/4″ x 3-3/4″. Adhere the photos to the photo mats and add them to the page. Finish by embellishing with a few stickers and create a title using Lullaby Lane Stickers and the White Sans Serif ABC/123 Letter Stickers.
Did you have cutesy nicknames for your baby, grandchild, newborn cousin, etc.? What do you think of the adorable “love bugs” on this baby scrapbook layout from Kylie? Relay your answers in the comments below!

This is adorable!
Love This Layout! Would love to adapt it to “Silly Goose”. Any idea how I’d make a goose?
So cute!!