April 14, 2022
Buzzin’ With Detail: Bee Scrapbook Ideas With The NSD 2022 Collection
Sweet as can bee! Buzz-worthy project ideas! Do your own sting! Hive-five designs! It’s all here (and more!) with the NSD 2022 collection and coordinating Bumblebee Punch! See for yourself with these bee scrapbook ideas, and imagine what other themes (flying kites, visiting farmers’ markets, gardening, nature walks and more!) that you can dream up that will scream “Spring has sprung!”
Psst! If you would like to attend an NSD event (virtual, in-person or hybrid events), you can connect with an Advisor near you using our handy Advisor Locator search on the website. US | CA | AU
To create these borders and card, you will need:
- NSD 2022 Project Recipe™ Kit or (Shop Canada | Shop Australia)
- NSD 2022 Laser Cut Bundle or (Shop Canada | Shop Australia)
- NSD 2022 Mini Pack Embellishments or (Shop Canada | Shop Australia)
- NSD 2022 Layered Embellishments or (Shop Canada | Shop Australia)
- NSD Cardstock Sampler or (Shop Canada | Shop Australia)
- Garden Friends Paper Pack — Sold out
- Cardstock (and shade of green) (Shop Canada | Shop Australia)
- Bumblebee Punch or (Shop Canada | Shop Australia) — Returning September
- Custom Cutting System with Circle Patterns or (Shop Canada | Shop Australia)
- 12-inch Trimmer with Straight, Wave, Scallop & Scoring Blades or (Shop Canada | Shop Australia)
- Micro-Tip Scissors or (Shop Canada | Shop Australia)
- Tape Runner or (Shop Canada | Shop Australia)
- Repositionable Tape Runner or (Shop Canada | Shop Australia)
- Foam Squares or (Shop Canada | Shop Australia)
- Pencil
Check out the whole NSD 2022 collection in the video below!

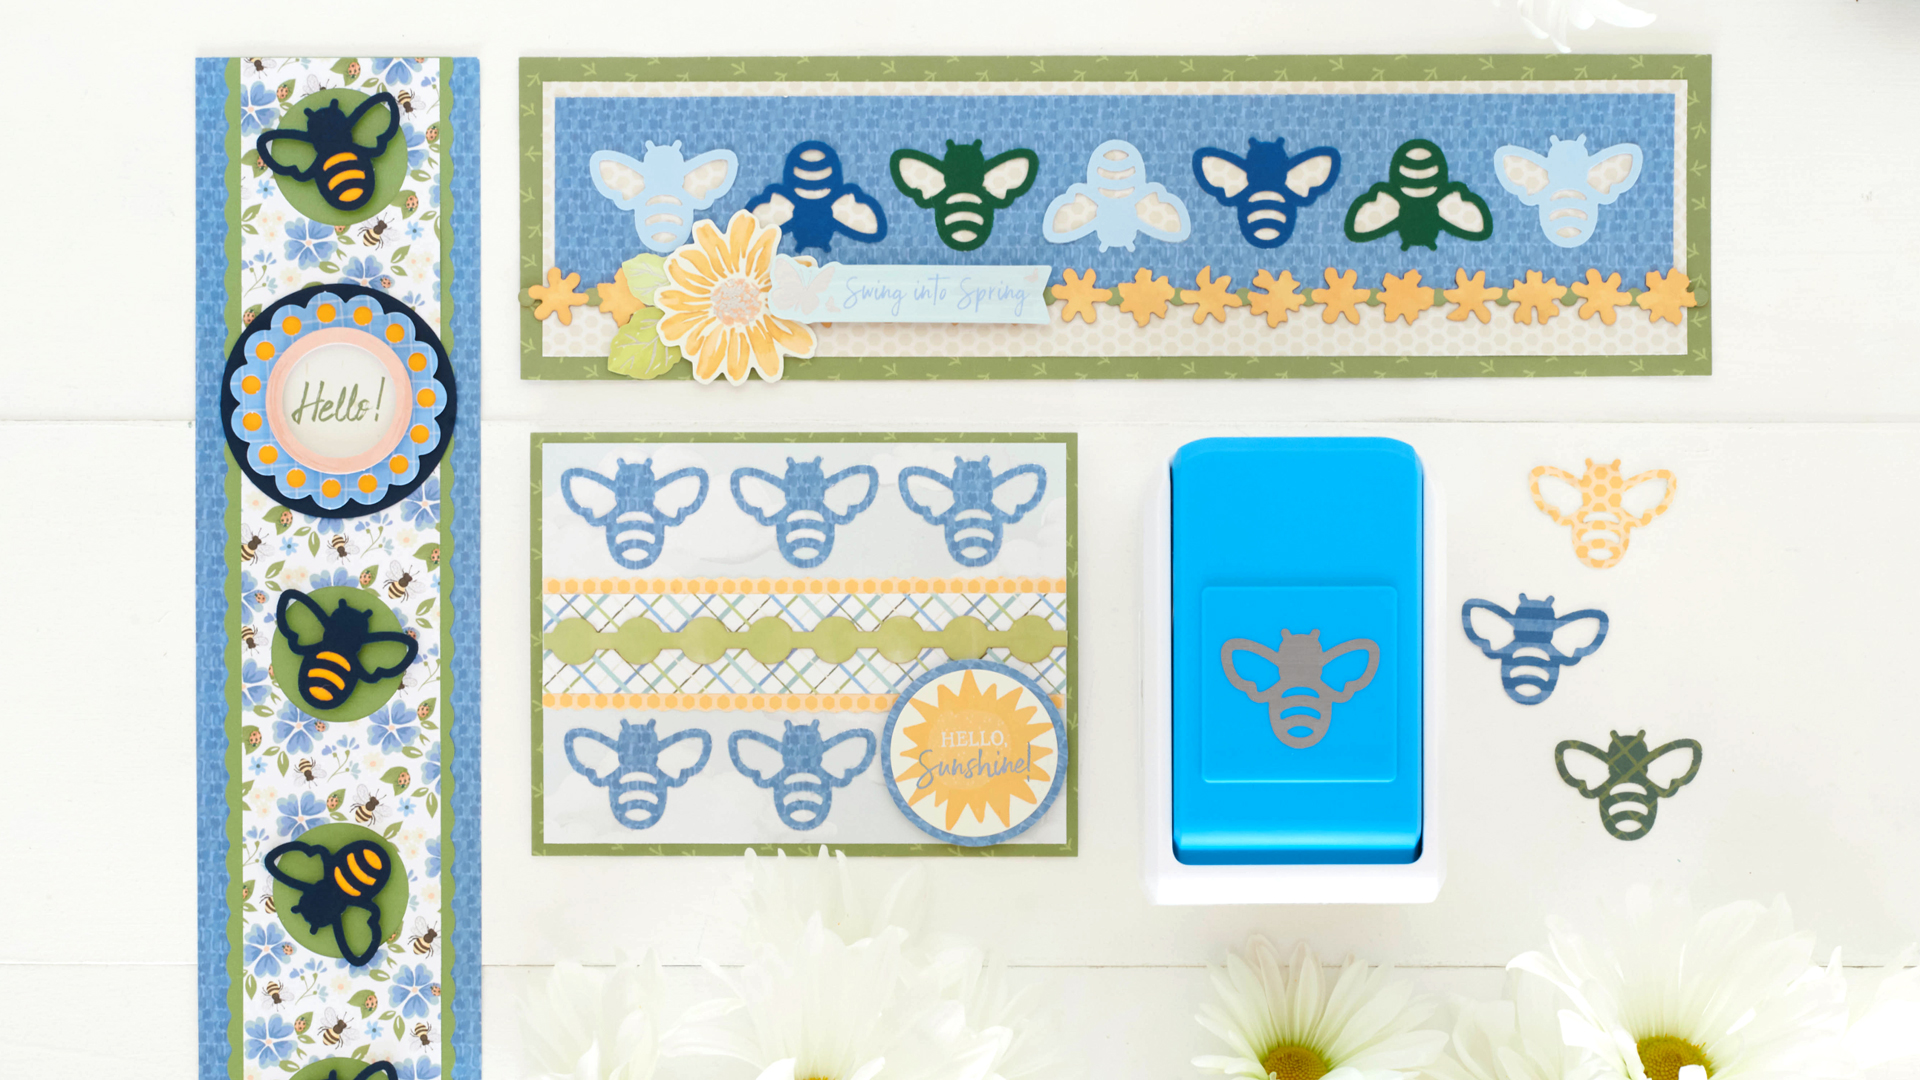
Swing into Spring Border

Step 1: Cut a 12″ x 3-1/4″ strip of green bird tracks paper for the base. Cut an 11-1/2″ x 2-3/4″ strip of beige honeycomb paper and adhere on the base.
Step 2: Cut a 12″ x 2″ strip of blue woven paper. Insert the Bumblebee Punch so that the edge of the punch is aligned with the edge of the paper. Punch. Rotate the paper so that you’re punching from the opposite side. Position the paper in the punch so that you see just half of the previous punch shape. Punch. Repeat across the strip until you have punched seven total times. Trim the ends of the strip so that it measures 11-1/4″. Mount on the border. (Save the bumblebees for a future project, like the card below.)
Step 3: Punch seven bumblebees from Light Blue, Blue and Dark Green Solid Cardstocks. Adhere in the spaces on the border.
Step 4: Adhere a floral laser-cut border and additional embellishments as desired.
Hello! Border
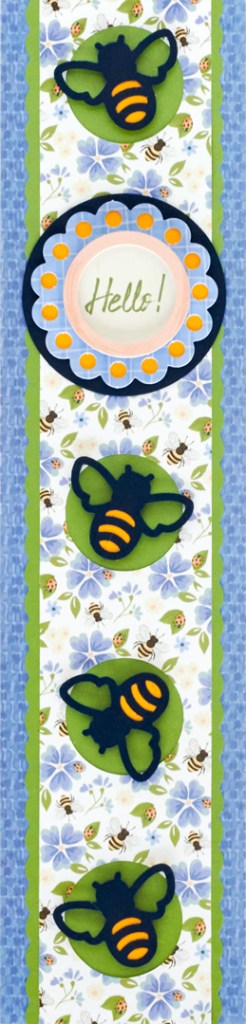
Step 1: Cut a 3″ x 12″ strip of blue woven paper for the base. Using the 12-inch Trimmer and the Scallop Blade, cut a 2-1/4″ x 12″ strip of green cardstock (any shade) and mount on top.
Step 2: Cut a 2″ x 12″ strip of bees and florals paper. Using the inside edge of the smallest Custom Cutting System Circle Pattern and the Red Blade, cut out five circles at regular intervals (one will be covered up). Adhere to the border.
Step 3: With the Bumblebee Punch, punch four bumblebees with Navy Solid Cardstock. Cut out small pieces of Goldenrod Solid Cardstock and adhere behind the bumblebee bodies. Adhere to the border using Foam Squares.
Step 4: Using the inside edge of the medium Custom Cutting System Circle Pattern and the Red Blade, cut a circle with Navy Solid Cardstock. Adhere to the border. Trace the “Hello!” layered embellishment on Goldenrod Solid Cardstock. Cut out using Micro-Tip Scissors. Adhere to the border.
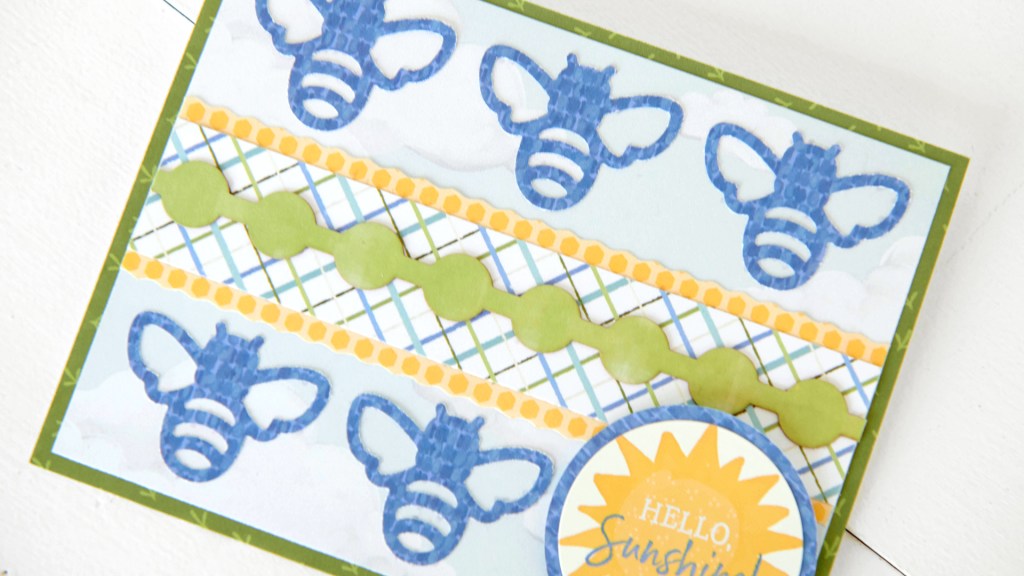
Hello, Sunshine! Card
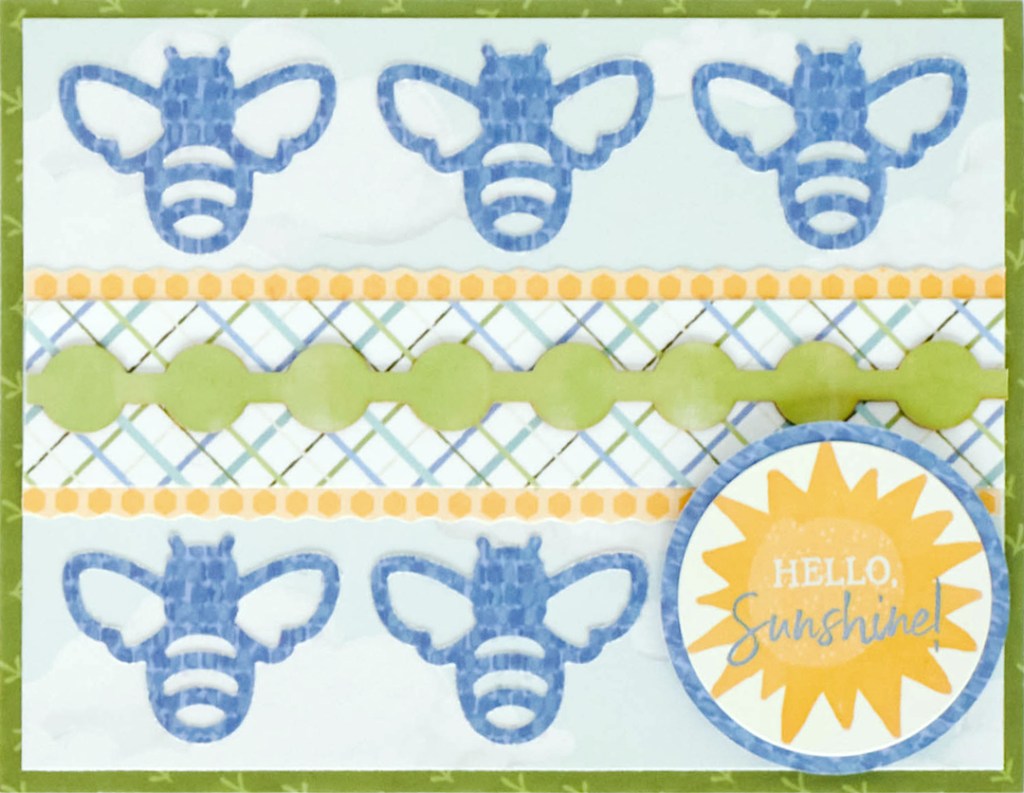
Step 1: Create the card base. Cut an 8-1/2″ x 5-1/2″ piece of White Solid Cardstock. Using the 12-inch Trimmer and the Scoring Blade, score along the long edge at 4-1/4″ and fold in half.
Step 2: Cut a 5-1/2″ x 4-1/4″ piece of green bird tracks paper and adhere to the front of the card. Cut a 5-1/4″ x 4″ piece of wispy clouds paper and adhere on top.
Step 3: Using the 12-inch Trimmer and the Wave Blade, cut a 5-1/4″ x 1-3/8″ strip of golden yellow honeycomb paper and adhere to the middle of the card. Cut a 5-1/4″ x 1″ strip of plaid paper and mount on the strip. Cut a 5-1/4″ segment of the circles laser-cut border and adhere on top.
Step 4: With the Bumblebee Punch, punch five bumblebees with blue woven paper. Adhere to the border.
Step 5: Using the inside edge of the medium Custom Cutting System Circle Pattern and the Blue Blade, cut a circle with blue woven paper. Adhere the “Hello, sunshine!” sticker on top. Mount on the card using Foam Squares for added dimension.
Are you ready to get to bees-ness with these bee scrapbook ideas? Are you loving the bee theme of this year’s NSD 2022 collection? Tell us your thoughts on the NSD collection and tools, events near you and more!

As usual Krislyn gives fun, creative ideas which are easy to follow. Can’t wait to make these.