April 15, 2022
Hop To It With This Easter Bunny Scrapbooking Layout
Hippity-hoppity, Easter’s on its way!
Yes, indeed — the day of bright- and pastel-hued eggs, brunch with family, woven baskets aplenty and kiddos loving on all the chocolate candies or money-filled plastic shells that a fluffy, magical creature left behind is this weekend! Religious scriptures make no mention of a long-eared, puffy-tailed animal who hides eggs on Easter Sunday, but nevertheless, the Easter Bunny is a prominent and beloved symbol of this springtime occasion. Well, blog contributor Kylie Kingham is hoppy about this egg-citing day, so she made a bunny scrapbooking layout that has us all ears!
Kylie’s Inspiration
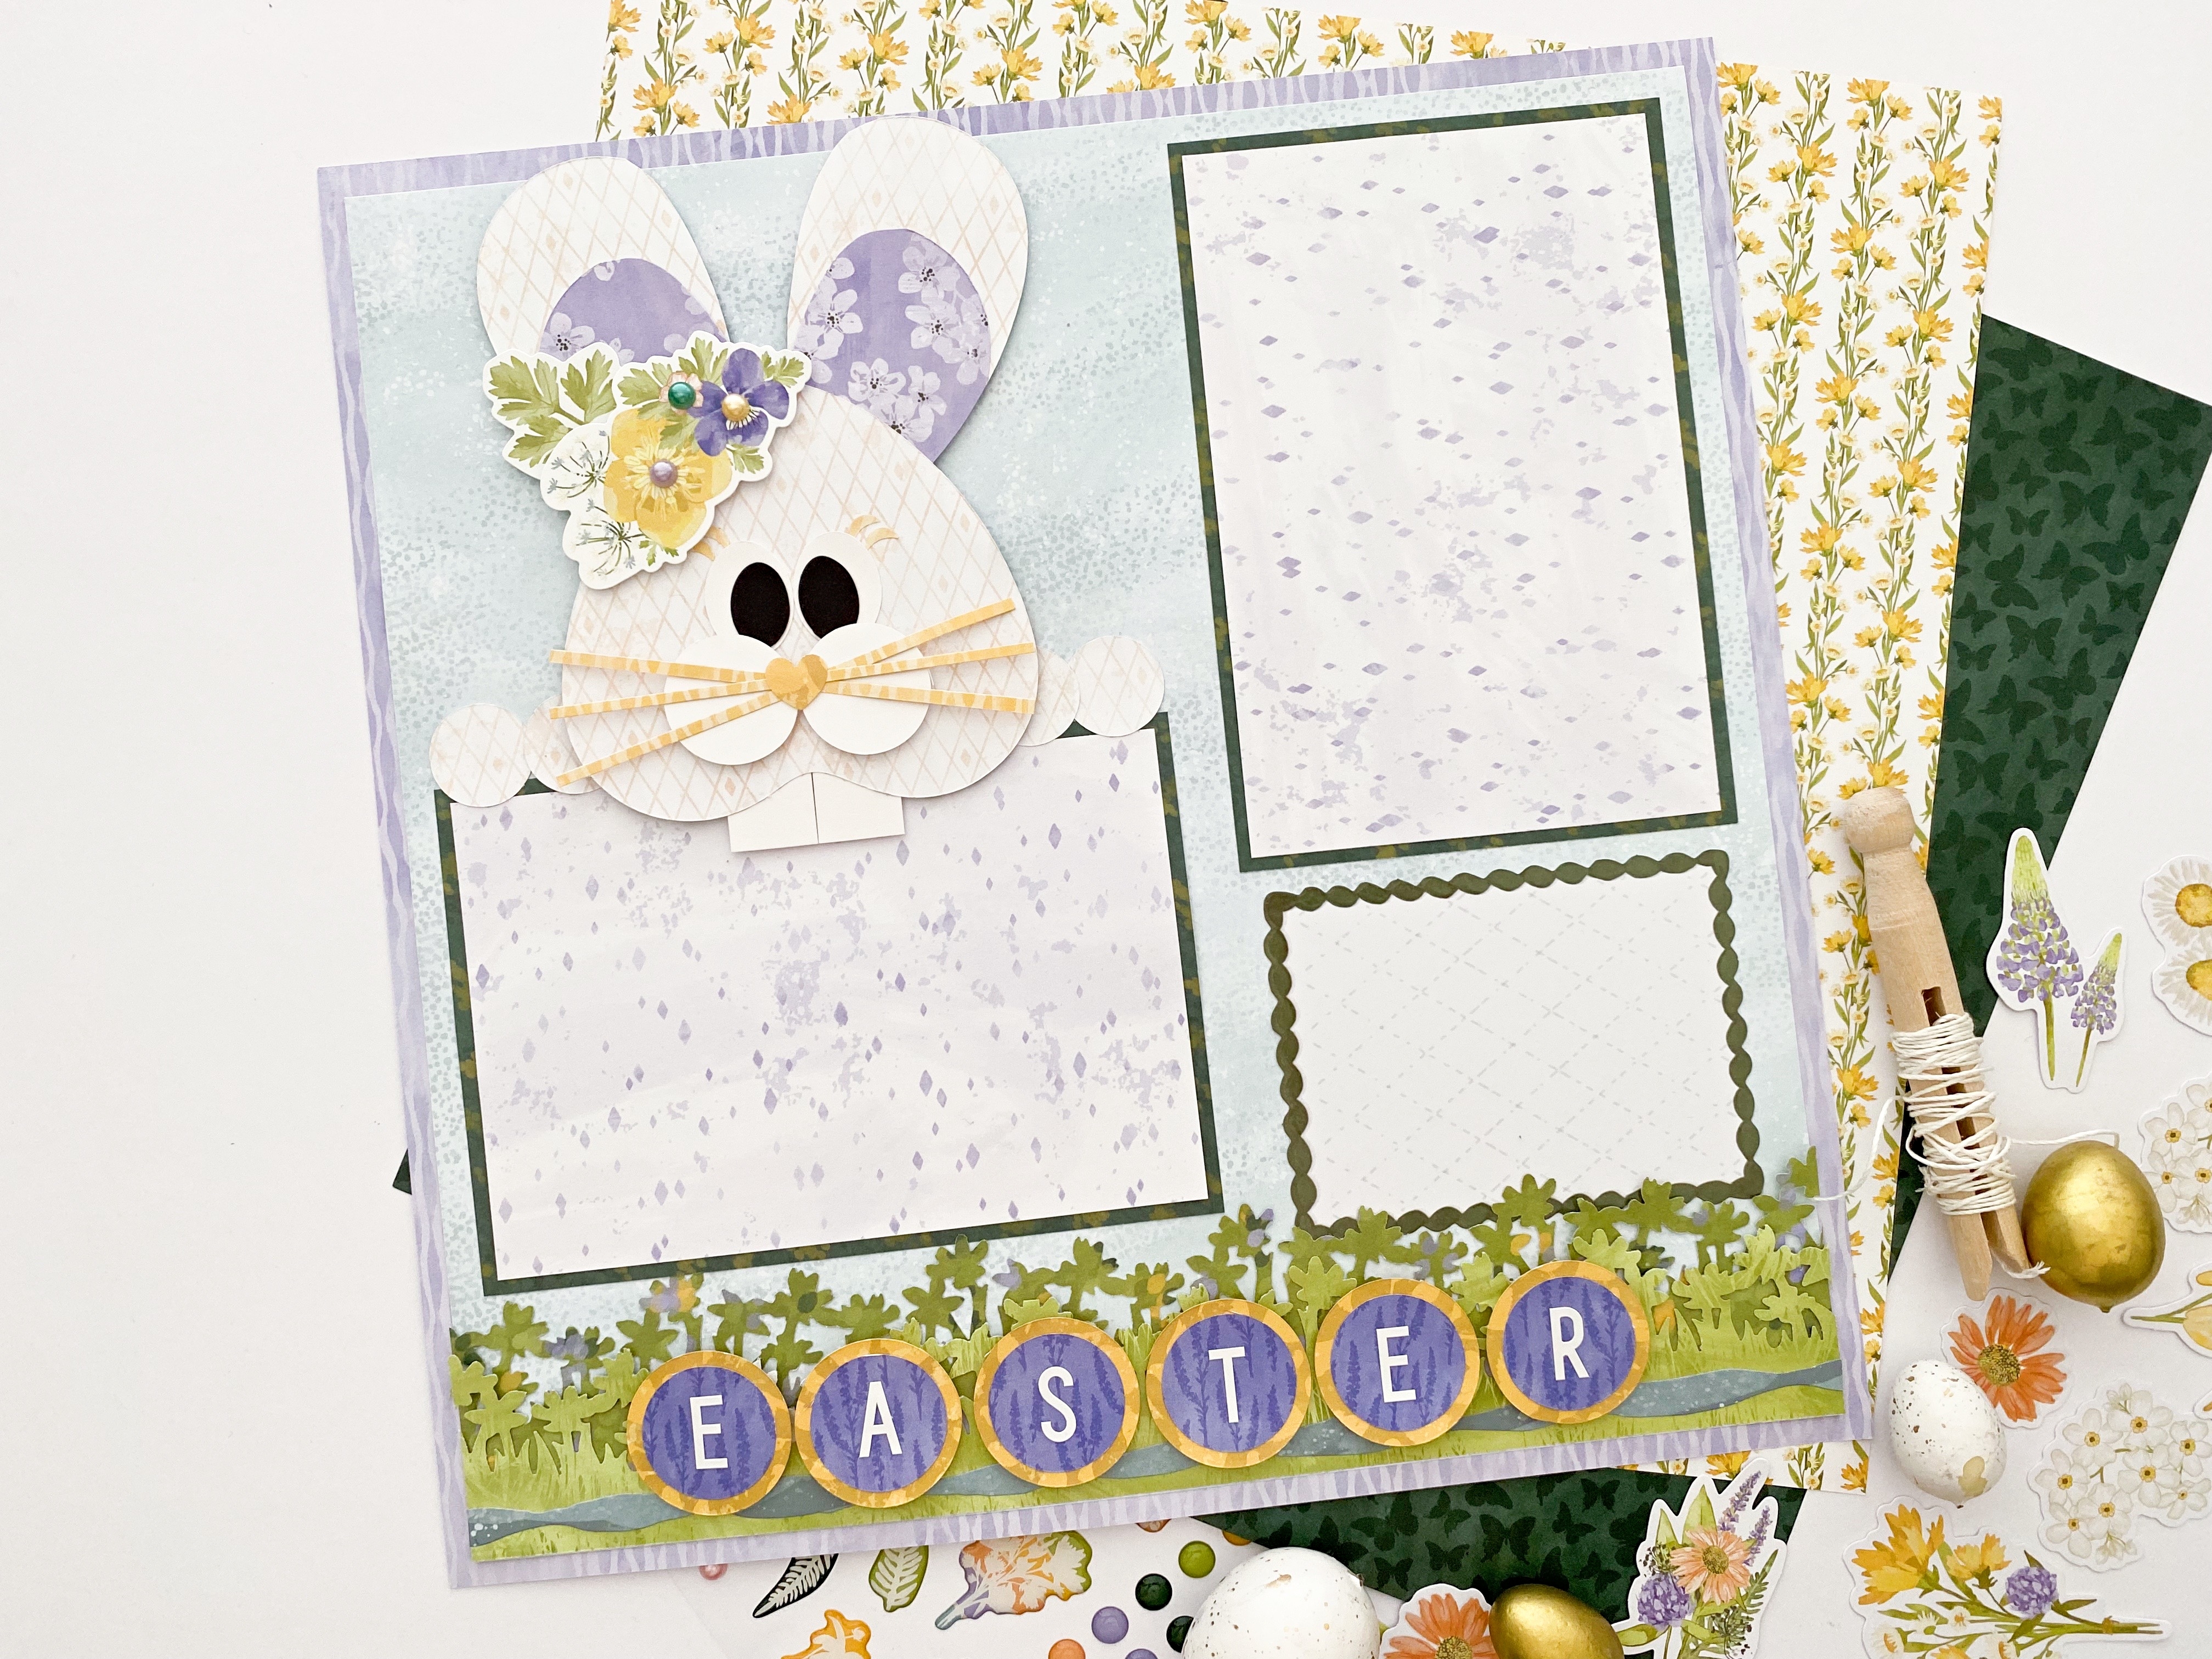
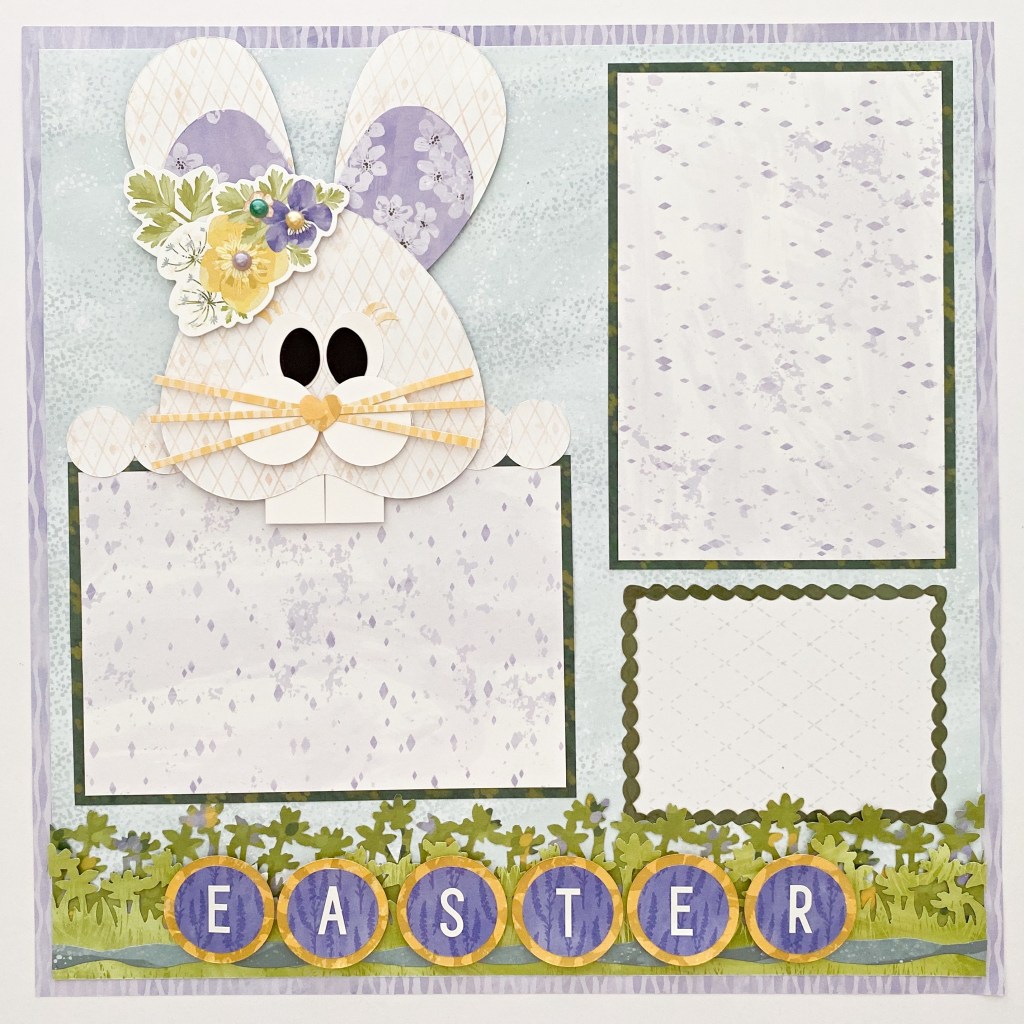
The pastel tones and floral themes of the Endless Meadows collection were the driving inspiration for my Easter-themed layout. They had me envisioning rolling meadows with the scent of fresh flowerbeds and cute little bunnies hopping by! I wanted to create a page that would help document my beloved Easter egg hunt or spring memories.
To create this layout you will need:
- Endless Meadows Paper Pack or (Shop Canada | Shop Australia)
- Endless Meadows Tone-on-Tone Paper Pack or (Shop Canada | Shop Australia)
- Endless Meadows Stickers or (Shop Canada | Shop Australia)
- Black & White Solid Cardstocks or (Shop Canada | Shop Australia)
- White Sans Serif ABC/123 Letter Stickers or (Shop Canada | Shop Australia)
- Wildflowers Border Punch or (Shop Canada | Shop Australia)
- Piece by Piece Mini Trio Punch Set or (Shop Canada | Shop Australia)
- Custom Cutting System with Circle, Oval & Gemstone Patterns or (Shop Canada | Shop Australia)
- 12-inch Trimmer or (Shop Canada | Shop Australia)
- Micro-Tip Scissors or (Shop Canada | Shop Australia)
- Repositionable Tape Runner or (Shop Canada | Shop Australia)
- Foam Squares or (Shop Canada | Shop Australia)
- Precision Point Adhesive Pen or (Shop Canada | Shop Australia)

Step 1: Trim a piece of designer paper to measure 11-1/2″ x 11-1/2″ and adhere over a contrasting piece of 12×12 paper. (Tip: You can remove the middle of the base sheet to conserve paper if you prefer.)
Step 2: With the Wildflowers Border Punch, punch once from grass designer paper. Using the 12-inch Trimmer, trim away the border to measure around 1-3/4″ wide. Trim 1/2″ from the length of the strip also. Repeat this exact process from a shrubbery designer paper. Adhere the grass border over the top of the shrubbery border at the base of the page, making sure the shrubbery border sits a fraction higher. Add a wavy border sticker over the top.
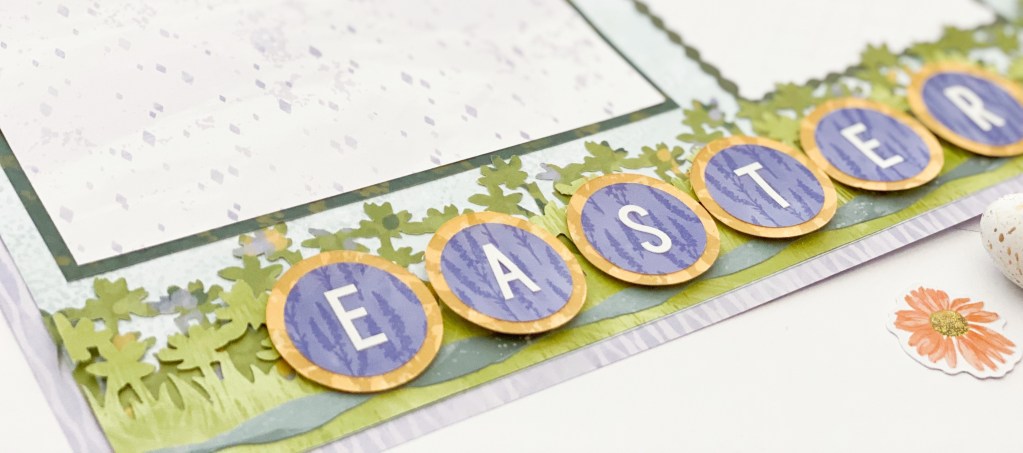
Step 3: Using the inside edge of the smallest Custom Cutting System Circle Pattern, cut six circles from honey yellow texture designer paper with the Green Blade. Cut another six from a different contrasting paper (here we used lavender sprigs tonal paper), only this time using the Red Blade on the inside edge. Adhere each smaller circle on top of the larger and create an “Easter” title by using the White Sans Serif ABC/123 Letter Stickers. Adhere with Foam Squares over the punched border for added dimension.
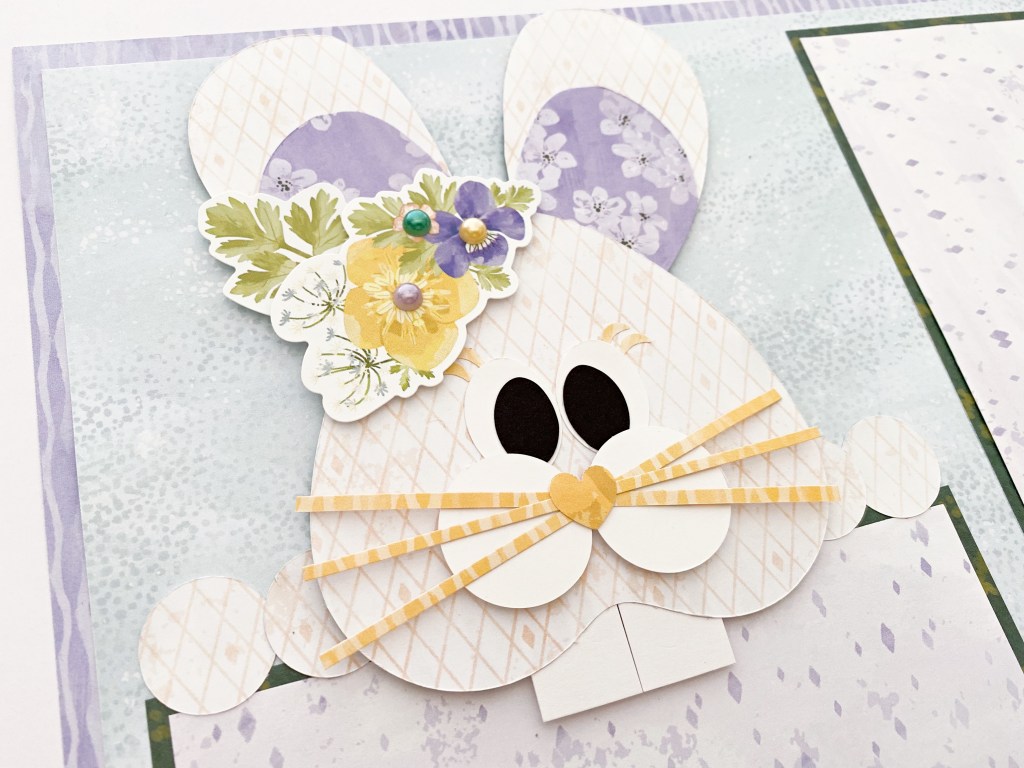
Step 4: To create the bunny:


- Using the small heart Custom Cutting System Gemstone Pattern, cut two hearts from diamond grid designer paper with the Red Blade. Cut one heart in half with scissors and carefully round off the square corners from both pieces. (Set the other heart aside for the head.) From lavender florals designer paper, cut another heart and cut it in half. Using scissors, carefully trim away any square corners as well as trimming down one side of each to make them slightly smaller than the first two halves cut. Adhere each smaller half over the top of the larger making sure the top curved edge is approximately 1″ down from the top edge of the larger halves. Trim away any overhang from the pointy end on both, to produce two “ears.” Turn the remaining full heart upside down and adhere both ears behind at the top.
- From White Solid Cardstock trim a strip of paper to measure 3/4″ wide and from that trim two pieces to measure 1-1/2″ long. Adhere these as “teeth” to the bottom-middle of the curve for the bunny’s head.
- Using the inside edge of the smallest Custom Cutting System Circle Pattern, cut two circles from White Solid Cardstock with the Green Blade. Adhere these with Foam Squares as the “snout” of the bunny.
- Next, trim two ovals from the inside edge of the smallest Custom Cutting System Oval Pattern and the Green Blade. Adhere these as “eyes.” Cut two ovals from the same template on the inside edge with the Blue Blade from Black Solid Cardstock. Adhere these as “pupils.”
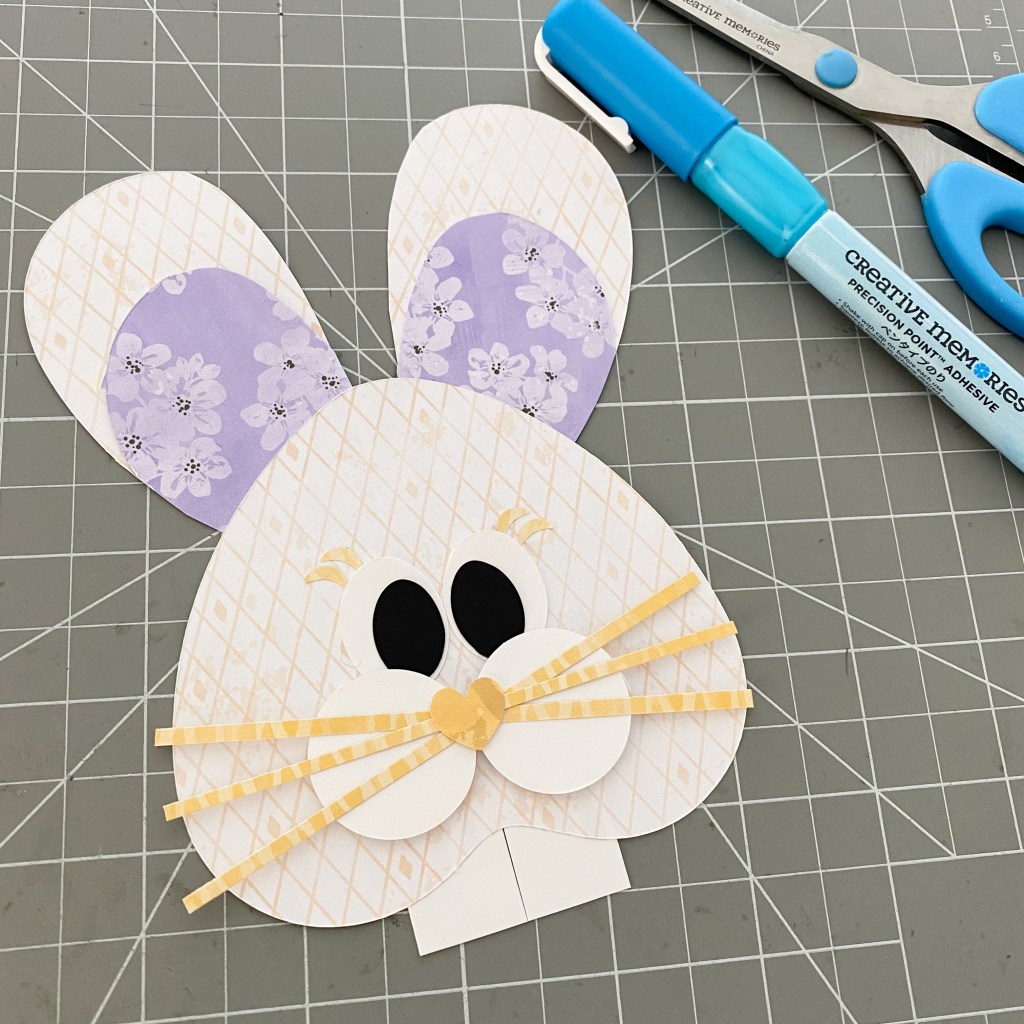
- Trim three very, very thin strips from contrasting paper (here we used honey yellow stripes tonal paper) to around 4″ long each. Adhere these as whiskers to the face with the Precision Point Adhesive Pen. Using the heart punch from the Piece by Piece Mini Trio Punch Set, punch one heart from the same paper and adhere as a “nose” over the top of the whiskers. As an extra feature, punch four crescent moon shapes from the Piece by Piece Mini Trio Punch Set and adhere as “eyelashes.”
- From the same paper as the bunny’s head, trim four circles from the inside edge of the smallest Custom Cutting System Circle Pattern and the Blue Blade. Set these aside for now.
Step 5: Cut two photo mats (here we used darker shrubbery designer paper) to measure 6-1/4″ x 4-1/4″ and adhere to the page. Adhere photos over the mats. (We have paper as placeholders for now.)
Step 6: Take the bunny and without adhering it, line it up above one photo. Take the four circles set aside from the previous step and adhere two on both sides of the bunny’s head, over the top of the photo as “paws.” Add Foam Squares to the bunny and adhere in place for added dimension.

Step 7: Finish the page by adding a journal card and extra embellishments.

What do you like about this Easter scrapbooking layout (and extra-cute bunny scrapbooking idea)? How are you celebrating this springtime occasion? Share your thoughts, ideas and special sentiments to us and others down below! Happy Easter, every-bunny!
Want even more Easter projects to try out? Then check out these egg-stremely awesome Easter scrapbook ideas!

Love this layout. Perfect for a grandkids page. ?
Very cute bunny. I love learning additional ways to use my tools
I love it!
So adorable to place the Easter Egg Hunt pics on this layout! Thank you for sharing Kylie Kingham.
Super cute! I love using the cutting system and punches to make clever additions to pages like this bunny, dogs, orchids, etc.. Thank you for the inspiration! Easter blessings!
I love this Easter layout; perfect for my Grandchildren
[…] Get Instructions! […]