July 15, 2022
Cast Your Catch Of The Day: Fish Border Scrapbooking Ideas
Some people have that memorable bucket list fishing trip stirring and swimming in the back of their mind. Maybe it was a remote, smooth stream with simple soft swishes of a fly-fishing line. Others may recall the adrenaline of a deep sea fishing charter experience and reeling in under the strain of a 200-pound (or even a thousand pounder!) monster. Whatever your fishing tale(s) may be, these fish border for scrapbooking ideas are a surefire hook, line and sinker!
To create these borders you will need:
- Serene Waters Paper Pack or (Shop Canada | Shop Australia)
- Serene Waters Tone-on-Tone Paper Pack or (Shop Canada | Shop Australia)
- Serene Waters Vellum Paper Pack or (Shop Canada | Shop Australia)
- Serene Waters Laser Cut Borders or (Shop Canada | Shop Australia)
- Serene Waters Embellishments or (Shop Canada | Shop Australia)
- Serene Waters Stickers or (Shop Canada | Shop Australia)
- Friendly Fish Border Punch or (Shop Canada | Shop Australia)
- 12-inch Decorative Trimmer or (Shop Canada | Shop Australia)
- 12-inch Trimmer with Straight, Scallop & Wave Blades or (Shop Canada | Shop Australia)
- Micro-Tip Scissors or (Shop Canada | Shop Australia)
- Tape Runner or (Shop Canada | Shop Australia)
- Repositionable Tape Runner or (Shop Canada | Shop Australia)
- Vellum Tape Runner Refill or (Shop Canada | Shop Australia)
- Foam Squares or (Shop Canada | Shop Australia)
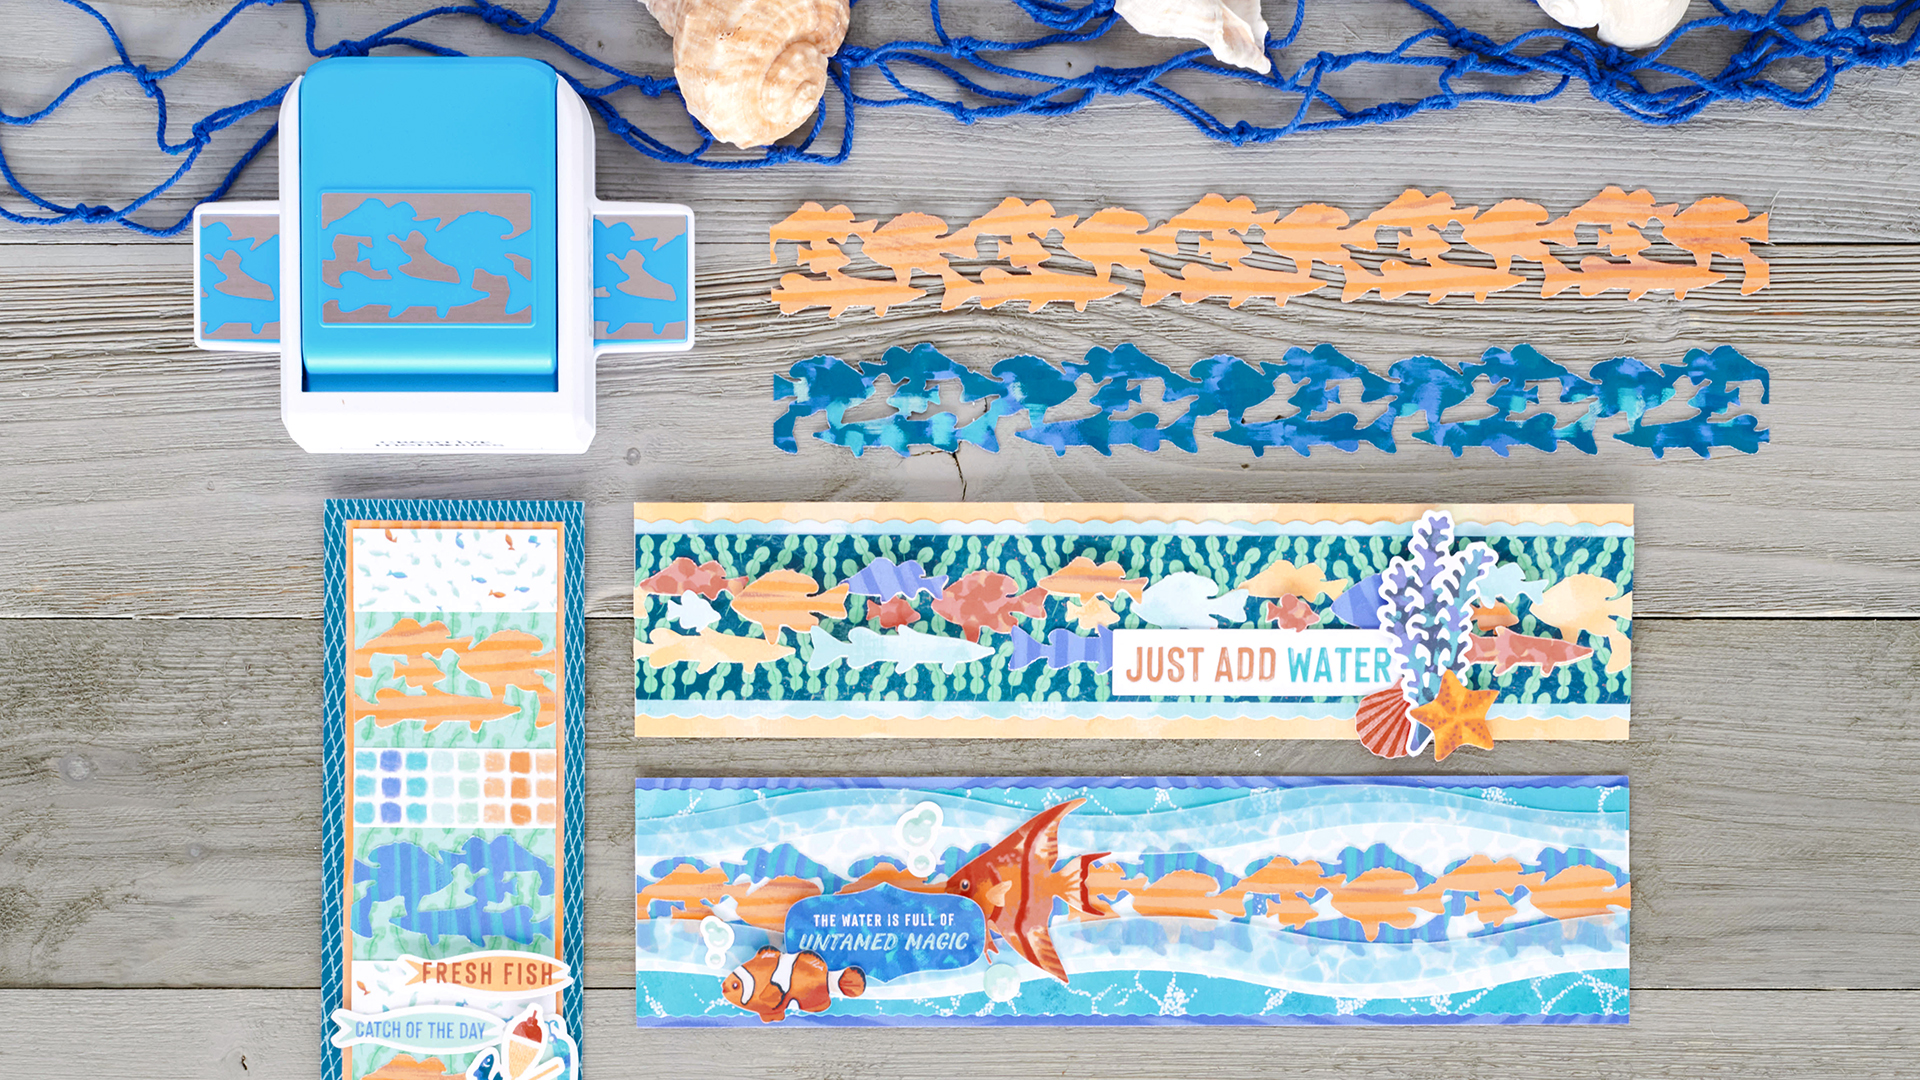
Check out the Friendly Fish Border Punch in action in the video below!

Just Add Water Border

Step 1: Cut a 12″x 2-3/4″ strip of butter yellow abstract paint daubs tonal paper for the base. Using the 12-inch Trimmer and the Scallop Blade, cut a 12″ x 2-3/8″ strip of abstract paint daubs tonal paper and adhere on the base. With the 12-inch Trimmer and the Straight Blade, cut a 12″ x 2″ strip of seaweed border designer paper and mount on top.
Step 2: Using the Friendly Fish Border Punch, punch a border with each butter yellow abstract paint daubs, soft medium orange stripes, red-orange abstract paint daubs, bright blue waves and aqua abstract paint daubs papers. Adhere the butter yellow border on the border. Cut out various fish from each of the other hues and adhere as desired on the border. Pop a few up with Foam Squares for added dimension.
Step 3: Add embellishments and stickers.
Untamed Magic Border

Step 1: Cut a 12″ x 3″ strip of bright blue waves tonal paper for the base. Using the 12-inch Trimmer and the Wave Blade, cut a 12″ x 2-3/4″ strip of glistening ripples designer paper and adhere on the base.
Step 2: Using the swell edge of the 12-inch Decorative Trimmer, cut a 12″ x 2″ (at the widest point) piece of aqua fishes tonal paper. Adhere on the border.
Step 3: Using the swell edge of the 12-inch Decorative Trimmer, cut two 12″ x 1/2″ ribbons with water ripples vellum paper. Adhere on the border using Vellum Tape Runner Refill. Burnish to hide the adhesive.
Step 4: Using the Friendly Fish Border Punch, punch a border with cool stripes designer paper, but turn it to the reverse side before punching. Punch a border with soft medium orange stripes designer paper. Trim off the long fish at the bottom. Adhere on top of the cool stripes fish (they should be going in the opposite direction).
Step 5: Adhere embellishments and stickers, popping some up with Foam Squares for added dimension.
Fresh Fish Border
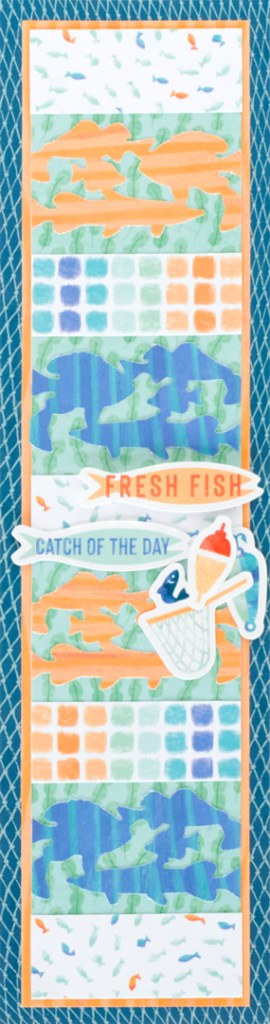
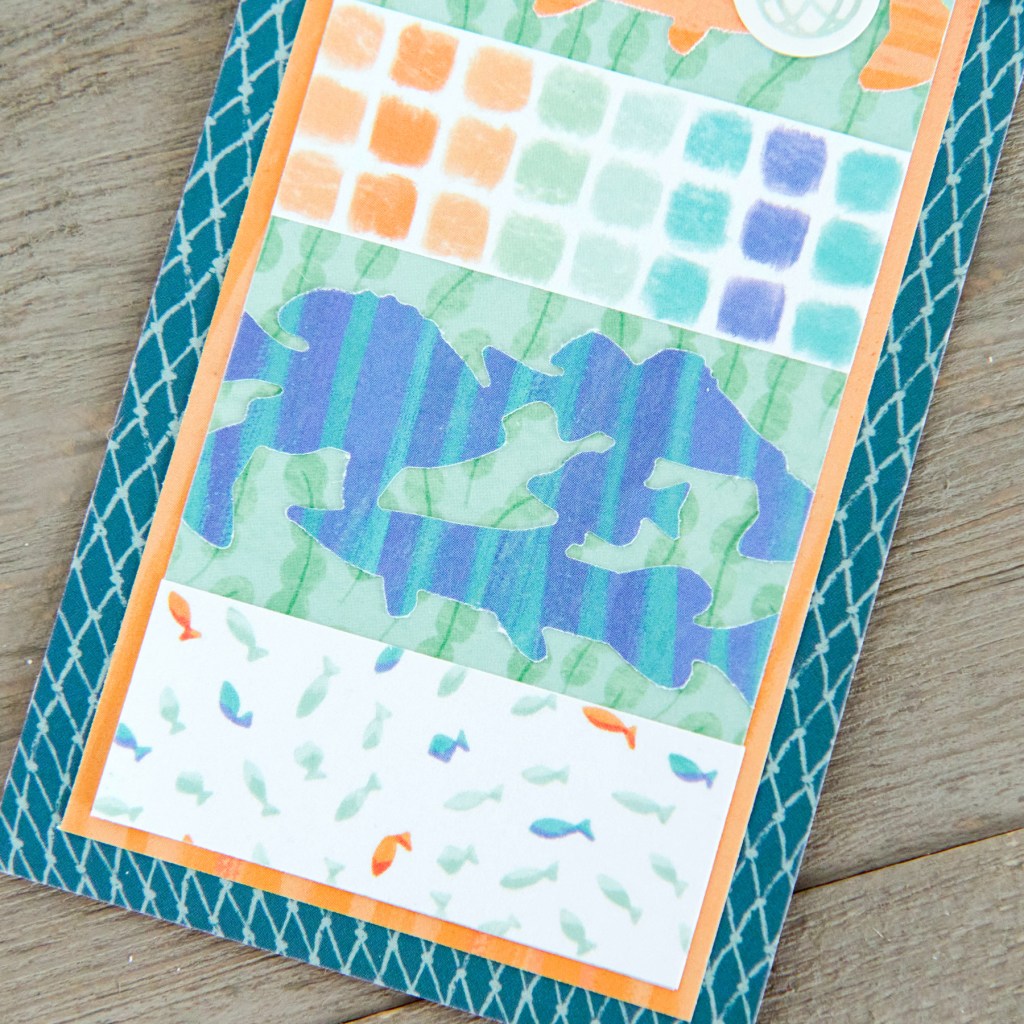
Step 1: Cut a 12″ x 3-1/8″ strip of fishing net designer paper for the base. Cut a 2-3/4″ x 11-1/2″ strip of soft medium orange stripes designer paper and adhere on the border. Cut a 2-1/2″ x 11-1/4″ strip of mint seaweed designer paper and mount on top.
Step 2: Cut three 2-1/2″ x 1″ strips with circling schools of fish designer paper and two 2-1/2″ x 1″ strips with multi-hued blocks designer paper. Adhere on the border as shown.
Step 3: Using the Friendly Fish Border Punch, punch a border with cool stripes designer paper (reversing it to the back side before punching). Punch another border with soft medium orange stripes designer paper. Trim two 2-1/2″ sections off both borders and adhere to the border as shown.
Step 4: Add stickers, popping some up with Foam Squares for added dimension.
Do you like to fish? If so, will you be making these fish border scrapbooking ideas? Cast your comments down below!

Very cute new border.
[…] Border 2 Blog Post […]