August 9, 2022
Create Newness With Texture Borders For Scrapbooking
“It’s so much fun to create a border that can be adapted and used with multiple collections for any kind of layout. It’s double the fun to also pull out some favorite punches and use them in different ways!”
Blog contributor Krislyn Mattei knows her scrappy stuff. Here she has created texture borders for scrapbooking!

To create these borders you will need:
- Totally Tonal Autumn Textures Paper Pack or (Shop Canada | Shop Australia)
- Totally Tonal Autumn Border Stickers or (Shop Canada | Shop Australia)
- Totally Tonal Summer Tonal Textures Paper Pack or (Shop Canada | Shop Australia)
- Totally Tonal Summer Border Stickers or (Shop Canada | Shop Australia)
- Totally Tonal Zoo Textures Paper Pack or (Shop Canada | Shop Australia)
- Totally Tonal Zoo Border Stickers or (Shop Canada | Shop Australia)
- Sunrays for Days Stickers or (Shop Canada | Shop Australia)
- Leave Nothing Behind Stickers or (Shop Canada | Shop Australia)
- What A Zoo, Too! Paper Pack or (Shop Canada | Shop Australia)
- What A Zoo, Too! Stickers or (Shop Canada | Shop Australia)
- Hot Fudge, Dark Green & Navy Solid Cardstocks or (Shop Canada | Shop Australia)
- Geometric Frame Punch or (Shop Canada | Shop Australia)
- Mandala Burst Border Punch or (Shop Canada | Shop Australia)
- 12-inch Trimmer or (Shop Canada | Shop Australia)
- Micro-Tip Scissors or (Shop Canada | Shop Australia)
- Tape Runner or (Shop Canada | Shop Australia)
- Repositionable Tape Runner or (Shop Canada | Shop Australia)
- Foam Squares or (Shop Canada | Shop Australia)
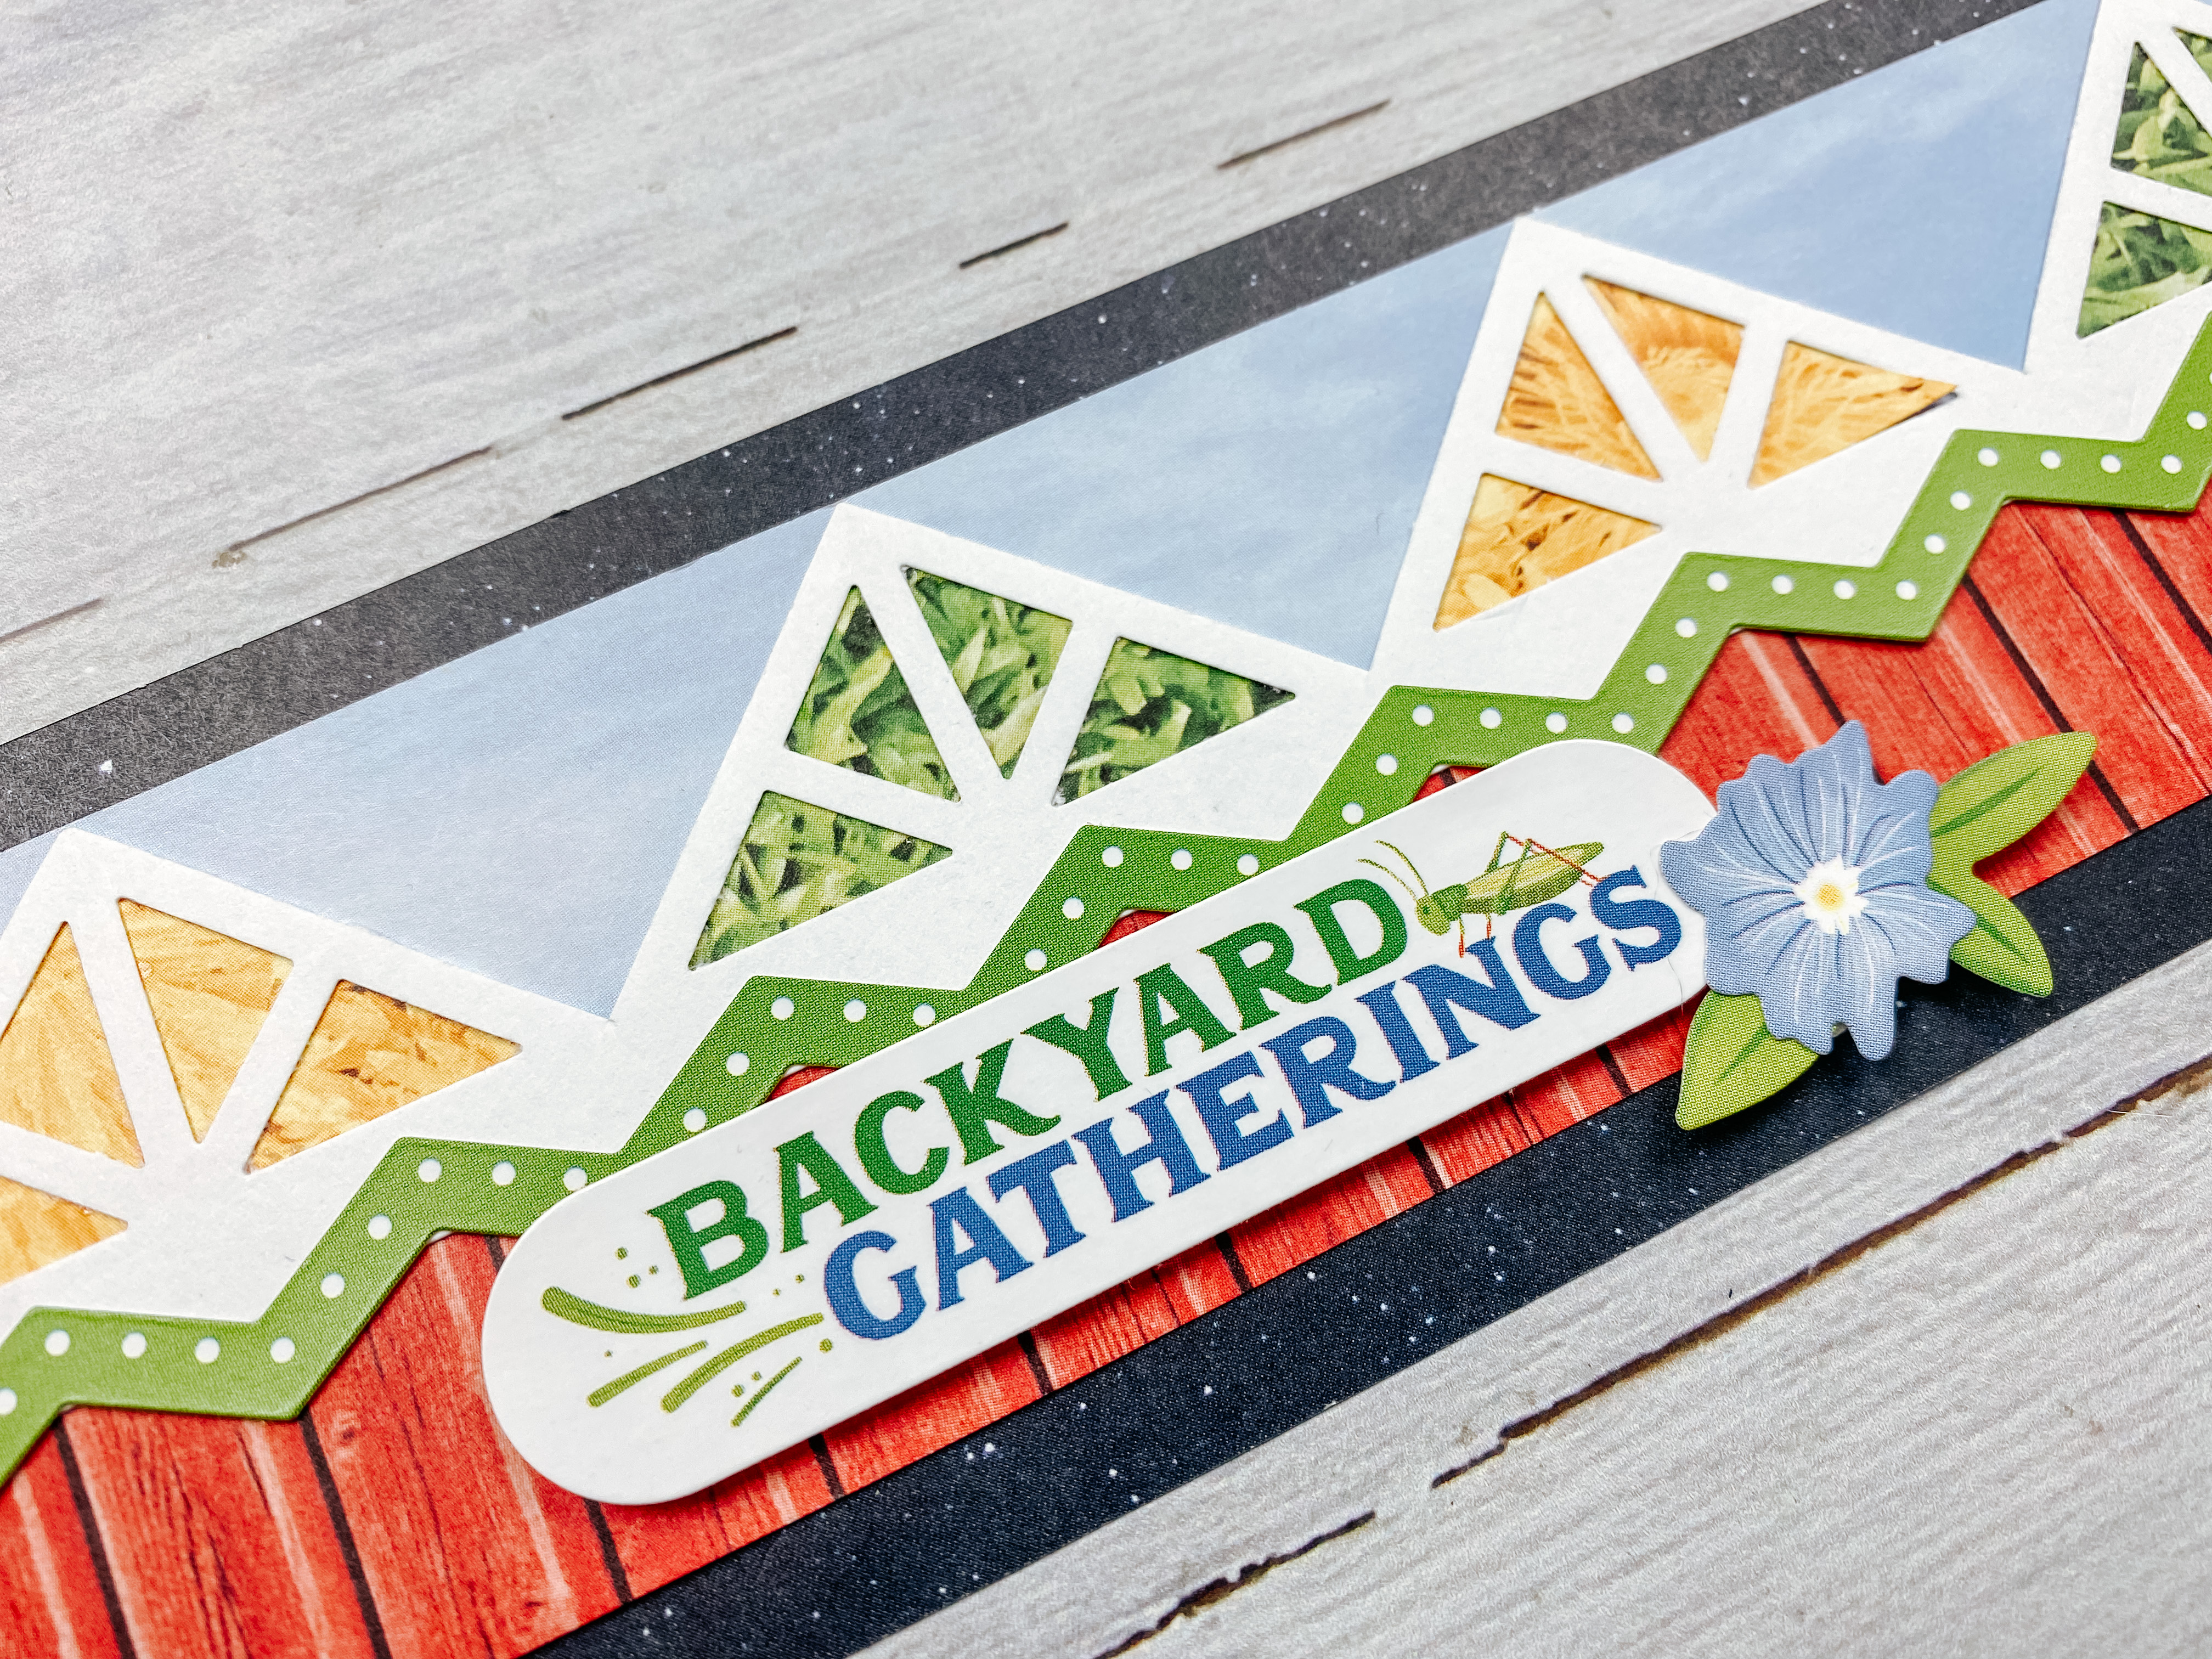
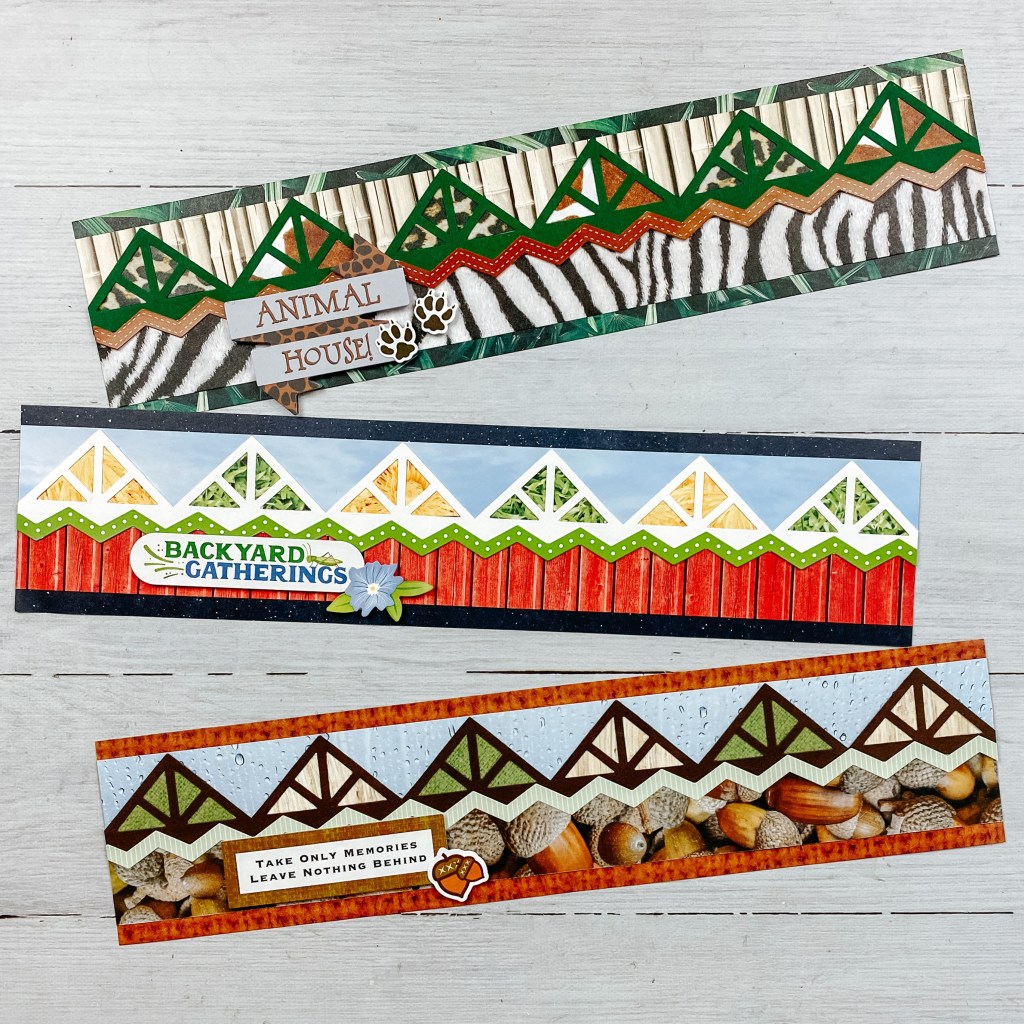
Geometric Triangles Border
Step 1: Cut a 12″ x 2-3/4″ strip of designer paper for the base. Cut a 12″ x 1-1/4″ strip of paper and adhere it to the top of the border, about 1/4″ from the edge. Cut a 12″ x 1″ strip of paper and adhere it to the bottom of the border, about 1/4″ from the edge.
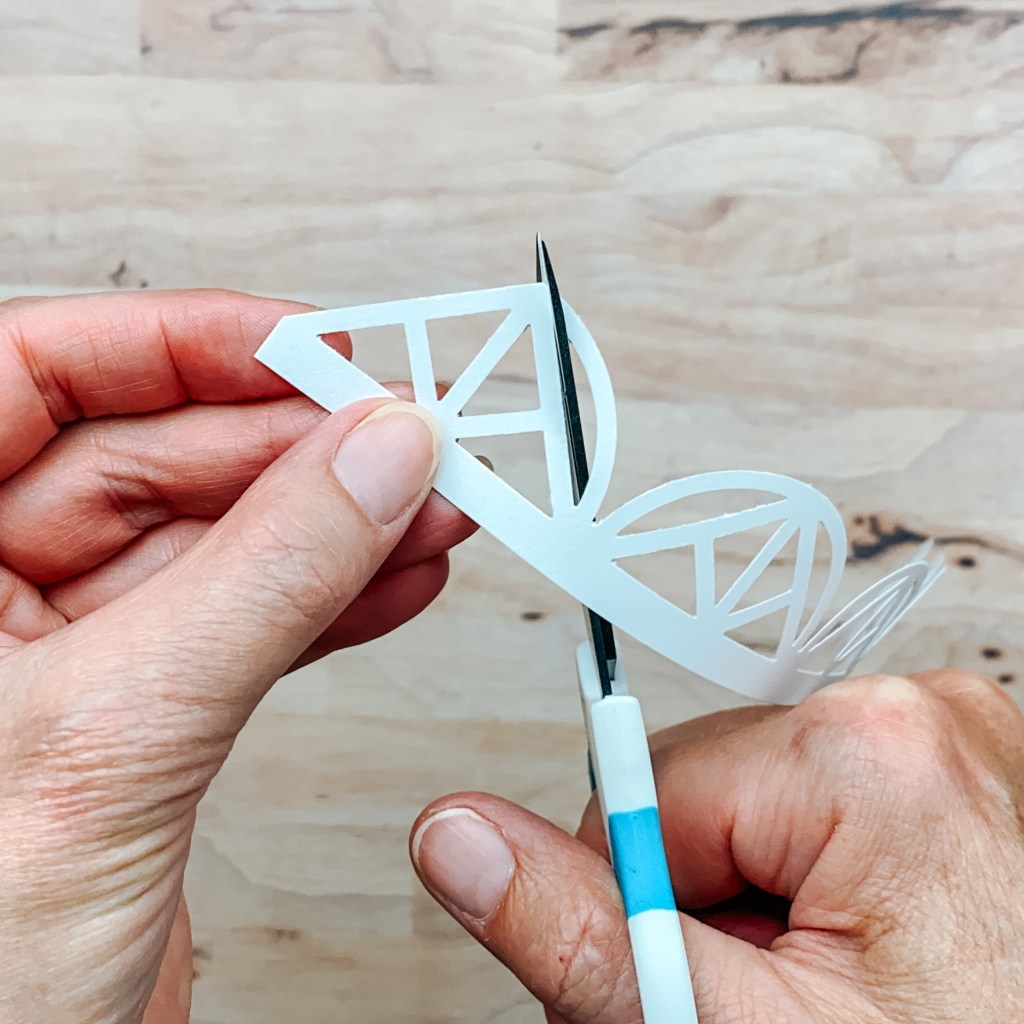
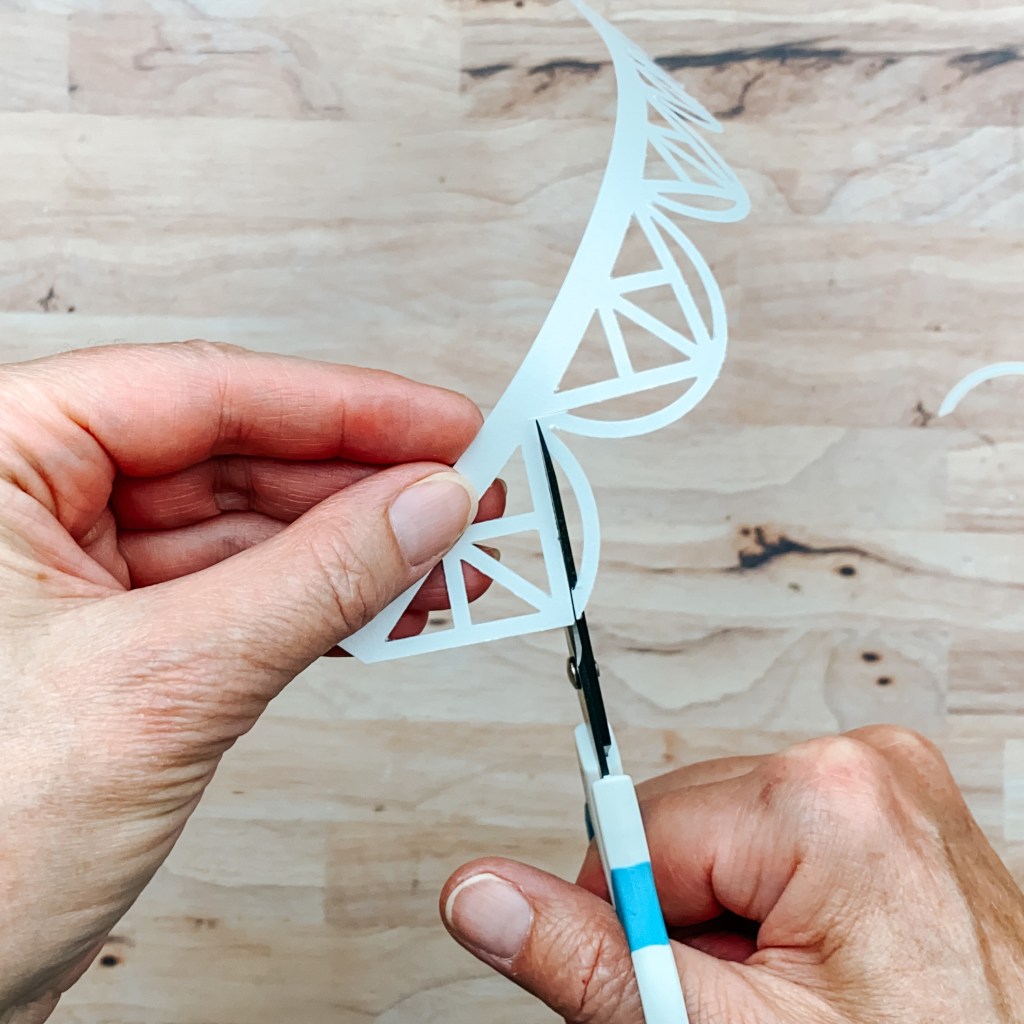
Step 2: Using the Geometric Frame Punch, punch a border with White Solid Cardstock. Trim it to 12″ x 1-1/4″. Using Micro-Tip Scissors, trim off the rounded edges of the border, as shown, leaving six triangles. Adhere on the border.
Step 3: Place a border sticker in the middle of the border as shown. Add additional stickers/embellishments, popping some up with Foam Squares for added dimension.
Mandala Flowers Border
Step 1: Cut a 2-3/4″ x 12″ strip of designer paper for the base.
Step 2: Using the Mandala Burst Border Punch, punch a border with either designer paper or cardstock and punch another with a different paper. Choose one to be the middle hue (using the photo as a guide). Trim this one to 1-1/4″ x 12″ and set aside.


Step 3: Trim the other border to 2-3/8″ x 12″. Using Micro-Tip Scissors, trim out the inner flowers from this piece, as shown. Shape the petals, then adhere on the middle (uncut) border. Layer the entire piece onto the outer (cut) border. Adhere on the base.
Step 4: Cut a 1″ x 12″ strip of designer paper and adhere on the border, about 1/2″ from the left edge. Place a leaves border sticker on the seam.
Step 5: Add additional stickers, popping some up with Foam Squares for added dimension.


Beautiful!! Love these!!
Love these!! As soon as I can see top of my desk again, I will attempt these beautiful borders!
Can’t wait to make these! I always love your borders, Krislyn!
Great Ideas!! Always love borders and quick, easy ideas!
Love your border ideas!! You are so creative and talented
Thank you for these beautiful border ideas. I love them! However, on the Geometric Triangles border, how did you accomplish the different colors in the inside of the triangles. Did you trace the triangle and cut out the different papers by hand? Thank you for an answer.
Oops, missed a step! They are 1-1/4″ squares cut in half. Thanks for the catch.
Great ideas…thanks
This really changes up the look of the Geo Punch, cool idea. I love all the texture it adds by cutting out the center of the Mandela Punch.
Wonderful borders, as always, Krislyn. Love your work, and that you share so much with us!
These are awesome ideas with new uses for the border punches! I can’t wait to make some Bavarian flare borders for my recent visit to Germany.
I made these using mostly solid cardstock. They are still beaautiful!