September 21, 2022
Buzzin’ With Detail: Bee Scrapbook Borders And DIY Card
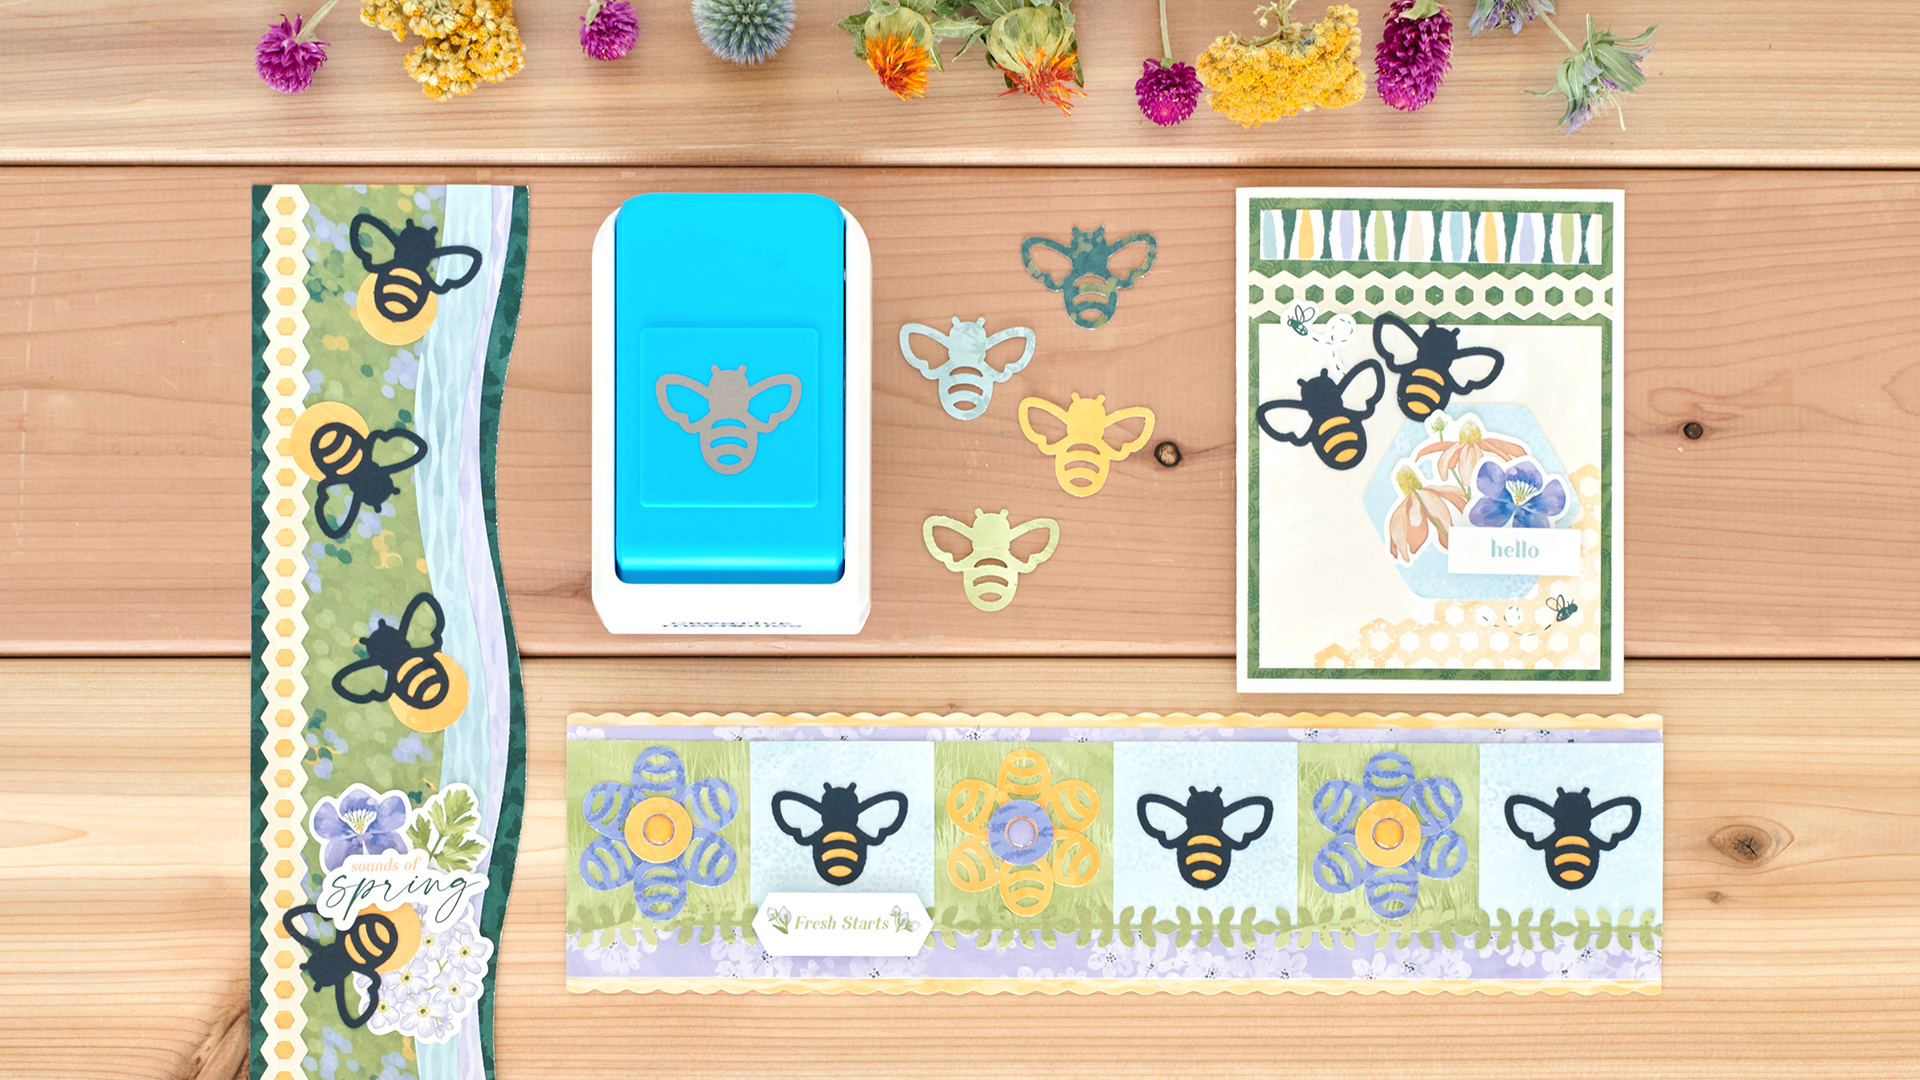
Black and golden stripes, translucent wings and a signature furry body, bees are a common sight in many gardens around the world. Bees are an important invertebrate in the animal kingdom — we need them to pollinate the food we eat, as well as the many trees and fragrant flowers to provide habitats for wildlife. Well, if you want to pay homage to these little winged creatures, then the Bumblebee Punch will make for un-bee-lievable projects. See for yourself with these bee scrapbook borders and DIY card!
To create these borders and card, you will need:
- Endless Meadows Paper Pack or (Shop Canada | Shop Australia)
- Endless Meadows Tone-on-Tone Paper Pack or (Shop Canada | Shop Australia)
- Endless Meadows Variety Mat Pack or (Shop Canada | Shop Australia)
- Endless Meadows Embellishments or (Shop Canada | Shop Australia)
- Endless Meadows Stickers or (Shop Canada | Shop Australia)
- Endless Meadows Border Stickers or (Shop Canada | Shop Australia)
- Black & White Solid Cardstocks or (Shop Canada | Shop Australia)
- Bumblebee Punch or (Shop Canada | Shop Australia)
- Original Border Maker System with Circle Chain Cartridge or (Shop Canada | Shop Australia)
- Custom Cutting System with Circle & Gemstone Patterns or (Shop Canada | Shop Australia)
- 12-inch Trimmer with Straight, Scallop & Scoring Blades or (Shop Canada | Shop Australia)
- 12-inch Decorative Trimmer or (Shop Canada | Shop Australia)
- Micro-Tip Scissors or (Shop Canada | Shop Australia)
- Tape Runner or (Shop Canada | Shop Australia)
- Repositionable Tape Runner or (Shop Canada | Shop Australia)
- Foam Squares or (Shop Canada | Shop Australia)
Take a look at the Bumblee Bee Punch in the video below!

Fresh Starts Border

Step 1: Using the 12-inch Trimmer and the Scallop Blade, cut a 12″ x 3″ strip of honey yellow waves tonal paper for the base. With the 12-inch Trimmer and the Straight Blade, cut a 12″ x 2-3/4″ strip of lavender floral designer paper and adhere on the base.
Step 2: Cut a 12″ x 2″ strip of grass designer paper and adhere on the border. Cut three 2″ x 2″ pieces of dusty sky blue spots designer paper and adhere at regular intervals on the grass strip.
Step 3: Using the Bumblebee Punch, punch three shapes with Black Solid Cardstock. Cut out pieces of honey yellow texture designer paper and adhere behind the bees’ bodies. Adhere on the dusty sky blue spots pieces.
Step 4: Punch out 12 bumblebees with lavender sprigs tonal paper and six with yellow texture designer paper. Using a scissors, trim off the wings of each. Apply Repositionable Tape Runner adhesive to the heads of all pieces and arrange six shapes to form a flower. Repeat and make two more flowers. Adhere to the border.
Step 4: Using the Border Maker System with the Circle Chain Border Maker Cartridge, punch a border section with honey yellow texture designer and lavender sprigs tonal papers. Trim out two honey yellow circles and one lavender circle. Add one to the middle of each flower. Place an epoxy gem in the middle of each.
Step 5: Adhere a leaves border sticker and title sticker.
Sounds of Spring Border

Step 1: Using the swell edge of the 12-inch Decorative Trimmer, cut a 3″ x 12″ strip of dark hunter green butterflies tonal paper for the base. Cut a 2″ x 12″ strip of leaf green shrubbery designer paper and mount on top.
Step 2: Cut a swell ribbon with each dusty sky blue and lavender waves tonal papers. Adhere to the swell edge of the base. Cut a 1/4″ x 12″ strip of honey yellow texture designer paper and adhere to the left side of the base. Top with a honeycomb border sticker.
Step 3: Using the inside edge of the smallest Custom Cutting System Circle Pattern and the Blue Blade, cut five circles with honey yellow texture designer paper. Punch five bumblebees with Black Solid Cardstock. Adhere to the border as shown, placing the bee bodies over the honey yellow circles.
Step 4: Add stickers, popping the title up with Foam Squares for added dimension.
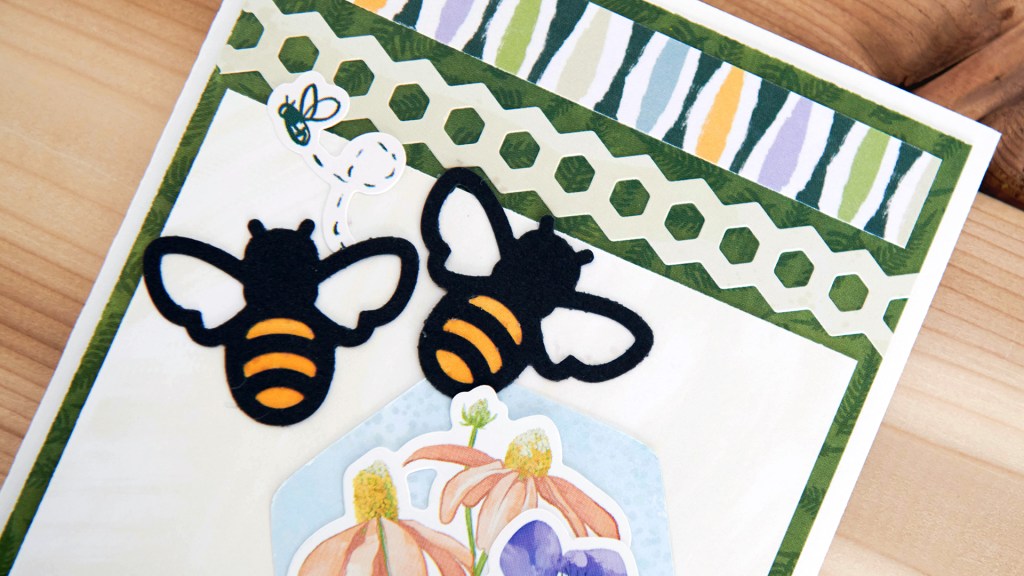
Hello Card

Step 1: Create the card base. Cut an 8-1/2″ x 5-1/2″ piece of White Solid Cardstock. Using the 12-inch Trimmer and the Scoring Blade, score along the long edge at 4-1/4″ and fold in half.
Step 2: Cut a 4″ x 5-1/4″ piece of leaf green fronds tonal paper and adhere on the front of the card.
Step 3: Cut a 3-3/4″ x 3-3/4″ piece from a honeycomb variety mat and adhere on the card. Cut a 3-3/4″ x 1/2″ strip of stripes designer paper and adhere to the top of the card. Place a 4″ section of a honeycomb border sticker in the space between.
Step 4: Using the inside edge of the hexagon Custom Cutting System Gemstone Pattern and the Blue Blade, cut a hexagon with blue spots designer paper. Adhere to the card and top with stickers.
Step 5: Punch two bumblebees with Black Solid Cardstock. Cut out pieces of honey yellow texture designer paper and adhere behind the bees’ bodies. Adhere on the card.
Which of these bee scrapbook projects has you buzzin’ with glee?

The bee body would also make great Easter eggs.
YES!!!