November 30, 2022
Flurry On The Fun With This Winter Scrapbook Layout
Let it snow, let it snow, let it snow… with this flurries-of-fun scrapbooking idea! Love winter and the chill of the season? Then this is your go-to project. (P.S. Did you know it is reported that on the 28th of January in 1887 that a ranch owner measured a snowflake that was 15 inches wide and eight inches thick?) Regardless of your unique snowflake escapade, adventures, caught-on-your-tongue moments, take a look at this beauty!

To create this layout you will need:
- Polar Lights Paper Pack or (Shop Canada | Shop Australia)
- Polar Lights Variety Mat Pack or (Shop Canada | Shop Australia)
- Polar Lights Embellishments or (Shop Canada | Shop Australia)
- Polar Lights Stickers or (Shop Canada | Shop Australia)
- White Solid Cardstock or (Shop Canada | Shop Australia)
- Original Border Maker System with Snowflake Circle Chain Cartridge or (Shop Canada | Shop Australia)
- 12-inch Decorative Trimmer or (Shop Canada | Shop Australia)
- 12-inch Trimmer or (Shop Canada | Shop Australia)
- Tape Runner or (Shop Canada | Shop Australia)
- Repositionable Tape Runner or (Shop Canada | Shop Australia)
- Foam Squares or (Shop Canada | Shop Australia)
- Icy Blue Micro-Tip Pen or (Shop Canada | Shop Australia)

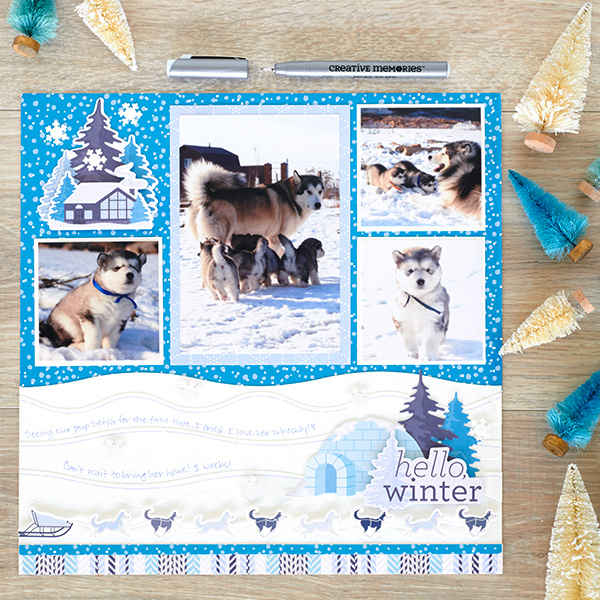
Step 1: Use a piece of scattered snow designer paper as the base for this layout. Using the swell edge of the 12-inch Decorative Trimmer, cut a 12″ x 5″ piece with White Solid Cardstock and adhere on the bottom of the layout. Cut a 12″ x 1/2″ strip with stripes designer paper and adhere on the bottom. Cut a 12″ x 1/4″ strip with scattered snow designer paper and adhere above the striped piece.
Step 2: Mount a 4″ x 6″ photo on a large variety mat and adhere to the middle of the layout. Crop three photos to 3″ x 3″ and mount on three 3-1/4″ x 3-1/4″ pieces of White Solid Cardstock. Adhere on the layout as shown.
Step 3: Using both the swell and wavy edges of the 12-inch Decorative Trimmer, cut three more strips with White Solid Cardstock. Adhere on the layout, using the photo as a guide for placement. Using the Icy Blue Micro-Tip Pen, add lines and journal as desired.

Step 4: Using the Snowflake Circle Chain Border Maker Cartridge, punch a border. Save the border for another purpose and use the snowflakes to decorate the layout. Add embellishments and stickers, popping some up with Foam Squares for added dimension.
What do you love to do in wintertime? What do you admire most about this winter scrapbook layout?

Beautifully done. Definitely saving this idea.
My first time on blog….why oh why did I not learn of this sooner, will so enjoy this site and find it inspiring and helpful