December 22, 2022
Deliver Merry Magic With This Christmas Scrapbook Layout: Letters To Santa
Every year, thousands and thousands of children write letters to Santa Claus in the hopes of winning the jolly North Pole resident over by convincing him they are worthy of certain requested gifts to be under tree on Christmas morning. To capture the merriment of this childhood rite of passage, blog contributor Sachiyo Omitsu delivered an idea that is a perfect make-your-spirits-bright package! Put your stamp of approval on this Christmas scrapbook layout!

To create this layout you will need:
- Seasonal Sightings Paper Pack or (Shop Canada | Shop Australia)
- Seasonal Sightings Foiled Embellishments or (Shop Canada | Shop Australia)
- Seasonal Sightings Laser Cut Borders or (Shop Canada | Shop Australia)
- Seasonal Sightings Stickers or (Shop Canada | Shop Australia)
- Seasonal Sightings Variety Mat Pack or (Shop Canada | Shop Australia)
- White Serif ABC/123 Letter Stickers or (Shop Canada | Shop Australia)
- White Sans Serif ABC/123 Letter Stickers or (Shop Canada | Shop Australia)
- Cranberry, Black, White & Bronze Shimmer Solid Cardstocks or (Shop Canada | Shop Australia)
- Original Border Maker System with Poinsettia Edge Border Maker Cartridge or (Shop Canada | Shop Australia)
- 4×6 Peekaboo Pockets™ or (Shop Canada | Shop Australia)
- 12×12 Top-Loading Single-Pocket Pages or (Shop Canada | Shop Australia)
- Black Dual-Tip Pen or (Shop Canada | Shop Australia)
- Multi-Purpose Tool or (Shop Canada | Shop Australia)
- 12-inch Trimmer or (Shop Canada | Shop Australia)
- All-Purpose Scissors or (Shop Canada | Shop Australia)
- Tape Runner or (Shop Canada | Shop Australia)
- Repositionable Tape Runner or (Shop Canada | Shop Australia)
- Foam Squares or (Shop Canada | Shop Australia)

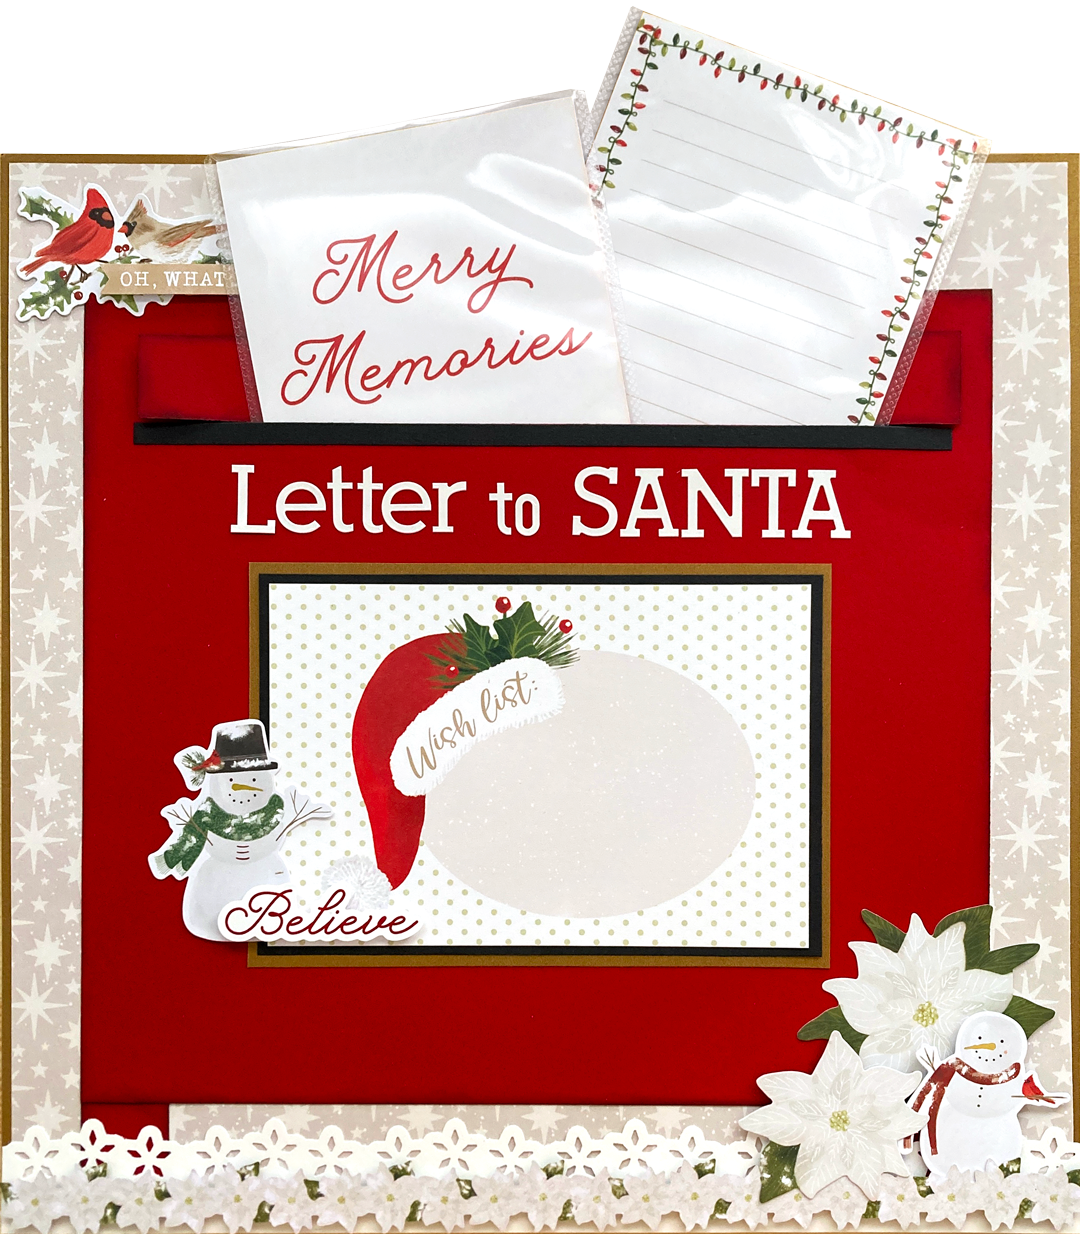
Step 1: Use a piece of Bronze Shimmer Solid Cardstock as the base.
Step 2: Cut the starry designer paper to measure 11-3/4″ x 11-3/4″ and add to the base.

Step 3: Cut the following segments from Cranberry Solid Cardstock. Once cut, use the Black Dual-Tip Pen to ink the edges of the segments.
- (1) 10″ x 9″
- (1) 1″ x 9″
- (2) 1″ x 1″

Step 4: Cut a piece of Black Solid Cardstock to measure 1/4″ x 9″. Cut a slit 1-1/2″ from the top of the 10″ x 9″ cranberry piece that you cut in Step 3, leaving 1/4″ from both sides uncut as shown. Adhere the black piece along the lower side of the slit.
Step 5: Using the Poinsettia Edge Border Maker Cartridge, punch a border from White Solid Cardstock. Cut the border at 1-1/4″ height.
Step 6: Adhere the 10″ x 9″ and 1″ x 1″ segments to make a “mailbox.” For 10″ x 9″ segment, use adhesives only on the edges.

Step 7: Insert the page into the 12×12 Top-Loading Single-Pocket Page. Using the Multi-Purpose Tool and a ruler, score a line along the top side of the black piece. Take out the page from the pocket page and cut a slit along the scored line. Adhere the cranberry 1″ x 9″ segment along the top side of the slit on the pocket page.
Step 8: Cut a piece of Black Solid Cardstock to measure 4-1/4″ x 6-1/4″ and Bronze Shimmer Solid Cardstock to measure 4-1/2″ x 6-1/2″. Add the black and bronze shimmer mats under the “Wish list” variety mat.
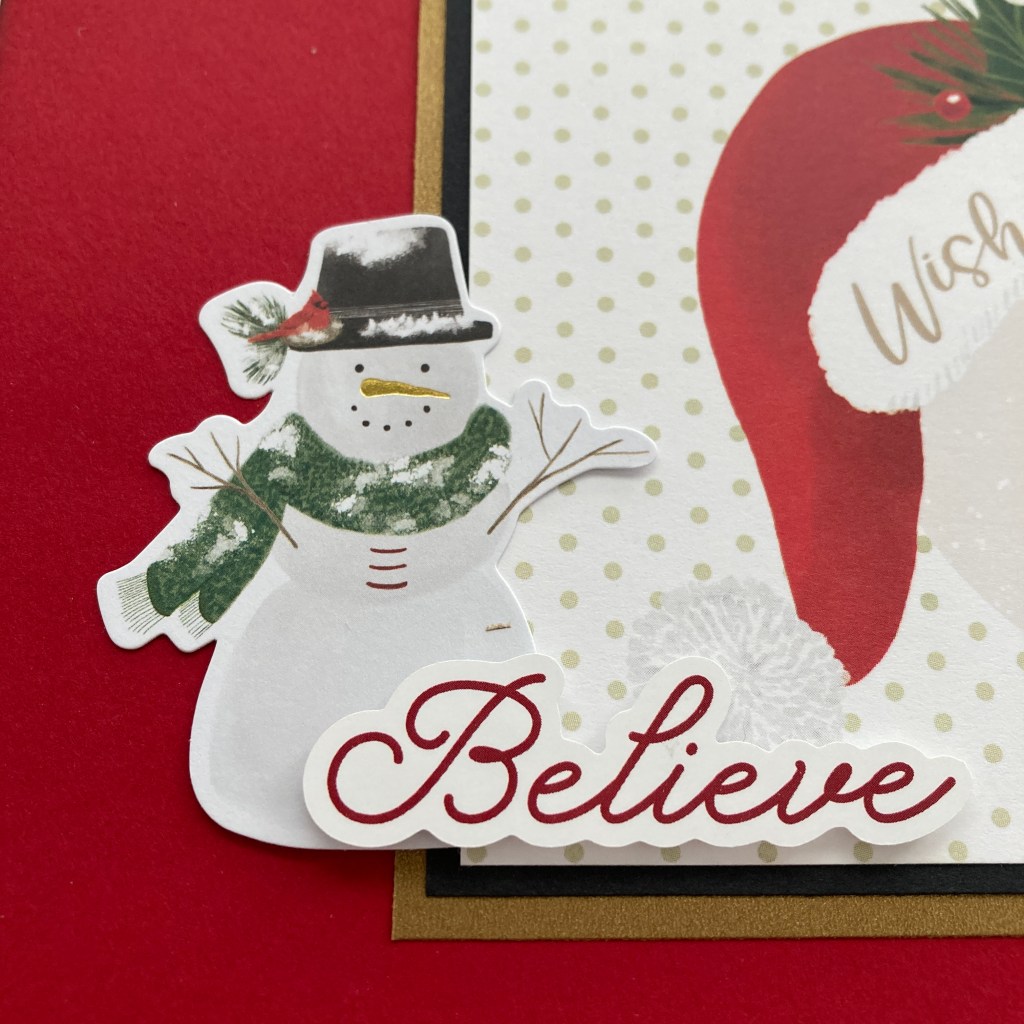
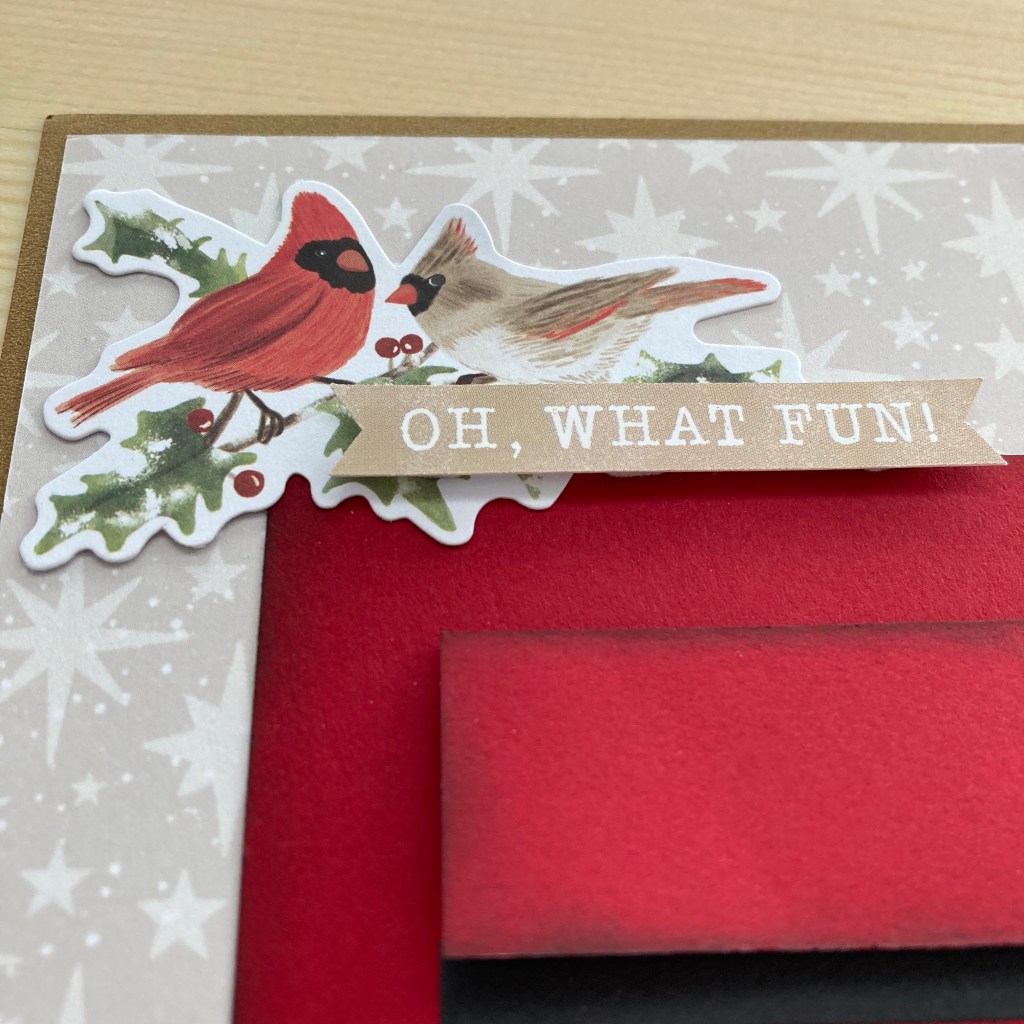

Step 9: Adhere stickers, embellishments and mats, using Foam Squares on some for added dimension.

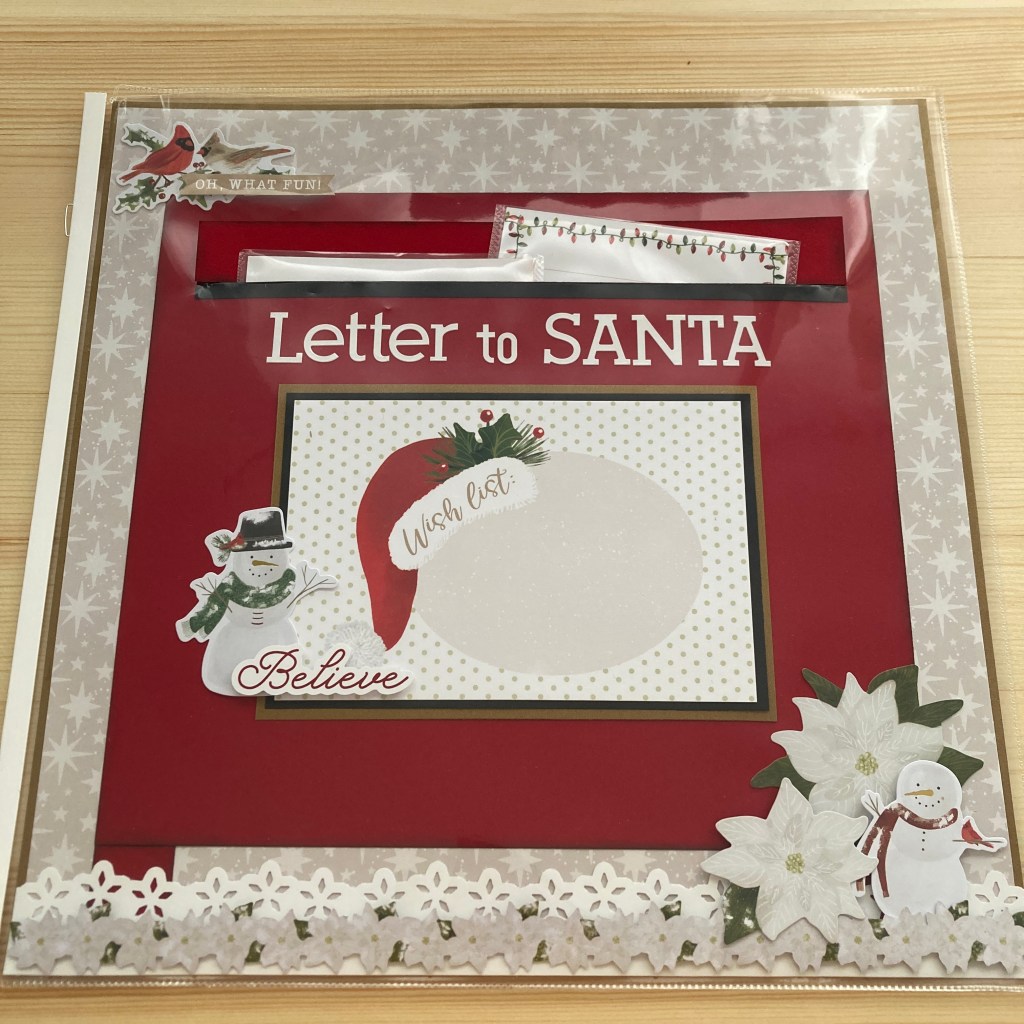
Step 10: Cut the corners of the Peekaboo Pocket™ tab so that you can tuck it in the pocket. Slide photos, journal mats or memorabilia into the pockets. Peel off the adhesive strip backing, tuck in the sealing face inside. Insert the Peekaboo Pockets™ to the mailbox.
What are you ’tis-the-season thoughts of the merry mailbox on this Christmas scrapbook layout? What letters, memorabilia, etc., would you put in the pocket? And how are you celebrating Christmas this year? Merry Christmas, one and all!
Psst, do you mail their letters? Scan a copy of the letter before putting it in the mail, or if you act as an nominal postal worker to the North Pole, keep them safe and tucked away to share years down the road! Make sure you date the letters, too!

Defiitely making this. Thank you so much for sharing. Merry Christmas.
That is absolutely beautiful!
LOVE this!! Thank you, as always, Sachiyo Omitsu and CM products for these great layouts!
A very classy and beautiful layout.
I live in Carrollton. Looking for scrapbook group to visit.
sherri
thestuddards@gmail.com
Love it!
Wonderful Idea for Christmas Memorabilia! Thanks so much for sharing Sachiyo! Always appreciate your creativity!
Love this! Absolutely want to try this. Thank you for sharing!
¡Está chulísimo! Lo voy a tratar muy pronto. ¡Gracias por compartir! ??