April 5, 2023
Hats Off To The Graduates: Graduation Scrapbook Layout
Growing up, we’re all told to work hard, reach for the stars and dream big. These exact sentiments are often times reinforced during graduation ceremonies as encouraging words for life’s journey ahead, while also shedding light on the importance of taking the time to look back and celebrate the dedication it took to get to graduation day. The student’s hard work definitely deserves a “Huzzah” moment! So, get ready to applaud your graduate’s academic accomplishments with this top-of-the-class graduation scrapbook layout!

To create this layout you will need:
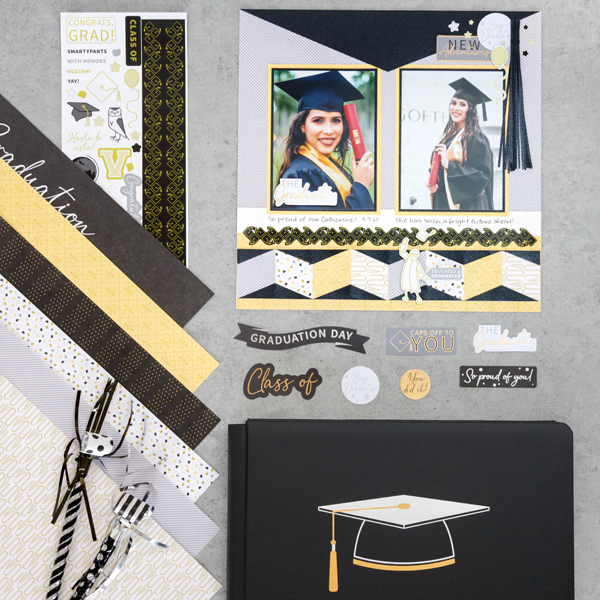
- Congrats, Grad! Paper Pack or (Shop Canada | Shop Australia)
- Congrats, Grad! Foiled Embellishments or (Shop Canada | Shop Australia)
- Congrats, Grad! Stickers or (Shop Canada | Shop Australia)
- White, Canary & Black Shimmer Cardstocks or (Shop Canada | Shop Australia)
- 12-inch Trimmer or (Shop Canada | Shop Australia)
- Tape Runner or (Shop Canada | Shop Australia)
- Repositionable Tape Runner or (Shop Canada | Shop Australia)
- Precision Point Adhesive Pen or (Shop Canada | Shop Australia)
- Foam Squares or (Shop Canada | Shop Australia)
- Black Dual-Tip Pen or (Shop Canada | Shop Australia)
Take a look at the Congrats, Grad! collection in the video below!

Step 1: Use a piece of stripes paper as the base for this layout.
Step 2: Create the graduation hat. Cut a 12” x 2-1/2” strip with Black Shimmer Solid Cardstock. Mark the middle of one long edge. Using the 12-inch Trimmer, cut from the middle mark to one opposite corner, then cut from the middle mark to the other corner. Adhere the triangle piece to the top of the layout. To make the tassel, cut eight 1/8” x 11” strips with Black Shimmer Solid Cardstock. Gather all strands together and fold loosely in half. Cut another small strip, apply Repositionable Tape Runner adhesive to it and wrap it around the folded strands two to three times, about 1” from the folds. On the back, apply Precision Point adhesive and/or Repositionable Tape Runner along the length of the tassel. Adhere on the right side of the layout as shown.

Step 3: Create the border. Cut a 12” x 3” strip with canary yellow caps paper for the border base. Cut a 12” x 2” strip with White Solid Cardstock. Adhere on the base. Cut eight 1-1/2” x 2” pieces with various paper scraps. Adhere side by side on the white strip, alternating hues. Cut eight 3” x 5/8” strips with Black Shimmer Solid Cardstock. Fold each in half and cut from one folded corner to opposite outer corner. Unfold and adhere on the border as shown. Adhere the border on the bottom of the layout.
Step 4: Cut a 12” x 1” strip with White Solid Cardstock. Adhere above the border. Place a graduation caps border sticker along the seam.
Step 5: Cut two 4-1/2” x 6” mats with Canary Solid Cardstock. Top with two 4-1/4” x 5-3/4” mats with Black Shimmer Solid Cardstock. Crop two photos to 4” x 5-1/2” and mount on top. Adhere on the layout.
Step 6: Adhere embellishments and stickers, popping some up with Foam Squares for added dimension.
Do you have a special upcoming or recent graduate in your life? Have you checked out the Congrats, Grad! collection yet?
P.S. Are YOU a member of the Virtual Crop Facebook Group? It’s your go-to place for MONTHLY Virtual Crops, MONTHLY Completed Album Challenges, WEEKLY LIVE STREAMING of Fast & Fun Projects with Noreen, LIVE QUARTERLY Secret Box Openings with project tutorials and so much more! We hope you’ll join our community of more than 31,000 fellow memory-keeping enthusiasts — you’ll feel right at home!
