April 28, 2023
Bring On The Sunshine With This Tropical Scrapbook Layout
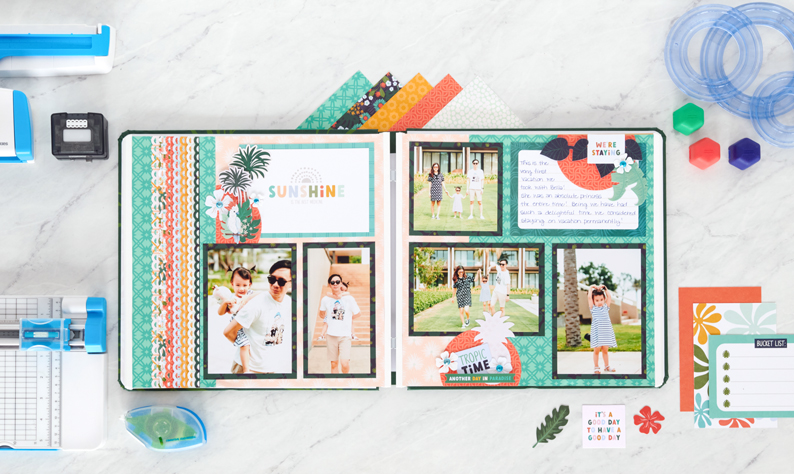
What’s on the itinerary for today? Soaking up the blue skies, sunshine and good vibes this tropical scrapbook layout gives off! With it’s show-stopping scallop border, this two-page spread is the perfect ticket to showcasing all of your vacation and summertime memories!

To create this spread you will need:
- Tropic Time Paper Pack or (Shop Canada | Shop Australia)
- Tropic Time Stickers or (Shop Canada | Shop Australia)
- Tropic Time Embellishments or (Shop Canada | Shop Australia)
- Tropic Time Variety Mat Pack or (Shop Canada | Shop Australia)
- Custom Cutting System with Circle Patterns or (Shop Canada | Shop Australia)
- Original Border Maker System with Mirrored Scallops Chain Border Maker Cartridge or (Shop Canada | Shop Australia)
- Tape Runner or (Shop Canada | Shop Australia)
- Repositionable Tape Runner or (Shop Canada | Shop Australia)
- Foam Squares or (Shop Canada | Shop Australia)
- Navy Dual-Tip Pen or (Shop Canada | Shop Australia)

Step 1: Use two pieces of the coral tropical leaves paper as the base for the spread.
Step 2: Cut a piece of the aqua diamond burst tile paper to measure 1-1/2” x 12”. Adhere along the left edge of the spread.
Step 3: Cut a piece of the aqua diamond tile burst paper to measure 8-3/4” x 12”. Adhere to the right edge of the spread.
Step 4: Using the Border Maker System with the Mirrored Scallops Border Maker Cartridge, punch seven borders from a variety of papers. Adhere so that they overlap on the right edge of the 1-1/2” strip of aqua paper.
Step 5: Cut a piece of aqua diamond tiles paper to measure 3/4″ x 12”. Adhere along the right edge of the borders.
Step 6: Using the outside edge of the smallest Circle Custom Cutting System Pattern, cut three circles with the Red Blade.
Step 7: Cut 1-1/2” from the side of the circles. Place/adhere the circles along the edge of the borders, along the bottom on the right and along the top right of the spread.
Step 8: Adhere the variety mats to the spread, tucking under the circles as shown.
Step 9: Cut three mats to measure 4-1/2” x 6-1/2” from the blue/green paper. Adhere to the spread.
Step 10: Cut one mat to measure 4-1/2” x 4-1/2”. Adhere to the spread.
Step 11: Cut one mat to measure 3-1/2” x 6-1/2”. Adhere to the spread.
Step 12: Adhere photos that measure: (2) 4” x 6”, (1) 6” x 4”, (1) 4” x 4”, (1) 3” x 6”
Step 13: Adhere stickers/embellishments using Foam Squares on some for added dimension.
Step 14: Journal as desired.
What’s your dream tropical vacation? What are your thoughts on the decorative border Melissa created using the Mirrored Scallops Chain Border Maker Cartridge?
P.S. Are YOU a member of the Virtual Crop Facebook Group? It’s your go-to place for MONTHLY Virtual Crops, MONTHLY Completed Album Challenges, WEEKLY LIVE STREAMING of Fast & Fun Projects with Noreen, LIVE QUARTERLY Secret Box Openings with project tutorials and so much more! We hope you’ll join our community of more than 31,000 fellow memory-keeping enthusiasts — you’ll feel right at home!
