December 15, 2023
Hone In On Hygge Happenings With This Winter Scrapbook Layout
As darker, longer evenings draw in, it’s time to curl up, settle in and do as the Danes and Norwegians do. Enter hygge! Pronounced “hyoo-guh,” this Scandi sentiment describes a feeling and mood of comfy contentment, conviviality and well-being. And winter is the most hygge time of year — think candles and toasty fireplaces, homemade sweets, comfort foods and piping hot drinks, fuzzy socks, slippers and sweatpants, hunkering down near a window seat while wrapped up in a knitted blanket and more warming tangibles and thoughts. Well, scrappers, here’s an idyllic, nicely icy project for you — snuggle down with this winter scrapbook layout and let your hygge happen!

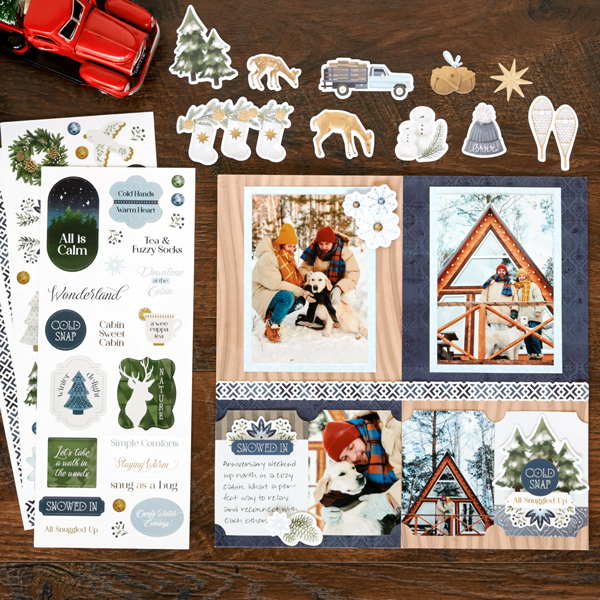
To create this layout you will need:
- Nordic Winter Paper Pack or (Shop Canada | Shop Australia)
- Nordic Winter Variety Mat Pack or (Shop Canada | Shop Australia)
- Nordic Winter Embossed Embellishments or (Shop Canada | Shop Australia)
- Nordic Winter Stickers or (Shop Canada | Shop Australia)
- Any Solid Cardstock (Shop Canada | Shop Australia) or 12×12 Refill Page (Shop Canada | Shop Australia)
- 2-Way Corner Rounder or (Shop Canada | Shop Australia)
- 12-inch Trimmer or (Shop Canada | Shop Australia)
- Tape Runner or (Shop Canada | Shop Australia)
- Repositionable Tape Runner or (Shop Canada | Shop Australia)
- Foam Squares Variety Pack or (Shop Canada | Shop Australia)
- Black Dual-Tip Pen or (Shop Canada | Shop Australia)


Step 1: Use a piece of cardstock (or a refill page) as the base for this layout.
Step 2: Cut both woodgrain and navy line art leaves papers in half lengthwise. Cut each again at 7”. Adhere the 7” pieces side by side on top of the layout. Adhere the remaining 5” pieces side by side (but swapped) on the bottom of the layout as shown. Place a border sticker along the seam at about 5”.
Step 3: Crop two photos to 4” x 5-1/2” and mount on two 4-1/2” x 6” pieces of baby blue pinwheel quilt paper. Adhere on the 7” pieces as shown.
Step 4: Place two journal cards from the embellishments pack on the bottom of the layout as shown. Crop two photos to 3” x 4”, notch the corners with the 2-Way Corner Rounder and adhere next to the journal cards, forming a row.
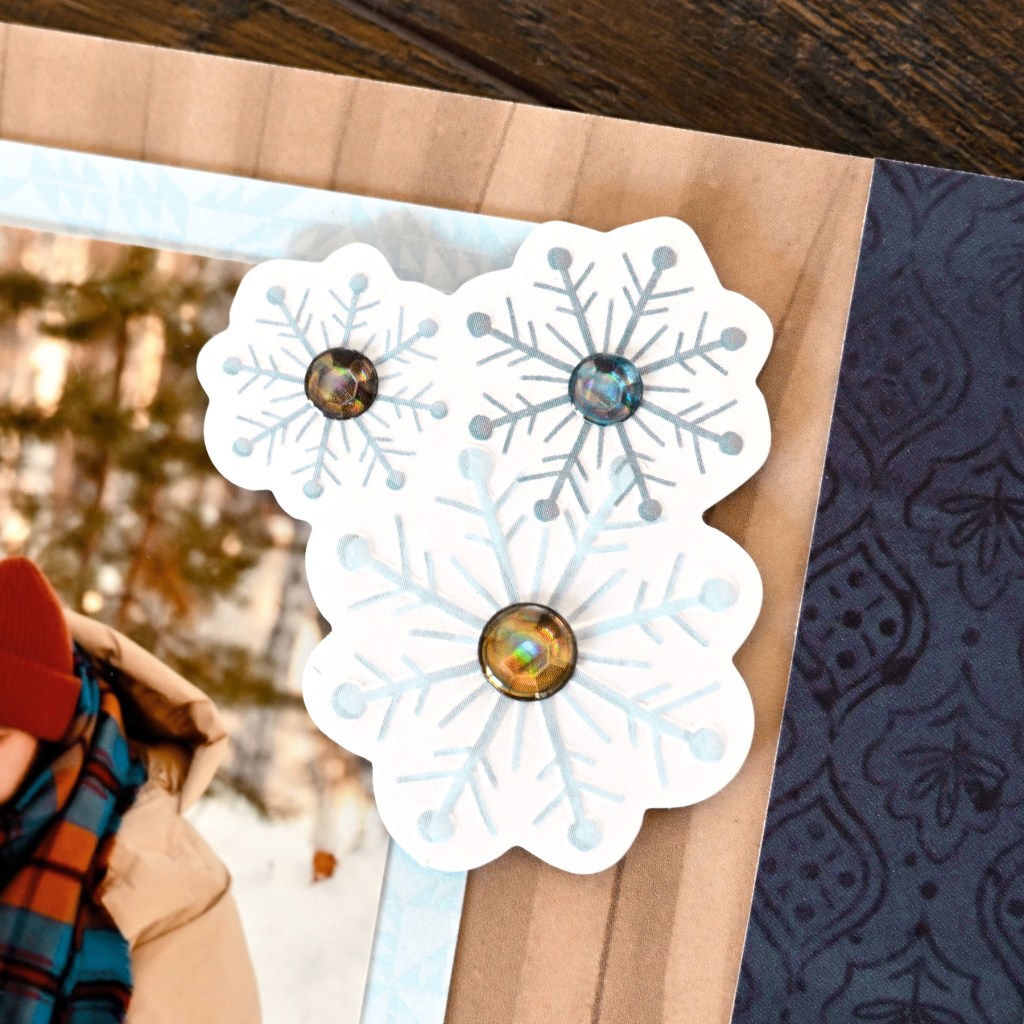
Step 5: Adhere stickers and embellishments, popping some up with Foam Squares for added dimension.
Step 6: Journal as desired on one of the journal cards.
In what ways do you hygge in the cold-weather months? Will you make this winter scrapbook layout to commemorate those cold, content days?

The Last Chance freebies have ended, but the party isn’t over! Help us clear the shelves of Last Chance products so we can deck the halls with that’s to come in 2024! For a limited time until Dec. 29, you can get $20 USD OFF one order of $100+ in Last Chance products (CA: $30 CAD off one order of $150+ in Last Chance products; AU: $35 AUD off one order of $200+ in Last Chance products)!
Shop & Redeem (and remember to check out with your Advisor): US | CA | AU
P.S. Are YOU a member of the Virtual Crop Facebook Group? It’s your go-to place for MONTHLY Virtual Crops, MONTHLY Completed Album Challenges, WEEKLY LIVE STREAMING of Fast & Fun Projects with Noreen, LIVE QUARTERLY Secret Box Openings with project tutorials and so much more! We hope you’ll join our community of more than 37,000 fellow memory-keeping enthusiasts — you’ll feel right at home!

Beautiful layout, Krislyn…thanks for the directions!
Beauiful layout!!! Thaks for sharing the directions!