March 1, 2024
Paint the Town With These Rainbow Scrapbook Banner Borders and DIY Card

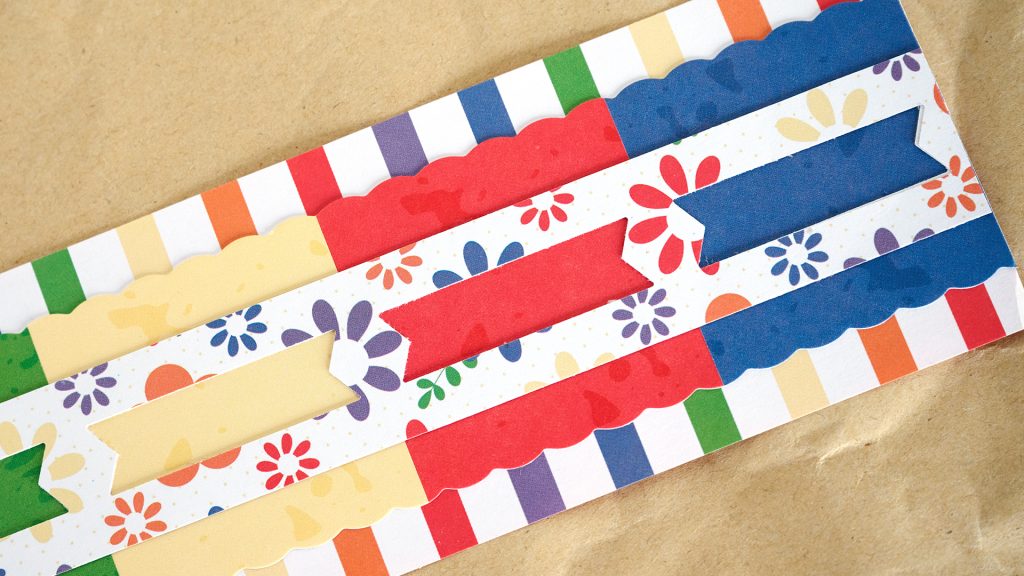
Take advantage of the full spectrum of the rainbow with these rainbow scrapbook banner borders and DIY card! You’ll love them for recording summer memories, a special trip and expressing gratitude. And not only does the Banner BMC create continuous banner borders, but you can use the cutouts to add extra banners to your projects like the ones below!
To create the card and borders you will need:
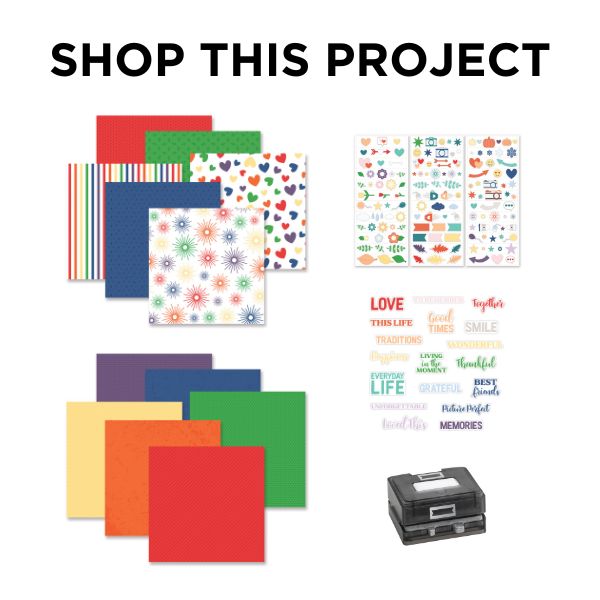
- This Life Paper Pack or (Shop Canada | Shop Australia)
- This Life Tone-on-Tone Paper Pack or (Shop Canada | Shop Australia)
- This Life Word Embellishments or (Shop Canada | Shop Australia)
- This Life Stickers or (Shop Canada | Shop Australia)
- White, Canary, Pumpkin, Red, Kelly Green, Blue & Eggplant Solid Cardstock or (Shop Canada | Shop Australia)
- Original Border Maker System with Banner Cartridge or (Shop Canada | Shop Australia)
- Custom Cutting System with Circle Patterns or (Shop Canada | Shop Australia)
- 12-inch Trimmer with Straight, Scoring & Scallop Blades or (Shop Canada | Shop Australia)
- Micro-Tip Scissors or (Shop Canada | Shop Australia)
- Tape Runner or (Shop Canada | Shop Australia)
- Repositionable Tape Runner or (Shop Canada | Shop Australia)
- Foam Squares Variety Pack or (Shop Canada | Shop Australia)

Good Times Border

Step 1: Cut a 12? x 2-3/4? strip with canary grid designer paper for the base.
Step 2: Using the Original Border Maker System and Banner Border Maker Cartridge, punch borders with Red, Orange, Canary, Kelly Green, Blue and Eggplant Solid Cardstocks. Arrange and adhere on the base as shown.
Step 3: Cut a 12? x 1-1/2? strip with blue starry nights designer paper and adhere on the base, about 3/16? from the top edge. Cut a 12? x 1-1/4? strip with bursts designer paper and adhere on top.
Step 4: Adhere a title embellishment and stickers, popping some up with Foam Squares for dimension.
Smile Border
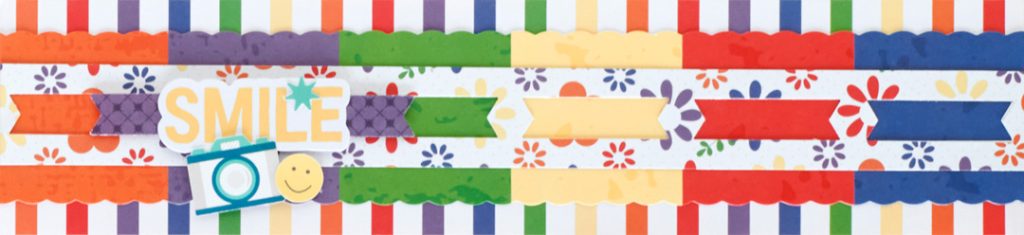
Step 1: Cut a 12? x 2-3/4? strip with stripes designer paper for the base.
Step 2: Cut a 12? x 2-1/2? strip with scrap paper. Cut a 2? x 2-1/2? piece with each pumpkin, eggplant, kelly green, canary, red and blue tonal canvas papers. Adhere on the scrap strip as shown. Using the 12-inch Trimmer with the Scallop Blade, cut 1/4? off each side, leaving a 12? x 2? strip. Adhere on the base.
Step 3: Using the Original Border Maker System and Banner Border Maker Cartridge, punch a border with floral designer paper. Trim to 12? x 1-3/16? and adhere on the border.
Step 4: Flip two of the floral banners punched out to the eggplant bursts side. Adhere behind the title using Foam Squares. Add stickers.
Floral Banner Border
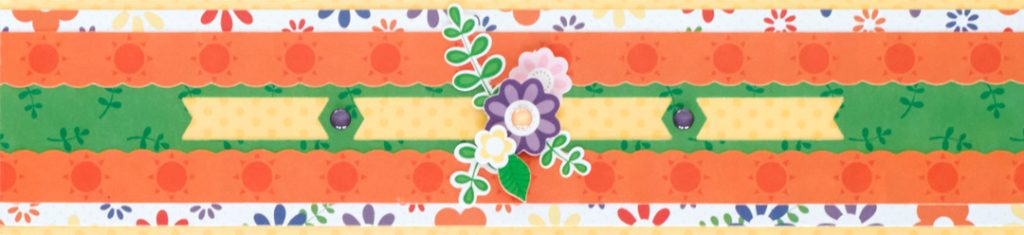
Step 1: Cut a 12? x 2-3/4? strip with canary dots tonal paper for the base. Cut a 12? x 2-1/2? strip with floral designer paper and adhere on the base. Cut a 12? x 1? strip with canary dot tonal paper and adhere on the middle of the border.
Step 2: Using the Original Border Maker System and Banner Border Maker Cartridge, punch a border with greenery designer paper, omitting the first and last “stops” and punching just the four middle stops. Trim to 12? x 1-3/16?. Adhere on top of the canary strip.
Step 3: Using the 12-inch Trimmer with the Scallop Blade on just one long edge, cut two 12? x 5/8? strips with pumpkin suns designer paper. Adhere on either side of the green strip as shown.
Step 4: Adhere stickers, popping some up with Foam Squares for dimension. Add an epoxy gem in the middle of one flower.
Sunshine Thankful Card

Step 1: Create the card base: Cut an 8-1/2? x 5-1/2? piece with White Solid Cardstock. Using the 12-inch Trimmer and the Scoring Blade, score along the long edge at 4-1/4? and fold in half.
Step 2: Cut a 5-1/4? x 1-1/4? strip with pumpkin suns designer paper and adhere on the top of the card, 1/8? from the edge. Cut a 5-1/4? x 1-1/2? strip with floral designer paper and adhere just below the pumpkin piece. Cut a 5-1/4? x 1/4? strip with red hearts designer paper and adhere just below the floral strip. Cut a 5-1/4? x 1? strip with greenery designer paper and adhere on the bottom, 1/8? from the edge.
Step 3: Using the inside edge of the medium Circle Custom Cutting System Pattern and the Red Blade, cut a circle with scrap paper. Using the Banner Border Maker Cartridge, punch several borders with canary dot tonal paper. Apply repositionable adhesive liberally to the scrap circle. Layer and adhere the banners all around the circle, overlapping and covering the scrap circle.
Step 4: Using the inside edge of the smallest Circle Custom Cutting System Pattern and the Red Blade, cut a circle with scrap paper. Using the Banner Border Maker Cartridge, punch a border with pumpkin stripes tonal paper. Cut the banners in half. Layer and adhere the half-banners around the circle. Using the inside edge of the smallest Circle Custom Cutting System Pattern and the Blue Blade, cut a circle with White Solid Cardstock. Adhere on the top of the pumpkin “sun”. Top with a smiley face sticker.
Step 5: Adhere the sunshine embellishments on the card. Add the title and epoxy stickers.
Aren’t these rainbow banner borders and DIY card creative? Which one are you most excited to recreate?
P.S. Are YOU a member of the Virtual Crop Facebook Group? It’s your go-to place for MONTHLY Virtual Crops, MONTHLY Completed Album Challenges, WEEKLY LIVE STREAMING of Fast & Fun Projects with Noreen, LIVE QUARTERLY Secret Box Openings with project tutorials and so much more! We hope you’ll join our community of more than 38,000 fellow memory-keeping enthusiasts — you’ll feel right at home!

LOVE these great ideas Krislyn! Absolutely love the bright and cheerful colors of this The Life Collection!