June 21, 2024
Give Your Projects Direction With The Compass Punch
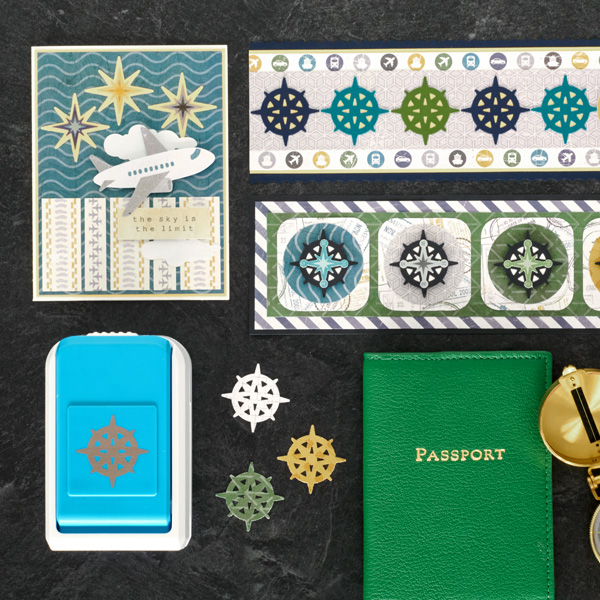
Whether you’re adding borders to spreads dedicated to your Euro summer trips, decorating photos of boating around with friends and family or adding finishing touches to trips near or far, the Compass Punch can add that extra bit of oomph. See how you can recreate these projects below!

To create these borders and card you will need:
- Passport to Adventure Paper Pack or (Shop Canada | Shop Australia)
- Passport to Adventure Embellishments or (Shop Canada | Shop Australia)
- Passport to Adventure Stickers or (Shop Canada | Shop Australia)
- White, Navy, Canary, Dark Sea Green & Avocado Solid Cardstocks or (Shop Canada | Shop Australia)
- Compass Punch or (Shop Canada | Shop Australia)
- Custom Cutting System with Circle Patterns or (Shop Canada | Shop Australia)
- Circle Punch or (Shop Canada | Shop Australia)
- 2-Way Corner Rounder or (Shop Canada | Shop Australia)
- 12-inch Trimmer with Straight, Scoring & Stamping Blades or (Shop Canada | Shop Australia)
- Micro-Tip Scissors or (Shop Canada | Shop Australia)
- Tape Runner or (Shop Canada | Shop Australia)
- Repositionable Tape Runner or (Shop Canada | Shop Australia)
- Foam Squares Variety Pack or (Shop Canada | Shop Australia)

What A View Border

Step 1: Using the 12-inch Trimmer and the Stamping Blade, cut a 12? x 3? strip with Navy Solid Cardstock for the base. Using the 12-inch Trimmer and the Straight Blade, cut a 12? x 2-5/8? strip with Canary Solid Cardstock and adhere on the base. Cut a 12? x 2-1/2? strip with travel dots paper and adhere on the canary strip. Cut a 12? x 1-3/4? strip with geo paper and mount on top.
Step 2: Using the Compass Punch, punch three shapes with Navy Solid Cardstock and two each with Dark Sea Green and Avocado Solid Cardstocks. Using the inside edge of the small Custom Cutting System Circle Pattern and the Blue Blade, cut seven circles with Canary Solid Cardstock. Adhere one circle behind each compass. Mount on the border as shown. Adhere the “What a View” sticker using Foam Squares.
Compass Border
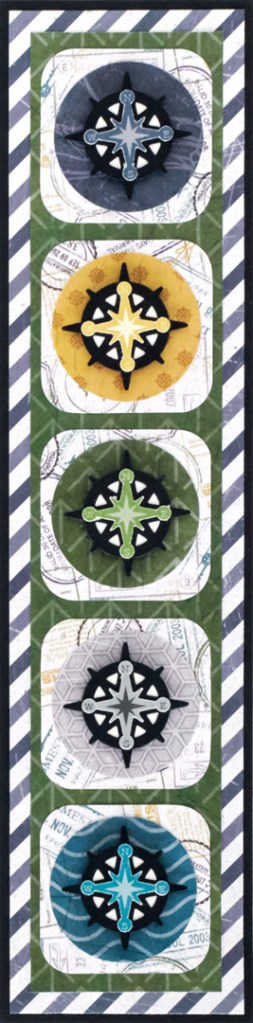
Step 1: Cut a 3? x 12? strip with Navy Solid Cardstock for the base. Cut a 2-3/4? x 11-3/4? strip with diagonal stripes paper and adhere on the base. Cut a 2-1/4? x 11-1/4? strip with arrows paper and mount on top.
Step 2: Cut five 2? squares with stamps paper. Round the corners using the 2-Way Corner Rounder. Adhere on the arrows strip.
Step 3: Using the Circle Punch, punch a circle with each map, compass, arrows, geo and waves papers. Adhere on the squares.
Step 4: Using the Compass Punch, punch five shapes with Navy Solid Cardstock. Using the inside edge of the small Custom Cutting System Circle Pattern and the Blue Blade, cut five circles with White Solid Cardstock. Adhere behind the compass shapes and mount on the border using Foam Squares.
Step 5: Top each compass with a coordinating compass sticker.
Sunshine Thankful Card
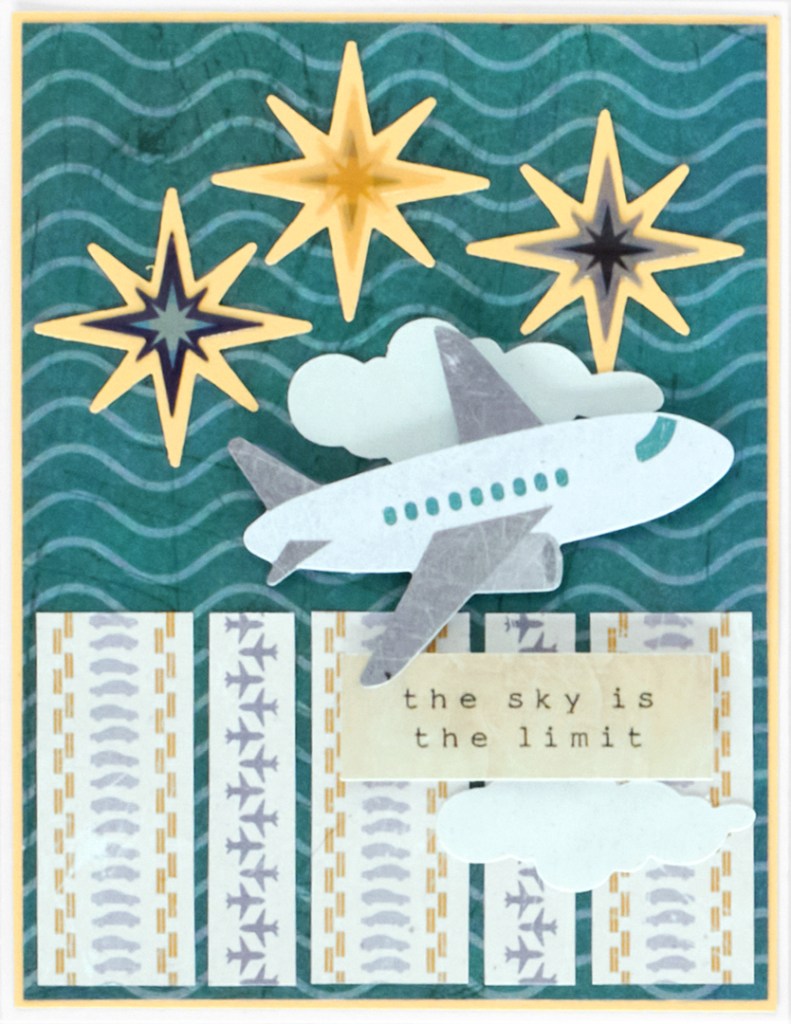
Step 1: Create the card base. Cut an 8-1/2? x 5-1/2? piece with White Solid Cardstock. Using the 12-inch Trimmer and the Scoring Blade, score along the long edge at 4-1/4? and fold in half.
Step 2: Cut a 4-1/8? x 5-3/8? piece with Canary Solid Cardstock and adhere on the front of the card. Cut a 4? x 5-1/4? piece with waves paper and mount on top.
Step 3: Cut strips from the travel stripes paper (cars and planes sections). Trim to 2? lengths and adhere on the card as shown.
Step 4: Using the Compass Punch, punch three shapes with Canary Solid Cardstock. Using Micro-Tip Scissors, trim away the outer rings of the shapes, leaving star compass shapes. Adhere on the card. Top each with a compass sticker.
Step 5: Adhere stickers, popping some up with Foam Squares for dimension.
How did your Compass Punch projects turn out? Are you planning any trips soon?
P.S. Are YOU a member of the Virtual Crop Facebook Group? It’s your go-to place for MONTHLY Virtual Crops, MONTHLY Completed Album Challenges, WEEKLY STREAMING of Fast & Fun Projects with Noreen, QUARTERLY Secret Box Openings with project tutorials and so much more! We hope you’ll join our community of more than 40,000 fellow memory-keeping enthusiasts — you’ll feel right at home!

I love these borders-just the perfect embellishment for a page that focuses on the photos!