July 29, 2024
July Completed Album Challenge PLUS A Wedding Scrapbook Layout

The arrival of the July Completed Album Challenge is here! Keep reading to learn how to compete in the challenge AND get some inspiration on how to commemorate all the weddings this season with a wedding scrapbook layout. Happy scrapping!
If you completed an album this month (does not need to be from start to finish in July, just completed in July), make a short video flipping through each of the pages in your newly completed album. Then, post your video in the Virtual Crop Facebook Group with the hashtag #CompletedJuly2024 for the chance to win!
Here’s an example of what your Completed Album Challenge video could look like!
For ALL the details on the Completed Album Challenge, check out this blog post.
Did you know?
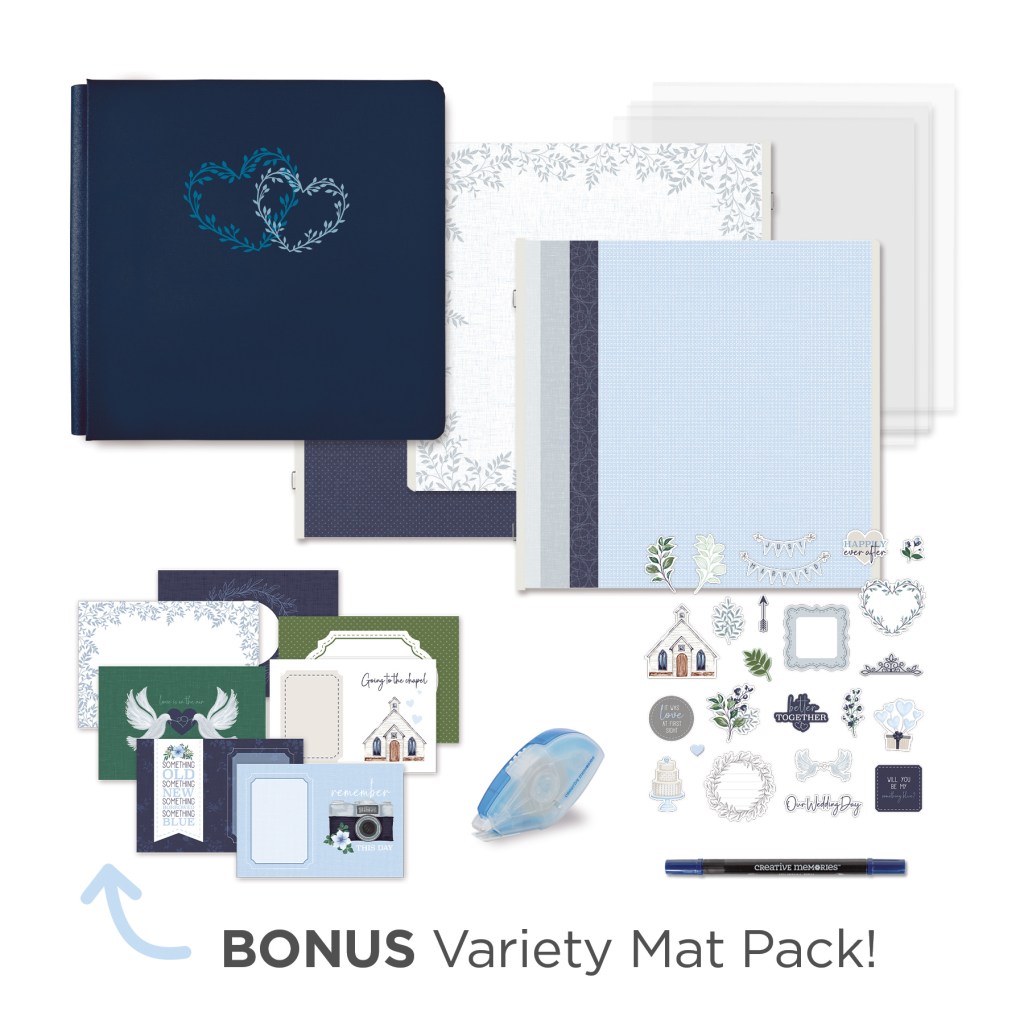

To create this layout you will need:
- Something Blue Paper Pack or (Shop Canada | Shop Australia)
- Something Blue Variety Mat Pack or (Shop Canada | Shop Australia)
- Something Blue Stickers or (Shop Canada | Shop Australia)
- White Solid Cardstock or (Shop Canada | Shop Australia)
- 12-inch Trimmer or (Shop Canada | Shop Australia)
- Micro-Tip Scissors or (Shop Canada | Shop Australia)
- Tape Runner or (Shop Canada | Shop Australia)
- Repositionable Tape Runner or (Shop Canada | Shop Australia)
- Foam Squares Variety Pack or (Shop Canada | Shop Australia)
- Navy Dual-Tip Pen or (Shop Canada | Shop Australia)


Step 1: Use a piece of mini hearts paper as the base for this layout.
Step 2: Cut a piece of White Solid Cardstock to 10-1/8? x 11-1/2? and cut a piece of baby blue polka dots paper to 9-7/8? x 11-1/4?. Adhere the baby blue polka dots piece onto the cardstock. Adhere the whole piece about 1-1/2? from the left edge.
Step 3: Adhere the blue leaves variety mat on the right-hand edge of the layout as shown. Mount a 4? x 6? photo on top of the navy journal wreath variety mat. Adhere the matted photo slightly overlapping the blue leaves mat. Cut a piece of White Solid Cardstock to 5-3/4? x 3-3/4?. Trim a photo to 5-1/2? x 3-1/2? and mount on top of the cardstock piece. Adhere to the layout as shown.
Step 4: Cut two pieces of mini hearts paper to 3-1/4? x 4-1/4”. Trim the horizontal chapel variety mat to 3? x 4? and mount to one of the mini hearts mats. Trim a photo to 3? x 4? and mount to the second mini hearts mat. Using the Micro-Tip Scissors, trim out the banner from the vertical “love” variety mat. Adhere the banner to the backside of the 3? x 4? matted photo. Adhere the chapel mat to the top-edge of the layout and the photo with the attached banner below.
Step 5: Adhere stickers, popping some up with Foam Squares for dimension.
Step 6: Journal as desired.
Are you close to completing an album this month? Remember to share a short video of you flipping through your completed album in the Virtual Crop Facebook Group (with the hashtag #CompletedJuly2024) for a chance to win — good luck!
P.S. Are YOU a member of the Virtual Crop Facebook Group? It’s your go-to place for MONTHLY Virtual Crops, MONTHLY Completed Album Challenges, QUARTERLY Secret Box Openings with project tutorials and so much more! We hope you’ll join our community of more than 40,000 fellow memory-keeping enthusiasts — you’ll feel right at home!
