August 27, 2024
Natural Charm: Rustic Fence BMC Border and Cards

The smell of pumpkins and apples have started wafting through the air — fall is almost upon us! Get into the seasonal spirit with these fall cards and border created by Advisor Brenda Rose. You’ll love these projects all your autumn layouts and correspondence.
To create the cards and border you will need:
- Autumn Cottage Paper Pack or (Shop Canada | Shop Australia)
- Autumn Cottage Vellum Paper Pack or (Shop Canada | Shop Australia)
- Autumn Cottage Variety Mat Pack or (Shop Canada | Shop Australia)
- Autumn Cottage Stickers or (Shop Canada | Shop Australia)
- Original Border Maker System with Rustic Fence Cartridge or (Shop Canada | Shop Australia)
- 12-inch Trimmer or (Shop Canada | Shop Australia)
- Tape Runner or (Shop Canada | Shop Australia)
- Repositionable Tape Runner or (Shop Canada | Shop Australia)
- Vellum Tape Runner Refill or (Shop Canada | Shop Australia)
- Foam Squares Variety Pack or (Shop Canada | Shop Australia)

Autumn Adventures Border:
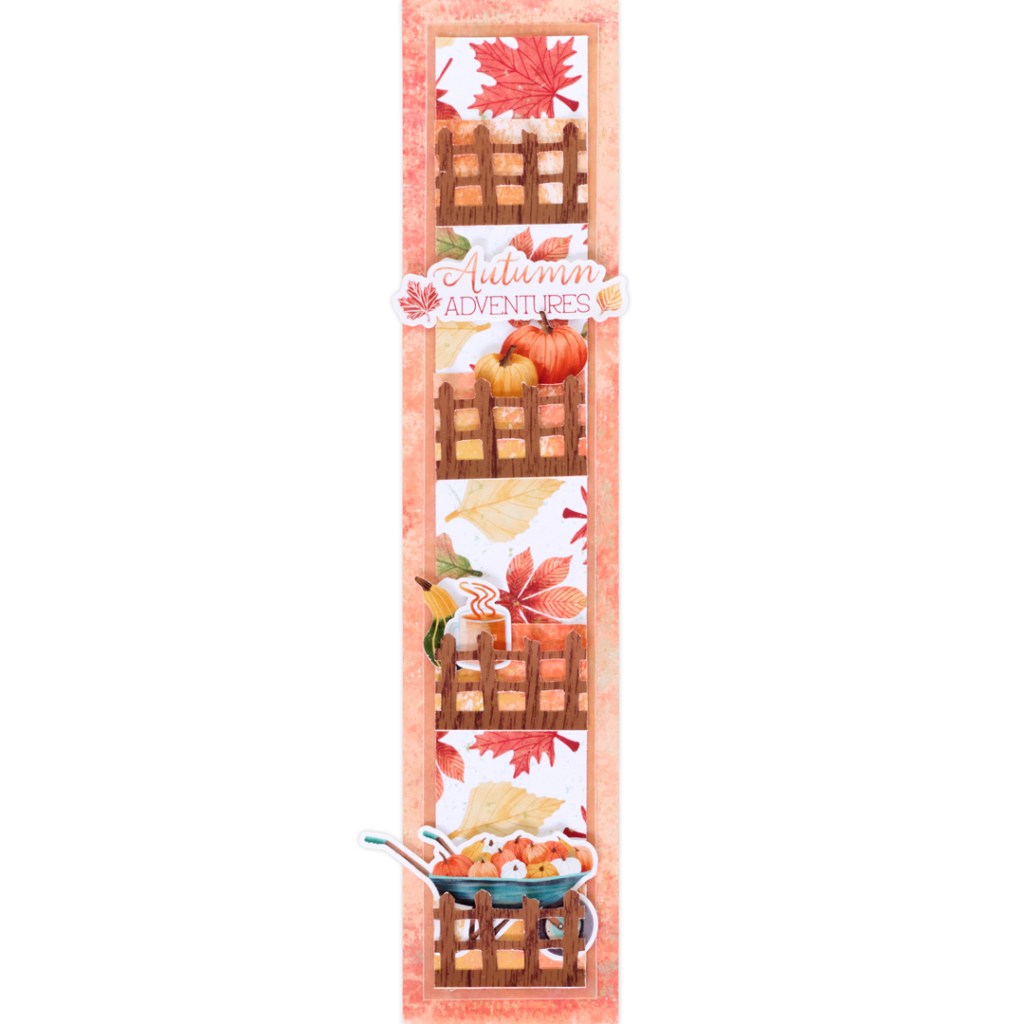
Step 1: Cut a 2-1/2? x 12? strip with Abstract Orange paper for the base.
Step 2: Cut a 2” x 11-1/2” strip with yellow vellum. Adhere to center of base.
Step 3: Cut a 1-3/4” x 11-1/4” strip with Abstract Orange. Use the reverse side and adhere to center of vellum.
Step 4: Cut four 1-3/4” x 1-1/4” pieces of yellow abstract paper. Starting at the bottom adhere at bottom of top paper, and then leave 1-3/4” in between each as you move upward.
Step 5: Using the Rustic Fence Border Maker Cartridge, punch a border with woodgrain paper. When you trim the border in height, it should be 1-1/8” tall. Trim into four 1-3/4” pieces. Add to yellow abstract paper putting adhesive only along the bottom of the fence so the rest of the fence can be lifted.
Step 6: Adhere the “Autumn Adventures” double pumpkins, green gourd, cider cup and wheelbarrow of pumpkins stickers as shown using Foam Squares for dimension.
Autumn. Sweet, Sweet Autumn Card:
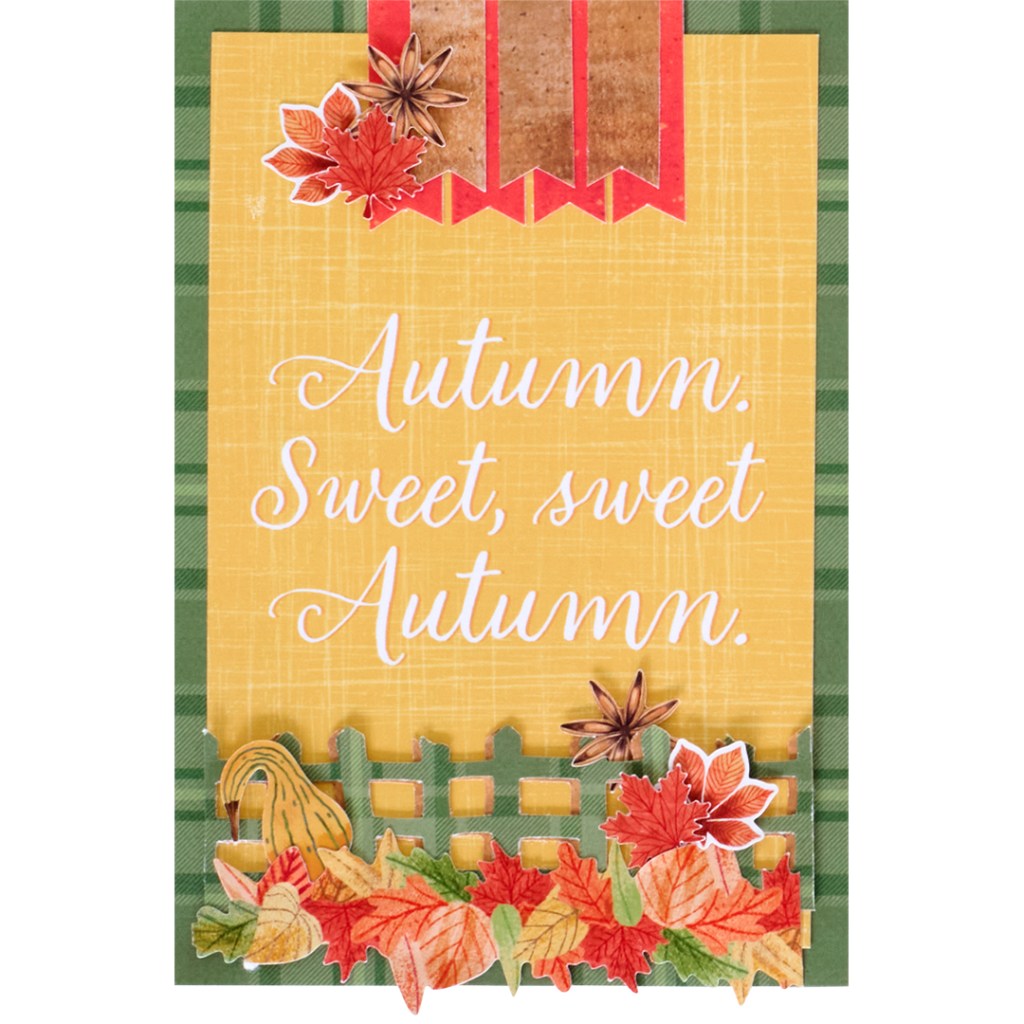
Step 1: Locate 4-1/2” x 6-1/2” green plaid mat card with oval journaling spot and 4” x 6” yellow “Autumn. Sweet, Sweet Autumn” card. Adhere yellow card to the center of the green plaid card
Step 2: Cut four ½” x 1-1/2” pieces from a 4-1/2” x 6-1/2” dark orange mat card (set aside for next card). Make a v-cut on end of all the pieces. Adhere to top front of the card starting 1” from right edge leaving only a sliver between the pieces.
Step 3: Cut three ½” x 1-1/4” pieces from a 4-1/2” x 6-1/2” woodgrain mat card (set aside for Step 4). Make a v-cut on the end of all the pieces. Adhere to top front of card over the dark orange pieces starting 1-1/4” from right edge leaving only a sliver between the pieces.
Step 4: Using the Rustic Fence Border Maker Cartridge, punch a border from the reserved woodgrain mat card. Next cut a border from a 4-1/2” x 6-1/2” green plaid mat card. When you trim the borders in height, they should be 1-1/8” tall. Adhere the green plaid over the woodgrain and shift it slightly to the right so that you can see the woodgrain fence. Trim fence down to 4” wide. Add ¼” from the bottom of the green plaid card putting adhesive only along the bottom of the fence so the rest of the fence can be lifted.
Step 5: Cut the leaves sticker border to 4” and add to bottom of fence. Also adhere the yellow gourd, leaves and anise star stickers as shown using Foam Squares for dimension.
Leaves are Falling Card:
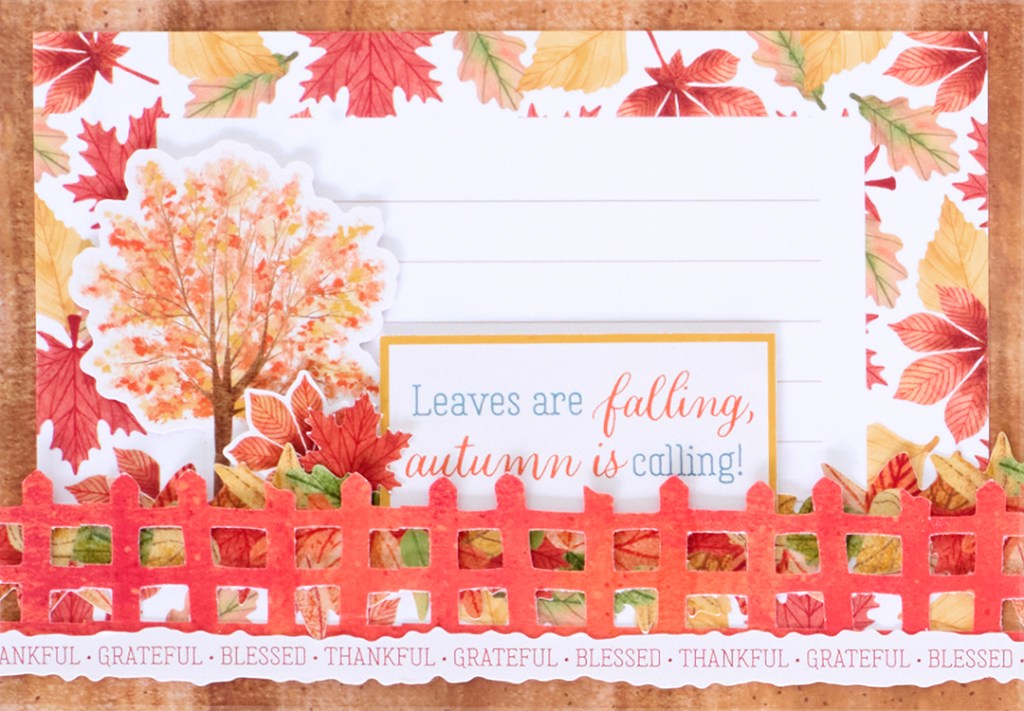
Step 1: Locate 4-1/2” x 6-1/2” woodgrain mat card with two journaling spots and 4” x 6” leaf border card with horizontal lines. Adhere the lined card to the center of the woodgrain card.
Step 2: Using Foam Squares, add the tree sticker to the left of the previous sticker. Cut the leaves sticker border to 6-1/2” and add to bottom of card 5/8” from the bottom. Add the “Leaves are Falling sticker 1-1/4” from the bottom and 1-1/2” from the right edge using Foam Squares over the leaves sticker border. Tuck two leaves stickers as shown using Foam Squares for dimension.
Step 3: Using the Rustic Fence Border Maker Cartridge, punch a border from the long side of reserved dark orange mat card. When you trim the border in height, it should be 1-1/8” tall. Add ¼” from the bottom of the woodgrain card putting adhesive only along the bottom of the fence so the rest of the fence can be lifted.
Step 4: Add the “Thankful, Grateful, Blessed” sticker to the bottom of the fence.
Which project has you most excited for autumn?
P.S. Are YOU a member of the Virtual Crop Facebook Group? It’s your go-to place for MONTHLY Virtual Crops, MONTHLY Completed Album Challenges, QUARTERLY Secret Box Openings with project tutorials and so much more! We hope you’ll join our community of more than 40,000 fellow memory-keeping enthusiasts — you’ll feel right at home!
