May 26, 2025
May Completed Album Challenge PLUS a Layout Perfect For Showcasing Family Traditions

Finished an album this month? Now’s the perfect time to head over to the Virtual Crop Group and show it off during the May Completed Album Challenge! If you need inspiration to get those last few pages done, check out this timeless single-page layout that is the perfect balance of vintage and modern!
Once you have completed your album (it does not need to be from start to finish in May, just completed in May), make a short video flipping through each of the pages in your newly completed album to share. Then, post your video in the Virtual Crop Group with the hashtag #CompletedMay2025 for the chance to win!
Here’s an example of what your Completed Album Challenge video could look like!
For ALL the details on the Completed Album Challenge, check out this blog post.
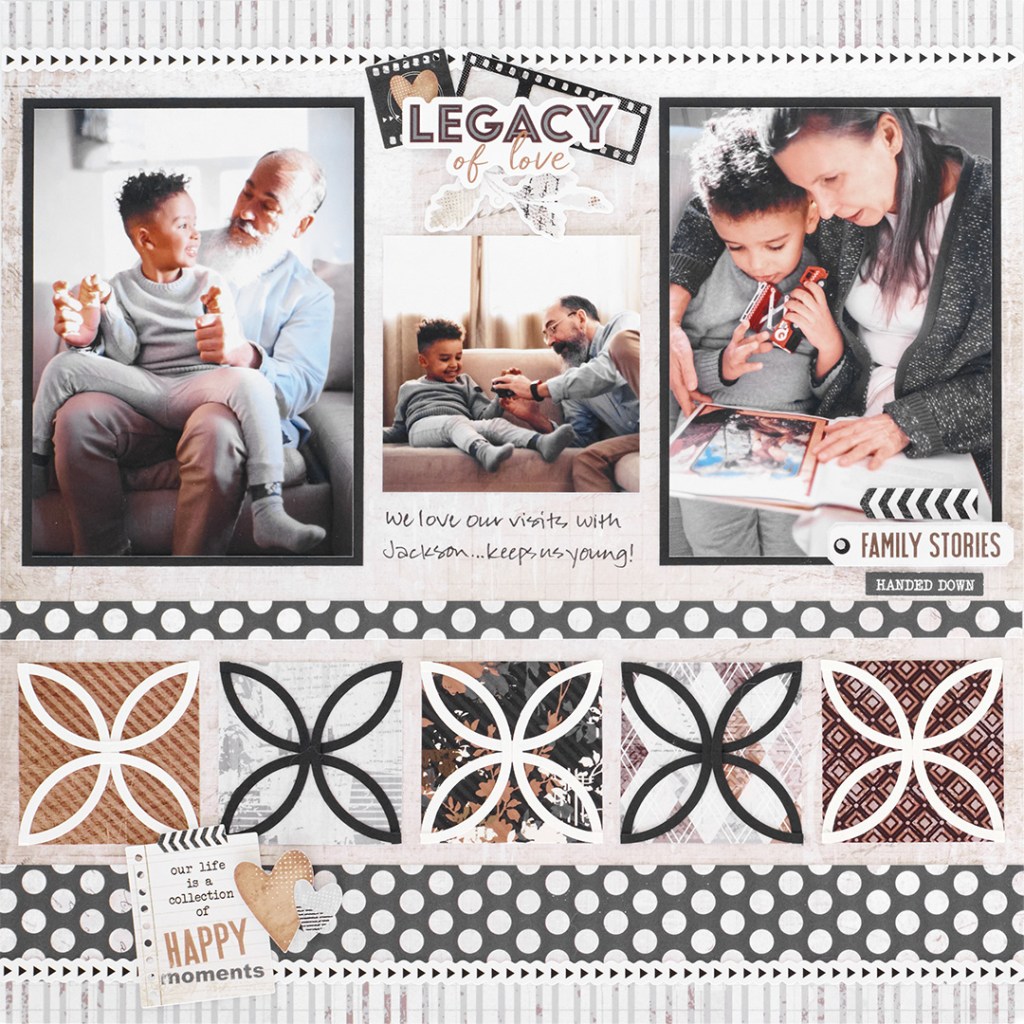
Layout by Krislyn Mattei — CM Independent Advisor
To create this layout, you will need:
- Legacy of Love Paper Pack or (Shop Canada | Shop Australia)
- Legacy of Love Stickers or (Shop Canada | Shop Australia)
- Bright White Cardstock or (Shop Canada | Shop Australia)
- Black Solid Cardstock or (Shop Canada | Shop Australia)
- Custom Cutting System with Circle Patterns or (Shop Canada | Shop Australia)
- 12-inch Trimmer or (Shop Canada | Shop Australia)
- Micro-Tip Scissors or (Shop Canada | Shop Australia)
- Tape Runner or (Shop Canada | Shop Australia)
- Repositionable Tape Runner or (Shop Canada | Shop Australia)
- Foam Squares Variety Pack or (Shop Canada | Shop Australia)
- Dual-Tip Black Pen or (Shop Canada | Shop Australia)
- Photo Trimmer or (Shop Canada | Shop Australia)

Step 1: Use a sheet of collage designer paper as the base for this layout. Cut a 12” x 3/4″ strip with distressed stripe paper and adhere on the top of the layout. Adhere an arrows laser cut border along the seam.
Step 2: Cut a 12” x 1/2″ strip with the distressed stripe designer paper and adhere on the bottom of the layout. Cut a 12” x 1-1/4” strip with polka dots designer paper and adhere just above the stripe designer paper strip. Adhere an arrows laser cut border along the seam.
Step 3: Using the inside of the medium Circle Custom Cutting System Pattern and the Blue Blade, cut a circle with Black or Bright White Solid Cardstock. Without moving the pattern, switch to the Green Blade and cut a circle, making a ring. Repeat to make a total of four black rings and six white rings. Cut each ring in half using Micro-Tip Scissors.
Step 4: Cut a 2-1/8” square with five different designer papers. Adhere four half rings on each square with the rounded edges meeting in the middle to create the patterns. Mount all five squares 1/4″ above the polka dots designer strip as shown on the layout. Cut a 12” x 1/2″ strip with the polka dots designer paper and adhere 1/4″ above the five squares.
Step 5: Crop two photos to 3-3/4” x 5-1/4” and mount on two 4” x 5-1/2” pieces of Black Solid Cardstock. Adhere on the layout as shown. Crop one photo to 3” x 3” and mount in between the larger photos.
Step 6: Adhere stickers using Foam Squares for added dimension.
Step 7: Journal as desired.
So, are you close to completing an album this month? Don’t forget to share a short video of you flipping through your completed album in the Virtual Crop Group with the hashtag #CompletedMay2025 for a chance to win — good luck! Remember, the Virtual Crop Group is your go-to place for MONTHLY Virtual Crops, MONTHLY Completed Album Challenges, QUARTERLY Secret Box Openings with project tutorials, pop-up giveaways and challenges, and so much more! We hope you’ll join our community of more than 46,000 fellow memory-keeping enthusiasts — you’ll feel right at home!

TFS the album and tips for 8×8 album page designs. Very helpful.
Curious and wondering if saving up some great blog content for us for the summer months when its too hot to be outside? With all the new collections like Legacy of Love, Through the Years, Relax Into Summer, All-American Blast, Craft Happy, and of course Hit the Road- there’s a bounty of layouts and borders you’ve hinted at in the product images.
Where can i find tips for 8×8 album?
Great layout, but why is CM now putting the ‘layout credits’ in a greatly reduced font where one literally needs a magnifying glass to read it? Seriously?? Give the Advisors the credit they deserve – and in a font size that everyone can read it – instead of in such a miniscule font that it smacks of being an “after thought”.
I love this layout. TY for the inspiration.