May 4, 2026
Why Annalisa Loves By the Seashore PLUS a Coastal Inspired Layout
There is something about being by the water that instantly calms the soul. It also happens to make for some of our favorite photos. For us at Creative Memories, we are just as eager as you are to get our latest collections onto our own pages. We thought it would be fun to take you behind the curtain to see how our team is personally inspired by the new By the Seashore collection. Afterward, stick around for a step-by-step layout you can create to jumpstart your next coastal album.
Watch: Annalisa, from home office, walks through the By the Seashore collection.
Annalisa’s Inspiration: Door County Days
For Annalisa, this collection is personal. Her family frequently travels to Door County, and she will be using this collection to document their time by the water. Because the collection offers such a wide range of tones, it is the perfect match for the “Cape Cod of the Midwest” vibe found in northern Wisconsin.
To create this layout, you will need:
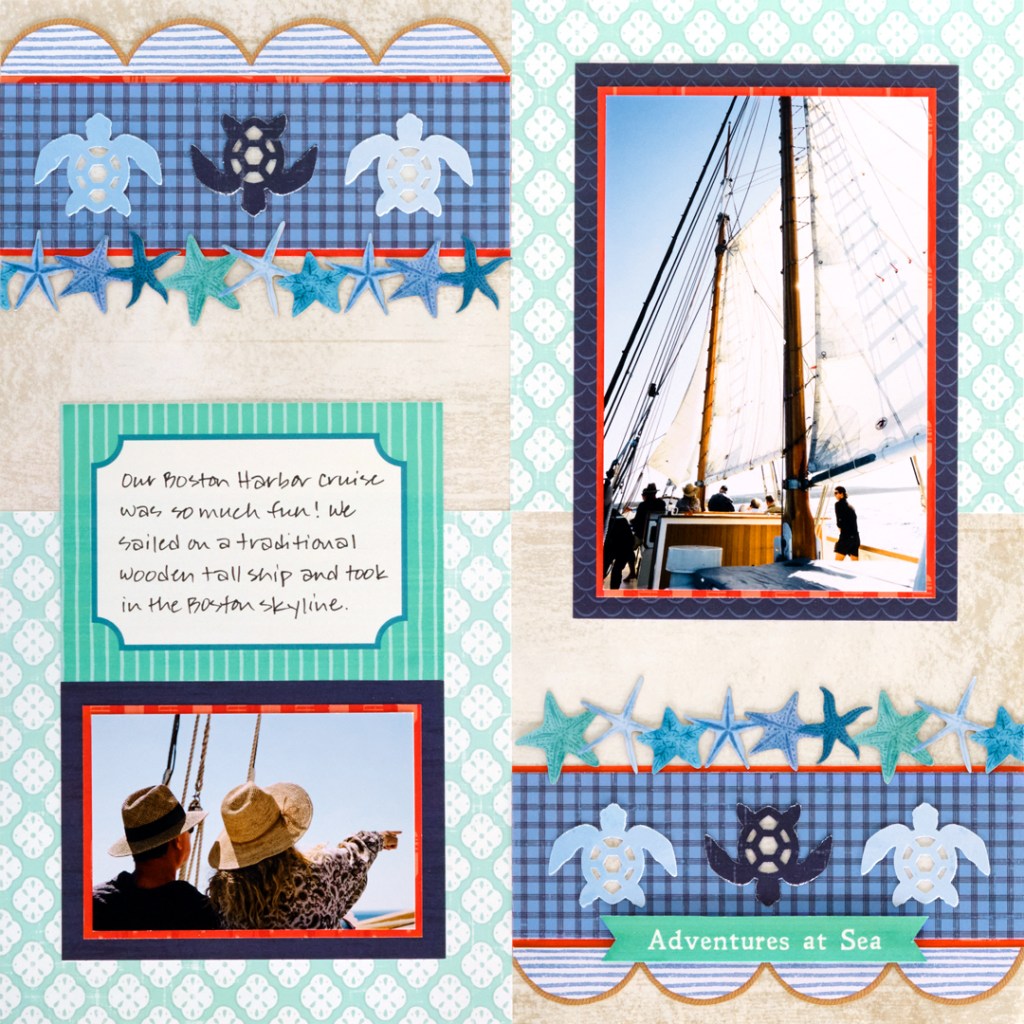

Step 1: Use a piece of shiplap designer paper as the base for this layout. Trim two 6″ x 6″ squares from the sand dollars designer paper. Adhere one square on the top-right corner and the other to the bottom-left corner of the base.
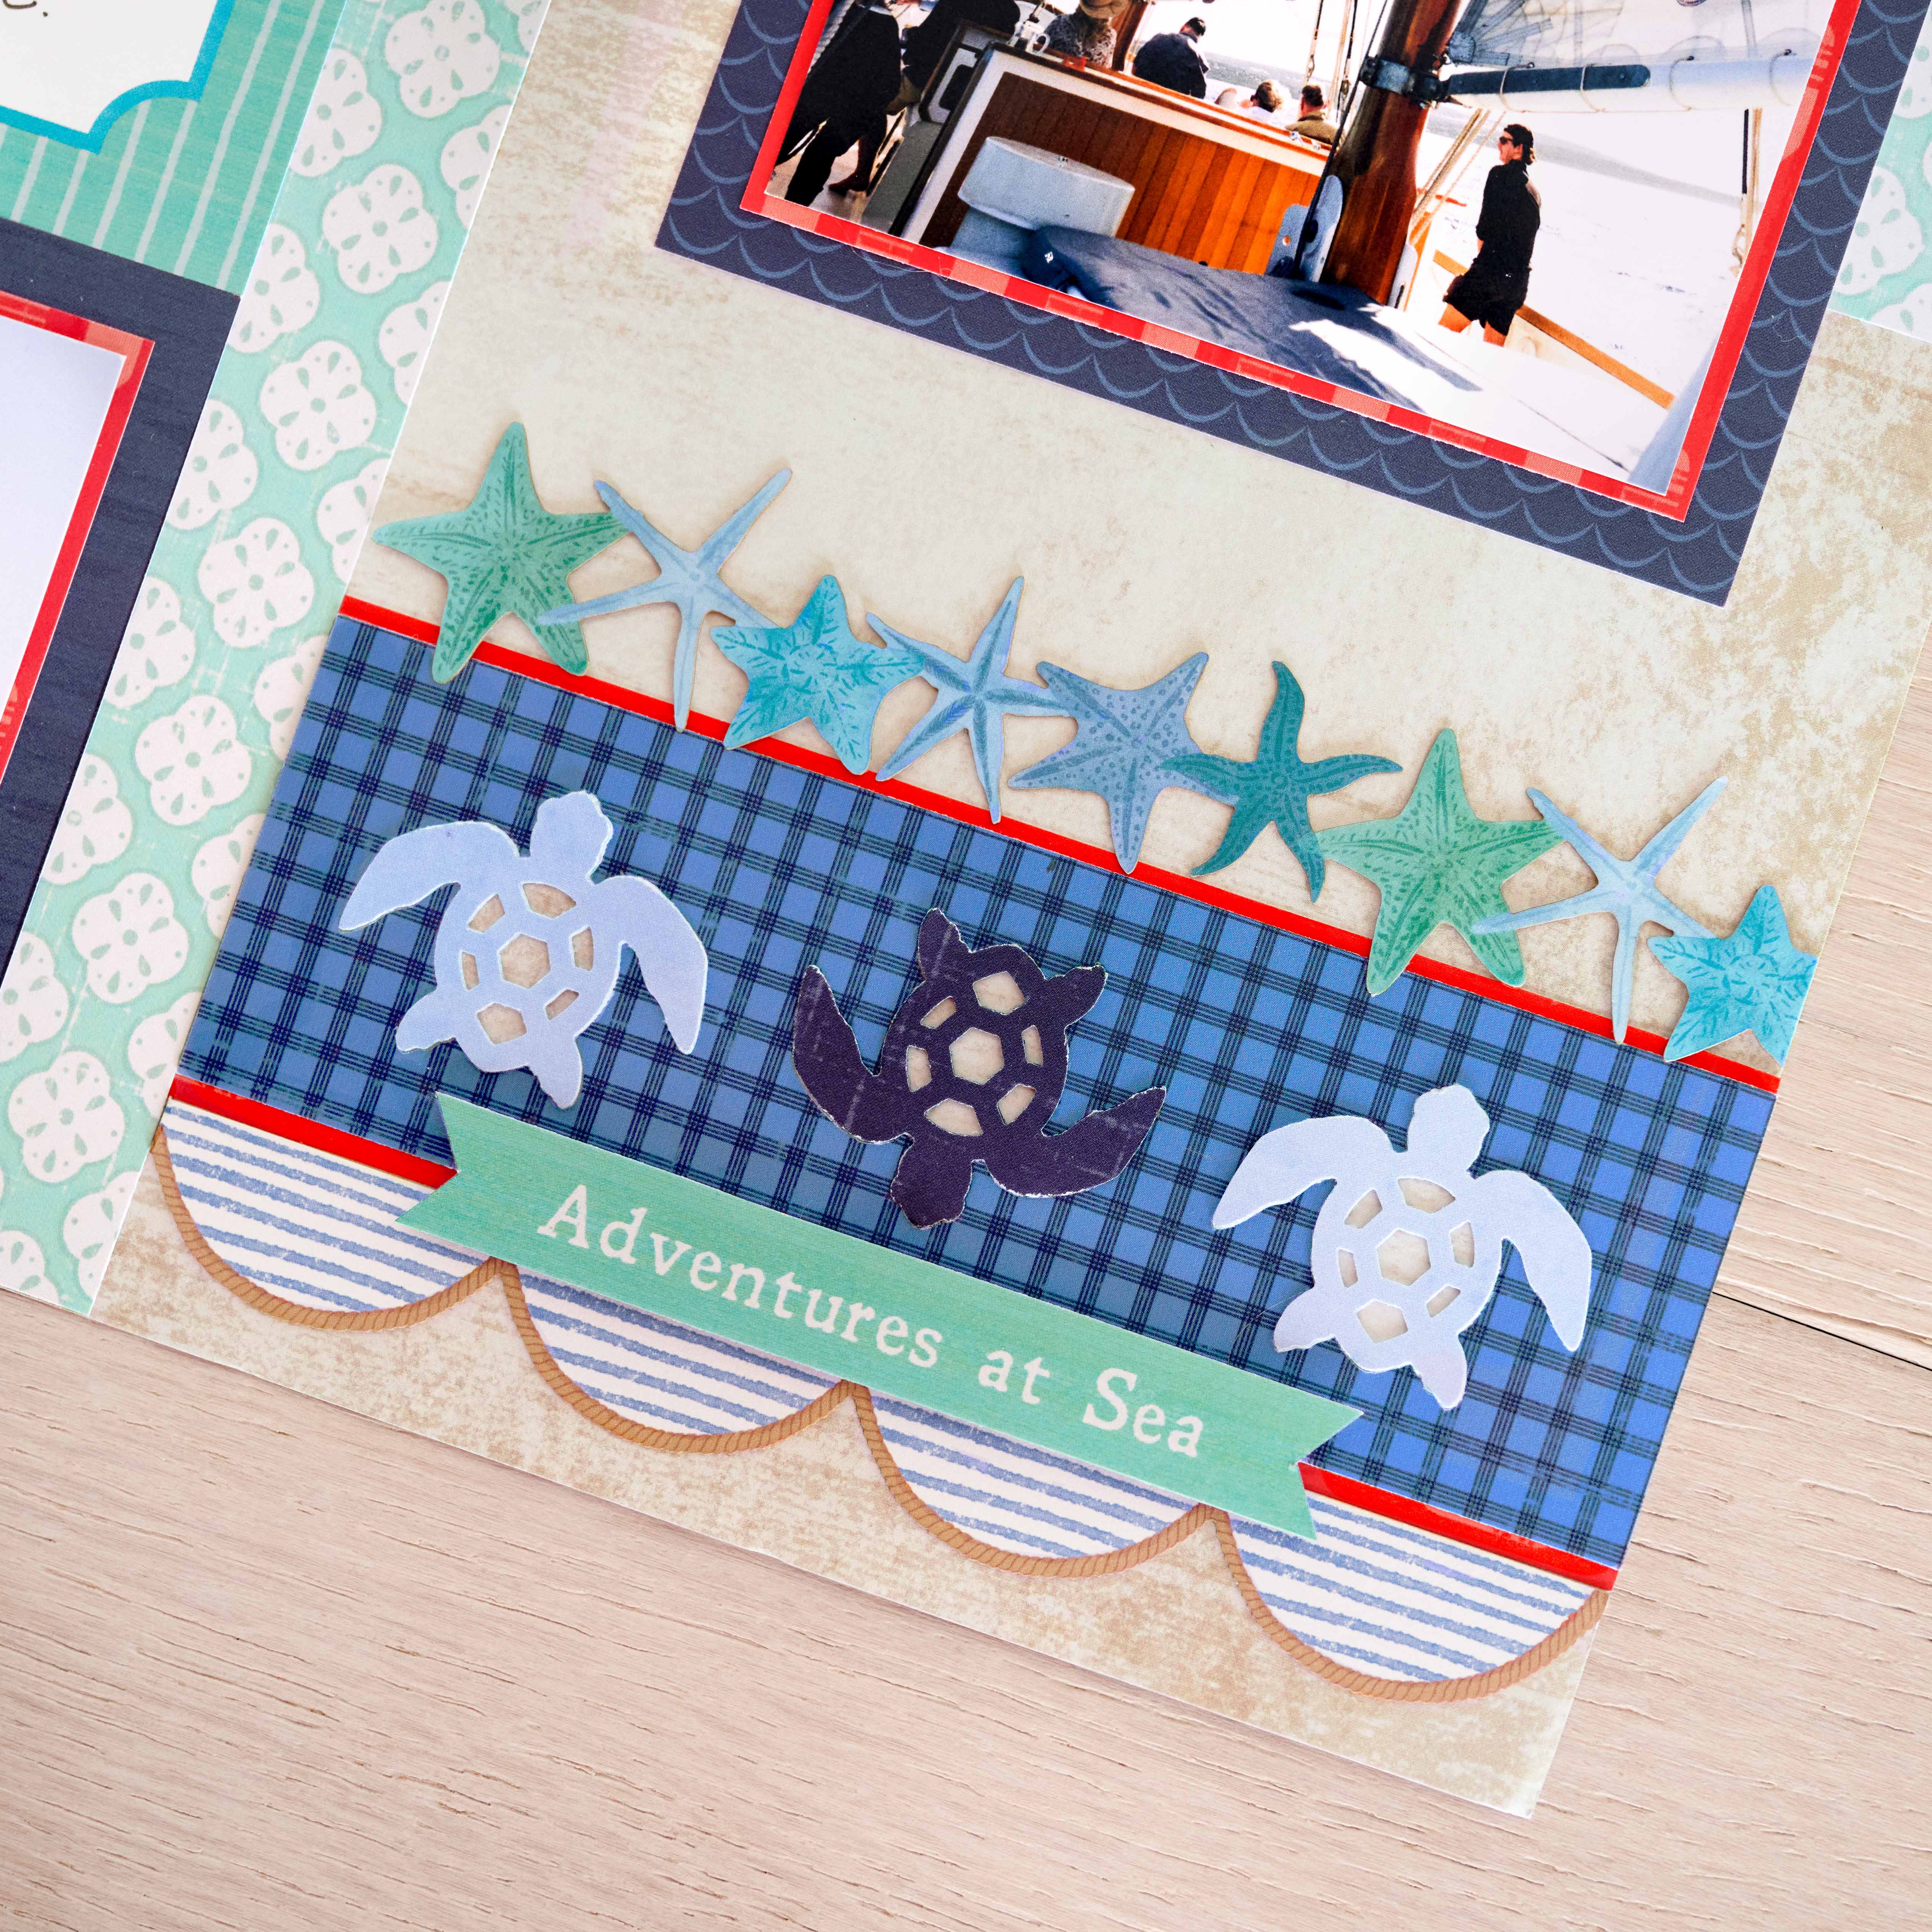
Step 2: Cut a 12″ x 1-15/16″ strip from the blue plaid designer paper. Make light pencil marks at 3″ and 9″ along one long side. Using the Sea Turtle Punch, center the punch on each mark and punch once. Rotate the strip to the opposite edge and punch on either side of your existing punches, ensuring they are evenly spaced.
Step 3: Cut two 12″ x 1/2″ strips from the red oars designer paper. Adhere them behind the blue plaid strip so just 1/8″ of the red paper is visible.
Step 4: Trim the assembled strip at 6″. Adhere one half of the strip 1″ from the top-left edge and the other half 1″ from the bottom-right edge of the layout.
Step 5: Punch four sea turtle shapes from the baby blue designer paper and two from the dark navy designer paper. Adhere the shapes into the punched-out areas on the blue plaid strips.
Step 6: Cut the striped scallop laser cut border and the starfish laser cut border in half at 6″. Adhere the pieces on either side of the blue plaid pieces as shown above.
Step 7: Fussy cut the “Adventures at Sea” ribbon from one of the mats and adhere it on the lower-right border using foam squares for added dimension.
Step 8: Adhere a 4-1/2″ x 6-1/2″ navy mat to the upper-right of the layout. Layer a 4″ x 6″ mat with the red oars mat on top. Crop a photo to 3-3/4″ x 5-3/4″ and mount it in the center.
Step 9: Cut two mats apart at 3-1/4″ and adhere them to the bottom-left corner. Layer a 4″ x 3″ red oars mat on top of the navy mat. Crop a photo to 3-3/4″ x 2-3/4″ and mount it on top.
Step 10: Journal as desired.
Now that you have heard how Annalisa plans to style these pieces and seen how to bring them together in this layout, we want to know your approach. Are you a fan of the bold anchors and stripes, or are you reaching for the neutral textures and sand-toned hues?
Whether you are scrapbooking a trip to the Great Lakes or a quiet weekend at the coast, this collection provides the perfect backdrop. Leave a comment and let us know which look you will be reaching for first!
P.S. Are YOU a member of the Virtual Crop Group? It’s your go-to place for MONTHLY Virtual Crops, MONTHLY Completed Album Challenges, QUARTERLY Secret Box Openings with project tutorials and so much more! We hope you’ll join our community of more than 52,000 fellow memory-keeping enthusiasts — you’ll feel right at home!


Can you zoom in on some of the details next time? it was hard to follow her descriptions without close ups…
Thanks!
Great ideas and I zoomed in to see the intricate details on the border. Very nice! You sold me!
Thank you for the video as it gave me the information and close up of the papers.