November 3, 2026
Merry & Bright: A Festive Wreath Layout with Tinsel & Cheer
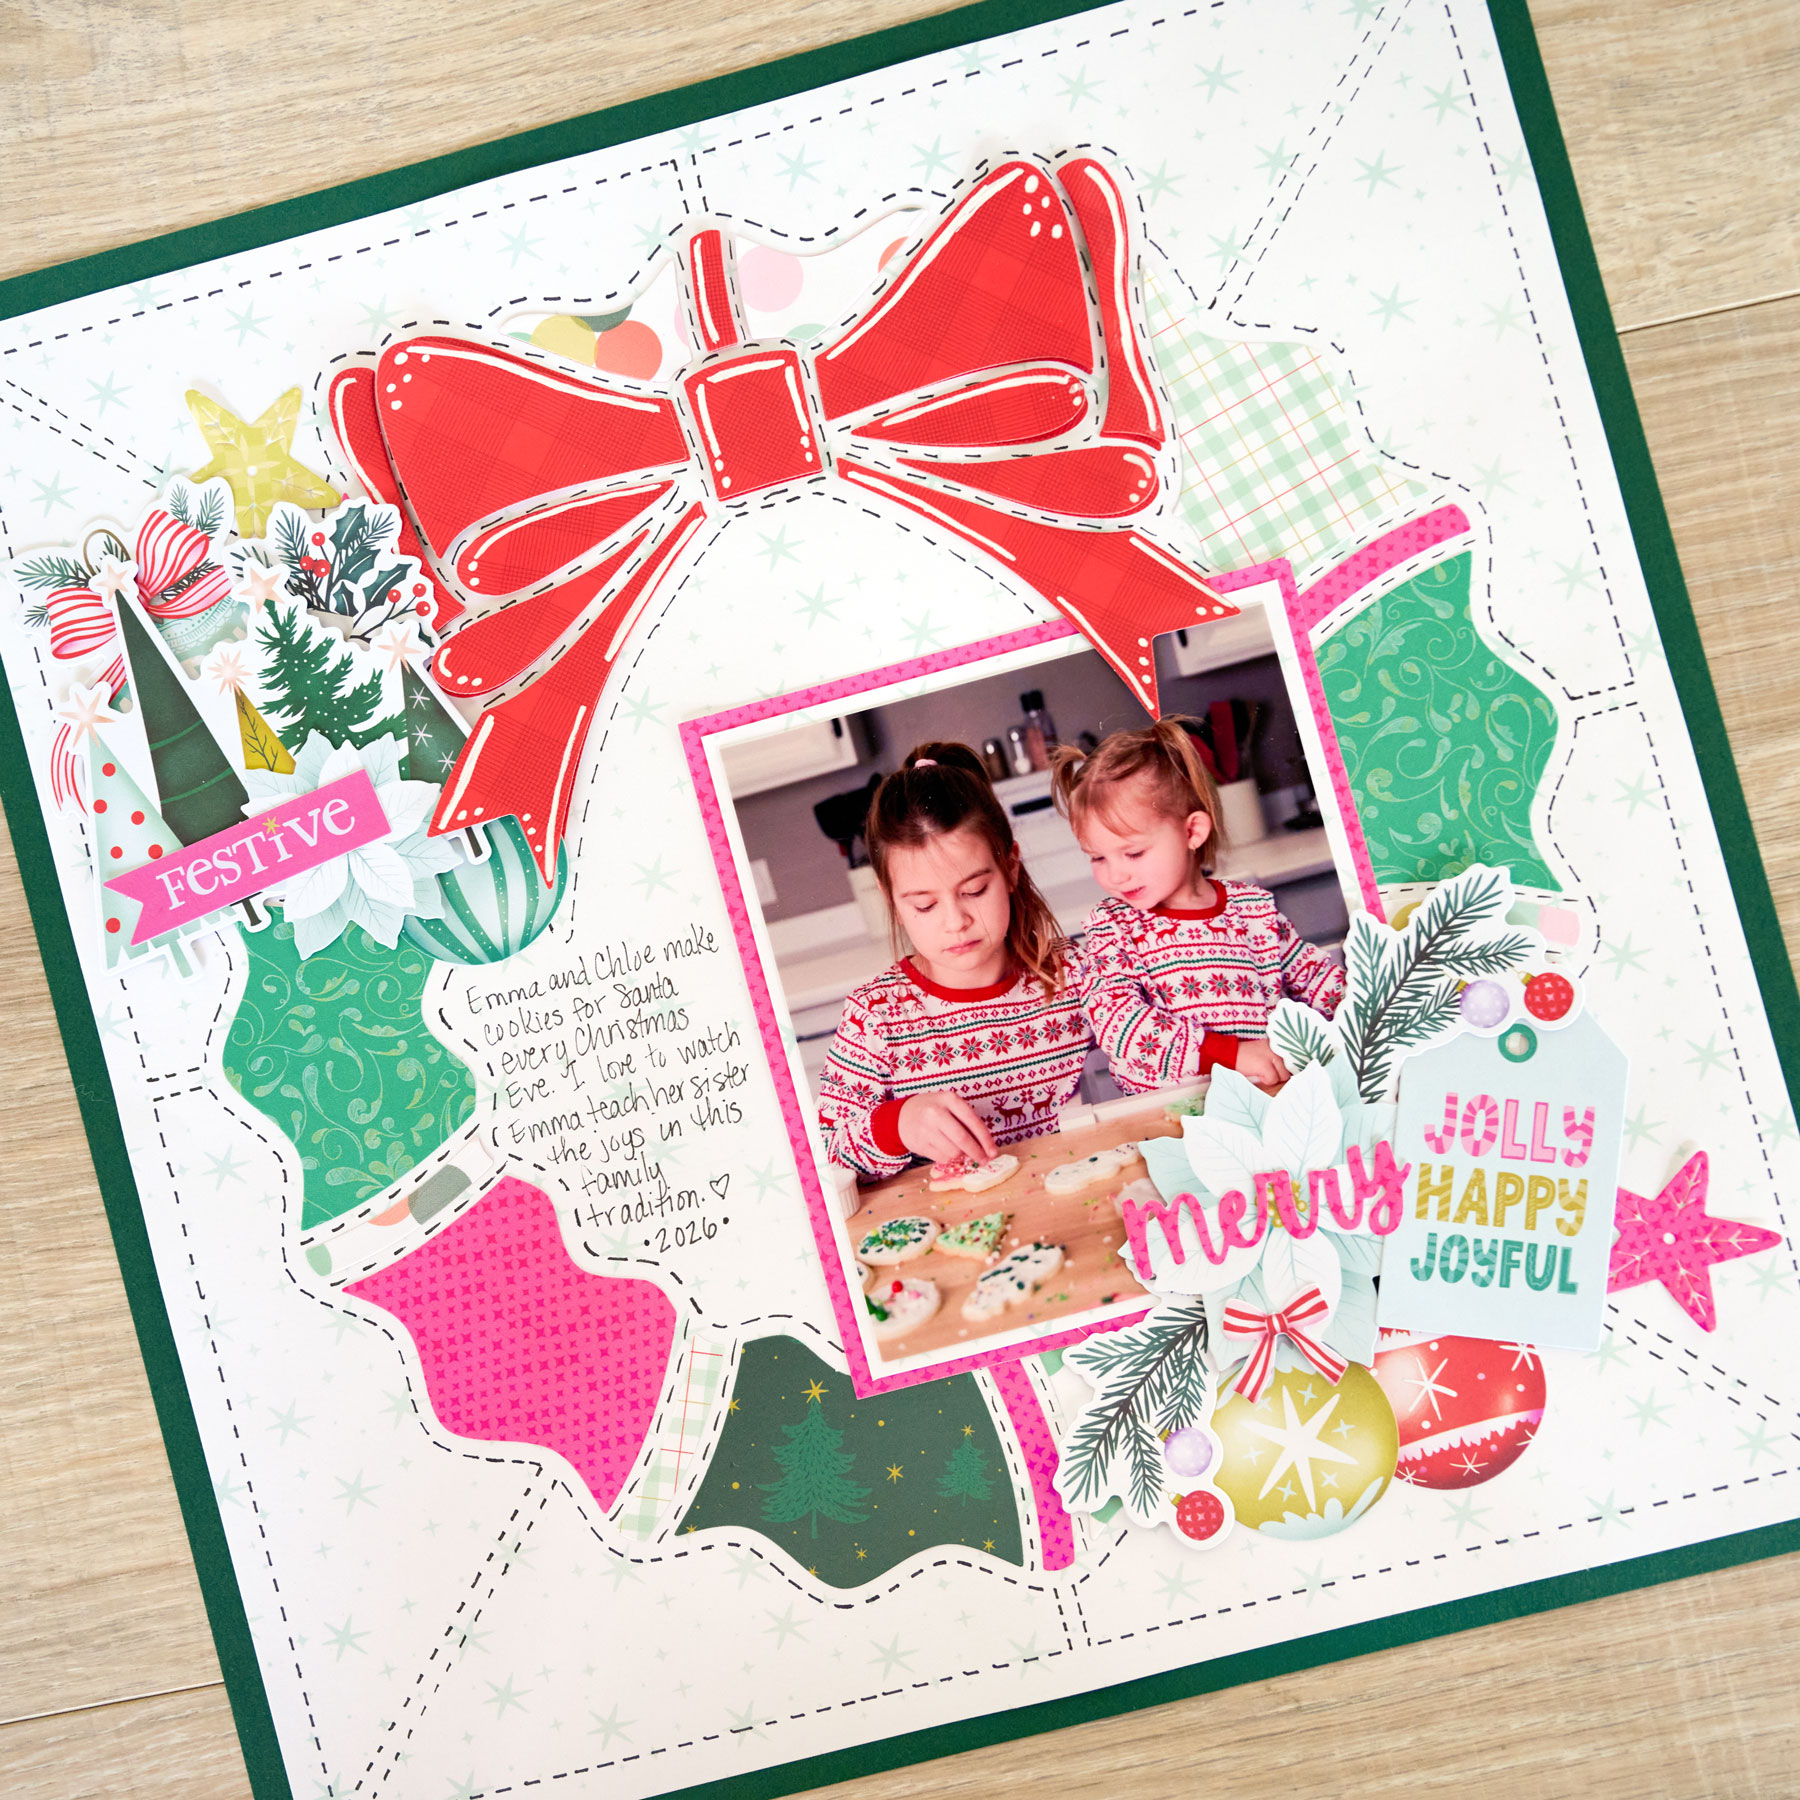
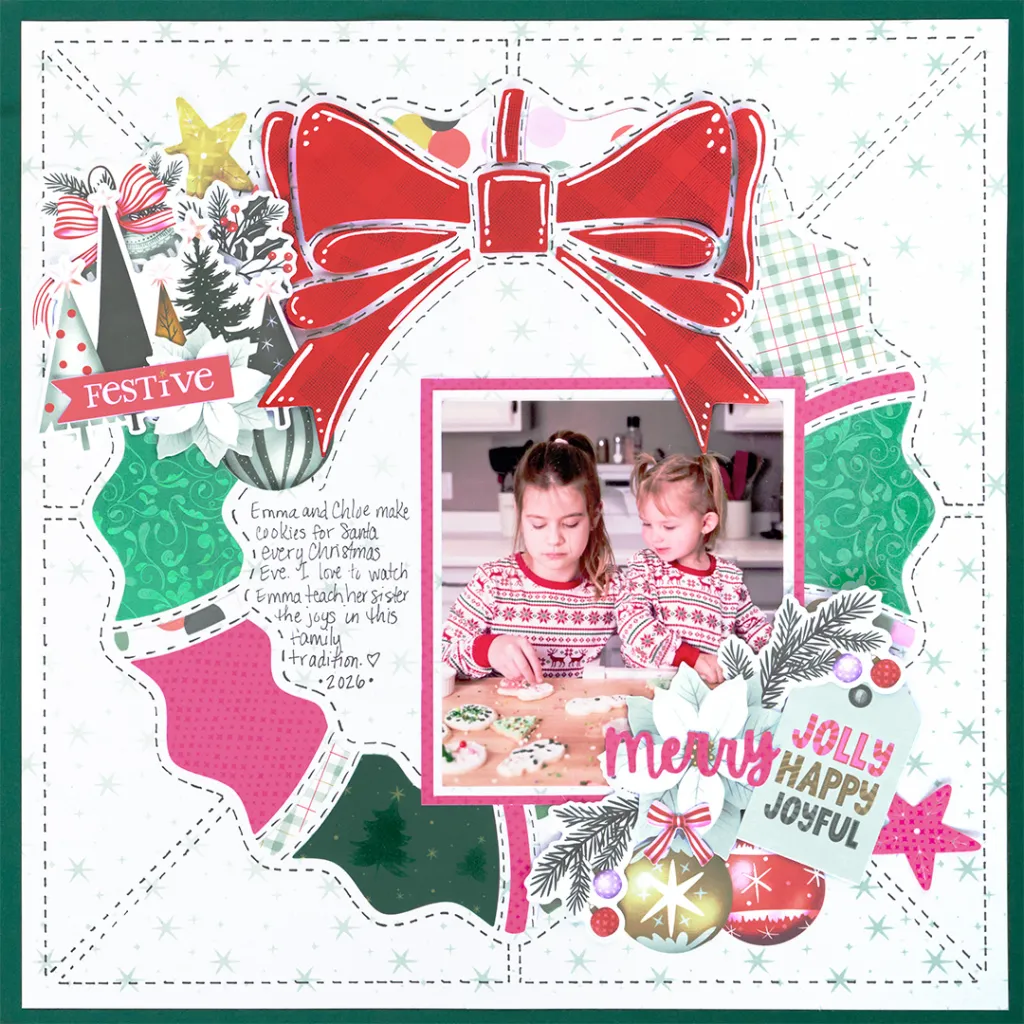
Deck the page with a patchwork wreath! The Festive Wreath Die-Cutting Set and coordinating Festive Wreath Recipe Template make it easy to cut and piece together each section of this cheerful design using your favorite Tinsel & Cheer papers.
A dimensional plaid bow, faux-stitched details and a cluster of ornaments, pine sprigs and a “Merry” title turn one sweet holiday photo into a showstopping single-photo layout. Before you dive in, watch Ashley from our home office walk you through how to use the Festive Wreath Recipe Template with its coordinating die-cuts — from matching each numbered piece to placing it on your page — so you can create the layout below with confidence!
To create this layout, you will need:
- Tinsel & Cheer Paper Pack
- Tinsel & Cheer Embellishments
- Festive Wreath Recipe Template
- Festive Wreath Die-Cutting Set
- Die-Cutting & Embossing Machine
- 12-inch Trimmer
- 13×13 Cutting Mat
- Layout Studio
- All-Purpose Clips
- Black Micro-Tip Pen
- White Gelly Roll Pen
- Repositionable Tape Runner
- Foam Squares Variety Pack – 1mm
- Micro-Tip Scissors

Love this layout?

Love this layout?

Step 1: Use the star designer paper as the base for this layout. Decide which Tinsel & Cheer designer papers you’d like to use for each section of the wreath — both the Festive Wreath Recipe Template coversheet and the dies are numbered, so matching each piece to its spot is stress-free.
Step 2: Position the Festive Wreath Recipe Template on the base and hold it in place with All-Purpose Clips, or use the magnets on the Layout Studio.
Step 3: Place a piece of your chosen designer paper on the Cutting Base Plate, lay the numbered wreath die ridge-side down on the paper and place the Universal Top Plate on top.
Step 4: Run it through the Die-Cutting & Embossing Machine and remove the piece from the die. Adhere it in its numbered section of the template, then repeat for each wreath piece.
Step 5: Die-cut the bow pieces twice from the red plaid designer paper. Adhere the first layer directly to the base within the template.
Step 6: If desired, use the White Gelly Roll Pen to add whimsical details to the top bow layer and allow the ink to dry well. Gently curl the top layer with your fingers to create dimension, then adhere it over the first layer with 1mm Foam Squares.
Step 7: For a “stitched” look, use the Black Micro-Tip Pen to trace each section of the template with short dashes (optional). Remove the template.
Step 8: Cut a photo mat from the star designer paper 1/4″ larger than your photo. Cut a photo mat from the razzleberry pink designer paper 1/4″ larger than the star mat.
Step 9: Adhere the photo to the star mat, then layer it on the razzleberry pink mat and adhere it inside the wreath as shown.
Step 10: Die-cut the “Merry” title and one star from the razzleberry pink designer paper, and one star from the chartreuse designer paper.
Step 11: Embellish as shown or as desired, layering the “Merry” title and stars into the clusters and using 1mm Foam Squares to create dimension.
Step 12: Journal to the left of the photo with the Black Micro-Tip Pen.
Pick Your FREE Black Friday Gift
From Nov. 2–13, choose a FREE Black Friday gift for every $150 USD / $165 CAD / $250 AUD you spend — with no limit! The Tinsel & Cheer Bundle featured in this layout is one of the gift choices, while supplies last.
Promo starts Nov. 2 at 9am CT and ends Nov. 13 at noon CT (AU: 3–13 Nov.). Gift Card purchases (valid in the U.S. only) do not qualify toward the spend threshold.

Want to recreate this layout?
We’ve gathered all the products featured in this project in one place, making it easy to find the papers, embellishments, tools and more.
P.S. Are YOU a member of the Virtual Crop Group? It’s your go-to place for MONTHLY Virtual Crops, MONTHLY Completed Album Challenges, QUARTERLY Secret Box Openings with project tutorials and so much more! We hope you’ll join our community of more than 53,000 fellow memory-keeping enthusiasts — you’ll feel right at home!

