November 4, 2026
Weave a Winter Wonderland with Winter Folk Art
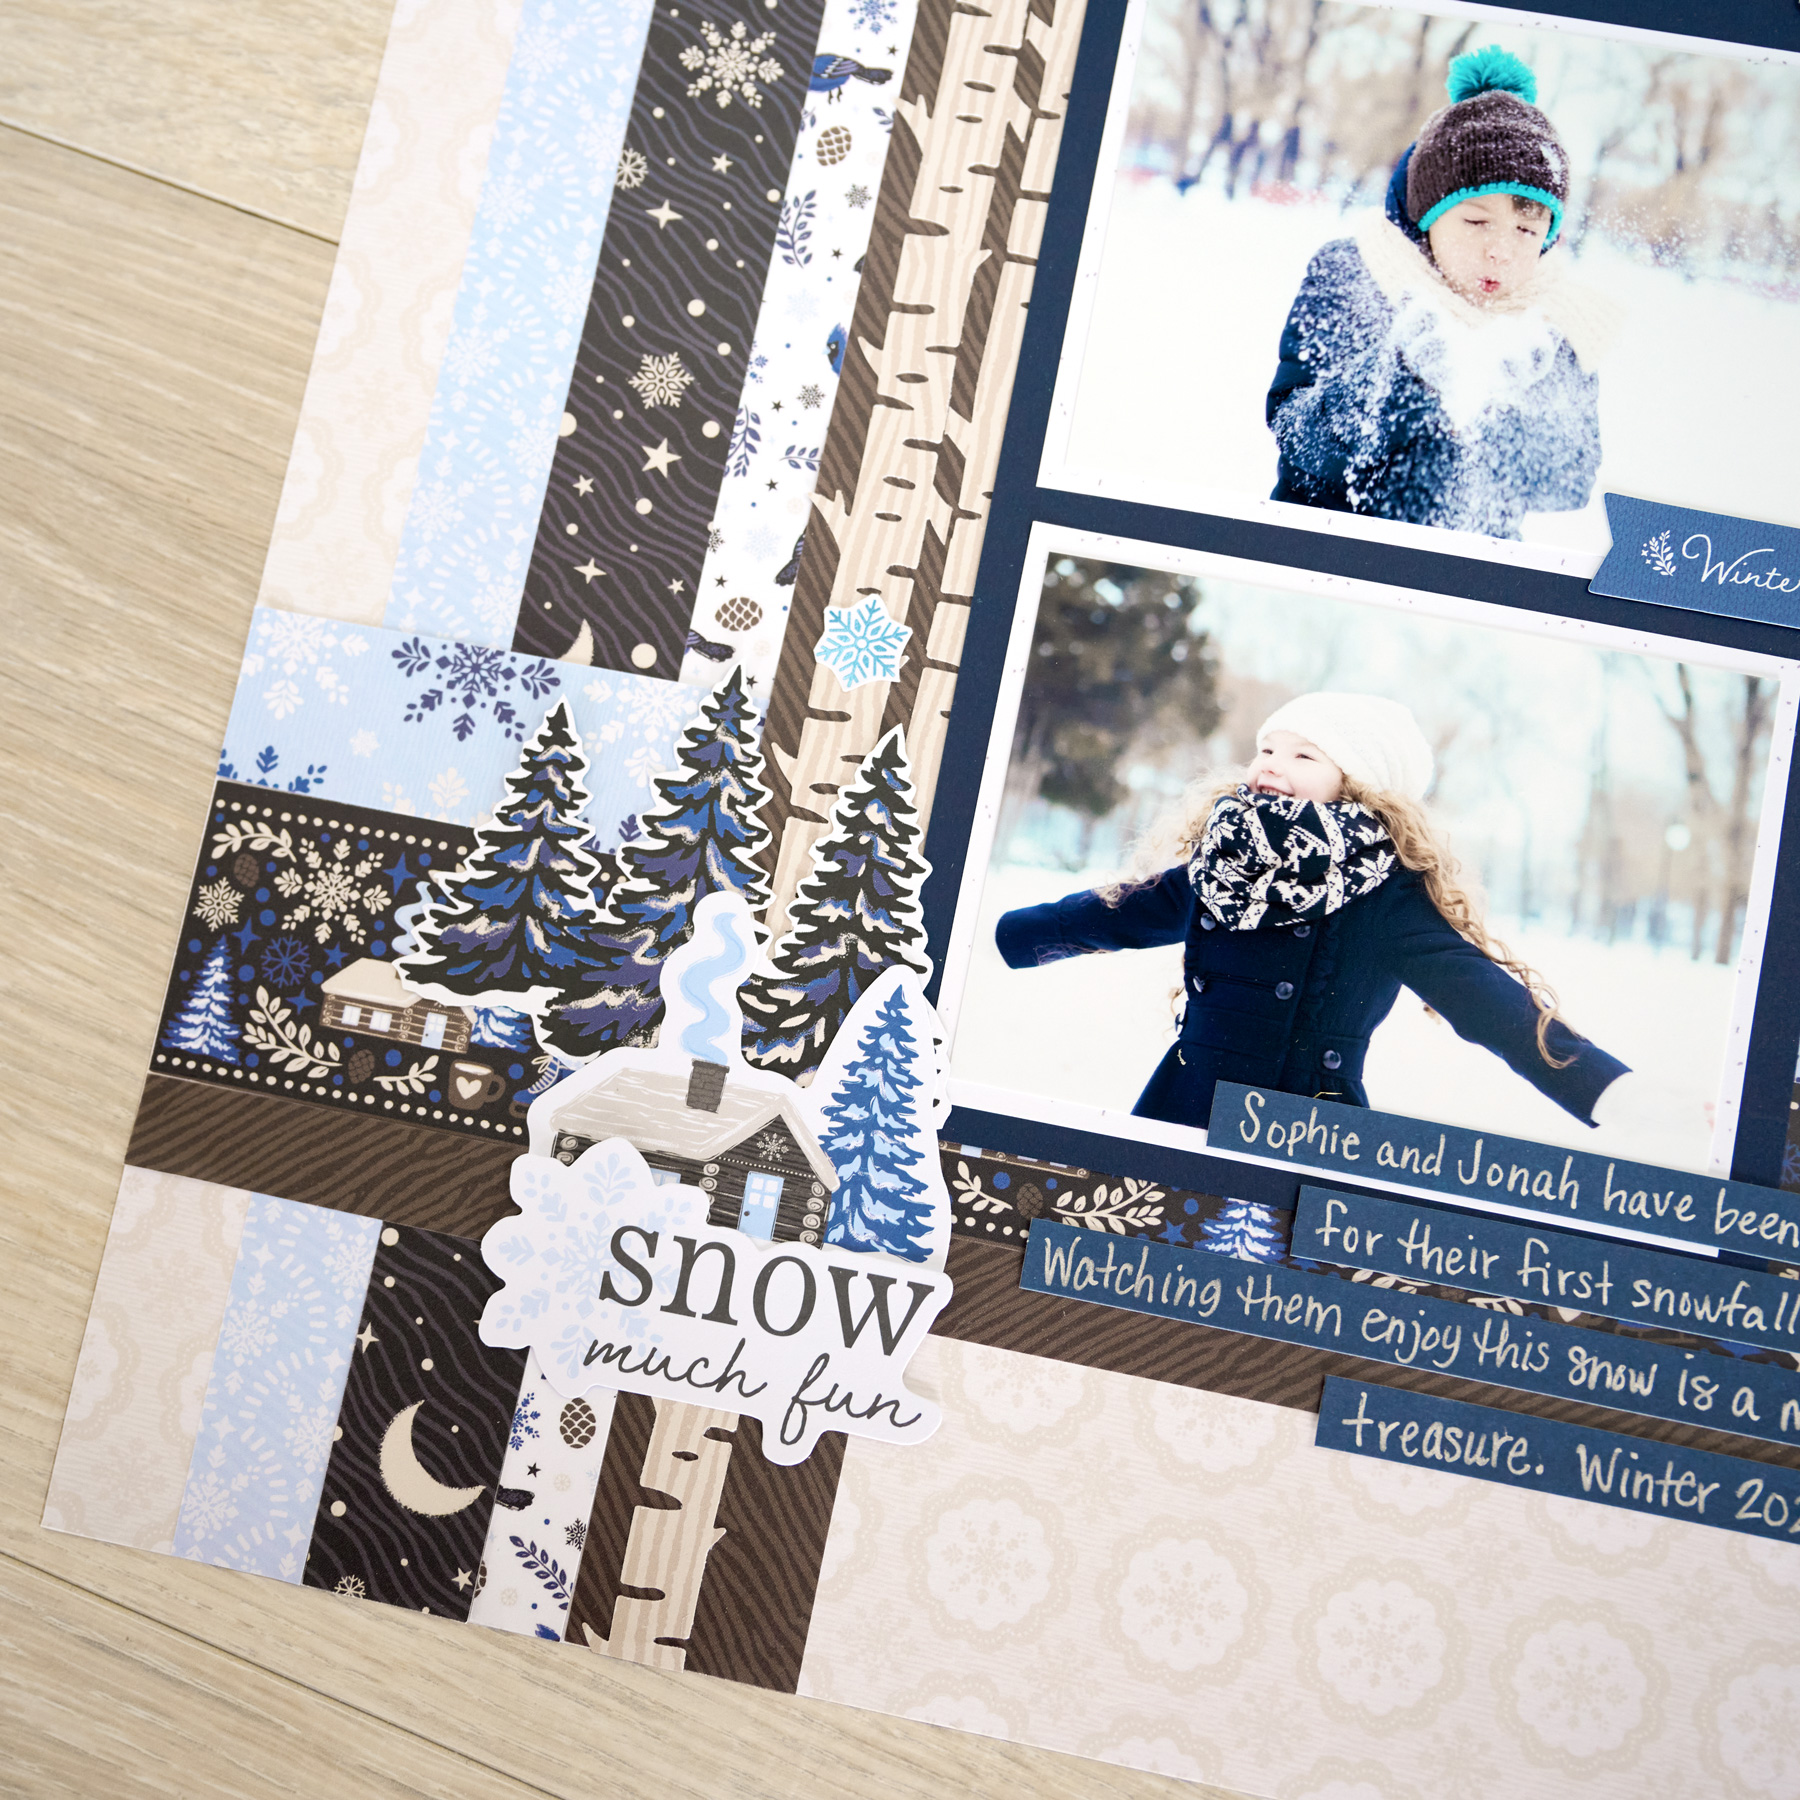
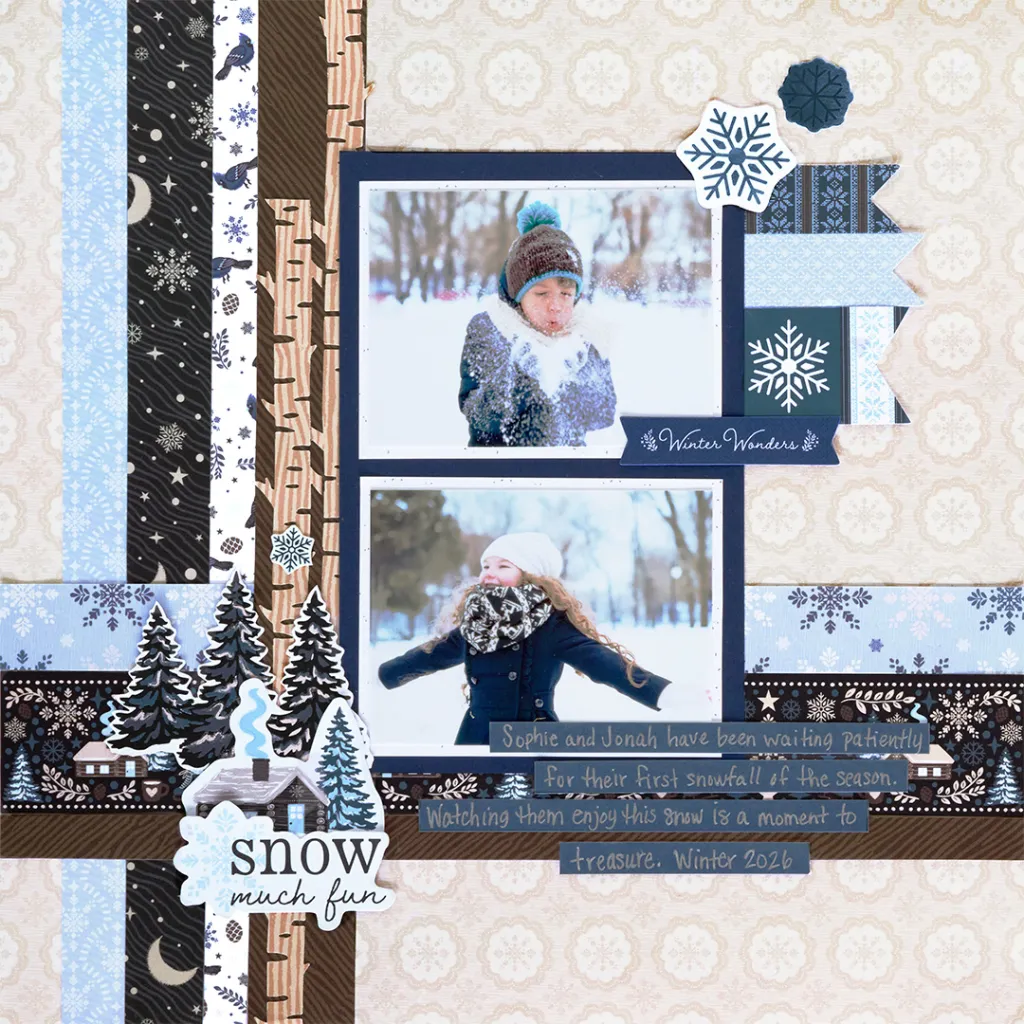
Capture the magic of the first snowfall with this cozy two-photo layout! Layered strips of Winter Folk Art papers, snowflakes, moonlit skies, blue jays and woodgrain all come together like a woven winter quilt. Punched birch trees, snow-capped pines and a sweet log cabin embellishment finish the scene, while journaling strips keep your story front and center.
To create this layout, you will need:
- Winter Folk Art Tone-on-Tone Paper Pack
- Winter Folk Art Paper Pack
- Winter Folk Art Embellishments
- Write On! Stickers – Navy
- Navy Solid Cardstock
- Birch Bark Border Punch
- Silver Gelly Roll Pen
- 12-inch Trimmer
- 13×13 Cutting Mat
- Cutting Mat Layout Ruler
- Micro-Tip Scissors
- Repositionable Tape Runner
- Foam Squares Variety Pack – 1mm

Love this layout?

Love this layout?

Step 1: Use the beige scalloped snowflake designer paper as the base for this layout.
Step 2: For the vertical strips, cut a 3/4″ x 12″ strip from the light blue snowflake designer paper, a 1″ x 12″ strip from the moon & stars designer paper, a 1/2″ x 12″ strip from the blue jay designer paper and a 1-1/4″ x 12″ strip from the hot fudge woodgrain designer paper, paying attention to the direction of the patterns.
Step 3: For the horizontal strips, cut a 1″ x 12″ strip from the dark blue snowflake designer paper, a 1-5/8″ x 12″ strip from the Winter Folk Art stripe designer paper and a 1/2″ x 12″ strip from the hot fudge woodgrain designer paper, paying attention to the direction of the stripe.
Step 4: Punch a 12″ strip of the beige woodgrain tone-on-tone paper with the Birch Bark Border Punch, then snip the two trees apart to create separate pieces. Line up the woodgrain direction for a natural look.
Step 5: Cut two 4-1/4″ x 3-1/4″ photo mats from the white & gray fleck tone-on-tone paper and one 7-1/4″ x 4-3/4″ photo mat from Navy Solid Cardstock or the navy sweater designer paper.
Step 6: Adhere the light blue snowflake strip vertically 3/4″ from the left edge of the base. Align the moon & stars strip directly against its edge, then continue with the blue jay strip and the 1-1/4″ hot fudge woodgrain strip.
Step 7: Adhere the birch trees next to the woodgrain strips as shown.
Step 8: Beginning 2-3/4″ from the bottom edge of the base, adhere the horizontal layers: the 1/2″ hot fudge woodgrain strip, the Winter Folk Art stripe strip and the dark blue snowflake strip.
Step 9: Adhere the photos to the white & gray fleck mats, then adhere them on the navy mat. Adhere the navy photo mat so the bottom edge is 3″ from the bottom edge of the base.
Step 10: Embellish the lower left corner of the photos as shown or as desired, using 1mm Foam Squares for dimension. (Tip: Fussy cut the foiled snowflake from the circle embellishment for an extra accent.)
Step 11: Embellish the upper right edge of the photo grouping as shown or as desired.
Step 12: Journal on the Navy Write On! Stickers strips with the Silver Gelly Roll Pen and allow the ink to dry well before touching. Adhere the strips below the photos.
Pick Your FREE Black Friday Gift
From Nov. 2–13, choose a FREE Black Friday gift for every $150 USD / $165 CAD / $250 AUD you spend — with no limit! The Winter Folk Art Bundle featured in this layout is one of the gift choices, while supplies last.
Promo starts Nov. 2 at 9am CT and ends Nov. 13 at noon CT (AU: 3–13 Nov.).

Want to recreate this layout?
We’ve gathered all the products featured in this project in one place, making it easy to find the papers, embellishments, tools and more.
P.S. Are YOU a member of the Virtual Crop Group? It’s your go-to place for MONTHLY Virtual Crops, MONTHLY Completed Album Challenges, QUARTERLY Secret Box Openings with project tutorials and so much more! We hope you’ll join our community of more than 53,000 fellow memory-keeping enthusiasts — you’ll feel right at home!

