November 17, 2026
Snow Much Fun with the Winter Decorative Bundle
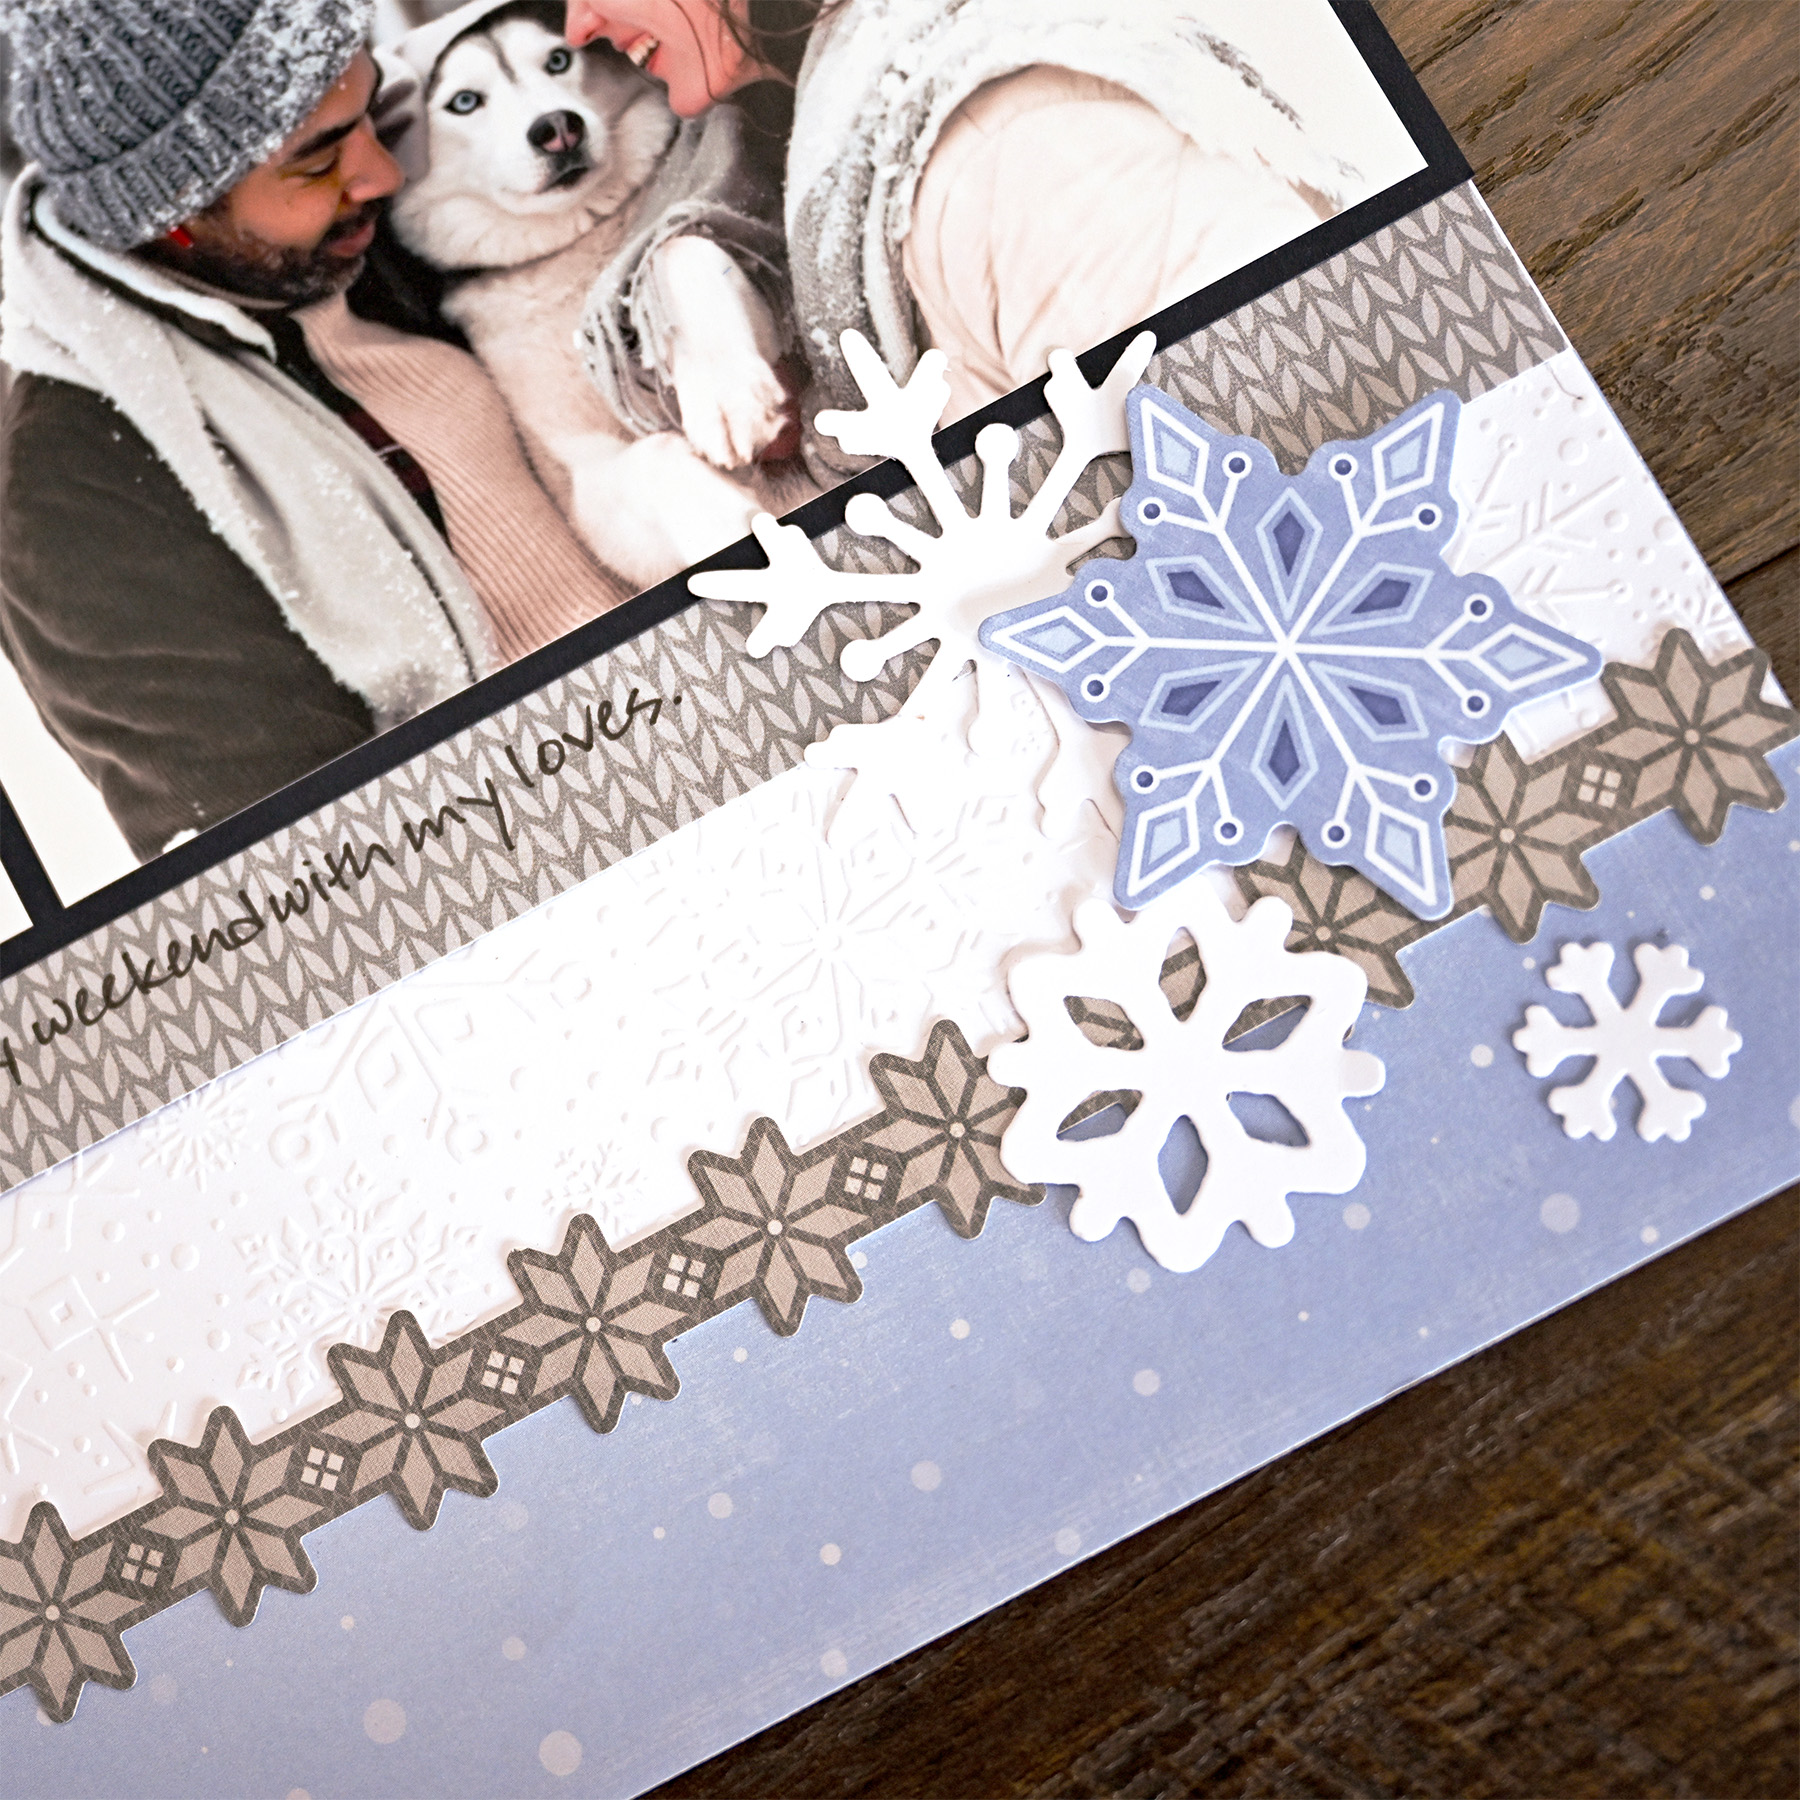
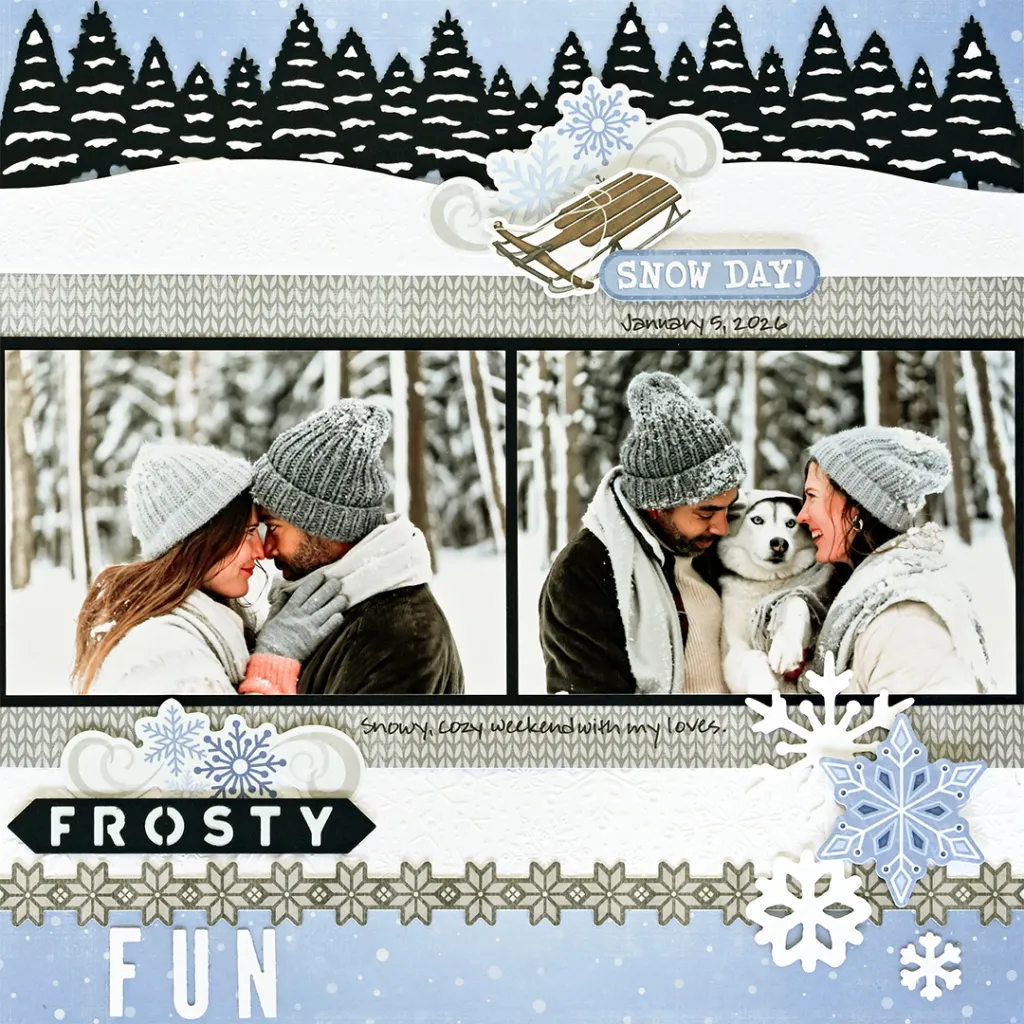
Bundle up — this layout is a snow day you’ll want to remember! The Die-Cutting & Embossing Winter Decorative Bundle brings together the Evergreen Horizon Border, the Shimmering Snowflakes Embossing Folder and the Winter Fun Titles & Icons for frosty details with tons of dimension.
Snow-capped die-cut trees, cozy sweater-knit Winter Bliss paper and an embossed snowdrift cut with a Custom Cutting System swell make this two-photo layout perfect for sledding days and snuggles by the fire.
To create this layout, you will need:
- Winter Bliss Designer Paper
- Winter Bliss Embellishments
- Winter Bliss Stickers
- Bright White Solid Cardstock
- Baby Blue Solid Cardstock
- Navy Solid Cardstock
- Die-Cutting & Embossing Machine
- Die-Cutting Titles & Icons – Winter Fun
- Die-Cutting Border – Evergreen Horizon
- Embossing Folder – Shimmering Snowflakes
- Dual-Tip Die-Cutting Tool
- Custom Cutting System Border Cutting Tools – Waves, Swells, Crests & Arch
- Red Custom Cutting System Blade Cartridge
- 12-inch Trimmer
- Photo Trimmer
- Micro-Tip Scissors
- Place & Peel Tape
- Tape Runner
- Repositionable Tape Runner
- Foam Squares
- Black Dual-Tip Pen
- Ruler

Love this layout?

Love this layout?

Step 1: Use a sheet of any cardstock or scrapbook page as the base for this layout. Cut two 12″ x 3″ strips from the blue portion of the snowflake designer paper and adhere them along the top and bottom of the base.
Step 2: Flip the remaining 12″ x 6″ piece to the reverse side (gray sweater) and adhere it in the middle of the base, leaving the bottom edge just lightly tacked down.
Step 3: Cut a 3″ x 12″ strip from Navy Solid Cardstock. Place the strip on the Cutting Base Plate, lay the Evergreen Horizon Die-Cutting Border ridge-side down on the strip (using a piece of Place & Peel Tape to secure it as needed) and place the Universal Top Plate on top.
Step 4: Run it through the Die-Cutting & Embossing Machine, then use the Dual-Tip Die-Cutting Tool to remove the piece from the die.
Step 5: Lay the die on top of a 12″ x 2-1/2″ strip of Bright White Solid Cardstock. Lightly trace around the trees with a pencil and cut them out with Micro-Tip Scissors.
Step 6: Adhere the white piece behind the Navy trees to create “snow-covered” trees. Adhere the border along the top of the layout.
Step 7: Cut a 3″ x 12″ strip from Bright White Solid Cardstock. Place the strip inside the Shimmering Snowflakes Embossing Folder, sandwich it between the Embossing Base Plate and the Universal Top Plate and run it through the Die-Cutting & Embossing Machine.
Step 8: Using the swell edge of the Custom Cutting System Border Cutting Tools and the Red Custom Cutting System Blade Cartridge, cut the embossed strip at 1-3/8″. Adhere the 1-3/8″ strip so the bottom straight edge is 3-1/4″ from the top of the layout.
Step 9: Tuck the swell edge of the remaining embossed strip just under the sweater paper so the straight edge is 1-1/4″ from the bottom of the layout. Adhere a gray snowflake border sticker along the seam as shown.
Step 10: Cut a 12″ x 4-1/4″ strip from Navy Solid Cardstock and adhere it 3-3/4″ from the bottom of the layout. Crop two photos to 5-13/16″ x 4″ and adhere them on the strip.
Step 11: Using the Winter Fun Titles & Icons, die-cut titles and shapes from cardstock scraps. Adhere them on the layout as desired, along with embellishments and stickers, popping some up with Foam Squares for dimension.
Step 12: Journal as desired with the Black Dual-Tip Pen.

Want to recreate this layout?
We’ve gathered all the products featured in this project in one place, making it easy to find the papers, embellishments, tools and more.
P.S. Are YOU a member of the Virtual Crop Group? It’s your go-to place for MONTHLY Virtual Crops, MONTHLY Completed Album Challenges, QUARTERLY Secret Box Openings with project tutorials and so much more! We hope you’ll join our community of more than 53,000 fellow memory-keeping enthusiasts — you’ll feel right at home!

